The first thing that comes to mind whenever someone talks about a computer’s performance is its RAM. While the CPU and GPU also play an important factor, your laptop will only be able to handle tasks that match the amount of memory you have installed.
Therefore, there are multiple situations where you may want to check your PC’s RAM. Some of my friends have mentioned scanning the devices in Device Manager to find the memory and started panicking when they couldn’t.
 If you ever felt the same way, there’s nothing to worry about. None of us could find RAM in the Device Manager, and it’s completely normal. There’s a perfectly good explanation behind this.
So, grab some coffee and put on your reading glasses because here’s how you can check RAM usage in Windows 11.
How To Check My RAM In Windows 11?
Before moving forward, I should point out that you will always see accurate memory information for at least 1 slot on the motherboard using one of these methods since Windows 11 running needs to have at least 1 system memory installed to be occupied in order to boot up.
However, if you have more than one installed physical memory on your available RAM slots, then you need to check the information carefully to ensure all the places are working.
Some users have reported that their memory information wasn’t accurate, and after evaluating their circumstances, it was discovered that their RAM wasn’t installed properly. So, if you find yourself in a similar situation, you just have to re-install the memory stick correctly inside your PC.
Moreover, you have to know the RAM types when getting new RAM for your PC. If your computer has different kinds of RAM in a number of slots, it will only show the effective frequency of the memory you have installed.
Also read how to update drivers on Windows 11.
As you can see, there are various ways for checking memory information on your Windows 11 computer.
By following the methods discussed in this section, you’ll see how much RAM your PC is available and how much is being used by your Windows 11 PC. They are relatively easy, step-by-step processes to find out the RAM being used when you have your PC running.
Memory is an essential part of the computer that temporarily stores the data to be accessed by your CPU. So, it’s important to keep the memory traffic in check. Otherwise, your operating system performance will be sluggish.
Here are the ways to check your RAM in Windows 11:
1. Check Device Specifications
The quickest and easiest way to find memory information is through the windows Settings app. However, if you are looking to find advanced information like the RAM speeds and number of RAMs installed, this won’t work as you can only see the total RAM size using this method.
Follow these steps to check device specifications:
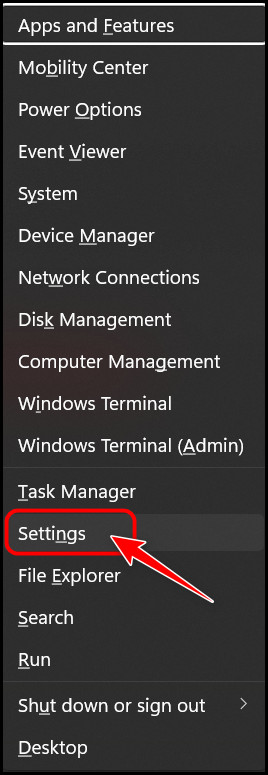
- Press the Windows and X keys at the same time to open a context menu above the Start icon at the bottom left corner of the taskbar. Click on Settings from the list.
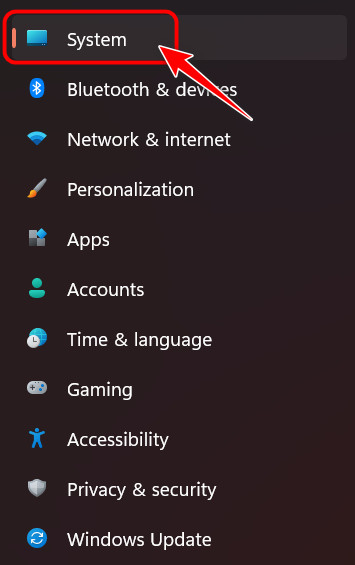
- Click on System on the left navigation menu.
- Scroll to the About option on the right panel and click on it.
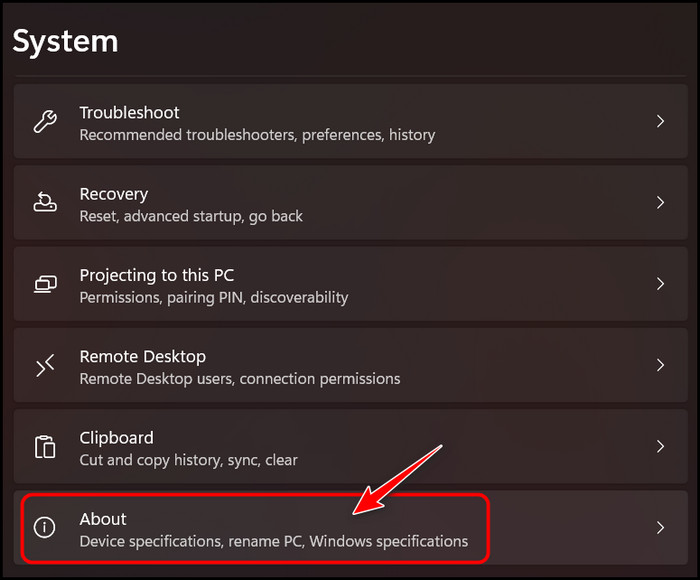
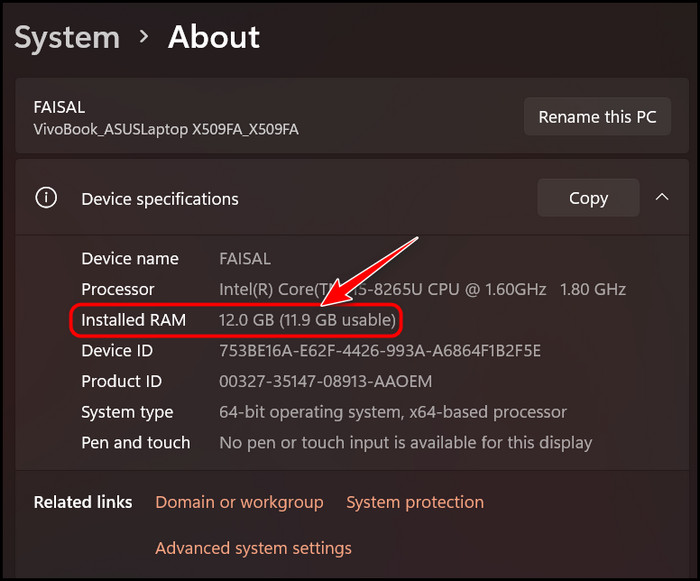
- Expand the Device Specifications option by clicking on it unless it’s already expanded. Look for the Installed RAM value below it to find the total RAM installed.
This method can also be used on Windows 10 as well as 11. The system summary should satisfy most people, but if you are an advanced user interested in discovering the current RAM usage and viewing detailed info like the speed and number of memory positions used, follow the next method.
Here is the easiest guide to fix drag and drop not working on Windows 11.
2. Check Memory Performance
I’m sure you have already used Task Manager in Windows 11 OS to kill programs and games when they are unresponsive, but that’s not all it can do. Windows 11 gives you detailed system information about your memory usage along with some helpful graphs by using Windows Task Manager.
Follow these steps to check memory performance:
- Press the Ctrl, Shift and Esc keys at the same time to launch the Task Manager.
- Select More details at the bottom if you don’t see any tabs at the top.

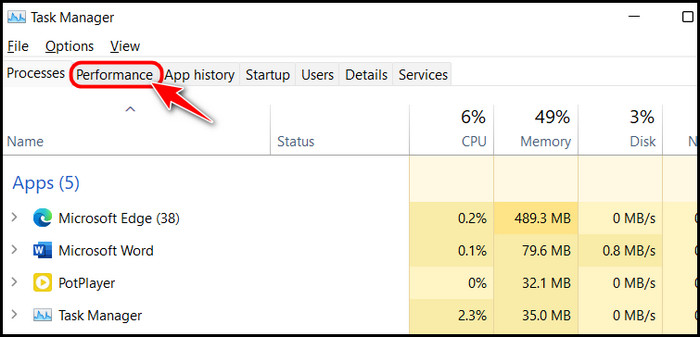
- Switch to the Performance tab at the top of the expanded window.
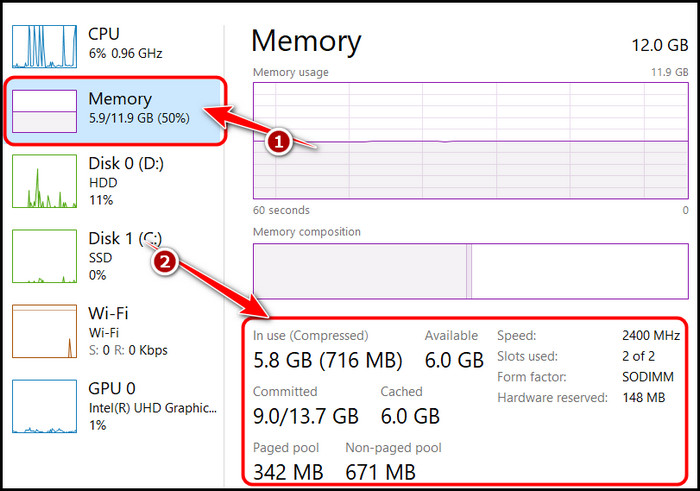
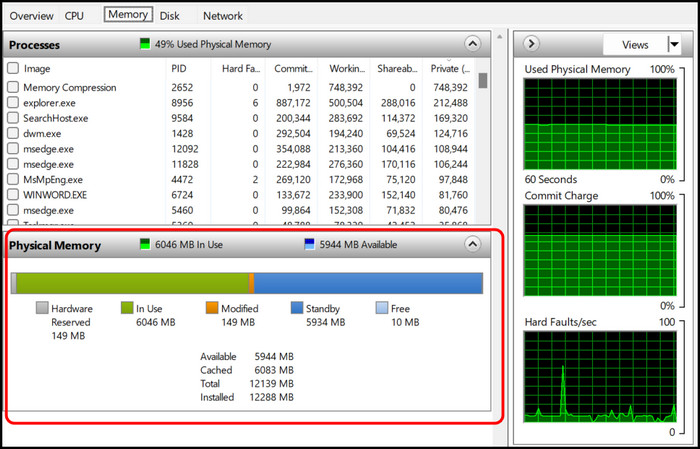
- Click on Memory on the left panel below to find the memory information. You can find the amount of RAM currently in use and the free amount, along with the speed and form factor.
This is how you check memory information in Windows 11 using Task Manager.
If you have disabled the Task Manager or it’s not responding for some reason, you can follow the next method to check the RAM details.
Also, check out our separate post on how to Ship RAM Safely.
3. Use Resource Monitor
Windows introduced an application called Resource Monitor in Windows Vista that went under the radar. You can make use of it on your Windows 11 computer to check hardware information, including RAM specs and use.
Follow these steps to use Resource Monitor:
- Click on the Start icon, search for Resource Monitor and launch it.

- Switch to the Memory tab from the top menu bar.
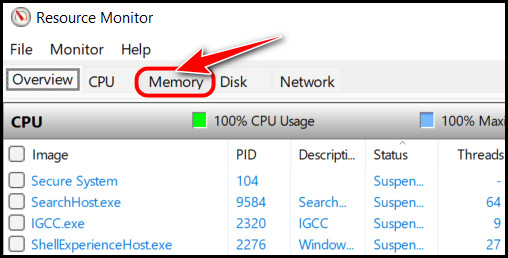
- Check the Physical Memory section to find information about your RAM.
If you are not satisfied with the information found using any of the methods above, I suggest using the CMD to run commands. You can find step-by-step instructions for that below.
Go and check our other article on can I use two different brands of RAM.
4. Use WMIC Command Line Utility
One of the most underrated tools in Windows is the Command Prompt. There are tons of utilities that can only be accessed by typing specific commands, and WMIC is one of those. You are going to use this to get memory information.
Follow these steps to use the WMIC command line utility:
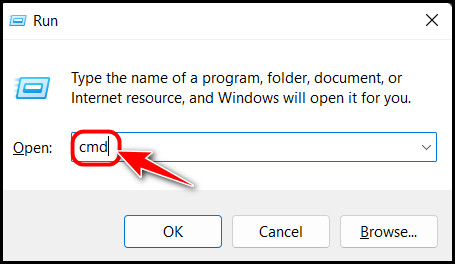
- Press the Windows and R keys at the same time to launch a Run window.
- Type cmd and press Enter.
- Type the following command: wmic MemoryChip get MemoryType, Name, Capacity, Configuredclockspeed, DeviceLocator, FormFactor, Manufacturer, Serialnumber, Speed in the Command Prompt window and press Enter to see the information.
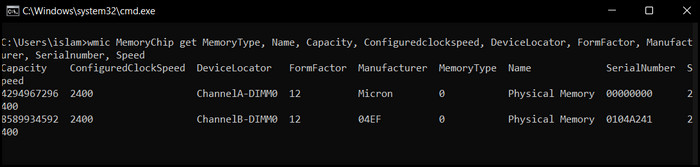
As you can see, you can find a long list of information for every individual RAM slot using this method. However, this can seem a little complicated, so if you want an easier way, you can try installing third-party apps like CPU-Z. Follow the next method for detailed steps.
Check out our recent article on is ADATA RAM good.
5. Use CPU-Z
Among the plethora of third-party management apps, CPU-Z is my personal favorite because of its simplicity and accurate information. It’s also completely free to use without any hidden charges. You can also use it to easily find the RAM you’re using.
Follow these steps to use CPU-Z:
- Launch a browser of your choice and navigate to the CPU-Z website.
- Scroll down to the Classic Versions section and click the Setup English button.
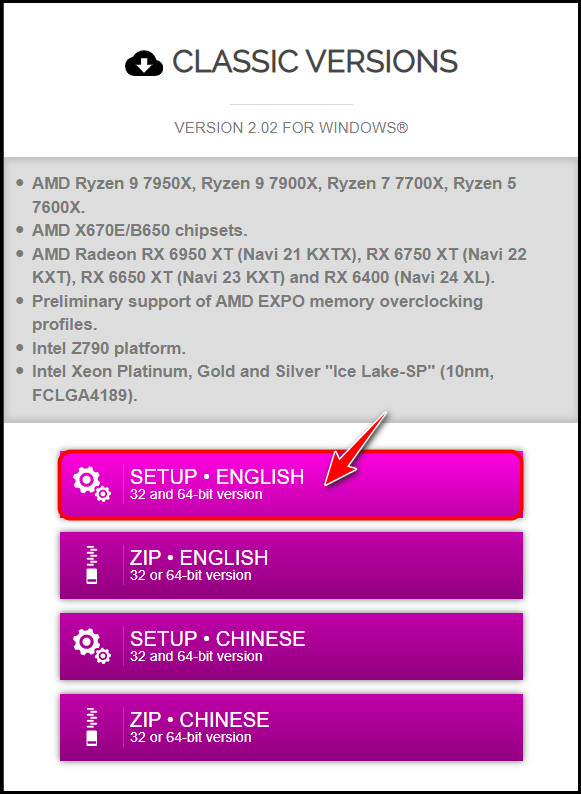
- Click on the Download Now button on the next page to proceed.
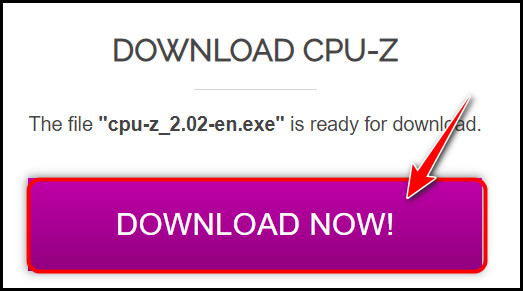
- Follow the Setup instructions to install it on your PC.
- Go to the Desktop after it’s installed, search for CPU-Z and launch it.
- Switch to the Memory tab from the top menu.
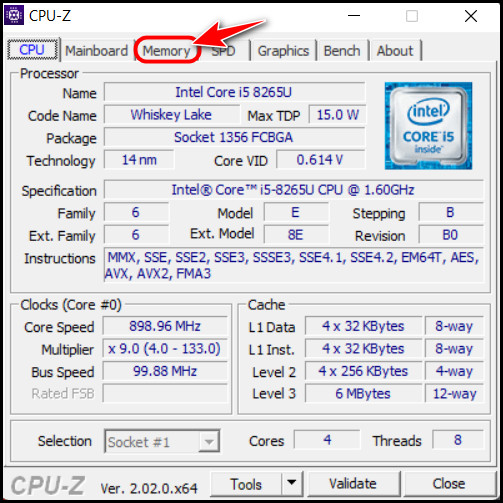
You can find all the necessary information in this section. Overall, CPU-Z should meet your needs, whether you are a beginner or a professional.
Why Is RAM Not Detected in Device Manager?
RAM is not detected in the device manager because Windows does not require any external drivers to be able to use Random Access Memory (RAM). The device manager only lists hardware components like USB devices, keyboards, and hard disk drives that constantly need updated drivers to function correctly.
Therefore, you won’t be able to access any information about your memory through the Device Manager window.
Since RAM is any PC’s primary volatile data storage component, meaning it doesn’t store anything permanently after a power off, people sometimes call it temporary storage.
A popular way to boost memory speed is to use XMP profiles, which were introduced by Intel. These are used to optimize your RAM’s memory profiles, mainly to help overclock. Some people consider these as virtual drivers for your memory since they improve performance, just like drivers.
Since the Device Manager cannot provide any such information, you need to look elsewhere.
There are plenty of third-party apps, like CPU-Z and HWiNFO, which provide accurate readings from the RAM, but it’s always better to access RAM information using tools that are already built into Windows.
Regardless of which software you use, the technical terms used to identify memories may be a little confusing. To fix that, I have included short descriptions of each setting below.
Here are the descriptions of technical terms used to identify RAM:
- Memory Type – This term can have two meanings, depending on the context. If this value is DRAM or SRAM, it refers to the type of RAM used. However, if it’s a number like 24, it refers to the bandwidth and type of RAM used. For example, 24 means you have a DDR3 SRAM installed.
- RAM Memory Speed – You might see different variations of this, but they generally identify the same thing. This denotes how fast your RAM is when it comes to receiving a request from your processor and then read/write data.
- RAM Memory Size – This is what you are probably looking for. You can understand how many programs and data your PC can handle in the background by checking if your RAM is 8, 12 or 16 GB. In most cases, the larger the size, the better the RAM.
Final Thoughts
To conclude, memory information does not belong in the Device Manager because it does not have associated drivers, as mentioned in the beginning. There are many ways to find this information without installing any external software. This way you can be aware of using too much memory space.
When you check how much RAM on your PC is being used, you can know how much more your computer memory can take.
I enjoy using CPU-Z because I like how simple it is to use. What about you? Do you plan to use a third-party tool to monitor your computer? Readers like you help support us so let me know if you have any questions or remarks in the comments.