Proper alignment and line spacing are crucial to construct meaningful and visually soothing Word documents.
Using random spaces and tabs to align your text can make the document chaotic and reduce readability. However, setting proper tab stops allows you to represent your text and numbers in a uniformly spaced document.
Throughout this article, I will demonstrate how you can effortlessly add, edit, and remove tab stops in Microsoft Word.
Let’s get started!
What is Tab Stop and Why Should You Use It?
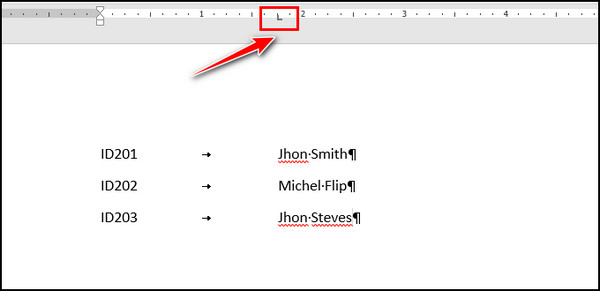
Tab stops in Microsoft Word are markers on the ruler that specify how the contents are aligned on a line. When you click the Tab button, the mouse cursor goes to the following tab stop. You will find all the tab stops in the horizontal ruler on top of your Word document.
The default tab stop in Microsoft Word is half-inch, meaning every ½ inch of the ruler is a tab stop. Pressing the Tab key will move the cursor half-inch to the right and automatically align text in Word.
Fortunately, MS Word has the functionality to alter the tab stops measurements according to your needs. But why should you consider using tab stops in your Word documents?
Tab stops in MS Word allow you to:
- Align the document contents to a precise location.
- Define the length of the indent.
- Set a custom amount of spaces anywhere in the document.
- Craft consistently spaced text.
Depending on the user’s needs, MS Word offers multiple kinds of tab stops. For instance, you can use any of the following tab stops according to your needs: left tab stop, right tab stop, center tab stop, decimal tab stop, and bar tab stop.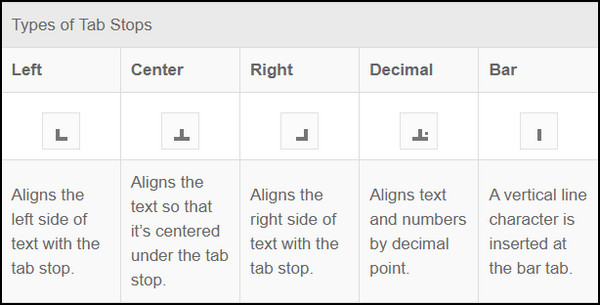
How to Set Tab Stops in Microsoft Word
First thing first, before setting a tab stop for your document, you must enable the ruler and the formatting marks. While the formatting marks allow you to see the spaces and the tabs in the Word doc, the ruler comes in handy in adding, moving, and removing tab stops.
To enable the formatting marks, select the Show/Hide ¶ key under the Paragraphs group or simply press Ctrl + *.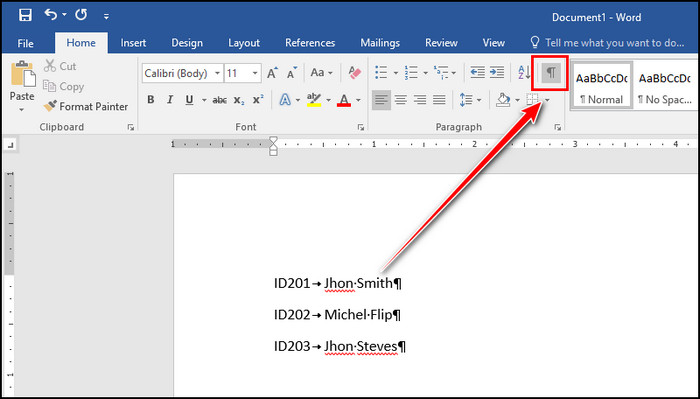
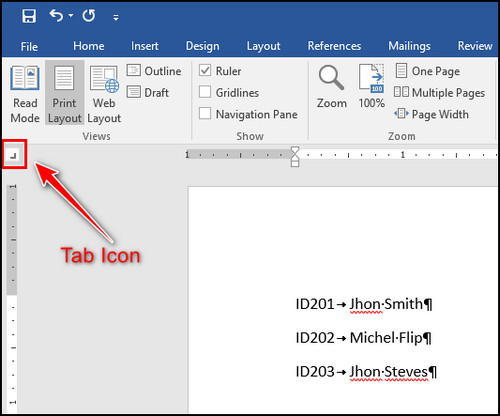
Contrarily, you can enable the Ruler by switching the View tab and checking the Ruler checkbox.
Once both functions are enabled, you can now precisely set tab stops using the ruler. For step-by-step instructions, consider the following procedure.
Here are the steps to set a tab stop:
- Highlight the text or numbers.
- Click the tab icon to select the tab stop type.
- Set the tab stop by clicking the Ruler.
- Select and drag a tab stop for more precise measurements.
Here, you can set multiple tab stops for a particular line or a different one for each line. Once you’re satisfied with the spacing, don’t forget to turn off the formatting mark and ruler.
How to Set Custom Tab Stops in Microsoft Word
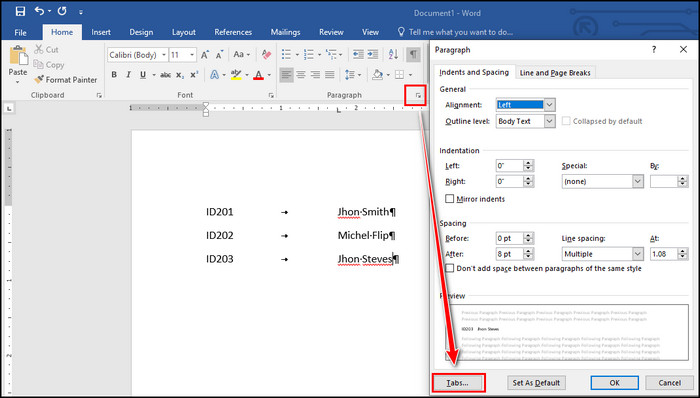
Setting custom tab stops is essential for more precise alignment. To set a custom tab stop, you have to use the Paragraph Settings. Navigate to Paragraph dialog box launcher > Tabs and type your desired tab stop position, Alignment, Leader, and click Set to create your custom tab stop.
Microsoft Word lets you add multiple tab stops so that you can use them to craft an organized and easy-to-follow document. Consider the subsequent instructions for adding custom tab stops on Windows and Mac.
Perform the following steps to create custom tab stops in Word:
On Windows
- Open your document.
- Open Paragraph Settings.
- Click Tabs from the bottom of the window.
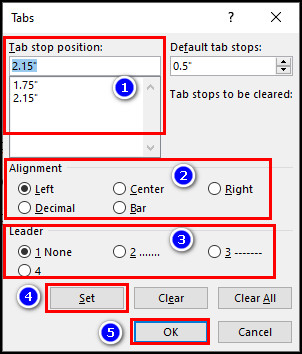
- Type your desired tab stop position in the Tab stop position text field.
- Choose an Alignment and Leader that suits your needs.
- Click Set and then OK to add the custom tab stop.
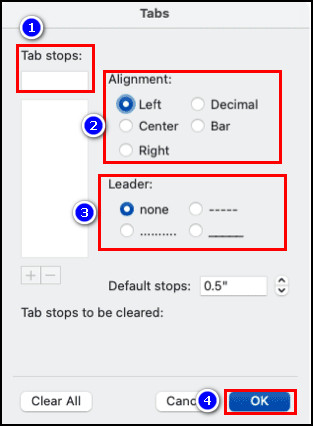
On Mac
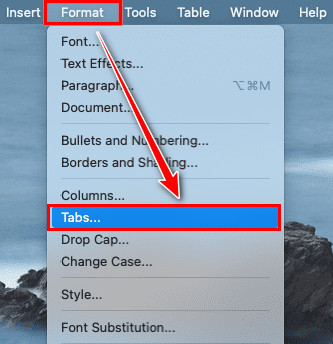
- Open your Word document on Mac.
- Navigate to Format > Tabs from the menu bar.
- Type the tab stop position in the Tab stop text field.
- Select an Alignment and Leader.
- Click OK to set your custom tab stop.
Using the same process, set multiple tab stops. Moreover, you can align text on a colon in Word, which can be handy for optimizing the document’s readability.
How to Change the Default Tab Stop in Word
As I mentioned earlier, by default, Word sets the tab stops after every 0.5 inches. However, when crafting a document for a presentation, I realized this default value was inappropriate for getting the result I had in mind. It pushes me to set a different value as the default tab stops.
In case you’re in a similar situation and need to alter the default value, go through the following steps, as I will share my experience of how I changed the tab stop default value.
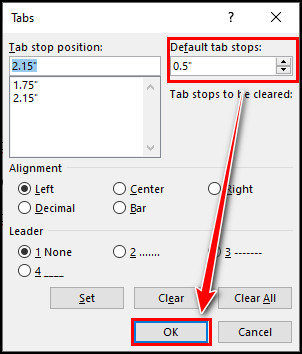
Execute the following steps to change the default value of tab stops on Windows:
- Open the document in Word and go to Paragraph Settings > Tabs.
- Type a value in the Default tab stop text box. You can also increase or decrease the value using the up and down arrows.
- Click OK to save the changes.
If you’re on a Mac, you can utilize the Default Stops section to change the default value of the tab stop.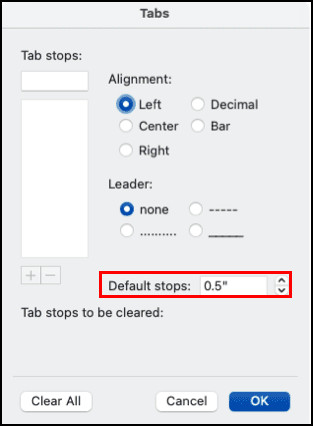
How to Clear Tab Stops in MS Word
If you mistakenly add some extra tab stops and want to get rid of all the tab stops or a single one, you can easily remove all the unnecessary tab stops using the Tab settings or ruler. Go through the following instructions to clear one or all tab stops in Microsoft Word.
Here’s how to remove or clear tab stops in Word:
Use Tab Settings
Bring up the tab settings by navigating to Paragraph Settings > Tabs. To delete a single tab stop, select the tab stop and click Clear.
You can also delete all the tab stops at once. To do so, click Clear All. After clearing the tab stops, don’t forget to click OK to apply the changes to your document.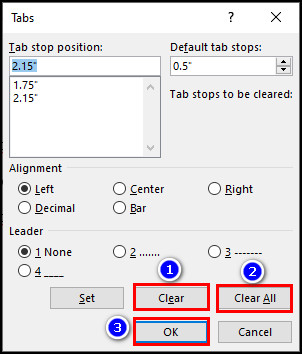
Use the Ruler
Alternatively, you can use the ruler to remove unnecessary tab stops. To do so, select the tab stop and drag it out of the ruler. It will instantly delete the tab stop. You can repeat the process to remove multiple tab stops.
Concluding Words
Setting custom tab stops will assist you in crafting more meaningful and manageable documents in Word.
With each press on the Tab key, the cursor moves about half an inch. However, modifying the tab stops settings allows you to set a custom space that suits your needs.
In case you have more queries regarding this topic, don’t hesitate to comment below.