Knowing how to align text in MS Word is crucial for writing a decent document.
The readability and beauty of the document rely a lot on the text alignment.
Hence it is important to know about the different methods of aligning text to write the perfect document.
This post will elaborate on how to align or justify text in Word.
Since alignment in Microsoft Word works in horizontal and vertical directions, you will also learn about them individually in detail.
So keep reading the post till the end.
Follow our guide on how to use thesaurus in MS Word.
How To Align Text In Word Horizontally
Horizontal text alignment in MS Word is tied to a paragraph, i.e., it is paragraph formatting. So when you set a horizontal alignment to a particular text inside a paragraph, it applies to the entire paragraph.
But that does not mean you need to set horizontal alignment for each paragraph individually. You can select multiple paragraphs and then set the alignment for all of them at once.
Now you might wonder where the paragraphs begin and end in your Word document. A new paragraph is created every time you press the Enter key.
To see the starting and ending points of the paragraphs in your document, go to the Home tab and click on the P icon inside the Paragraph group at the top ribbon. Then you will notice the P sign across your document, marking the end of each paragraph. ![]() Microsoft Word aligns the text to the left margin of the page by default. If the indent is different from the left margin, then the first line of the paragraph will align with the indent and the following lines with the left margin.
Microsoft Word aligns the text to the left margin of the page by default. If the indent is different from the left margin, then the first line of the paragraph will align with the indent and the following lines with the left margin.
There are four options to align the text horizontally:
| Alignment | Description |
|---|---|
| Left | Aligns the text to the left margin of the page |
| Center | Aligns the text to the center of the page |
| Right | Aligns the text to the right margin of the page |
| Justify | Aligns the text to both the left and right margins of the page |
You can choose anyone among the four alignment options for a particular paragraph.
Check out the easiest way to fix grant access issue with Microsoft Word on mac.
Follow the methods below to align text horizontally in Word:
1. Use The Alignment Options On The Ribbon
The most popular way of aligning text horizontally in Word is to use the alignment options in the top ribbon.
Here are the steps to align the text using the ribbon:
- Open the document in Word.
- Select the paragraph that you want to align horizontally. You can select multiple paragraphs or use CTRL+A to select all the paragraphs in the document.
- Go to the Home tab from the top.
- Locate the four alignment options inside the Paragraph group in the top ribbon. The four options are: left, center, right and justify, respectively.
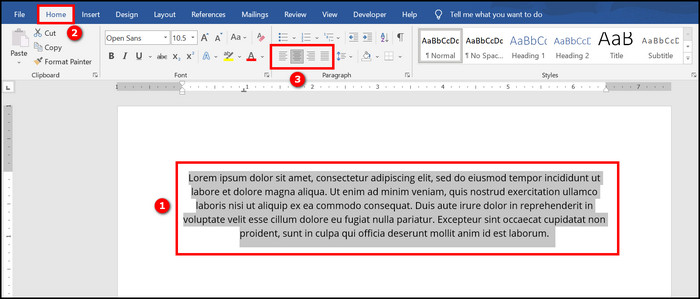
- Click on your required alignment option from the top ribbon.
You will see the required horizontal alignment is applied to the selected text.
2. Through Keyboard Shortcuts
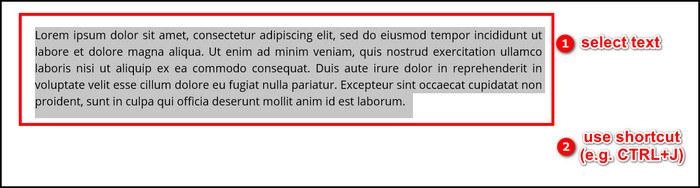
If you like to use keyboard shortcuts, you can remember the shortcuts for horizontally aligning text in Word.
Here are the keyboard shortcuts to align text horizontally in Word:
| Alignment | Shortcut |
|---|---|
| Left | CTRL+L |
| Center | CTRL+E |
| Right | CTRL+R |
| Justify | CTRL+J |
Once you know the shortcuts, you can align the text as follows:
- Open the document in Microsoft Word.
- Select the paragraphs you want to align. Press CTRL+A to select all the text in the document.
- Use the keyboard shortcut from the above table to apply the required alignment.
Once you get hold of the keyboard shortcuts, it is easier and faster to use the shortcuts instead of the top ribbon, especially if you align the text a lot.
Read more on how to add headers and footers in MS Word.
3. Use The Paragraph Dialogue Box
If you want to explore more options, then using the Paragraph dialogue box is the best option. It has other formatting options, such as indentation, spacing, etc.
Here are the steps to align the text using the Paragraph dialogue box:
- Open the document in Microsoft Word.
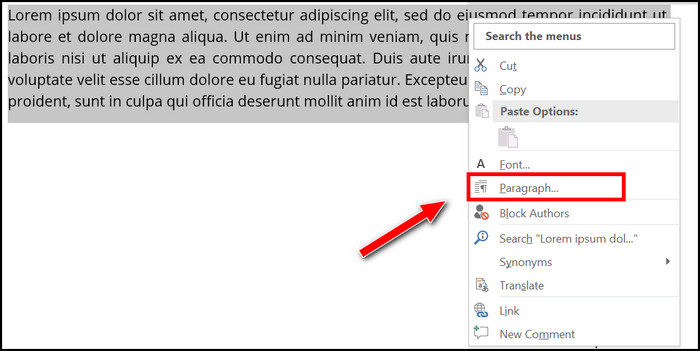
- Select the paragraph of text you would like to align.
- Right-click on the selection.
- Click on Paragraph from the Context menu. The Paragraph dialogue box appears.
- Ensure you are in the Indents and Spacing tab.
- Locate the Alignment dropdown in the General section.
- Select the required alignment (left, center, right, justify) from the Alignment dropdown list.
- Click on the OK button at the bottom to apply.
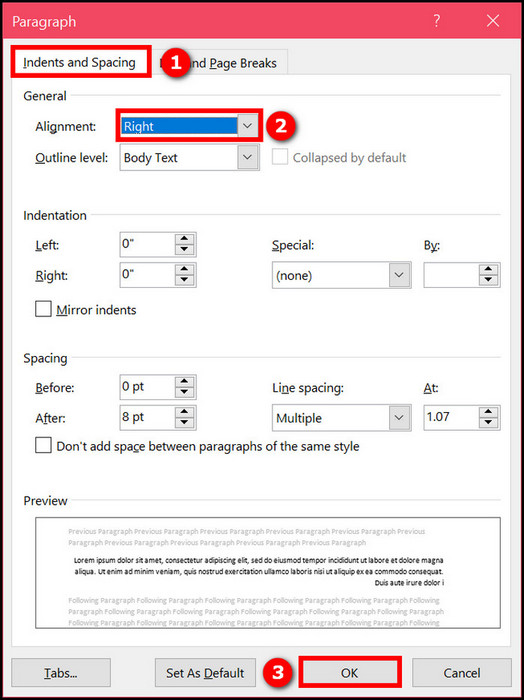
You can change other formatting options, such as indentation and spacing from the dialogue box. Below is a Preview box where you can see the alignment before confirming the change.
Go through our epic guide on how to dictate in Microsoft Word desktop/web.
4. Use Tab Stops
People often use spaces while aligning text in a multi-column document. The process is incorrect, as things will misalign upon changing the text.
Even if you replace the text with another text containing the same number of characters, the alignment can break if the font is proportional (proportional font means each character does not take equal space).
So the best way to deal with such a case is to use tab stops. You can define a tab stop for each column in your document and specify the alignment for each tab stop.
The following types of alignments are possible using tab stops:
| Tab stop | Description |
|---|---|
| Left | Text is flush to the left, extra text is pushed to the right |
| Right | Text is flush to the right, extra text is pushed to the left |
| Center | Text is centered, extra text is pushed to the both sides |
| Decimal | Used for aligning the decimal point of a number |
The columns will align correctly along the tab stops, even if you change the text later using this method.
Here are the steps to align text using the ruler:
- Open the document in Microsoft Word.
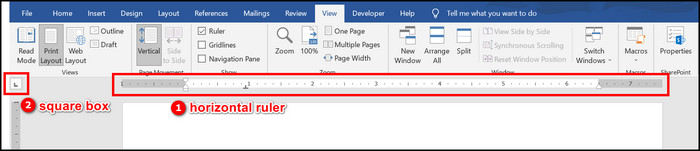
- Go to the View tab and ensure the Ruler is checked.
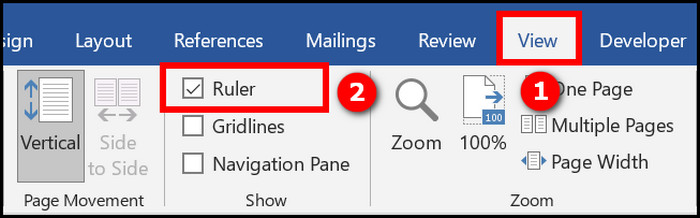
- Notice the horizontal ruler at the top and the small square box at the left of the horizontal ruler (and above the vertical ruler).
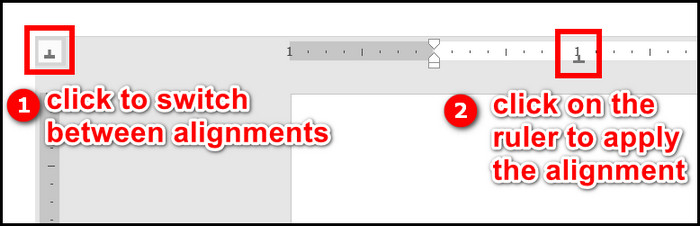
- Click on the square box left to the horizontal ruler to switch between the different alignments. Stop clicking once you have the required alignment showing in the square box.
- Click on the horizontal ruler at the position where you want to add the tab stop with the chosen alignment. It will add a tab stop with the selected alignment.
- Repeat the process for defining tab stop with alignment for all the necessary columns.
- Start typing the text and use the Tab key to jump to the next tab stop (for entering the text of the next column). This way, you would enter the text for all the columns, one line at a time.
For example, you want a center alignment on the first column (one inch from the left margin), a left alignment on the second column (3.5 inches from the left margin) and a decimal point alignment on the third column (5.5 inches from the left margin).
Now you would first switch to center alignment by clicking in the square box left to the horizontal ruler, then click on the horizontal ruler below the 1″ mark to enter the center alignment tab stop.
Next, you would keep clicking on the square box until the left alignment shows up. Then you would click on the horizontal ruler below the 3.5″ mark to enter the left alignment tab stop.
Finally, you would click on the square box until the decimal point alignment appears. Then you would click on the horizontal ruler below the 5.5″ mark to enter the third tab stop with decimal point alignment.
You would fill the columns line by line with all the tab stops applied. Here is what the result looks like: 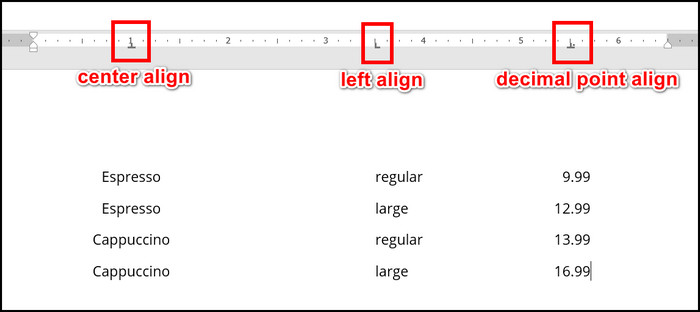
Also, follow our guide on how to access all documents in Word.
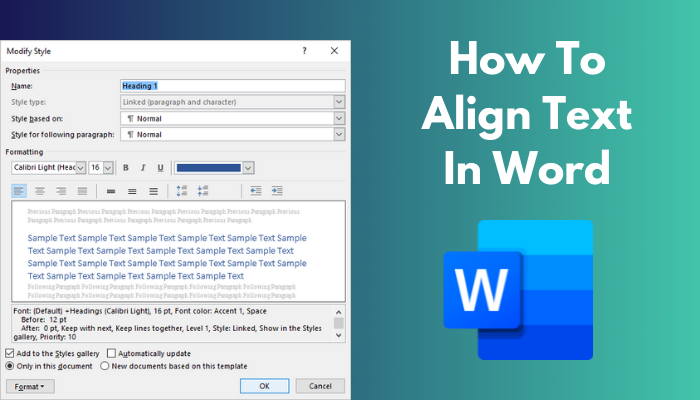
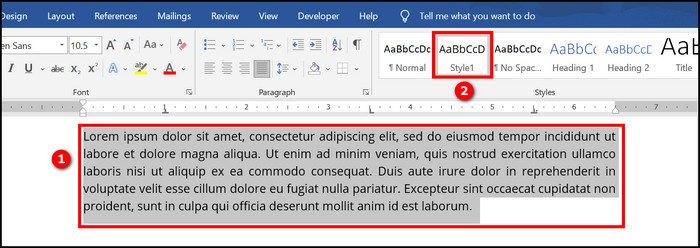
5. Define A New Style
If you are to align multiple paragraphs across the document, and the paragraphs also share some other formatting options, then you should define a new style.
While defining the style, you can specify the horizontal text alignment and the other formatting options common to the paragraphs.
Then instead of applying the text alignment and the other formatting to each paragraph, you would apply the newly defined style. It makes the job much easier and saves time too.
Here are the steps to define a new style with text alignment in MS Word:
- Open the document in Word.
- Go to the Home tab.
- Notice the three arrows at the right of the Styles box.
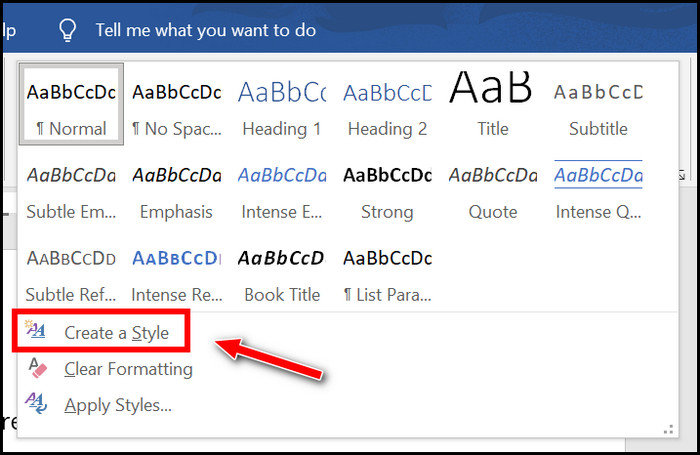
- Click on the bottom arrow (when you hover the cursor over it, it will show the label More) of the Styles The Styles box will expand to show all the options.

- Click on Create a Style. The Create New Style from Formatting dialogue box appears.
- Click on the Modify button.
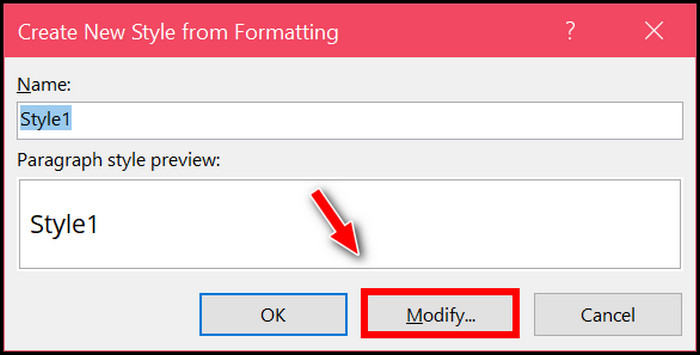
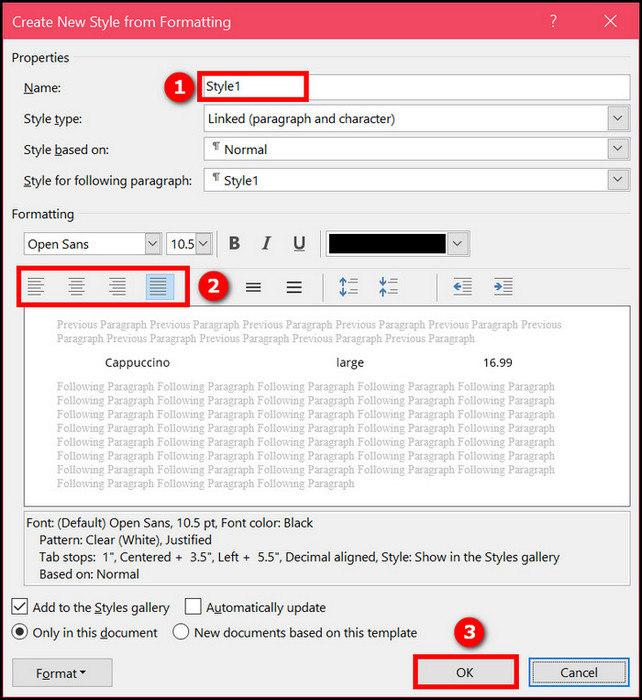
- Give a name to the new style.
- Select the text alignment under the Formatting section.
- Configure the other formatting options common to the paragraphs. You can click the Format button at the bottom to get further options.
- Click on OK to save the new style. You will see the new style in the top style gallery.
- Select the paragraph where you would apply the text alignment (and the other formatting).
- Choose your newly defined style from the Styles gallery to apply the style to the paragraph.
Now all you need to do is to select the paragraphs one by one and apply the newly defined style to them. It will save a ton of time compared to selecting each paragraph and then applying the alignment and the other formatting.
How To Align Text Vertically In Word
In the case of vertical alignment in Microsoft Word, there are four options to choose from:
| Alignment | Description |
|---|---|
| Top | Aligns the text to the top margin of the page |
| Center | Aligns the text between the top and bottom margins of the page |
| Justified | Aligns the text to both the top and bottom margins of the page (with the extra space distributed between the paragraphs) |
| Bottom | Aligns the text to the bottom margin of the page |
It is important to note that if you select part of a paragraph and then apply vertical alignment, Word puts section breaks as required to align the selected text vertically. 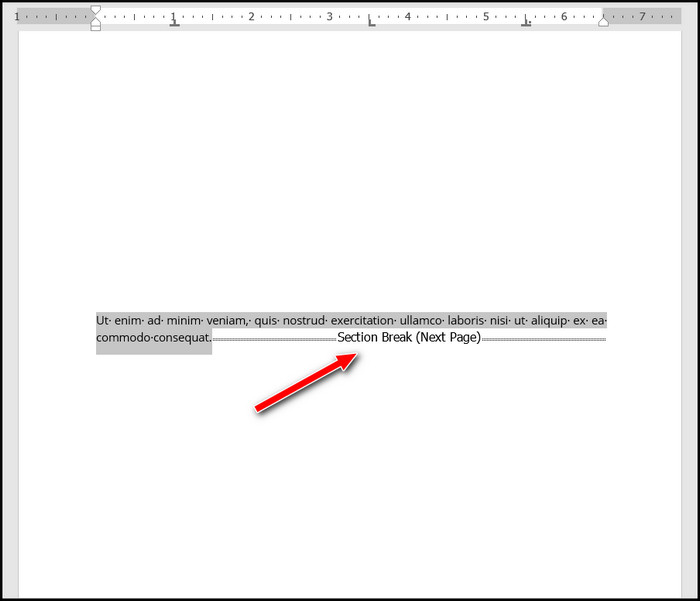 For example, you select a part of a paragraph and apply center vertical alignment. Then Word will insert two page breaks at the beginning and end of the selection. It will put the selected text on a new page in the middle, where it will be vertically aligned to the center.
This behavior is different from that of horizontal alignment, where selecting a part of a paragraph would align the whole paragraph. If you do not want such an unexpected result, select the whole paragraph before applying vertical alignment.
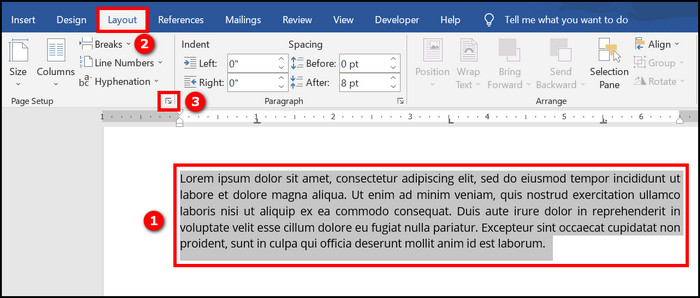
Here are the steps to align the text vertically in Word:
- Open the document in Word.
- Select the paragraph you want to apply vertical alignment.
- Go to the Layout tab from the top.
- Notice the Page Setup group at the top ribbon.
- Click on the small arrow at the bottom-right of the Page Setup group. The Page Setup dialogue box will appear.
- Go to the Layout tab in the Page Setup dialogue box.
- Click on the dropdown beside Vertical Alignment.
- Select the vertical alignment (top, bottom, center, justify) from the dropdown.
- Click on the dropdown beside the “Apply to” option at the bottom.
- Choose the Selected text from the list.
- Click on the OK button at the bottom to apply the vertical alignment.
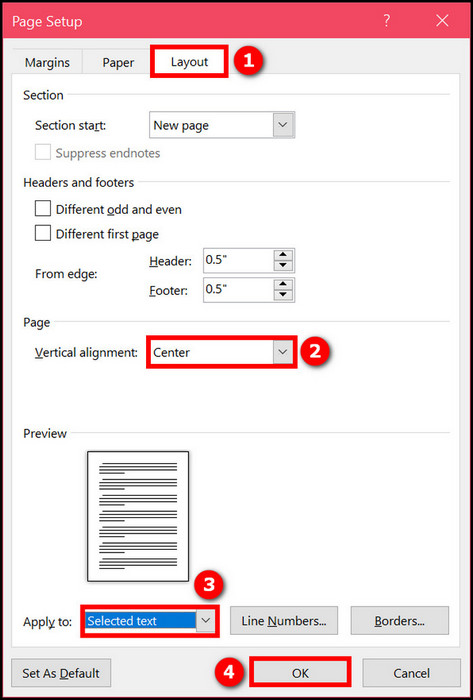
You will see the vertical alignment applied to the paragraph(s) as defined.
Final thoughts
A perfectly aligned text makes a world of difference to a document. Text alignment conveys the meaning while adding to the readability of the text.
MS Word lets you align the text along the horizontal and vertical directions. There are some subtle differences in how alignment works in the two directions.
In addition to using the common methods of aligning text, you can define a new method or use tab stops to get the perfect alignment while saving time in the long run.