Streaming is one of the most popular online activities nowadays. Some aspire to be a full-time streamers, and others do it as a pastime.
However, preparing for and setting up a stream can seem daunting if you have no experience. I want to assure you that it’s not as difficult as it seems.
You need to ensure you go through a guide and perform all the preparation step by step.
Luckily, today I’m going to discuss the process of going live on Twitch, the most popular streaming platform.
Therefore, go through the post till the end to know everything you need about going live on Twitch.
Things To Do Before Going Live On Twitch
Maybe you’re not aiming for a full-time streaming career or content creator. You might do live streams occasionally for fun and think about skimping on the preparations.
But the reality is, you never know when things might turn around. You might become popular and gain traction in the streaming scene, making you consider a streaming career.
So it’s best to go through all the preparations and start strong.
Twitch is the best platform for live streaming, especially if you’re into gaming. IRL streams are also quite popular on Twitch.
Before streaming on Twitch, you must know the rules of the platform. Otherwise, there’s a significant chance of doing something wrong and getting a warning/ban.
This process shouldn’t discourage you, as the rules are not hard to follow. Ensure you follow some simple rules, and you’re all set.
Once you know the rules, you should proceed and create a Twitch account. If you’re watching other streamers, you might already have a Twitch account, but the username matters a lot.
An attractive and unique username will help a lot in your streaming career. You can change your username on Twitch every 60 days. So if you’re unable to change the username right now, better create a new account.
Note: To create a new Twitch account, head over to Twitch and click on the Sign-Up button from the top-right corner. Then choose a unique and catchy username.
Choosing a strong password is a must. It’s more important if you’re going to stream, as streamers are often the target of phishing/hacking. Use a password manager and password generator to create and save a strong password.
Fill up the rest of the form, and don’t forget to enable 2FA (two-factor authentication).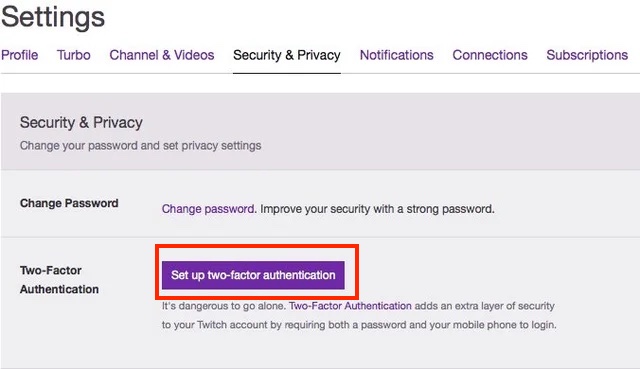
Remember, Twitch won’t allow you to stream without setting up 2FA. Since your target is to go live on Twitch, you should set it up now. Also, check out the easiest ways to link ea prime gaming with twitch.
Now it’s time to choose the streaming software. There are many options to choose from. Twitch Studio is the best option if you’d like something straightforward.
The app is from Twitch, so everything is streamlined and straightforward. Setting it up takes a few clicks, and there are some templates for overlays.
If you want easy access to more features and custom plugins, Streamlabs OBS is a great option. Streamlabs has a management system and plugins for donations and loads of extra features that make it simple yet effective.
Lastly, if you’d rather have something basic with options to add features to later, try the OBS Studio. OBS Studio is free and open-source software. Moreover, Streamlabs OBS is built on top of the OBS Studio. So, you can’t play the games in your origin library? Don’t worry, with our simple guide you can fix origin login issues in under a minute.
That tells a lot about the software. OBS Studio is highly flexible and scalable. The best part is that it comes barebones initially, not taking a heavy toll on your PC. You can add features later as you need them.
But if tinkering with softwares and setting them up is not your game, skip OBS Studio and go for the other two options.
Once you’ve chosen your streaming software, it’s time to set up your Twitch channel. You need to add the different panels, link your socials, hire a moderator or two, go through the mod settings and configure as you demand.
While configuring the social media and the Twitch channel panels, ensure consistent branding. It’ll boast professionalism, and viewers will find your channel polished.
You can tweak the different settings of your Twitch account as you continue to grow, depending on your needs. But ensure you set up the channel correctly and add other panels accordingly to make it look professional. While fixing twitch errors, you saw that chrome is not loading twitch anymore. Quickly check out our expert’s provided solution to fix the error.
Don’t forget to add Paypal or another donation link as you wouldn’t have access to the Twitch Partner program at the beginning.
Adding a channel intro can also make your channel stand out among others. You can add custom emotes now or wait until you have some fan following.
At this point, you also need to do some planning. Think ahead about what your streams will be about, how you would present yourself to the audience, the streaming schedule, and such.
I’m assuming you already have a decent computer to stream from. You don’t need the latest and greatest PC, and these days mid-tier computers are good enough for streaming and light gaming.
But playing games or streaming them at high resolution will demand better hardware.
If you plan to add a facecam (which you should), buy a webcam or use the DSLR you already have. Ever been in a situation where your two favorite twitch streamers started streaming at the same time? Check out our epic post to find out how to watch multiple twitch streams simultaneously.
You also need some lights, a good microphone, and other hardware stuff. Once you have all the hardware, set them up.
Here’s a rundown of the things you need to do before going live:
- Familiarize yourself with the Terms of Service and Community Guidelines.
- Create a new account or change your username to something that catches your attention.
- Set up 2FA (two-factor authentication).
- Pick the streaming software.
- Customize your channel by adding panels and linking donations.
- Hire a moderator and tweak the Twitch settings.
- Plan your streaming schedule and content.
- Collect and set up the streaming hardware (PC, camera, microphone, lights, etc.)
Once you’ve completed all these steps, you’re ready to go live on Twitch.
How To Go Live On Twitch
Going live on Twitch is relatively easy if you have completed the preparatory steps. The exact process will vary on the streaming software you’re using.
The Twitch mobile app also has the streaming option so that you can stream from a smartphone too. So, you can’t change the display name on Twitch? Quickly check our epic post to fix twitch error code 403.
Here are the methods to go live on Twitch:
1. Use Twitch Studio
Twitch Studio is the streaming software coming from, well, you guessed it right, Twitch itself. Twitch designed the software keeping new streamers in mind.
Hence, everything is nicely integrated, and there’s hardly anything to set up.
Moreover, Twitch Studio has overlay templates that you can use with the click of a button. You can also configure them in the software.
Therefore, if you don’t have much idea regarding streaming software and want something simple, Twitch Studio is the way.
Follow the steps below:
- Download and install Twitch Studio.
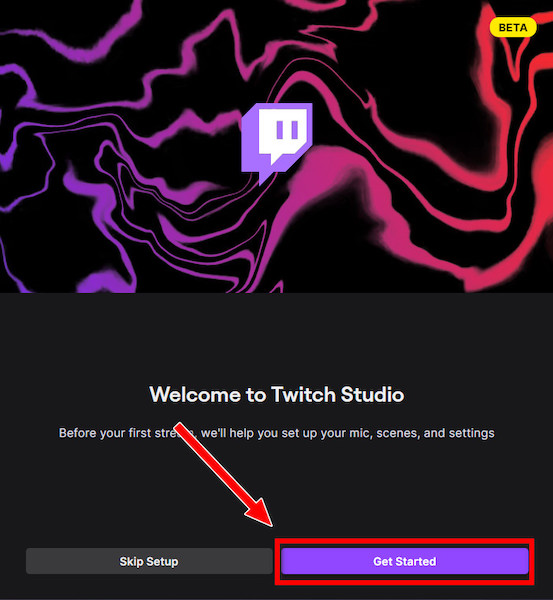
- Launch the app and log in to your Twitch account.
- Go through the initial setup, which will help you connect the mic and camera.
- Accept the default scenes from the templates.
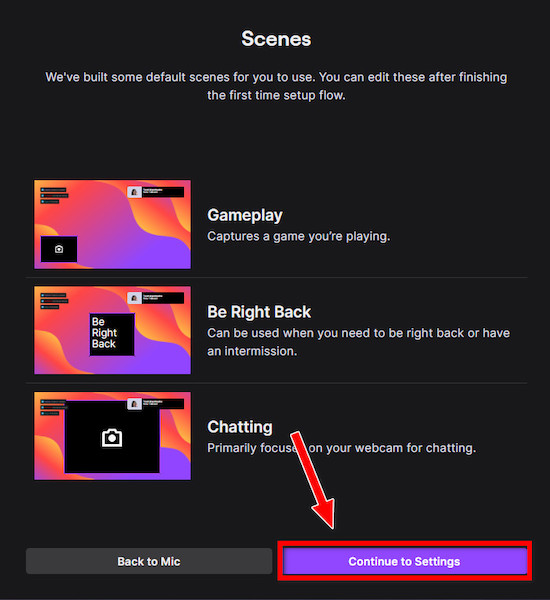
- Customize the scenes from the left by clicking on the Edit button.
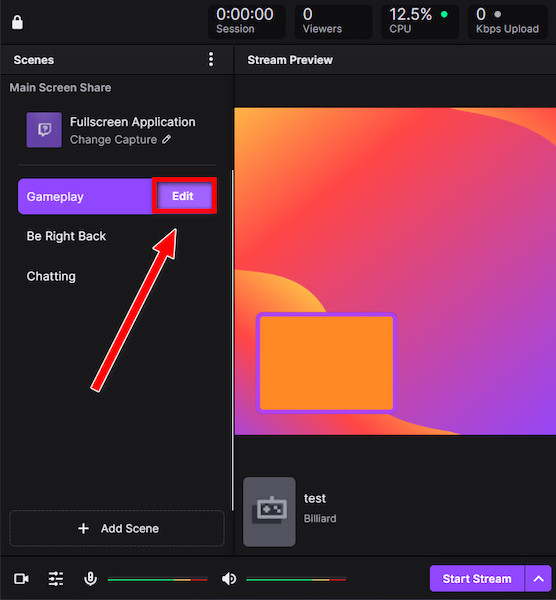
- Adjust the audio volumes below.
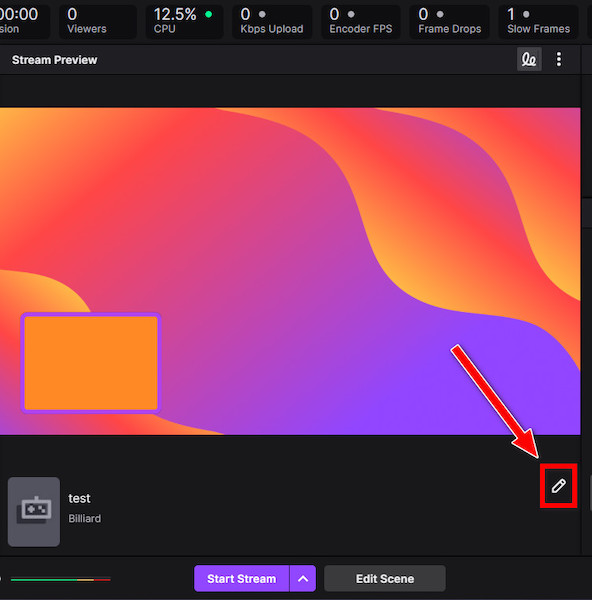
- Click on the pencil icon below the live preview. Give your stream a title and edit other info.
- Click on the Start Stream button at the bottom.
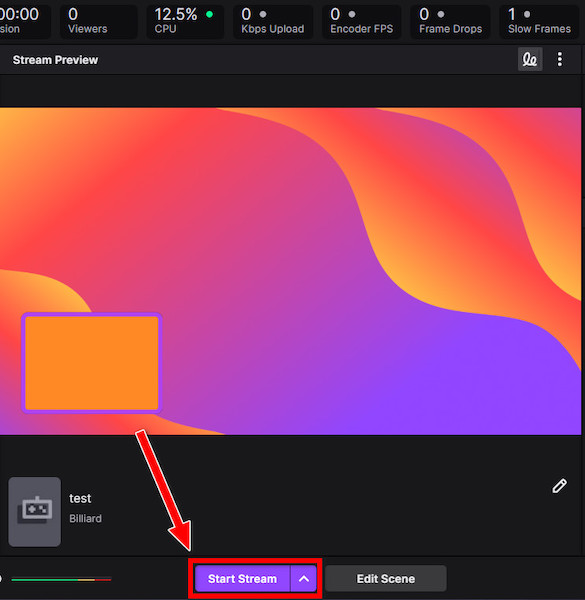
- Check if everything is correctly set. Otherwise, make changes now.
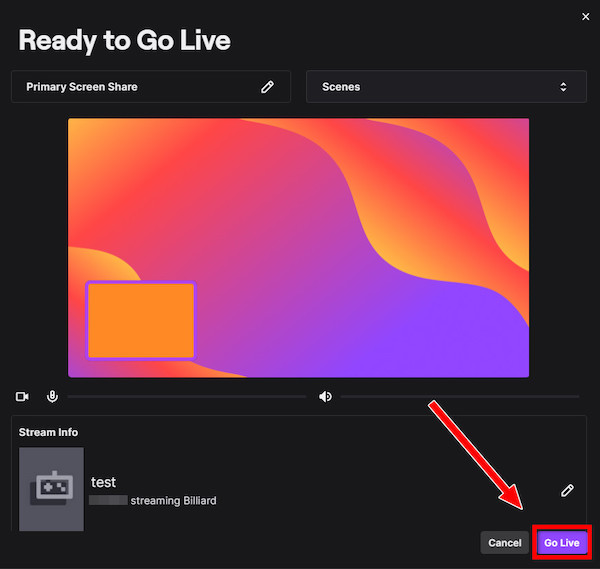
- Click on Go Live to start streaming.
As you can see, the process is relatively seamless and requires little time to set up. All other options will require more time and effort to set up and go live.
2. Use Streamlabs OBS or OBS Studio
Streamlabs OBS and OBS Studio are both quite famous among streamers. In fact, Streamlabs OBS is built upon OBS Studio.
The general procedure for both of these softwares is the same. There might be some minor differences here and there, but overall they’re equivalent.
Follow the steps below:
- Download and install Streamlabs OBS or OBS Studio.
- Launch the app. When you launch it for the first time, the software will scan your hardware and give you the optimal settings. Accept it.
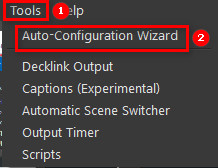
- Go to Settings > General and Auto Optimize if you have missed it in the previous step in Streamlabs. In OBS Studio, this option is in Tools > Auto-Configuration Wizard.
- Connect your Twitch account to the software. You will be prompted for it the first time you launch the software. Otherwise, go to Settings > Stream and follow the steps.
- Add your overlay files or use one from the Streamlabs.
- Find the Sources section in the middle portion of the bottom row.
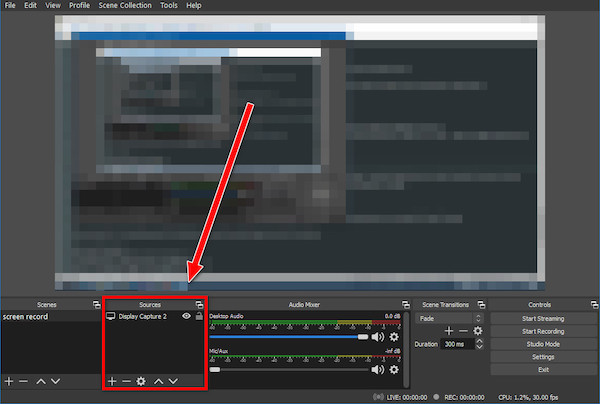
- Click on the plus + sign on the Sources panel to add a new source.
- Select Game Capture and give it a name. Ensure it’s capturing the entire screen.
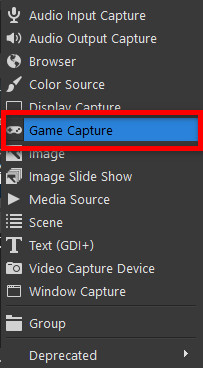
- Repeat the above steps to add a Video Capture and select your webcam. It’ll add the facecam to the screen. Use the handlebars to resize it and put it in your overlay.
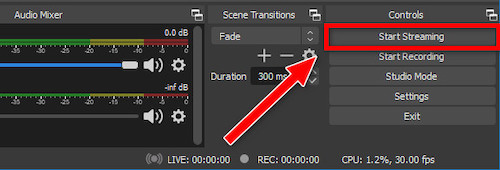
- Click on the Start Streaming button at the bottom-right once your game screen, facecam, and audio are set up correctly.
The best thing about using Streamlabs OBS or OBS Studio is that you can configure every little detail and make it exactly as you want. So, your twitch app full screen is not working? You can launch the theatre mode or you can quickly fix this issue by checking our epic content.
3. Use Twitch mobile app
Twitch mobile app is available on the Android Play Store and the iOS App Store. In addition to watching streams, you can go live from the app.
Streaming from the mobile app is the fastest way to go live and requires almost no setup.
Here are the steps:
- Download and install the Twitch mobile app.
- Launch the app and sign in to your Twitch account.
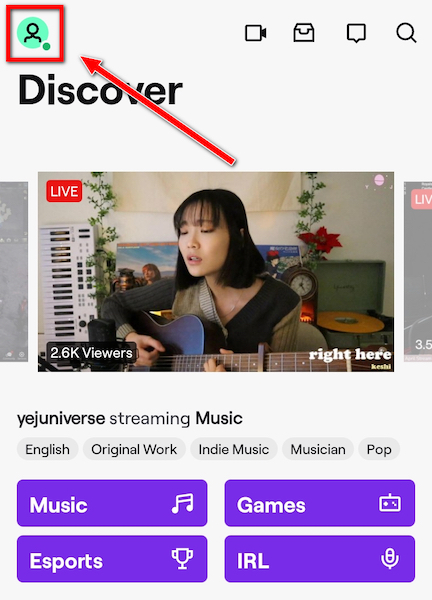
- Tap on your avatar from the top-left corner.
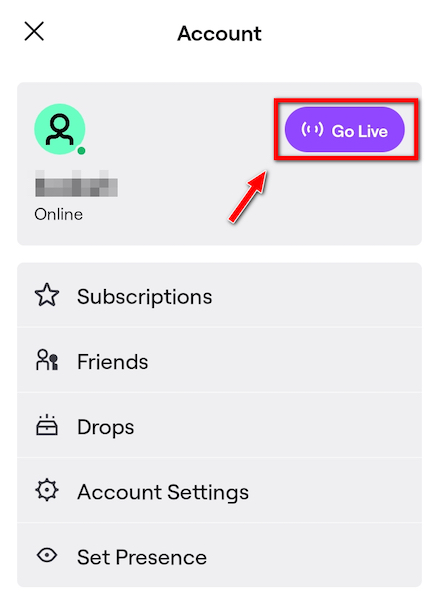
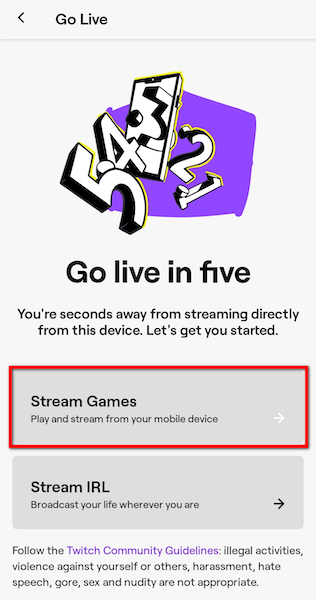
- Tap on Go Live. You’ll see two options: Stream IRL and Stream Games.
- Select Stream Games if you’d like to stream a mobile game.
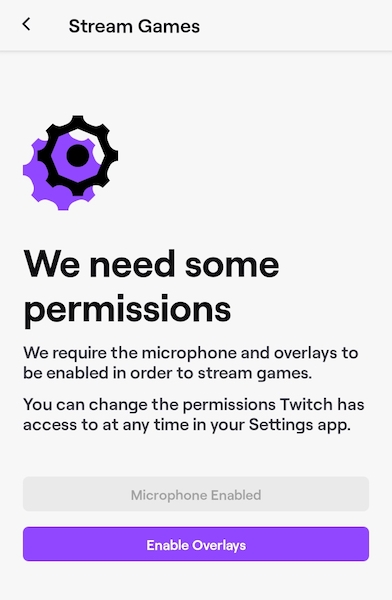
- Give the app appropriate permissions for mic and overlay.
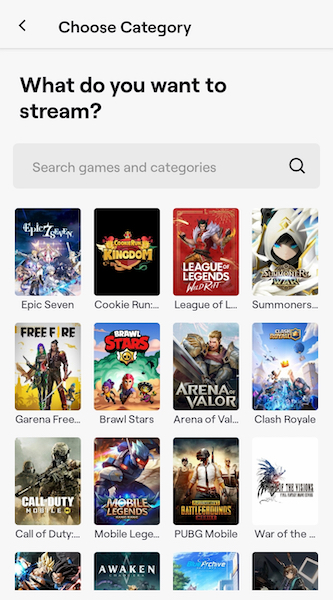
- Select the Category.
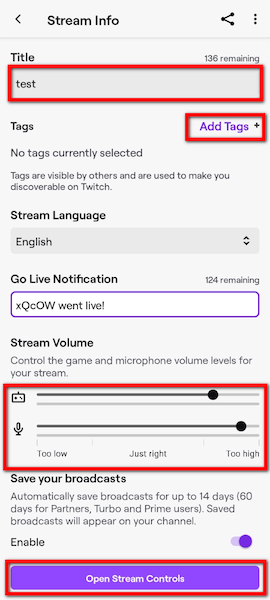
- Give the stream a title, add tags and manage audio (game audio and mic) before going live.
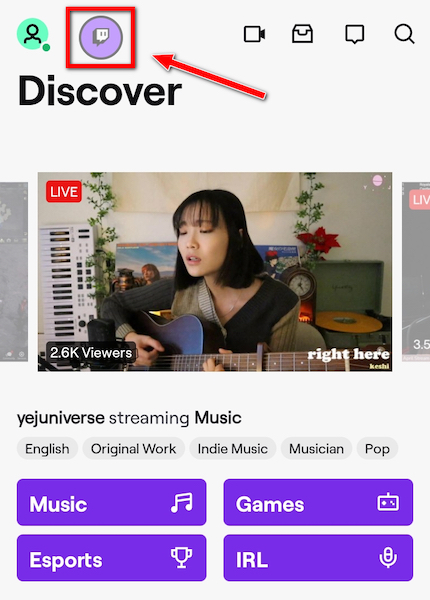
- Tap on the Twitch floating bubble to expand it.
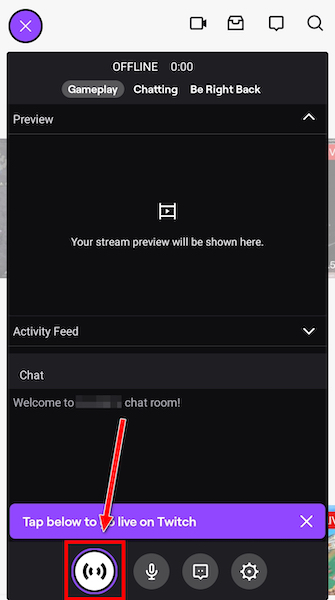
- Tap on the record button to start the stream.
- Turn off pop-up notifications if you choose Stream Games above. Otherwise, pop-up notifications will be visible in the stream and might leak personal data.
- Select Stream IRL if you want to do a Just Chatting or stream something using your phone camera.
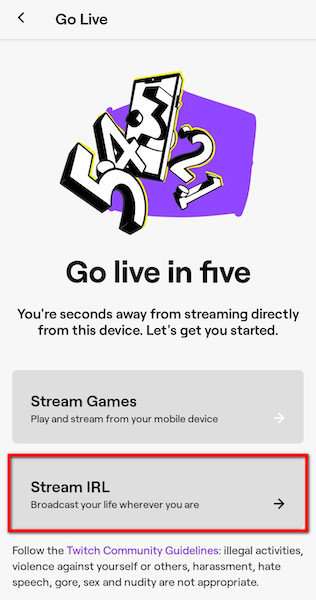
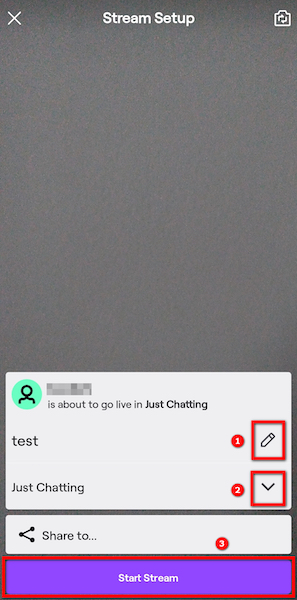
- Give your stream a title and choose the category.
- Tap on Start Stream to go live.
Going live from the Twitch mobile app is quick and a no-fuss solution.
Final Thoughts
Streaming is becoming increasingly popular these days. You might also desire to go live on Twitch.
If you think about going through many settings before you can go live, luckily, the list might be long, but it’s easy to cover.
So follow the steps with patience, and you will finish them quickly. After that, going live on Twitch will be your second nature.