Have you ever wondered why Twitch display names are a bit eccentric? The answer is very simple. It is to let you stand out among millions of users.
Every single day, thousands of new streamers try their luck to become the next bigshot. So, if you want to gain more attention than your competitors, then having a punchy username is a must. But it has to be relevant to your content and brand.

If you’re a new streamer who just started his journey, you wouldn’t know all these. In most cases, you’d use a random name. But now you know its importance and want to change your name.
However, instead of seeing your new name, you’re shown Twitch error 403.
Changing Twitch name color is a great way to gain a lot of audiences. Quickly check out our epic guide to find out how.
What does error 403 on Twitch mean?
Twitch error 403 means that you can’t change your display name. Twitch’s naming policy lets a user change their username once every 60 days and their display name at any time. But if there are any server errors or browser-related issues that forbid you from doing so, you might face error code 403.
This error code appears for minor reasons, but the impact of not being able to change your name is huge. So, don’t waste a single moment.
So, your twitch following list is not working? Find out the cause and solutions to your problem real quick by checking our epic guide.
How to fix Twitch error 403
Like any other platform, Twitch has rules and regulations every user needs to follow. For example, you can alter your username after a set period of 60 days. Similarly, you can only change capitalization in your display name.
Therefore, if you violate these rules, you’ll see error codes. But the problem comes when you follow the correct procedures but still end up seeing error messages like 403.
Most of the time, it happens if there are bugs or glitches in Twitch servers or your system. But it only takes a moment to solve this issue. Also, check out the easiest ways to link ea prime gaming with twitch.
Follow these steps to fix Twitch error 403:
1. Re-login into your Twitch Account
Many people claimed to solve error 403 by logging out, and then logging in helped solve this problem. You might feel skeptical, but this is definitely a surefire method. When you re-login into Twitch, all your temporary data is deleted.
So, when you enter Twitch, you get a fresh copy of your account details. This helps to remove all possible glitches. Check out our separate post to fix adblock not working on twitch anymore on Chrome.
Here’s how you can do it:
- Go to Twitch in your browser or app.
- Click on Profile Icon>Log Out.
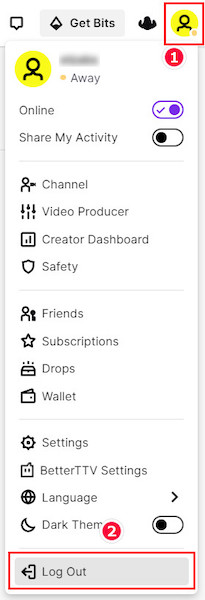
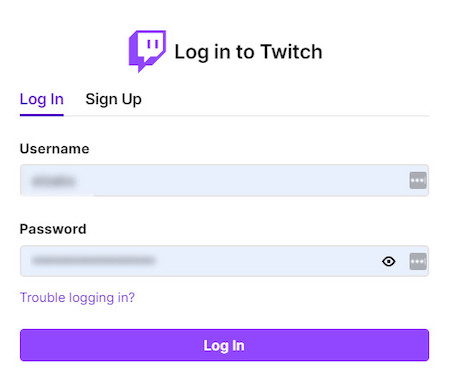
- Now, enter your Username and Password to access Twitch.
2. Check the Twitch Server Status webpage
A major reason for error 403 to show up is the server glitches on Twitch’s end. If the servers are down or if devs are currently making changes in them, then you’re very likely to see error 403. Twitch error code 6000, also referred to as unsupported browser error playback can occur due to an Outdated graphics card. Follow our separate post to know more about this error.
To notify the general users about bugs and problems with Twitch, It has a dedicated website where operations such as Login, Web, Cha, etc.
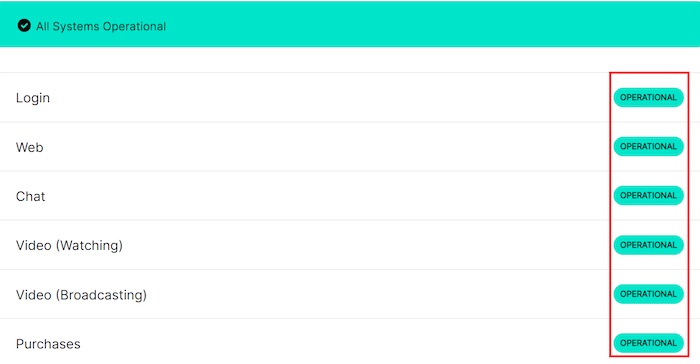
Follow these steps to check Twitch Server Status:
- Open your browser.
- Go to Twitch Status.
- Check if all options under Systems are Operational.
Twitch also records every past incident related to a server error. So you can check them out.
3. Clear your Browsers Cache Files and Cookies
Cache files and cookies are temporary data that enable a website to load faster on your device.
This is very useful for platforms like Twitch that require detailed information. But corrupted or damaged browser data can cause minor bugs to show up.
Therefore, you should clear your cache files and cookies periodically to minimize the risk of encountering error codes.
Here’s how to do it:
- Open Chrome and press ctrl+shift+del.
- Under Basic, set Time range>All time and check all available options.
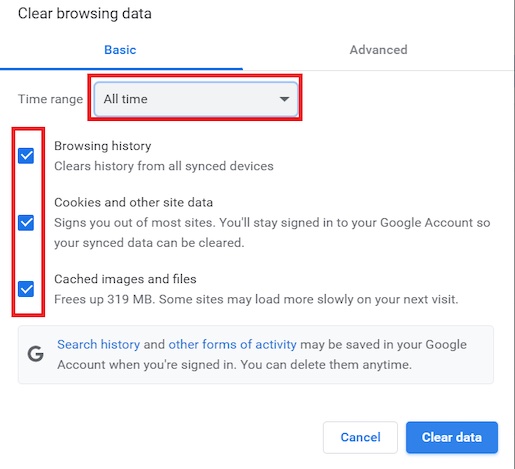
- Select Clear Data and relaunch the browser.
Now navigate to Twitch, and you should be able to change your Display name without any issue.
4. Use a VPN
Many people use VPNs to get a stable connection and to watch geo-restricted content on Twitch.
VPNs come in both software and browser extensions. No matter which you use, if you encounter error 403 while VPN is On, then try again after disabling it. In some cases, changing servers has resolved this issue.
Although you can use the free VPNs available on the internet, I would advise against it. Free VPNs have many security loopholes and show glitches every now and then.
Therefore, if you have the ability to spare money, purchase premium VPNs as they offer much better service and stability.
5. Disable 3rd party Browser Extensions
Browser extensions are mainly used to provide extra facilities while browsing. You can find many extensions that offer specific services for Twitch, and a lot of people use them.
But some of these extensions aren’t properly maintained, which results in various scripts failing to load correctly. And if you download popular extensions from unofficial sites, it can do harm to your system as they’re malware in disguise.
Here are the steps to do it:
- Open Chrome. Click on the three vertical dots.
- Navigate to More Tools>Extensions.
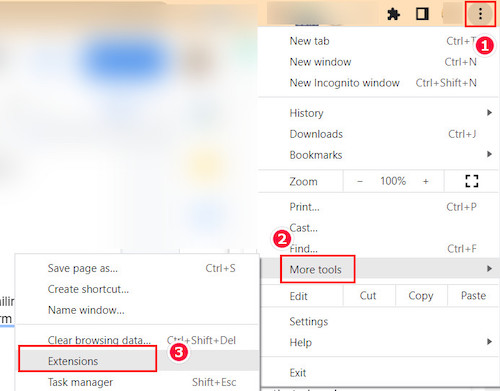
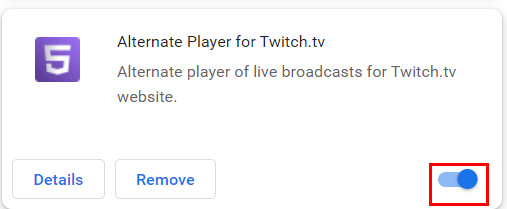
- Click on the blue bars of the extensions that you wish to disable.
6. Use a Different Browser
Browsers aren’t perfect. If there are any scripts that are malfunctioning, you’ll face difficulty while browsing.
A significant amount of people claimed that they had no problem changing their display name from an alternate browser. So this method is very likely to work for you.
People usually use Chrome, Safari, and Firefox. If you’re using any from this list, then try others. You also have the option to choose from Brave, Opera, Tor, and many more.
7. Enable Two-Factor Authentication
Two-factor Authentication is an extra wall that protects your account from being misused by others. But most people think it to be a bother and avoid it.
Your display name is a crucial part of your channel as others recognize you through it. So, if two-factor authentication is disabled for your account, Twitch might not give you access to change your name.
Follow these steps to enable two-factor authentication:
- Open your browser and go to Twitch,
- Navigate to Settings.

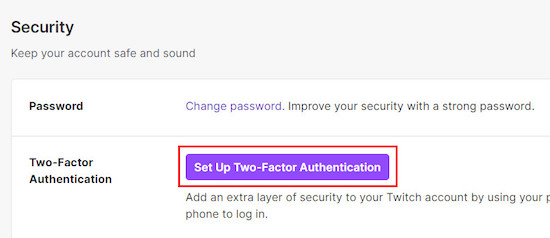
- Go to Security and Privacy.

- Click on Set up Two-Factor Authentication.
- In the popup window, select Enable 2FA.
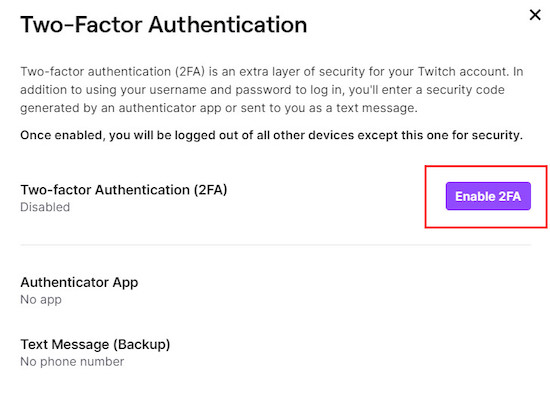
- Enter your Phone number and select continue.
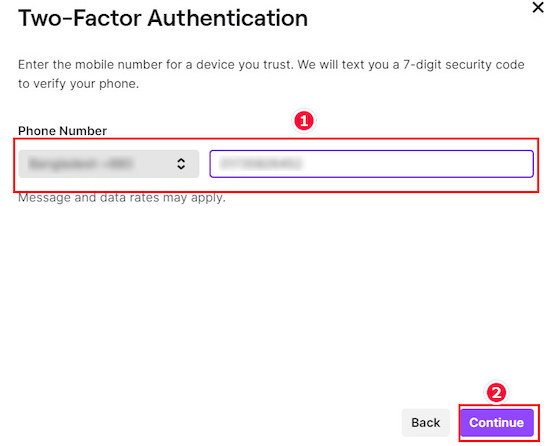
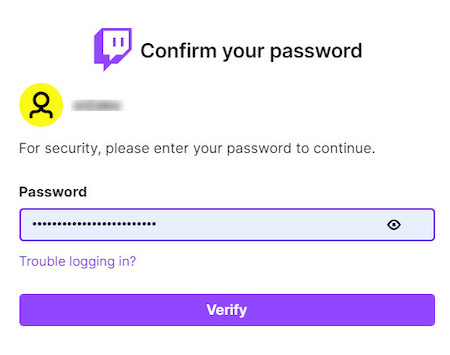
- Input your Twitch account password to complete the process.
You can also use the authenticator app to access Twitch easily.
8. Contact Twitch Support
Contacting Twitch support is the final solution for every problem related to Twitch. You can contact the devs from here.
You will have to provide your problem details, and they will find an appropriate solution.
Is there a difference between Username and Display Name on Twitch?
Most newcomers get confused when they see separate options for username and display name. Even some veteran streamers might not be able to point out the exact difference.
Both The Username and Display Name must be the same for every user. The only difference is that your Username can’t contain any capital letters.
When you comment in the chatbox or others visit your profile, they will see your Display Name. In other words, everyone on Twitch will recognize you based on your Display Name. And Your username is that which is included in your channel URL.
Can I change my Twitch Username?
Yes, you can. Not only your username, but you can also change your display name. Usernames are unique as it is used to identity streamers.
Most streamers that already have an established brand don’t usually change their usernames, as their fanbase could get confused if they aren’t notified beforehand.
But it is a different story for newbies and mid-level streamers. If they think that they want to switch to another genre for their content or change their usernames to something more befitting of their persona, they can easily do it without any worry.
Here’s how you can change your Username on Twitch:
- Log in to your Twitch account.
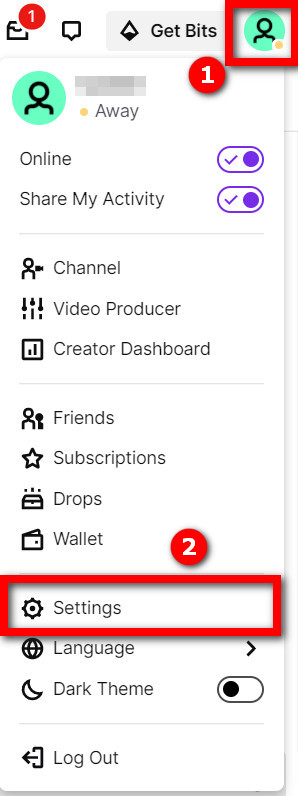
- Click on Profile Icon>Settings.
- Under Profile Settings, Click on the Edit Icon beside Username.
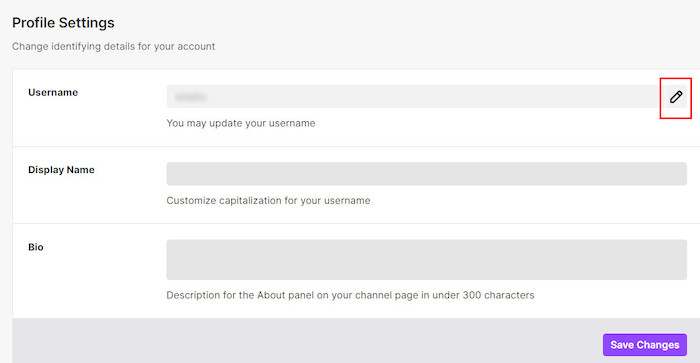
Note: You can also change your Display Name in this manner.
FAQ
Question: Why can’t I change my Twitch name?
Answer: You can change your Display Name anytime, but your Username can only be changed every 60 days.
Question: What does this mean you may not change your display name, only the capitalization of it?
Answer: Your Display Name will be the same as your Username. You don’t have permission to use any other Display Name. You can only change the capital letters in your Username to create a Display name.
Final Thoughts
In most cases, we are shown error codes for minor reasons. But if you don’t have the proper knowledge, these minor reasons can be a major headache.
If you’ve read through my guide, I’m positive that you can solve error 403 very quickly.