You might have heard that there is a spell check option in Gmail. But if in some way or another, you found that your Gmail spell checker is not working as intended, it might be an issue with your Gmail settings or device.
Some of my colleagues asked me to check why their spell checkers were not working, and from various websites, I found some common and specific solutions to that problem.
If you, too, are looking for solutions to the same problem, there is no need to worry, as I will list all my findings in a listed way for your convenience. All you need to do is follow my instructions carefully, and your problem will be solved in no time.
Why is my Gmail Spell Checker not Working?
Your Gmail spell checker might not be working because of disabled spell checking in Gmail settings. Addditional reasons are turning off spell checking in your browser settings, service down of Gmail, unsynced system time and date, corrupted browser cache, etc.
One of the most common reasons why the spell checker is not working is because it is not enabled by default settings. You are to enable it manually. Another reason is that your browser might disrupt the spell checker if some options are turned on.
The common reasons include corrupted cache, incorrect or changed passwords, network instability, lack of necessary updates, old browser versions, etc.
Check out the easiest way to Fix Gmail Error 007.
Does Gmail have spell check
You will be delighted to know that Gmail has a built-in spell checker for about 21 languages till now. Of course, English is one of the most used languages, and it is obviously included.
So, when you have this feature enabled and are typing in the same language as selected in the spell checker, you will get notified about any spelling mistakes as you type. This notification type is not too flashy, and you will see red underlines on the incorrect words.
This spell checker might not be as strong as Quillbot or Grammarly, but it is good enough for a free feature and is suitable for daily use.
How do I Turn On Auto Spell-Check in Gmail
As mentioned above, there are various reasons your Gmail spell check is not working. If you specifically know the reason, you can easily turn it on by solving the problem.
But if you do not know, you have to try the common solutions first and eventually, you will get to the needed one.
Here’s what you have to do to turn on auto spell-check in Gmail:
1. Turn on the spell-check feature from Gmail
The spell check feature in Gmail is not turned on by default. So, you are to turn it on manually from your computer. You do not require high-level computer knowledge to turn it on, so let’s get started.
Follow the steps to turn on the spell-check feature from Gmail:
- Go to Gmail from any of your browsers. Here I am using Chrome.
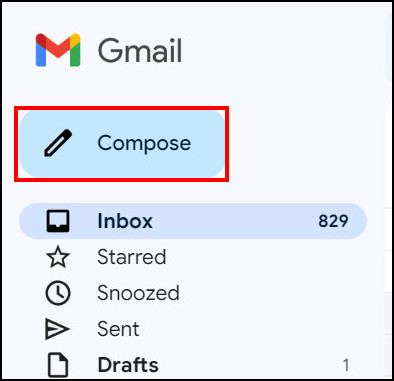
- Look at the left panel and click on the compose A small window will pop up.
- Click on the vertical three dots icon at the window’s bottom right corner. Some more options will appear beside.
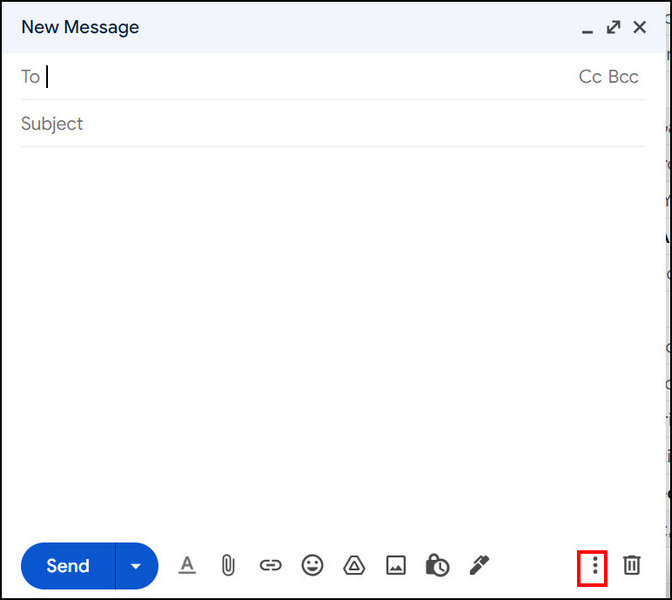
- Select Check spelling from those options. You will see a small drop-down menu at the lower right corner of the screen.
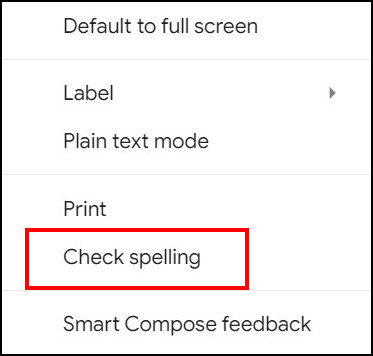
- Click on the drop-down menu to change your language or leave it as it is. It will automatically detect your language if it is within the supported language.
Congratulations if this worked for you, but if it didn’t, then don’t get disheartened, as there are more methods to fix the problem. So head over to the next solution down below.
Find out how to fix Gmail 78754 failure on Outlook.
2. Enable Enhanced spell-check in your Browser
Most browsers should support spell-check. But yours might be turned off due to some reasons. No need to worry as I will show you how to turn it on.
Follow the steps below to enable enhanced spell-check in your browser:
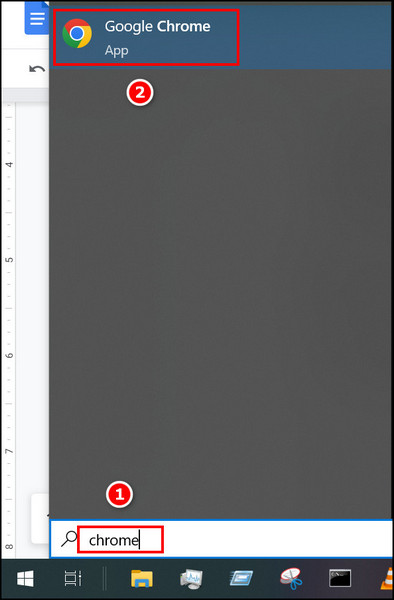
- Press the Windows key on your keyboard and type Chrome. Select the best match, and your Chrome Browser will be opened.
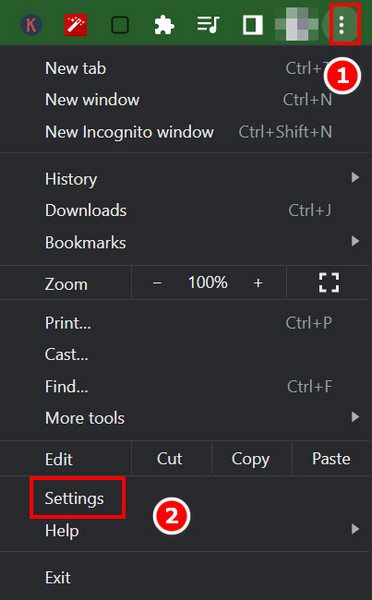
- Look at the top right corner of your browser, and you will see a vertical three dots icon. Click on it. Some more options will appear.
- Select Settings. Another Chrome tab will appear.
- Look for Languages on the left panel and click on it. The right panel will change options. Click on Enhanced spell check, and you are done.
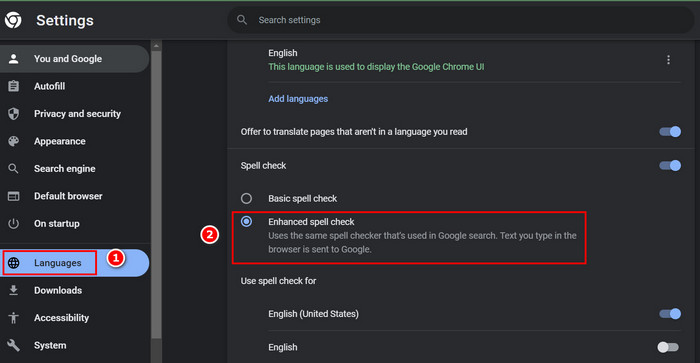
- Select the language you want to use spell check for if you want another language other than English.
If you are still in a fix, follow the next method to fix the Gmail spell check issue.
3. Correct system time and date
If your system time and date are different than your local time and date, your browser might misbehave. Often this results in unwanted behaviors, including an unresponsive spell-checker.
Follow the steps to correct the system time and date:
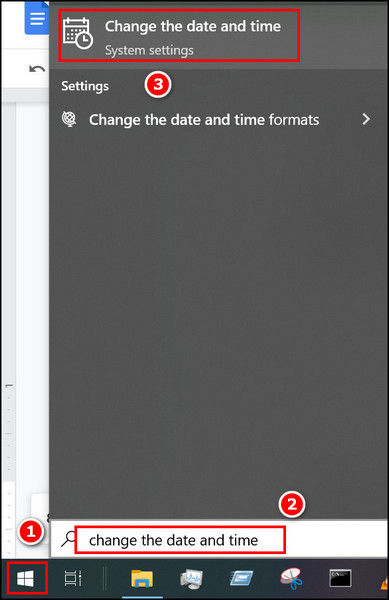
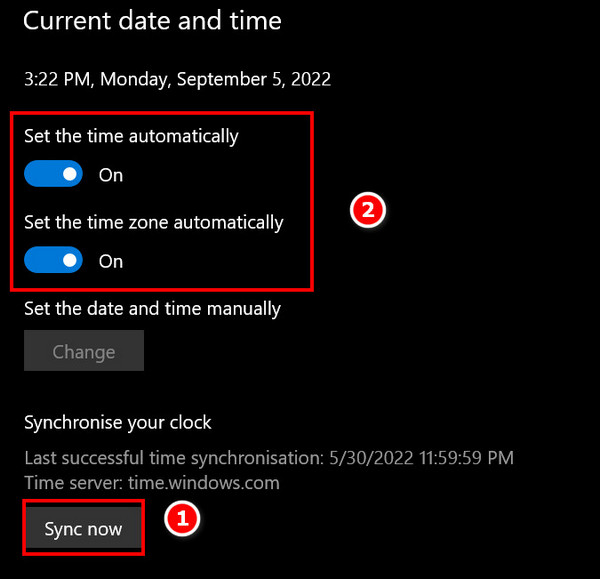
- Click on the Windows icon at the bottom left corner of your Desktop and type Change the time and date. Select the best match.
- Click on Sync now and wait for a few seconds. Remember to connect to the internet before clicking sync now.
- Make sure that Set time automatically and set date automatically are toggled on.
If time and date are not the issues in your case, try the next method.
4. Check Gmail server outage
You might be able to type in your Gmail composer, but the Gmail service might be off. This will result in the failure to check the spell.
Simply go to Downtime Detector, and you will see a Gmail outage for the last 24 hours, along with server status. But if you do not trust other websites, you can use Google Workspace Status Dashboard. It shows all the Google services’ statuses.
5. Check network instability
Network instability might be the reason why your Auto-spell check is not working. So, it is crucial to check it before any software changes.
Follow the steps below to check network instability:
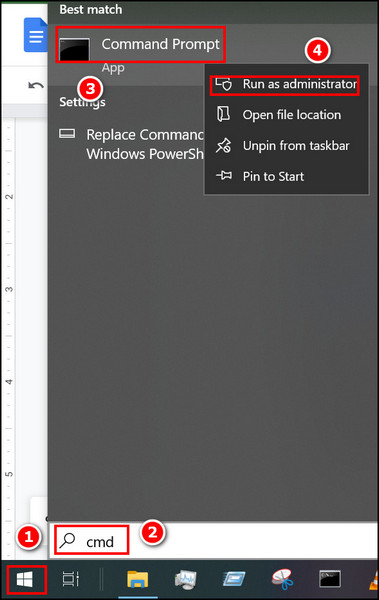
- Click on the Windows icon at the bottom left corner of your Desktop and type cmd. Right-click on the best match, and some options will appear.
- Select Run as administrator, and then click OK.
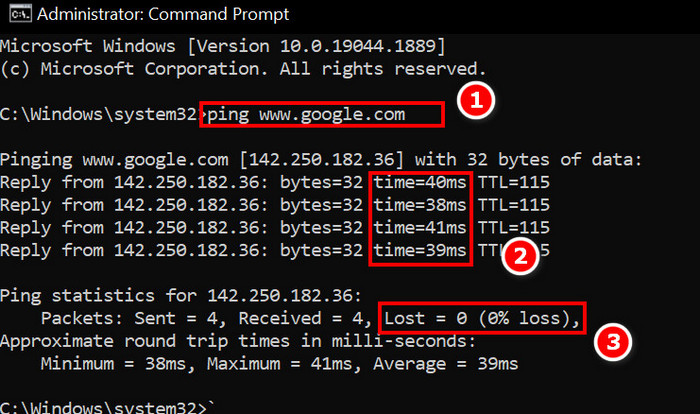
- Type Ping www.google.com and press Enter. Pinging will start.
- Check for Time and packet loss. The network is stable enough if your time is less than 100ms and packet loss is 0%. If not, you might need to upgrade your network.
If your network is working fine, consider heading to the next solution.
6. Clear corrupted cache
A corrupted cache is responsible for a performance boost. But if it gets corrupted, it creates issues that are hard to solve. So, clearing them is the right choice sometimes.
Follow the steps to clear the corrupted cache:
- Press the Windows key on your keyboard and type Chrome. Select the best match, and your Chrome Browser will be opened.
- Look at the top right corner of your browser, and you will see a vertical three dots icon. Click on it. Some more options will appear.
- Select Settings. Another Chrome tab will appear.
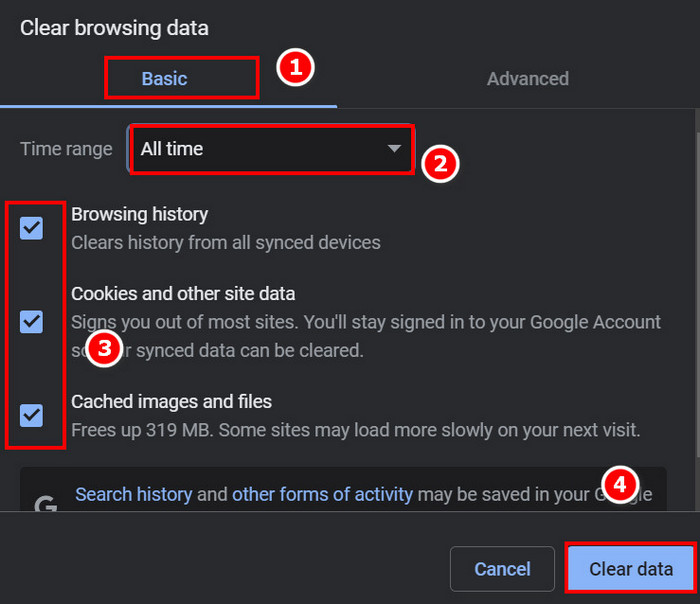
- Look for Privacy and security on the left panel and click on it. Then select Clear Browsing data on the right panel.
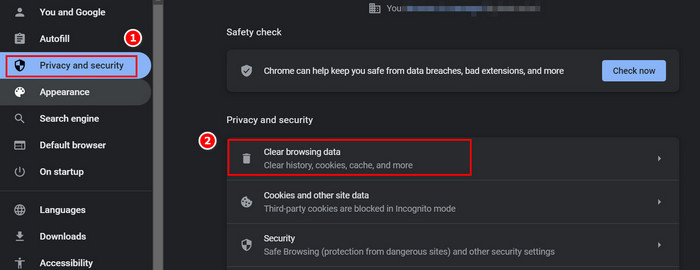
- Make sure you have selected the Basic tab and the time range as All time. All the check marks are to be selected. Also, back up any password or history you want to keep.
- Click on Clear data, and your cache will be cleared.
7. Update your Browser
Keeping your browsers and softwares up to date is a good practice. There might be some bugs in your current browser version causing your problem. So, it is recommended that you update your browser.
Follow these steps to update your browser:
- Press the Windows key on your keyboard and type Chrome. Select the best match, and your Chrome Browser will be opened.
- Look at the top right corner of your browser, and you will see a vertical three dots icon. Click on it. Some more options will appear.
- Select Settings. Another Chrome tab will appear.
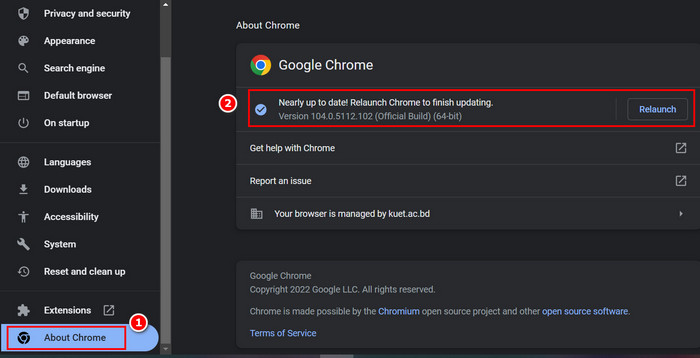
- Click on the About Chrome option at the bottom of the left panel. If your Chrome is not up to date, it will start updating. Click on relaunch when finished.
This time you should have your spell checker working just fine. If not, then mind going through the next solution.
8. Update Windows
The problem might be because of your outdated windows. So, it is worth a try to update your Windows.
Follow the steps to update Windows:
- Press the Windows key on your keyboard and type Update. Press Enter.
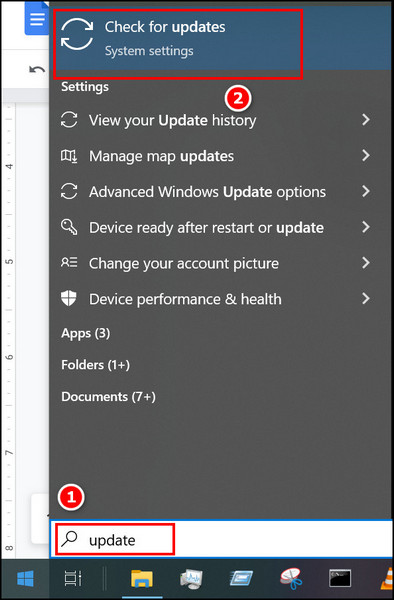
- Wait for a few minutes, and you will see if your Windows is updated or not. If not, it will start updating on its own.
Conclusion
I hope my solutions have saved you at least some time that you would waste looking for solutions on the internet. For me updating my browser worked as charm. Type how your problem was solved and what difficulties you faced during the procedure in the comments section below.
If you have other fixes, feel free to share them with us in the comments below!