As an Outlook user, you must be dealing with many emails daily.
Also, you might use the Calendar feature of Microsoft Outlook frequently. It makes the job of managing events and appointments much more effortless.
Over the years, the number of calendar items saved in Outlook might grow to such an extent that it slows down the software. Luckily, you can delete calendar items older than a certain date or delete them from a specific range. You can also delete all calendar items if needed.
There is also the option to recover or restore deleted calendar items using different methods.
This post will guide you through the different methods to delete, archive and restore calendar items in Outlook.
So keep reading the post till the end.
You may also like to read about fix Outlook server-side rules not working.
How To Delete Calendar Items In Outlook
As you continue to use Outlook for a long time, the number of calendar items saved in Outlook pile up. These calendar items can take up a significant amount of storage.
Removing calendar items is an option if you need to free up space in Outlook.
Related contents you should read Change Outlook Rules.
Follow the methods below to remove calendar items in Outlook:
1. Delete Outlook calendar items
If you are sure you do not need the calendar items anymore, you can delete them permanently. Otherwise, skip to the following method to archive items (which is easy to recover).
Deleted calendar items are stored in the Deleted Items folder in Outlook. You can find the Deleted Items folder in the left folder view.
When you exit the Outlook desktop app, the contents of the Deleted Items folder are cleared. So the deleted calendar items are removed permanently unless you recover them before exiting the app (though there are settings to prevent such behavior, more on that in the next section).
Here are the steps to remove calendar items from Outlook:
- Open the Outlook desktop app.
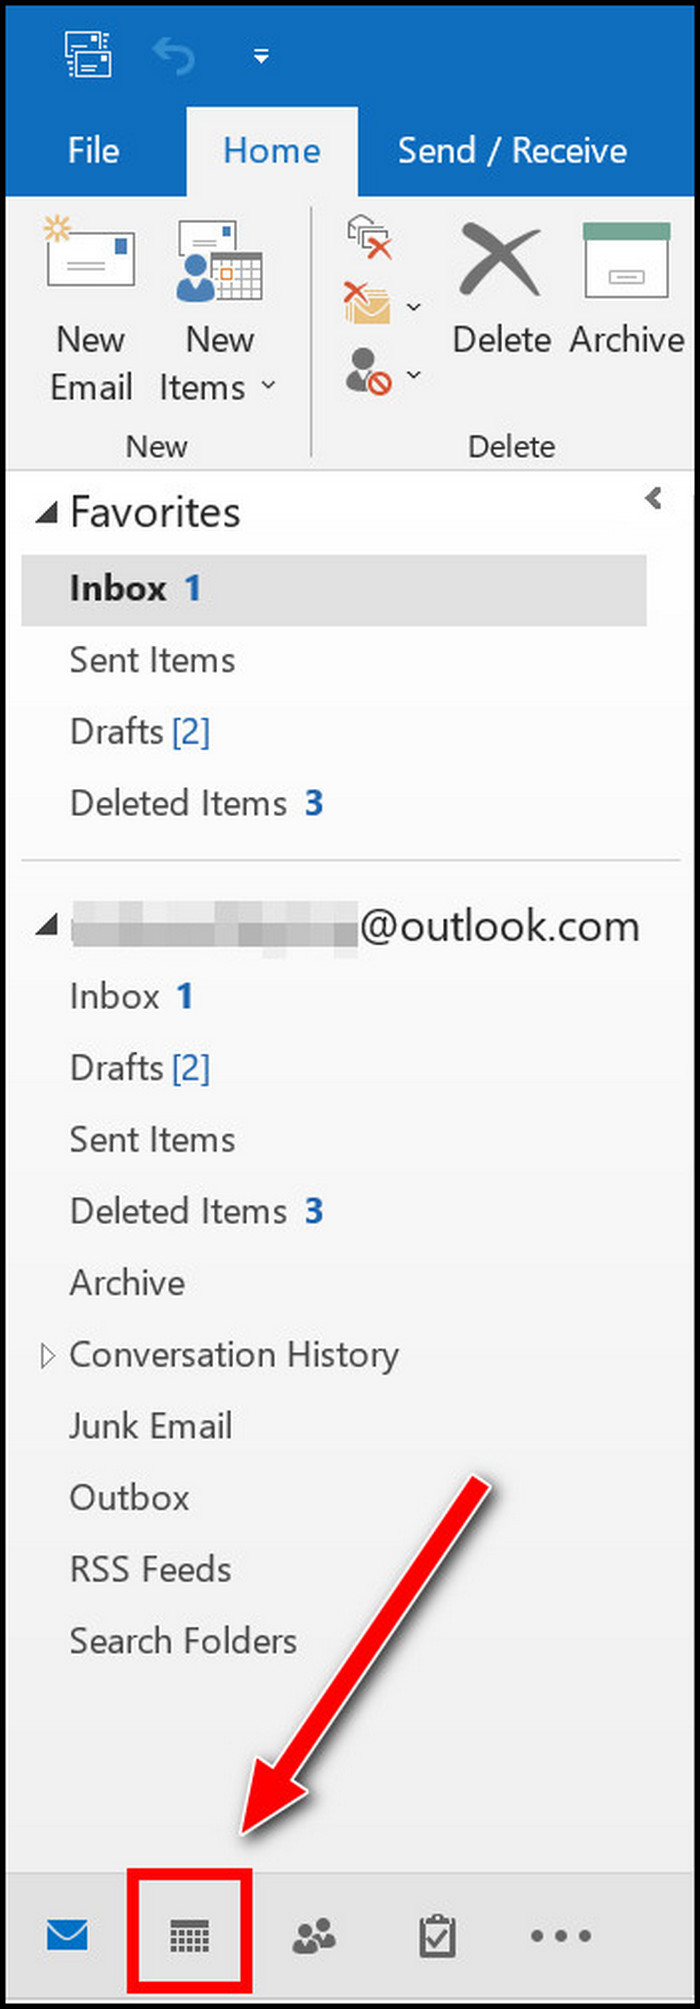
- Click on the Calendar icon from the bottom left to go to the Calendar view.
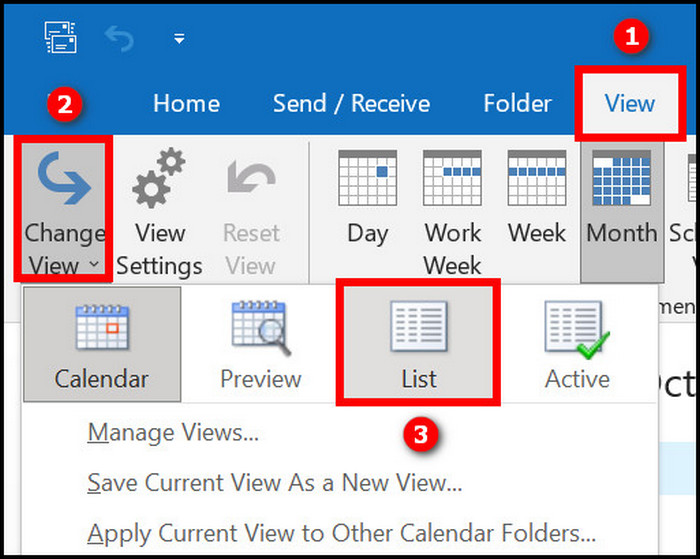
- Switch to the View tab from the top.
- Click on Change View from the top menu (inside the Current View group). A dropdown list of views will appear.
- Select List from the dropdown.
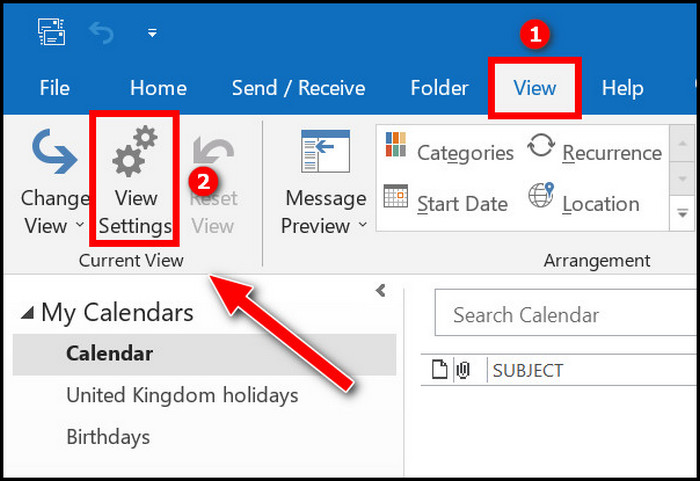
- Click on View Settings from the top menu (inside the Current View group). A new window will open.
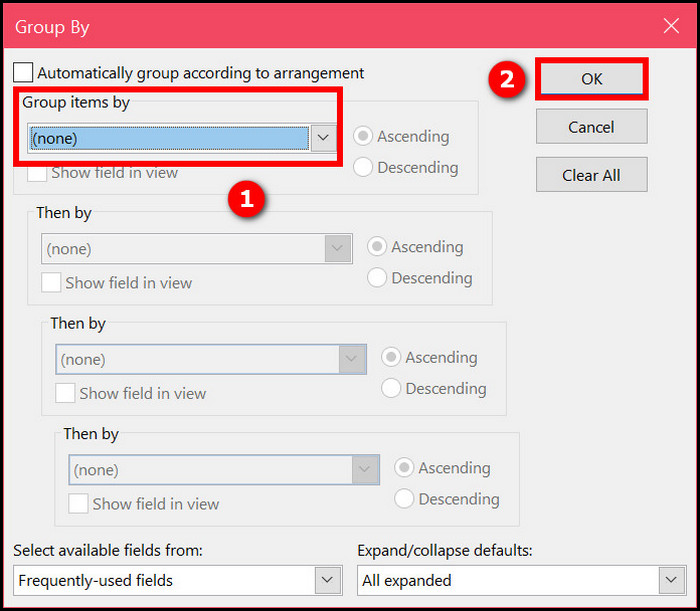
- Click on Group By. A new window will open.
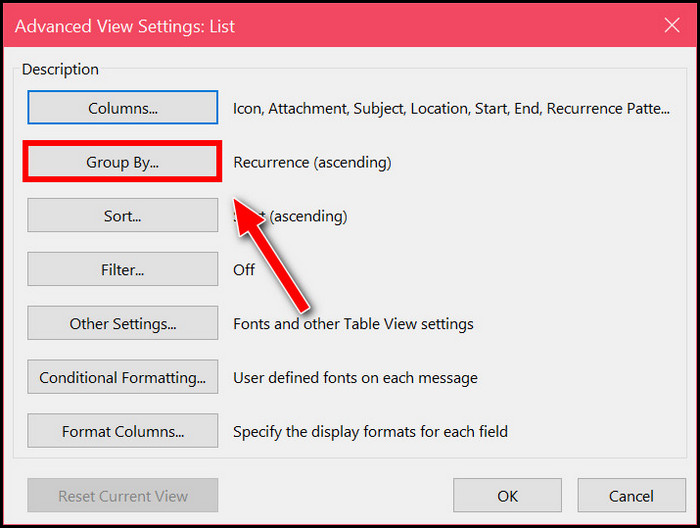
- Select “none” on the “Group items by” dropdown.
- Select “none” on the “Then by” dropdown.
- Click OK. It will ensure there is no grouping on the calendar items list so that you can sort the list freely. You will see a list of calendar items sorted by Start date. To sort them accordingly, you can click on the headings (subject, location, start, end, recurrence pattern, etc.).
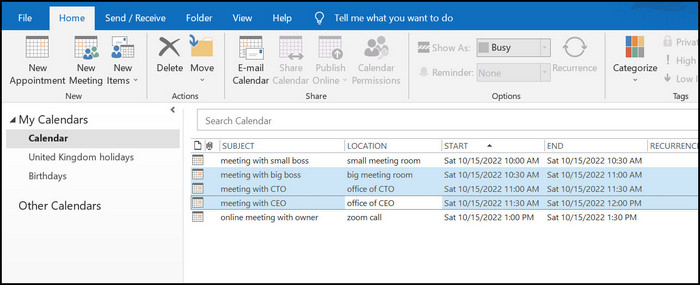
- To delete a range of calendar items, select the first calendar item in the range. Then hold down the Shift key and click on the last calendar item in the range. This will select all the calendar items in the range. Then press the Delete key to delete the desired range of calendar items. You can use this procedure with sorting to delete items older or newer than a specific date.
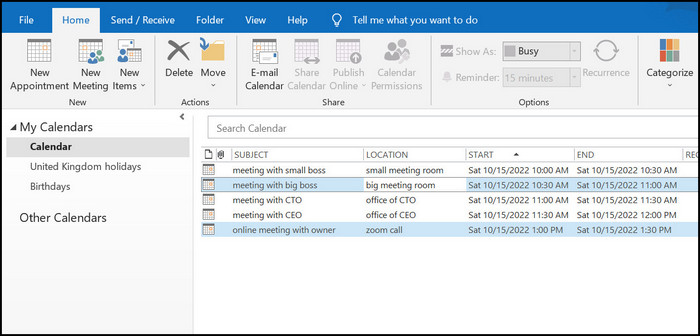
- To delete specific calendar items, hold down Ctrl and click on the calendar items one by one to select them. Then press the Delete key to delete the selected items.
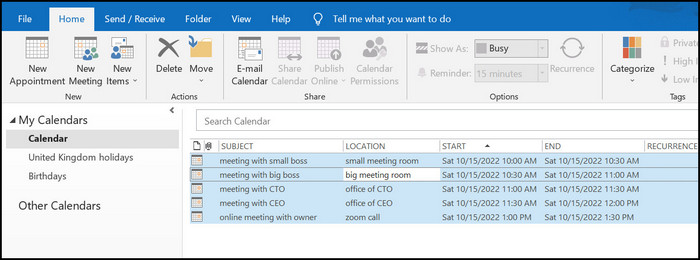
- To delete all items from calendar, press Ctrl+A to select all calendar items. Then press the Delete All the calendar items in your Outlook account will be deleted permanently.
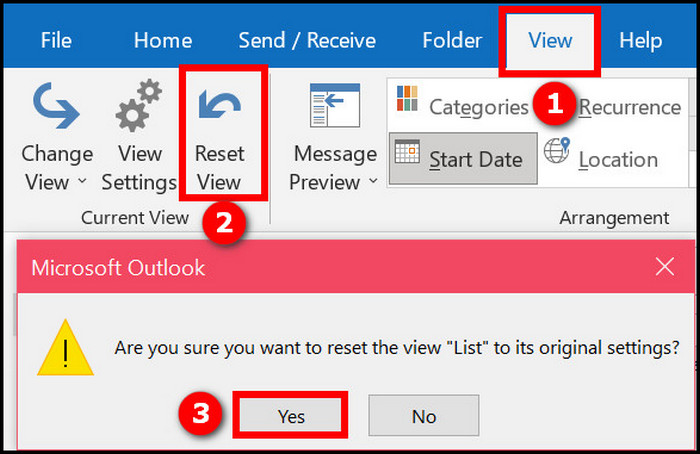
- To reset the list view to default, click on the View tab from the top. Then click Reset View > Yes.
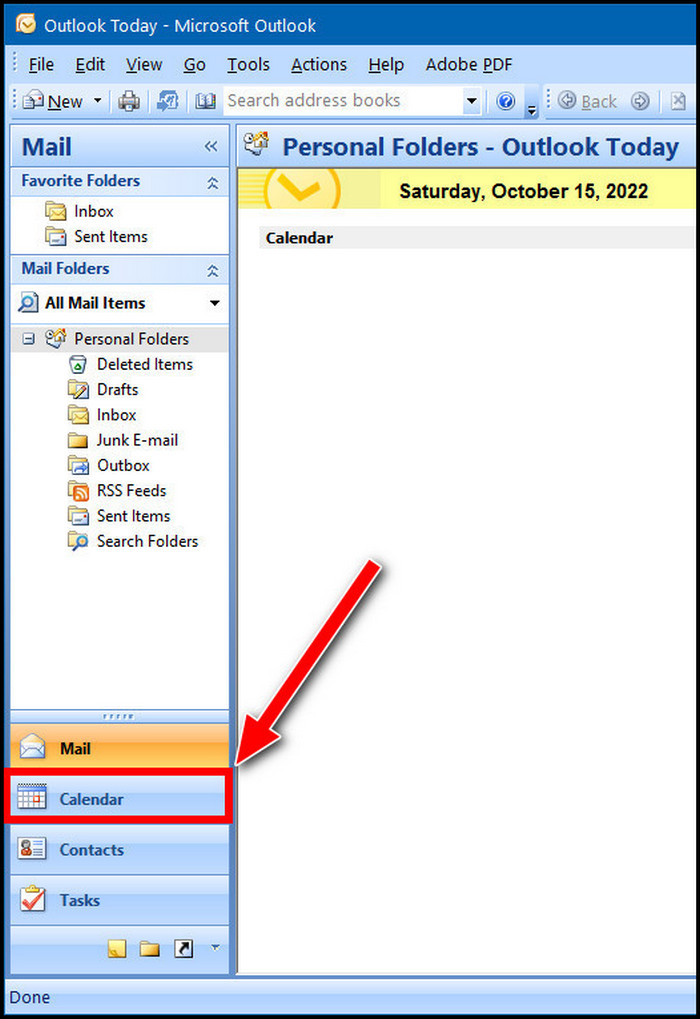
- If you are using Microsoft Outlook 2007, you must click on Calendar from the Navigation Pane on the left.
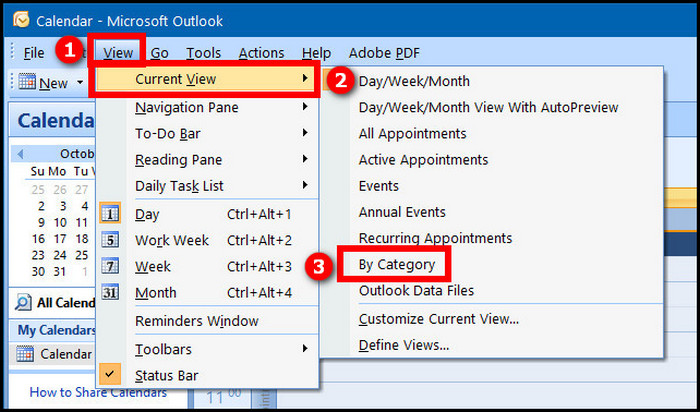
- Click on the View tab on the top and select Current View > By Category.
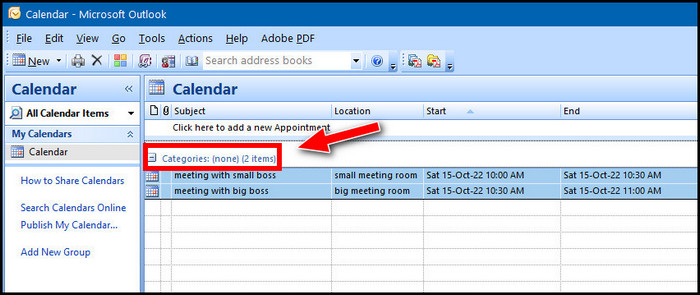
- Click on Categories: (none) from the top of the table and press CTRL+A to select all the calendar items. Press Delete to delete all calendar items permanently.
2. Archive calendar items
If you want to remove items from your Outlook calendar but are unsure about needing them later, then archiving calendar items is the option.
By archiving calendar items, you will be able to recover the items later.
Microsoft Outlook stores the calendar items in an Outlook Data File (.pst). When you archive calendar items, they are moved into a new Outlook Data File (.pst), and your data file is cleared.
Some more guides on crocs add Profile Picture in Outlook mobile app.
Here are the steps to archive calendar items in Outlook:
- Open the Outlook desktop app.
- Click on the File tab from the top.
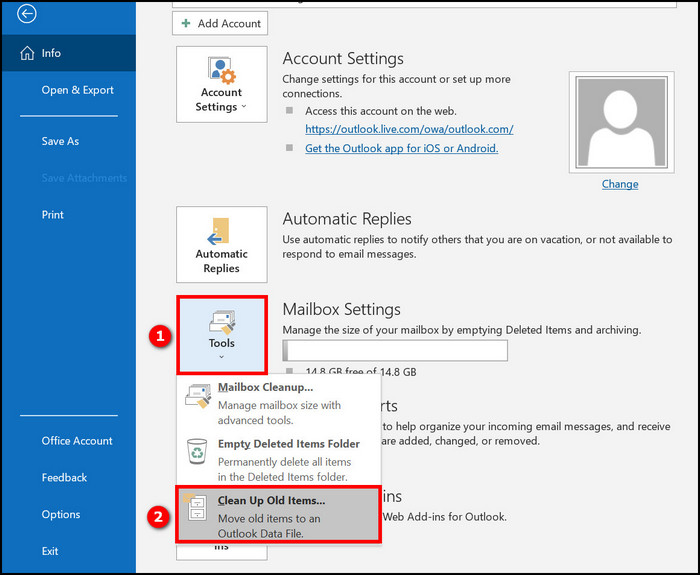
- Click on Cleanup Tools from the left menu, then click on the Archive button. In case you cannot find the Cleanup Tools option, click on the Tools box, then select “Cleanup old items” from the list. If you cannot find it, your organization might have disabled it to prevent you from archiving records. Contact your organization’s Microsoft 365 administrator in such a case.
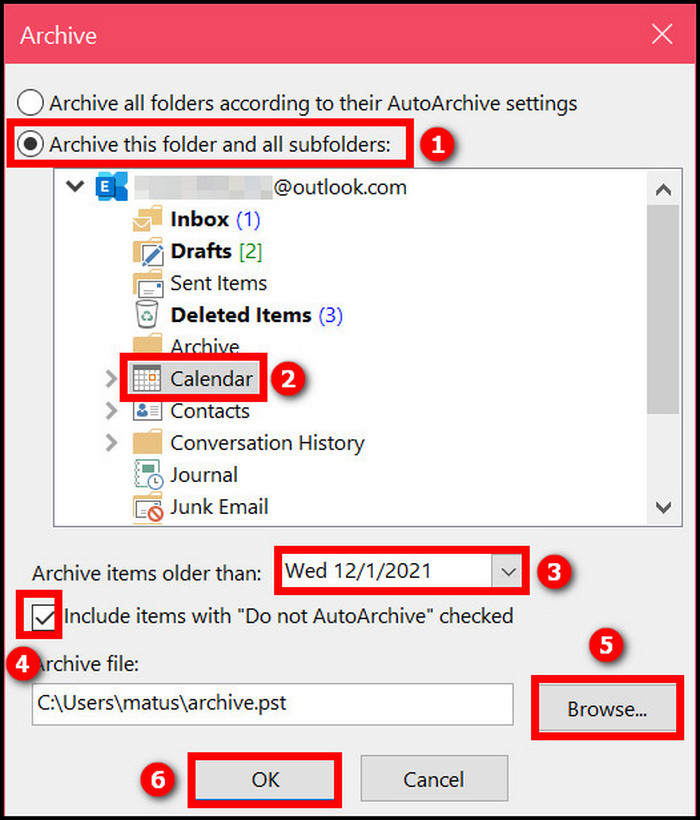
- Select “Archive this folder and all subfolders.”
- Click on Calendar from the folder list.
- Provide an appropriate date in the “Archive items older than” option. To archive everything, provide a future date.
- Check the box “Include items with Do Not AutoArchive checked” to archive items marked to be excluded from AutoArchive.
- Click on the Browse button to change the archive file location, or you can leave it in the default location. Either way, remember the file location. If you choose to recover the calendar items later, you will need the file location.
- Click OK.
When you return to the main Outlook window, you should see the orange/gray archive status bar below, indicating that the archive is in progress.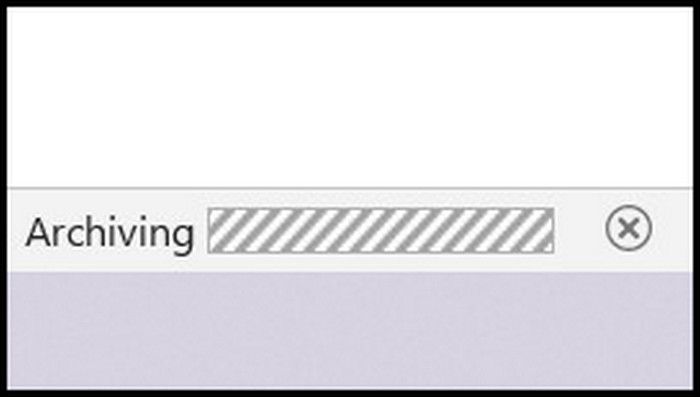
Check out the easiest way to know about Outlook Signature Not Showing Images.
How To Remove Calendar Items In Outlook 365
To make the Outlook app more responsive or clear the storage, you might wish to remove calendar items in Outlook 365.
In the previous section, two methods to delete calendar items in Outlook have been discussed. The first method deletes the calendar items (puts the items into the Deleted Items folder or removes them permanently). The second method archives the calendar items (puts the calendar items into another Outlook Data File).
You can follow anyone of these methods to remove calendar items in Outlook 365.
Follow our guide to know about how to add US holidays to Outlook Calendar.
How To Recover Deleted Calendar Items In Outlook
The previous section discusses two methods to remove calendar items in Outlook: the archive method and the permanent deletion method.
It is possible to recover deleted calendar items from both methods (if certain conditions are met).
But, before that, do check our latest post on fix Outlook Crashes KERNELBASE.dll
Follow the methods below to recover deleted calendar items in Outlook:
1. Recover from the archive
When you delete calendar items through archiving, it is pretty easy to recover the items as the items are stored in a different Outlook Data File (.pst). So restore the calendar items from the archive data file, and you are good to go.
Here are the steps to recover archived calendar items in Outlook:
- Open the Outlook desktop app.
- Go to the File tab from the top.
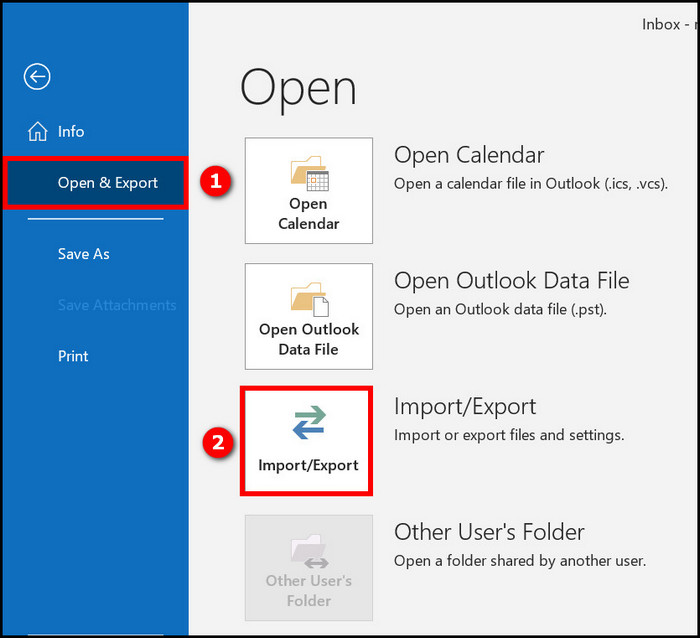
- Click on “Open & Export” from the left menu.
- Click on Import/Export tile.
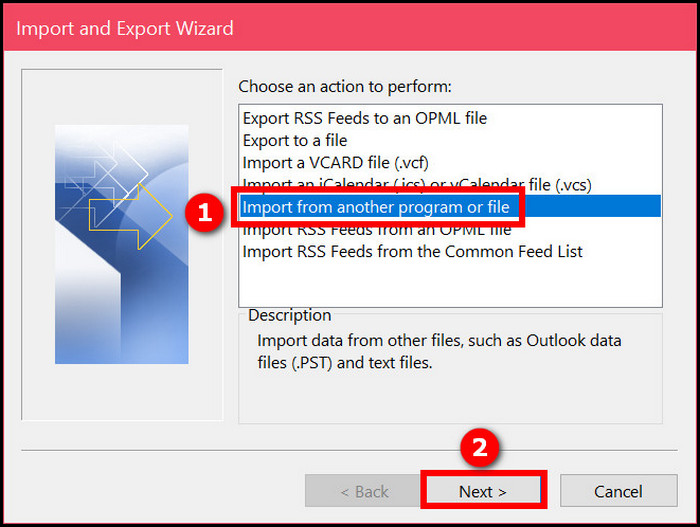
- Select “Import from another program or file.”
- Click on Next.
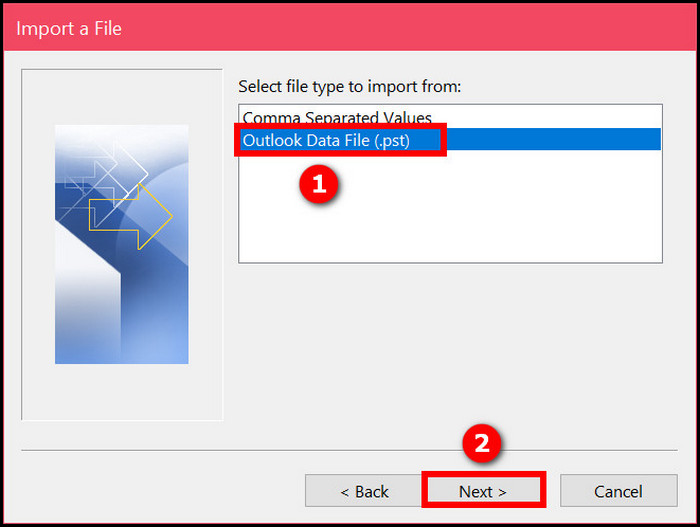
- Select “Outlook Data File (.pst).”
- Click on Next.
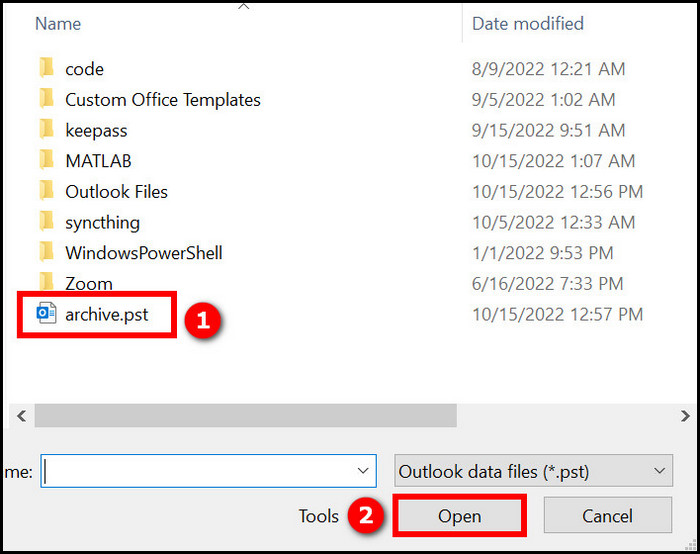
- Click on the Browse The File Explorer window will open.
- Go to the location where the archive (.pst) file is located.
- Double-click on the archive file. The File Explorer window will close, and the name of the archive file will appear beside the Browse button.
- Click on Calendar from the folder list.
- Check the “Include Subfolders” checkbox if you want to add subfolders data too.
- Select the destination of the calendar items by choosing between “Import items into the current folder” and “Import items into the same folder in” (the second option imports items into the same folder name as the source folder).
When the import process finishes, you will have all the archived calendar items restored into your Outlook app.
But before that, go through our epic guide on Outlook Icons not showing forward reply status.
2. Recover from Deleted Items folder
If you have deleted the calendar items directly (by pressing the Delete key), you can recover them only if they are still in the Deleted Items folder.
It is because when you press the Delete key to delete items from Outlook calendar, they are moved into the Deleted Items folder. All the contents inside the Deleted Items folder are cleared by default when you close the Outlook app.
So unless you have changed the settings, the deleted calendar items are gone for good.
However, if your settings refrain the Deleted Items folder from clearing immediately upon exiting the app, you can recover the calendar items.
To stop Outlook from clearing the Deleted Items folder, go to File > Options > Advanced > Outlook start and Exit and uncheck the “Empty deleted items” option, then hit OK.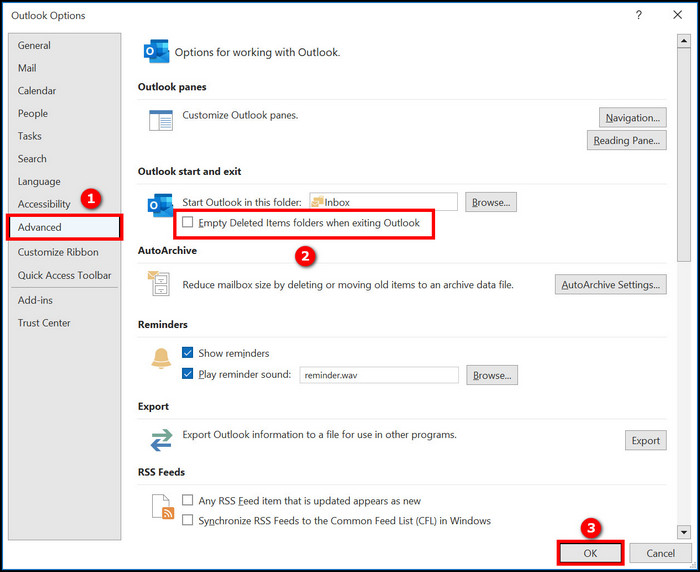 Assuming your Outlook settings were set not to clear the Deleted Items folder, here is the procedure to recover deleted calendar items:
- Open the Outlook desktop app.
- Click on the Deleted Items folder from the left folder pane. It will open the folder with all the deleted contents like emails, calendar items, attachments, etc.
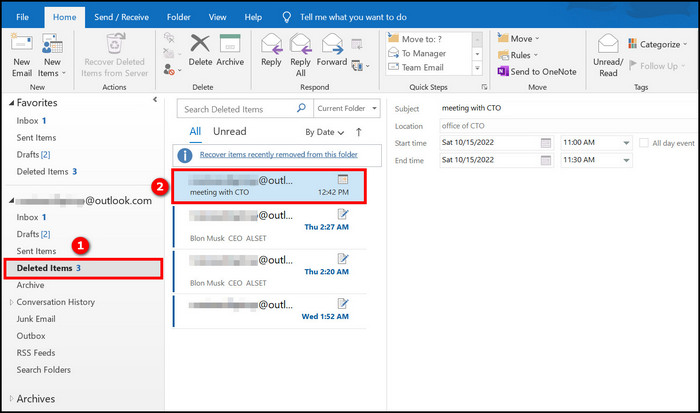
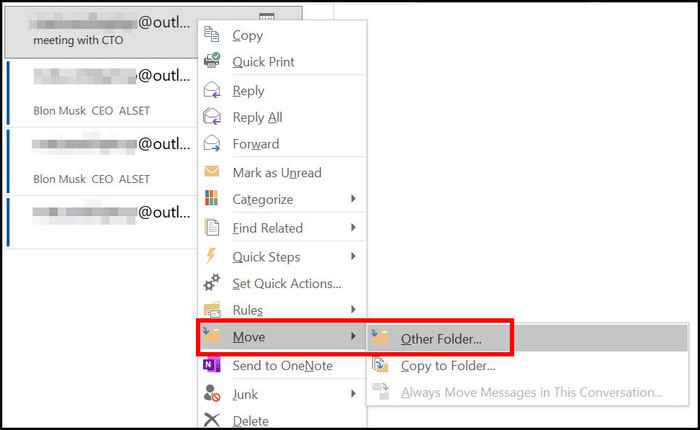
- Right-click on the deleted calendar item you want to restore.
- Select Move > Other folders.
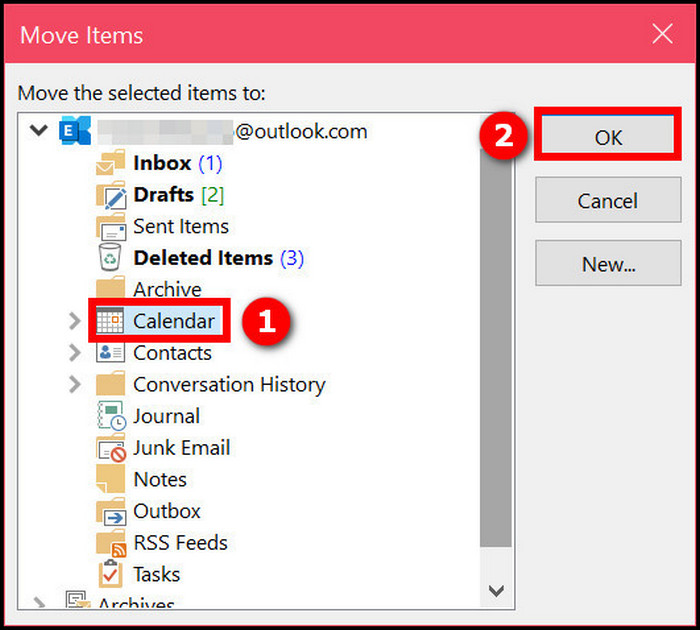
- Choose a folder like “Calendar” to place the recovered calendar item.
- Click on OK to save the changes.
Now you will see the deleted emails in the chosen folder.
Also, check out our separate post on how to add vacation to Outlook Calendar?
Final Thoughts
The calendar is fully integrated with Outlook emails, so it helps organize events and add appointments easily.
If you have a large number of calendar items in Outlook, the performance might become slow, or it might be hard to find a specific calendar item.
So people often need to know how to delete calendar items in Outlook 365. Using different methods, you can archive or remove calendar items of any particular range or all of them together.
If there is a mistake while removing calendar items, you can restore the calendar item (in most cases) by following the appropriate method.