Due to dust accumulation, a power supply unit performs poorly and fails to deliver optimal energy to your PC. So, time-to-time maintenance and cleaning up are needed to keep the PSU condition in the best shape.
There are many methods on the internet, but none clearly explain how to do it properly. Thus, I am here.
In this article, I will guide you to the accurate approach to dust your PSU perfectly in just 5 simple steps.
So, let’s begin!
Check out our recent article on what Power Supply do I have.
How to Clean a PC Power Supply Unit Perfectly
Cleaning the PC power brick regularly is really important to ensure a longer lifespan for your PSU. Generally, cleaning your power supply at least 2 to 3 times a month is considered okay.
There are a couple of simple steps that I personally follow to dust up my power supply effectively. Just follow the steps sequentially as I explain each one briefly.
Here are the ways to clean a computer PSU properly:
Step 1: Shut Down the PC
The first thing you should consider before cleaning up your PC is to Shut down the PC and unplug the power cable off your computer. Never clean the inside of your PC while it is running or plugged in, as this can result in accidental zaps or voltage overflow.
Turn off your PC and allow it to rest for a minute or two before removing the computer case’s side panel. It will discharge any remaining power in the PSU and help other components to cool down.
Step 2: Detach Cable Connections and Side Panel
After turning off your PC, you can safely detach all the cables from your PC case. Then, unscrew and remove your computer’s access panel. 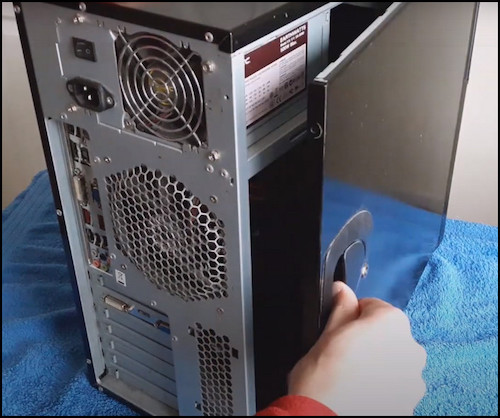
You can now identify the power supply unit around your computer’s top or bottom. You can also recognize the PSU from the large fan it contains.
Also, check out our separate post on what happens if your Power Supply is too weak.
Step 3: Remove and Disassemble the PSU
You must consider a few things to take out and disassemble the PSU properly.
Here are the ways to remove PSU from the motherboard:
- Unplug the PSU cables connected to the motherboard.
- Remove the screws from the computer’s backside that connects to the PSU.
- Unscrew the four nuts holding the PSU in the casing and carefully pull the PSU from inside the casing.
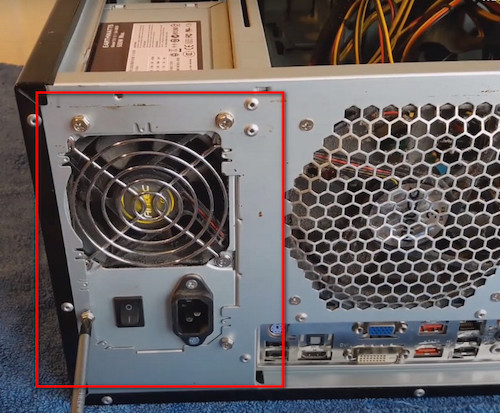
- Remove the screws from the PSU metal case to open it up.
- Disconnect the fan cable and keep the frame aside if the fan connector is removable. If not, find the fan screws on the frame and remove them.
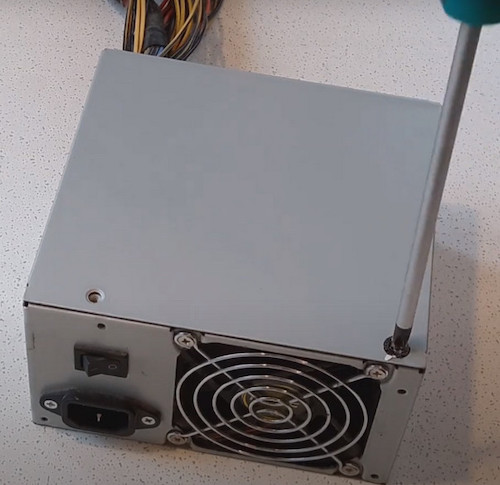
Once you pull apart the PSU, now it’s time for the cleaning.
Follow our guide step-by-step to fix Computer not turning on Power Supply.
Step 4: Use Compressed Air
After opening the PSU fan, you can use a blower or compressed air to clear up the dust.
Blow the compressed air to the fan to dust off the surface. At the initial stage, you can use a simple air sprayer for ease as it clears the dirt easily. 
Make sure to use the straw attachment that came with the dust-off can. Focus your spray also on the PSU’s corners and interior. I suggest you dust off with short bursts of spraying.
Furthermore, wipe out the circuit board and the bundle of wires from the PSU. Repeat this dusting process until no visible dust remains or comes out of the power supply.
Check out the easiest way to fix computer turns on and off repeatedly.
Step 5: Use Brush and Microfiber Cloth
After using the compressed air, use a Brush and Microfiber Cloth to wipe out dust from the fan’s upside and downside. Separate the PSU wires slightly and wipe between them as well.
Finally, dip the microfiber cloth into procure isopropyl alcohol and wipe off all the surfaces. For extra cautiousness, you should also rub off the dust from the Cables, Motherboard, Hardware, and Casing. 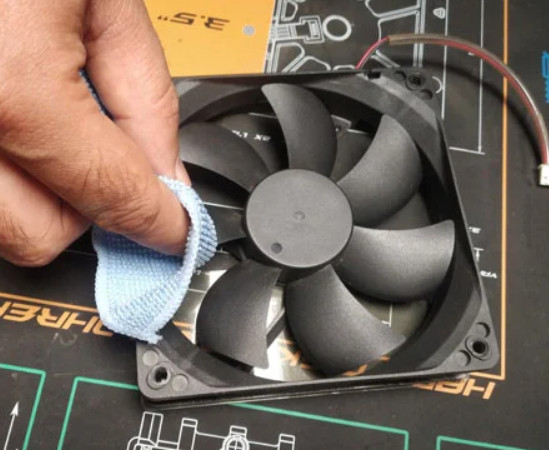
After carefully cleaning up the dust from every delicate part, now it’s time to reassemble all the components back. Just screw up the PSU back in the PC case, connect all the wires and side panel. Turn on your PC and check whether everything works properly or not.
Go and check our other article on how to know if CPU cooler is compatible with Motherboard.
FAQs
How do you clean a power supply without compressed air?
To clean a power supply without compressed air, detach the PSU from the PC case and use a brush and microfiber cloth to clear up the dust from the PSU fans.
How do you dust a power supply?
To dust a power supply unit, turn off your PC and remove the PSU from the case. Use a blower or compressed air to clear up any accumulated dust on your PSU.
Can I use a hairdryer/vacuum cleaner to dust my PC?
No, I strongly recommend you avoid using hairdryers or vacuum cleaners near PC components. They often create static electricity that can damage the sensitive components of your PC.
Final Words
Keeping the inside of your PC case dust-free is essential to maintain an overall safe PC temperature. And dusting the power supply unit is the most crucial one.
Hopefully, after reading thoroughly, you now know the efficient technique to clean your computer’s PSU.
Feel Free to comment down below if you have any suggestions for us.