Every PC has a CPU cooler attached to the processor to remove heat. As it’s an electronic component, you may need to upgrade or change the cooler sooner or later.
For your worries, I assure you that taking out the CPU cooler is both harmless & effortless, and you can do it on your own. You just have to follow the guidelines given here.
So, without any delay, go through this guide as I’ll show the simple steps of removing a cooler unit to replace it with a new CPU cooler.
Quick note: This guide will work for both AMD & Intel CPU coolers, including other third-party coolers.
What Precautions To Take When Attempting To Remove a CPU Cooler?
There are some steps that you should go through before taking off your cooler. These are to be done to prevent removing the cooler without damaging it, other parts of your PC, or hurting yourself in any way. These are safety measures regarding static electricity, coolant in liquid coolers, etc.
Before you start to remove the fan, you must take these precautions:
- Stay away from working on carpeted surfaces, as it will produce static electricity. Later, it will cause sensitive electrical components to malfunction.
Additionally, to eliminate any static that has built on your hands by touching a grounded metal object. I advise you to use antistatic equipment like wrist straps before contacting any electrical equipment.
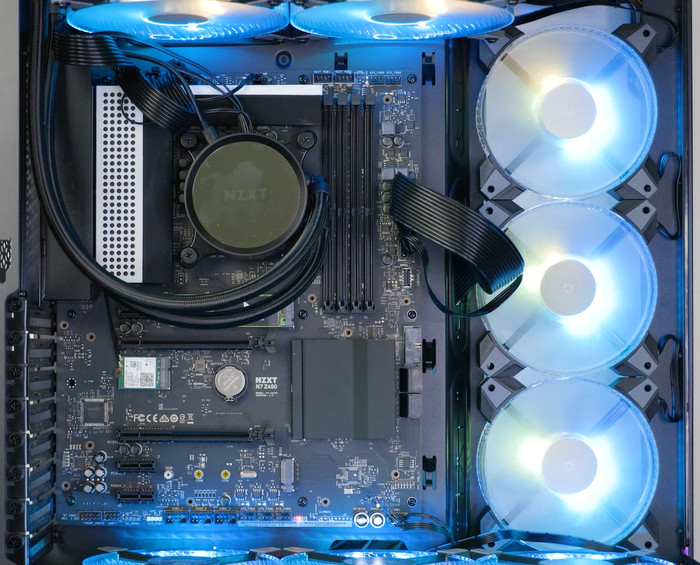
- If you have a liquid CPU cooler on your PC, beware of possible coolant liquid damage. If there is any spillage, it can severely damage the processor and other PC components.
- Don’t pull on screws or turn the screwdriver too hard to loosen the screws. Or else, the force may cause damage the motherboard physically. Screws and clips need to be attached firmly but not too rigid.
If you are completely checked with the safety measures I mentioned above, you can take your steps towards removing the cooler. Otherwise, you can’t remove your cooler from your computer without any mishap occurring.
See our most recent post on CPU cooler won’t install.
When Should You Remove the CPU Cooler?
Your cooling system needs to be separated from the motherboard in certain obvious situations. These are times when you are installing a new CPU cooler, to reapply the thermal paste between the CPU and heatsink, or if you want to give your PC components a thorough cleaning.
You may also want to take off your cooler to test what happens to your CPU if you run it without a cooler but, trust me, you do not want to do this.
It is highly suggested that you do not turn on your computer in any situation without a CPU cooler installed in it. This can cause severe and irreversible damage to your main processing chip, motherboard, and even the other components due to the sheer amount of heat produced by your processor.
Also, check out our separate post on can I start a PC without a CPU cooler.
How to Remove a CPU Cooler From Motherboard
The whole process of removing a processor’s cooler is almost similar for all coolers. The change you will find in the attaching object (screws or plastic pins or retention clips) between the motherboard & the cooler. However, those are not a major concern.
A cooler is generally made up of a heatsink and a fan. The heat sink is the part that is in contact with the processor. The fan(s) are joined with the heat sink with the help of screws.
The whole contraption is secured to the motherboard on top of the CPU. Removing it will require you to disconnect the joints between the heat sink and the motherboard. Although, you should not immediately get started with that or you could damage your CPU, motherboard, or other parts unintentionally..
The step-by-step process of removing a cooler is discussed here.
Here are the steps to remove a CPU cooler:
Step 1: Warm Up the Thermal Paste
The cooler and CPU have a layer of thermal paste in between. Firstly, you need to warm up that thermal compound to soften it. If you try to remove the cooling fan without warming up the paste, you won’t be able to separate the cooler from the motherboard because it may pry the processor out.
The worst case can happen if the processor comes out with the heat sink with bent pins. I am certain you don’t want that to happen.
Turn on the PC and keep it running for 10 to 15 minutes. In some cases, this may not be enough. Then you have to keep it on for a few more minutes to soften the thermal paste. Otherwise, it will be unsafe and difficult to take off the cooler.
When it is properly heated, the cooler should easily come off then because the warm thermal paste ought to be gooey and pliable.
After that, turn off the computer and unplug all the cables.
Here’s a complete guide on how to know if CPU cooler is compatible with Motherboard.
Step 2: Loosen the Screws/Clips/Pins
Now you have to unhook the cooler from the motherboard. Your cooler is usually hooked to the motherboard with four screws, plastic pins, or retention clips.
Using a screwdriver that matches is suggested if it is joined with the screws. If the retention clip attaches it, slowly lift the cam lever from the retention frame. Release the heatsink’s holding clips from its attaching hooks on the motherboard socket.
For plastic pins, you must rotate the pins 90 degrees in the direction the arrow indicates.
The proper way to take off the screws/pins is in an alternative diagonal pattern. Then you can disconnect the cooler. ![]()
Check out our recent article on do you need a CPU cooler.
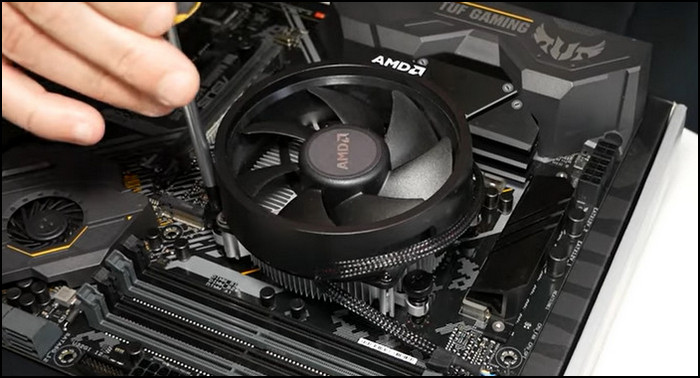
Step 3: Detach the Cooler
When you make an attempt to break the connection between the cooler back and the CPU lid, gently twist the CPU cooler in both directions (clockwise & counterclockwise).
Move steadily at the beginning in one direction until you encounter some resistance, then reverse your path. Since the thermal paste is heated, releasing the cooler shouldn’t be too difficult. Finally, lift and remove the fan.
Note: Be careful with pins in your motherboard and the CPU. Don’t bend or break any pins while separating the cooler from the board.
How to Reapply Thermal Paste After the Cooler Is Removed?
You may have removed your cooler to newly apply thermal grease on your processor. Again, you might have gotten a new cooler. Before moving on to installing it, you will have to remove the thermal compound and apply it afresh onto your processor’s lid.
First, after taking off your CPU cooler from the CPU, you must remove all of the old thermal paste that is stuck to the heat sink and also the CPU lid. Try using a piece of dental floss or a razor blade to get it off. Make sure to be gentle when doing this so as not to damage any components.
Once all of the old thermal paste is removed, clean the surface with some isopropyl alcohol and let it dry completely before applying the new thermal paste.
Take enough paste that is the size of a pea and spread it on the main chip’s lid to make an even layer. Ensure that there are no air bubbles or gaps in between. After ensuring that everything is properly applied, reattach the CPU cooler. Your system should now be ready to go!
FAQs
How do you remove CPU cooler screws?
To remove CPU cooler screws holding it in place, you can use a number two Phillips screwdriver. Or you can use the screwdriver that matches with screws. Place the screwdriver on top of the screws and rotate counterclockwise until they are detached.
Can you change CPU cooler without removing motherboard?
Yes, you can change the CPU cooler without removing the motherboard. But you must be careful while you do that. Or you may accidentally damage other hardware parts.
How long can a CPU run without a cooler?
After experimenting with a couple of CPUs running without a cooler, I found that the CPU would last 50 to 60 seconds without a cooler. After that, the CPU will burn like toasted bread.
Final Thought
Always proceed cautiously and follow standard safety guidelines when you handle any electrical components. Most importantly, never place the CPU cooler on top of a CPU without using thermal paste.
Always verify that the clamps or screws are securely and completely connected to the motherboard when reattaching the cooler. Overheating of the CPU can be caused by one loosened screw.
Comment below if you have any queries.
Peace Out!