Sorting your Outlook appointments category-wise really helps to identify your schedules in an organized way.
Doing it manually for each event is quite easy, but can you make an automatic color code scheme? Yes, it’s possible. But the process may seem a little confusing for new Outlook users.
Read through this article as I explain and simplify how to categorize Outlook calendar appointments automatically.
Let’s begin.
You may also like to read about how to embed a PDF into an Outlook email?
How to Auto-Categorize Calendar Appointments in Outlook
There is no direct option provided in the Outlook app or Web version for categorizing calendar appointments. You can manually pick each event in your Outlook calendar and add a color code to it. It can be a little bothersome when you have tons of meetings set in your calendar.
As a workaround, you can set conditional formatting that will work as an automatic categorizer for your Outlook appointments. This works in every version of Outlook (2013/2016/2019/Office 365) and also Outlook Web Access (OWA).
This technique is a little tough. So let me break down the process for your easy understanding.
Here are the ways to color code appointments in the Outlook calendar automatically:
1. Via Outlook Desktop App
You can tweak the conditional formatting option in the Outlook application to set a rule sorting appointments with color categories.
Here’s how to automatically color code appointments in the Outlook desktop app:
- Open the Outlook app and go to your Calendar pane.
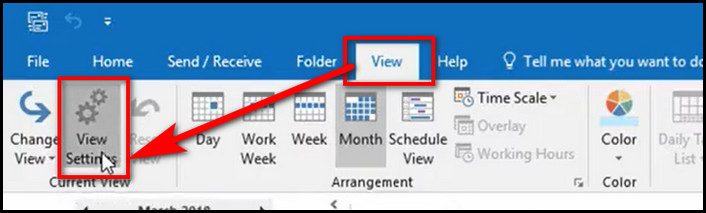
- Switch to the Views tab and choose View Settings.
- Hit on the Conditional Formatting button.
- Select Add to create a new rule on the newly opened Conditional Formatting dialog box.
- Name your rule according to the type of appointment.
- Pick a color from the drop–down menu.
- Hit the Condition button. A Filter dialog box will pop up.

- Type the condition you want to set for the rule in the Search for the word(s) box.
For example, if you want to color all appointments with the text Urgent Meeting in their subject fields, just enter the text Urgent Meeting into the box.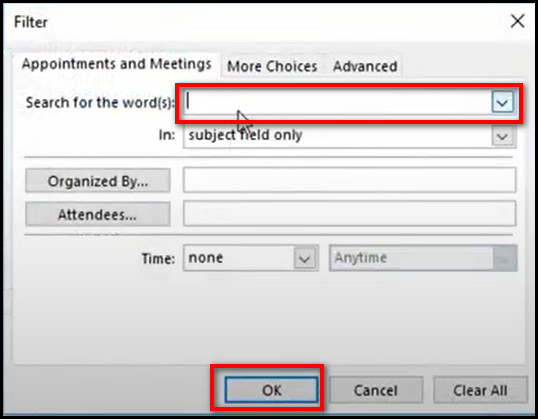
- Set other specifications for the Rule like Organized by, Attendees and Time. (Not mandatory).
- Select the OK button in all the dialog boxes to save the changes.
From now on, whenever you add a schedule with the keyword Urgent Meeting in the subject title, Outlook will automatically add a categorizing color to it.
Also related, how to delete duplicate emails in Outlook?
2. Using Outlook Web
Alternatively, you can use Outlook Web Access (OWA) to auto-categorize calendar events.
Follow these steps to add an auto-categorizing rule for appointments in Outlook web:
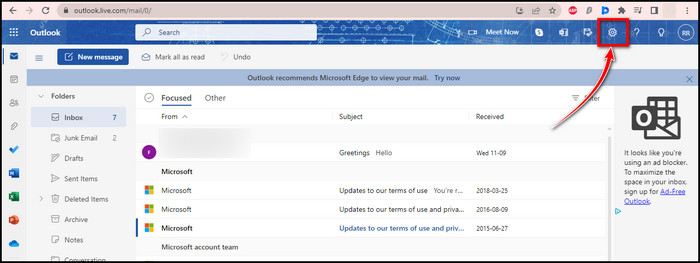
- Navigate to the Outlook web page and log in to your account.
- Go to Settings and choose View all Outlook settings.
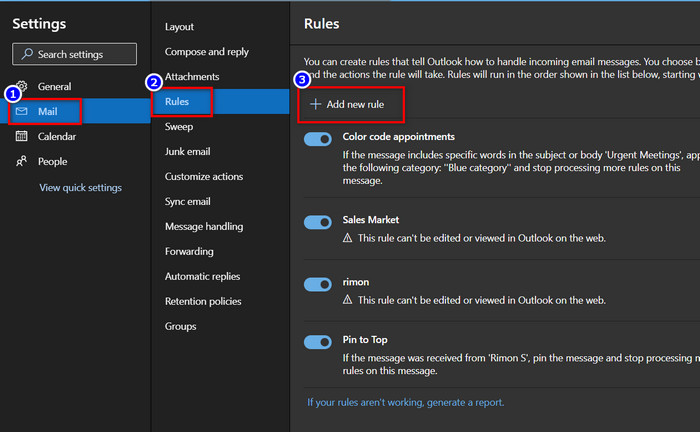
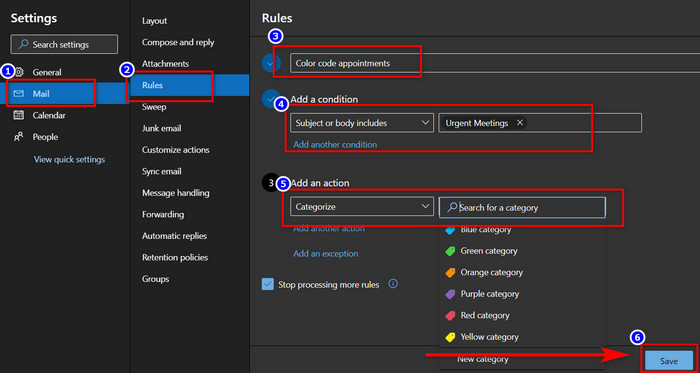
- Open the Mail tab and select Rules.
- Click on Add new rule.
- Enter a name according to your rule in the Name your rule text box.
- Open the Add a condition dropdown arrow and select Subject or body.
- Enter a keyword to use as the criteria. For example, enter Urgent meeting in the text box so that any appointments with the text in the subject will be categorized.
- Click on the Add an action dropdown menu.
- Select Categorize, and then select the category you want to assign.
- Hit the Save button.
After that. the new rule will be added to the Rules settings dialog box, and any calendar events that match the rule criteria will be sorted with the color you picked. Follow the steps to add as many rules as you want.
Related guide about categorize emails in Outlook automatically.
How to Assign Color Category to Calendar Appointments in Outlook Manually
When you want to color-categorize a few calendar appointments separately, doing it manually is the quickest option. You can do it both in the Outlook application and the web version.
Here are the ways to assign color categories to calendar appointments in Outlook:
Method 1: Via Desktop Outlook Application
Using the desktop app, you can add color categories to the Outlook calendar events. You can also create new categories and then apply them to your calendar event.
Here’s how to color-code appointments via the desktop Outlook application:
- Open the Outlook app and go to the Calendar pane.
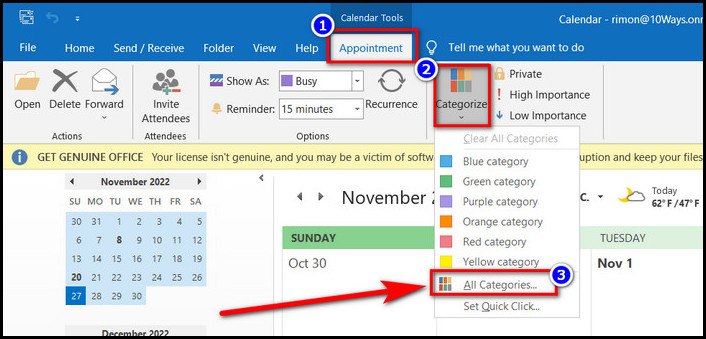
- Select an appointment with a Single–click. The Appointment tab will open on the Main Menu ribbon.
- Hit on Categorize under the Tags menu.
- Choose All Categories from the drop menu. The Color Categories window will pop up.
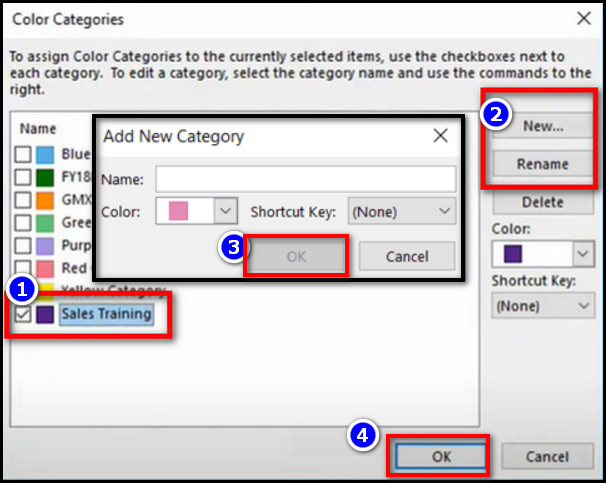
- Select New to create a new category.
- Name your category and pick a color of your choosing.
- Choose a Keyboard shortcut (Not Mandatory).
- Hit OK to apply the changes.
After that, select any calendar appointment you like and click the Categorize option. Select the new color category you just created, and your appointment will be categorized accordingly.
Also related to this guide on how to change default language on Outlook?
Method 2: Using Outlook Web Version
As an alternative, you can browse Outlook Web Access (OWA) and assign a color category for your calendar schedules. What’s more, you can use this method in your Mac and Mobile browsers (iPhone/Android) as well.
Follow these steps to color-categorize calendar events via Outlook Webpage:
- Navigate to the Outlook web and sign into your account.
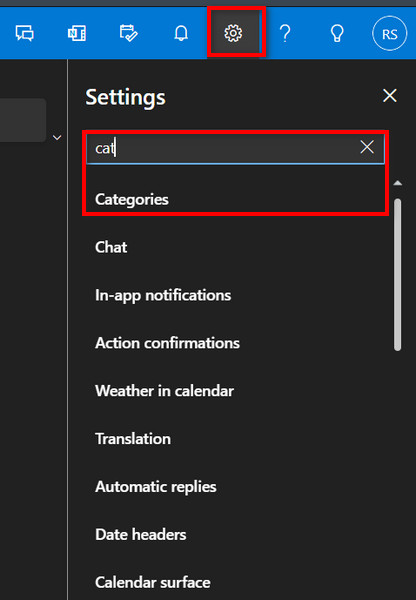
- Hit the Settings button.
- Type Categories in the search bar and open it.
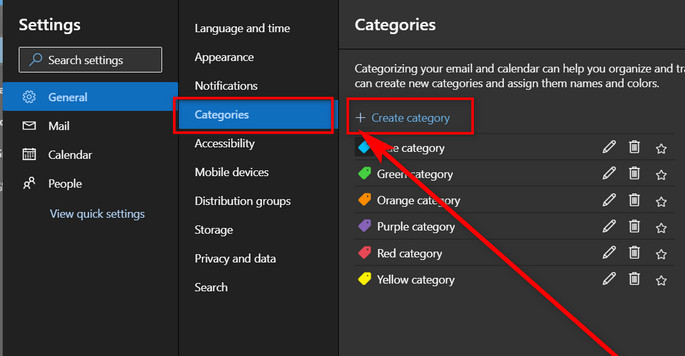
- Click on Create category in the Categories settings screen.
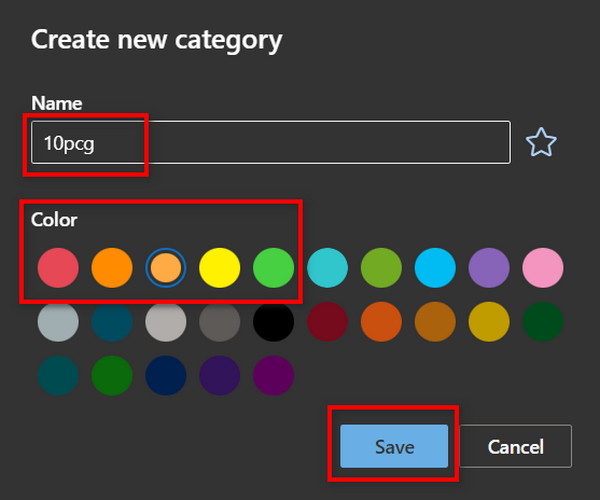
- Give a name to your category and pick a color of your choosing.
- Click on the Save button.
- Repeat the same steps to create multiple new categories.
- Choose Exit.
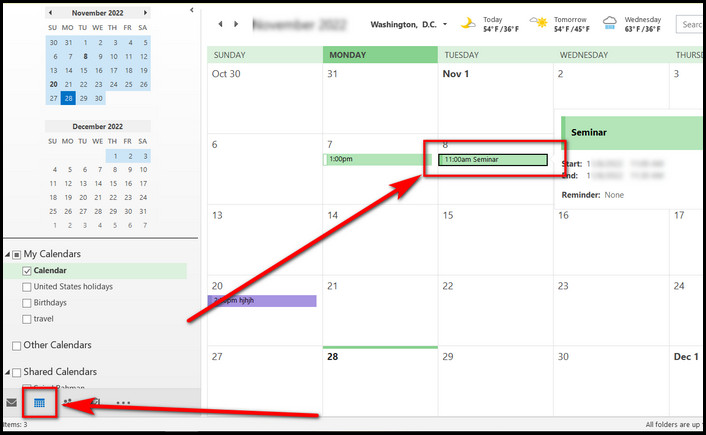
Once done, you can select any appointments and use color categories from the drop-down menu beside the Calendar icon to sort them with color.
FAQs
Can you automatically categorize calendar appointments in Outlook?
Yes, you can create conditional formatting to automatically color-categorize Outlook calendar appointments.
How do I automatically color-categorize a meeting in Outlook?
To automatically categorize calendar appointments in Outlook, you must create a conditional formatting rule. Open Outlook > Home > Rules > Create Rule > Advanced Options > Add your conditional rule > OK.
How do you color code a schedule in Outlook?
To enable color-coded schedules in the Outlook calendar, open Calendar > select your appointment/ meetings/ event > Categorize > All Categories > New > Rename > pick a color > OK.
How do I categorize outlook calendar on iPhone?
You can not categorize Outlook calendar on iPhone using the iOS app for Outlook. However, you can log in to the Outlook web on your iPhone browser and set color categories for the calendar events.
Final Words
Categorizing your Outlook calendar events is a great scheme, and doing it automatically can really boost your workflow.
Hopefully, you have read the article carefully and now know the proper methods to use auto-color categories for your calendar appointments.
Still stuck on any steps or have new queries on Outlook issues? Feel free to comment down below.