If you’re still stuck with the same old blue-and-white Outlook calendar, brother—you’re lagging behind. Outlook allows you to manually select a color for each calendar event to distinguish your appointments and meetings easily.
Thinking how to make it possible? Hang on! As a 7+years of Outlook expert, I am here to help.
In this article, I will share my in-hand Outlook knowledge to help you color-code appointments in Outlook with some quickest but effective methods.
Let’s begin.
Check out our separate post to add optional attendees in Outlook Mac meetings.
Why should You assign Color Code Appointments in Outlook Calendar?
You need to assign color-code appointments in your Outlook Calendar to make your schedules more organized and easily readable. It helps to quickly identify important items out of other irrelevant ones, saving valuable time. Plus, coloring your Outlook calendar gives it a fresh and vibrant look.
Outlook has the built-in option to enable color categories for it’s items. What’s more, you can also assign a color to contacts, messages, tasks, notes, and journal items.
Suppose you have a very important meeting that you must attend. You can color it red in the calendar items list. Or if you have a meeting that you have already attended, you can make it black. Convenient, isn’t it? 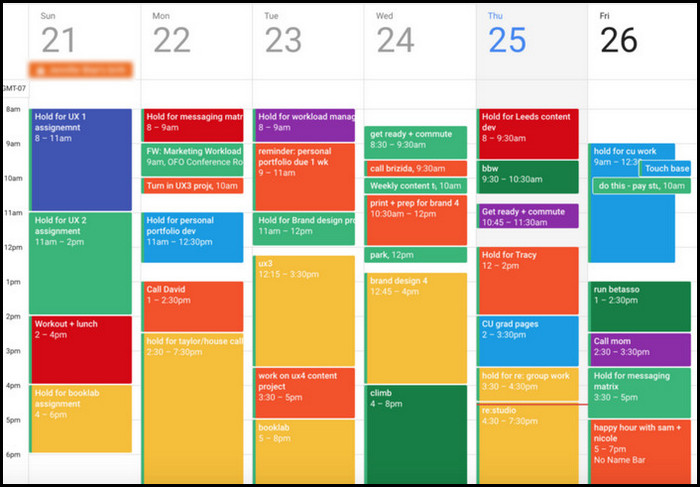
With the Outlook color-code function, you can look at your calendar, and in a glance, you realize what appointments are what and how much importance they hold.
Overall, color labeling different pieces of information on your Outlook calendar is sure to improve memory retention and, in turn, productivity in less time.
Now that you understand the necessity for color assigning in Outlook, let’s look at the most efficient methods to enable color code in the next section.
Also, check out our separate post on add meeting to Outlook calendar easily.
How to Assign a Color Category to a Calendar Appointment, Meeting, or Event
You can assign a color category to the MS Outlook Calendar appointment, meeting, or event in two ways. Either you can use the desktop Outlook application or navigate the Outlook Web Access (OWA).
Both ways work equally effectively with less time than you imagine.
Color coding in Outlook items is pretty easy. People actually don’t know the proper process and spread false rumors about it. But you don’t have to worry.
Let me break down each method stepwise to make it simple for you.
Find out how to add picture on Outlook email.
Here are the methods to enable color-code appointments in the Outlook calendar:
Method 1: Use Desktop Outlook Application
You can assign color categories to the Outlook calendar through the desktop app. Make sure you install the latest version of the Office 365 app and sign in to your account.
Here’s how to color-code appointments via the desktop Outlook application:
- Launch the Outlook app and open Calendar.
- Single-click an appointment to select it. You will see the Appointment tab open on the Ribbon.
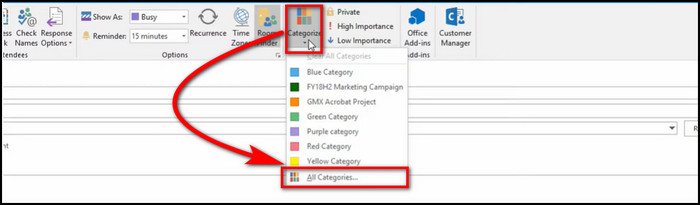
- Click on Categorize under the Tags group.
- Select All Categories from the drop menu. The Color Categories window will prompt up.
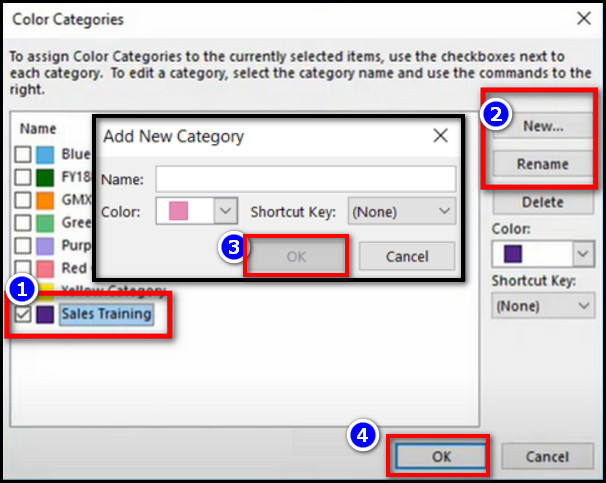
- Select New to create a new category.
- Name your category and select a color of your choosing.
- Choose a Keyboard shortcut if you want.
- Repeat this same to add multiple categories.
- Hit OK to apply the changes.
Afterward, select an existing calendar appointment and click the Categorize option. Pick the new category you just created, and your appointment will be categorized with that color.
Note: Only the 15 most recently used color categories appear on the Categorize menu. To see more colors, click All Categories on the Categorize menu.
Follow our guide step-by-step to add multiple emails to Outlook easily.
Method 2: Browse Outlook Web Version
Alternatively, you can browse Outlook Web Access (OWA) and assign a calendar category from there. Moreover, you can also use this method in your Mac and Mobile browsers.
Follow these steps to color-categorize calendar events via Outlook Webpage:
- Browse to the Outlook webpage and log in to your account.
- Click on the Settings button (wheel icon) on the upper right ribbon.
- Type Categories in the search bar and select it.

- Click on Create category in the Categories settings window.
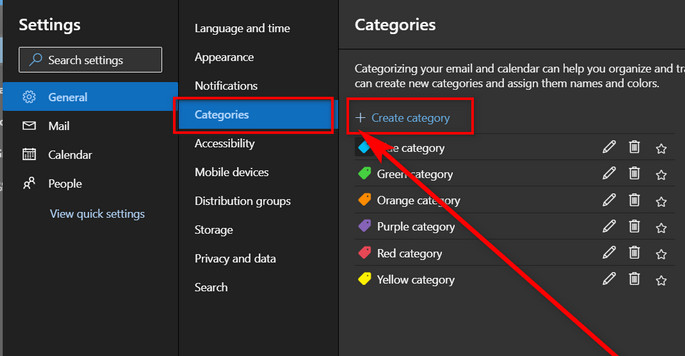
- Name your category and pick a color of your choosing.
- Hit the Save button.

- Repeat this same to add multiple categories and Exit.
Once done, you can edit any existing or new appointments and add categories to them from the drop-down menu beside the Calendar icon.
Wait, manual color coding seems a bit of a hassle? Well, you can also configure Outlook to color code appointments automatically.
Want to know how? Read the following section to find out.
Also read on how to add new Mailbox in Outlook easily.
How to Automatically Color Code Outlook Calendar
You can set automatic color codes in Outlook calendar appointments through the conditional formatting option in Outlook. It removes the nuisance of adding color categories repeatedly and gives your Outlook interface a brighter and more visually dynamic look.
Let me share a personal story. One of my close friends used to categorize his calendar appointments with different colors manually.
For example, all the appointments with the word Meetings in the subject line turned Blue, all the appointments with the words Sale View turned Green, and so on.
To remove his pain a little, I customized a rule of automatically categorizing calendar appointments. Since then, his workflow has increased, and he now maintains his Outlook meetings more effortlessly.
Here’s how you can automatically color code appointments in the Outlook calendar:
- Launch the Outlook app and open your Calendar folder.
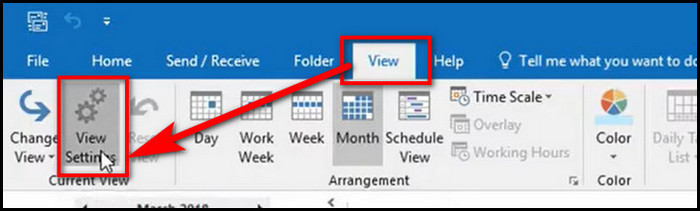
- Switch to the Views tab and select View Settings.
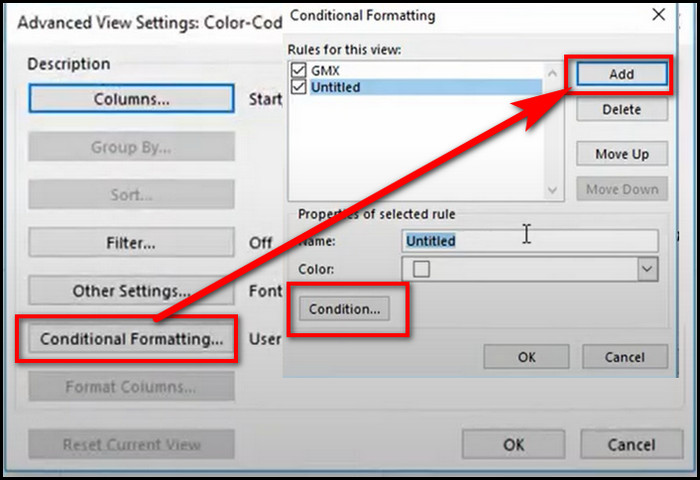
- Click on Conditional Formatting. It will open a Conditional Formatting dialog box.
- Select Add to create a new rule.
- Name your rule and set a color from the drop-down menu.
- Hit the Condition button. A Filter dialog box will pop up.
- Enter your criteria for the rule. For instance, if you want to color all appointments with the text Urgent Metting in their subject fields, just enter the text Urgent Meeting into the Search for the word(s) box.
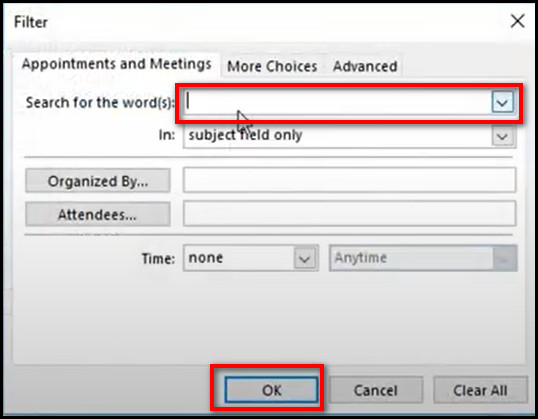
- Select the OK button in all the windows to save the changes.
From further on, whenever you add a meeting with the text Urgent Meeting in the title, Outlook will automatically color it.
Getting confused about picking the right color for your Outlook events? Keep reading the next section as I give examples of my own customized colors for each important task.
FAQs
How do I color coded appointments in Outlook calendar?
To enable color-coded appointments in the Outlook calendar, open Calendar > select your appointment > Categorize > All Categories > New > Rename > pick a color > OK.
How do I automatically categorize calendar appointments in Outlook?
To automatically categorize calendar appointments in Outlook, you need to create a conditional formatting rule. Open Outlook > Home > Rules > Create Rule > Advanced Options > Add your conditional rule > OK.
Why can’t I see color categories in the Outlook calendar?
If a shared Outlook calendar owner restricts the permission to view color categories, you will not see color categories in the Outlook calendar.
Bottom Line
Outlook calendar’s color coding is a great scheme to help users categorize similar tasks and organize other items with separate colors.
I felt very happy to guide you through this article, and hopefully, you now know the efficient ways to assign color categories to calendar events in MS outlook.
Feel free to ask any questions regarding Outlook in the comment section below. I will gladly help you guys.