In the event of the corona pandemic, when we were all stuck in a lockdown, most of our meetings and classes were held online. During that period, the Zoom app relieved us, and we could easily conduct essential meetings via this application.
While we are in a Zoom meeting, we can use a fantastic feature called annotation to present our points to our viewers. Using this annotation tool is very simple.
Throughout this article, I will show you the easiest ways to use Zoom annotation so that you can apply it and make great use of it.
So without further delay, let’s dive into the content and don’t skip any part of it.
You may also like to read about how to fix Outlook Zoom add-in not working?
How to Use Annotation Tools on Zoom for Windows, Mac and Linux
With the help of the annotation tool from the Zoom app, you can present your ideas and thoughts to your viewers. Open the Zoom application on your desktop, then start a meeting. Click on the Screen Share option, choose your screen, and select the Annotate button from the top pane.
Let’s head out and see the entire process of using the annotation function on Zoom.
Here are the steps to use the Zoom annotation tools for Windows, Mac and Linux:
1. Enable Annotation Tools on the Zoom App
Sometimes when your annotation function is disabled, you will not be able to see the Annotate button on your Zoom. In those situations, the first thing you need to do is to Enable the Annotation feature. After enabling it, your annotate button will be visible in the Zoom application.
Let’s find out how you can enable the annotation feature on Zoom.
Related contents you should read about does Zoom record your screen or just the Meeting?
Here is the process to enable the annotation feature on Zoom:
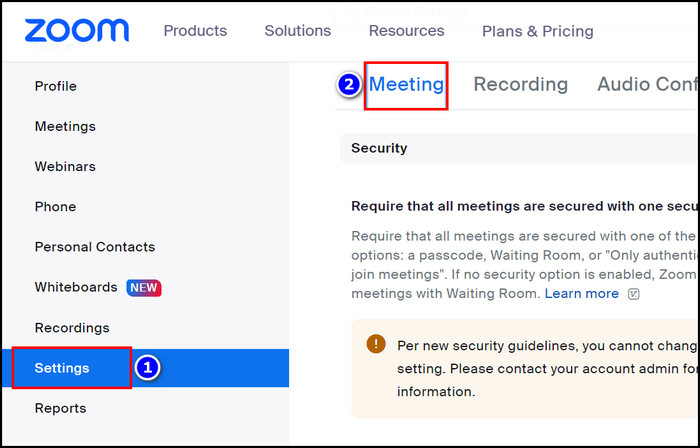
- Log in to the Zoom Web Portal.
- Select the Settings option from the navigation pane.
- Click on the Meeting section.
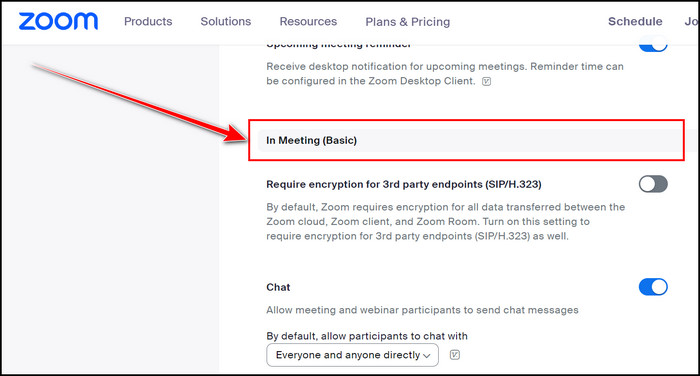
- Scroll down and find the In Meeting (Basic) section.
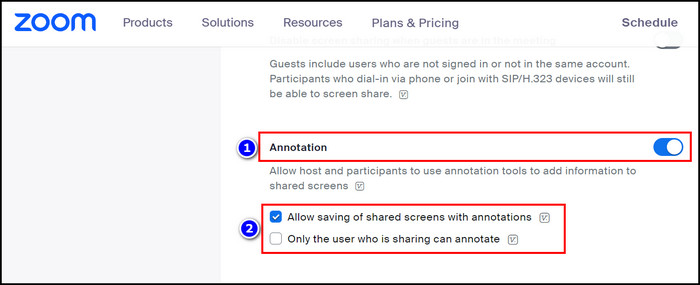
- Toggle On the Annotation option from the In Meeting (Basic) section.
- Check the Allow saving of shared screens with annotations box if you want your annotation screen to be saved.
- Enable the Only the user who is sharing can annotate box if you don’t want any other participants to share their annotation.
After enabling the annotation function, when you share your screen on Zoom, you will see the Annotate option in the top pane.
Related guide about how to change text size on Zoom chat?
2. Use Annotation Tools
Using the Annotation tool on the Zoom app to present your view is very straightforward. You just need to launch the Zoom application and click on the Screen Share option. Move to the Top navigation pane, select the Annotate option, and use it according to your need.
I simplified the method below for your clear understanding.
Here are the methods to use the annotation tools on the Zoom application:
- Launch the Zoom program.
- Click on the New Meeting option.
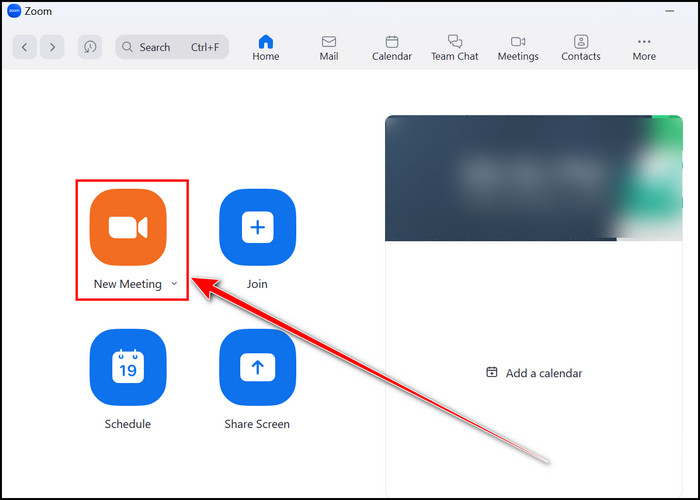
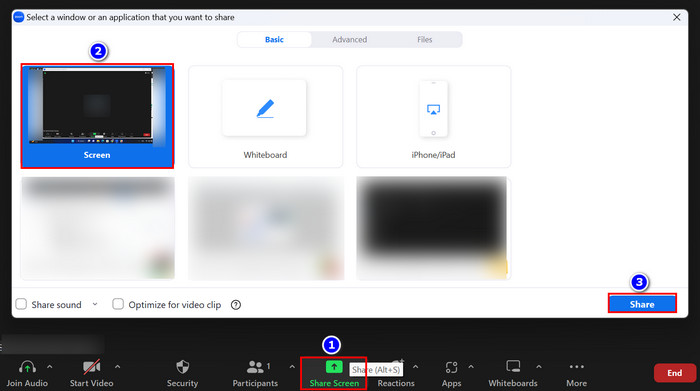
- Select the Screen Share option.
- Choose the preferred window you want to share with your participants and hit the Share button.
- Move your cursor to the Top pane and select the Annotate button.
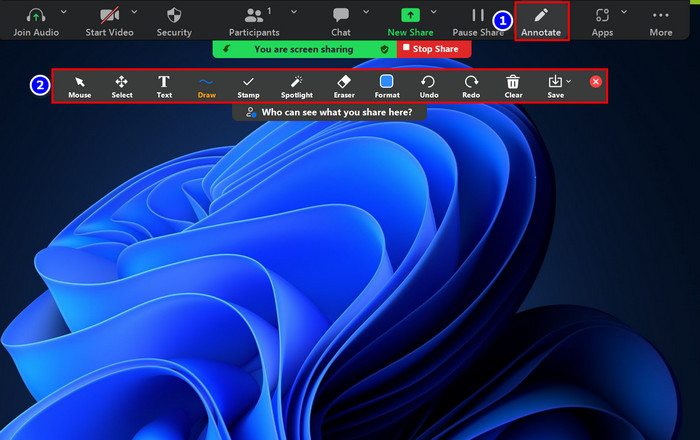
- Use the Annotation Tools according to your needs. For your aid, I am displaying the available annotation tools and their function below.
- Mouse: It is the mouse cursor that is handy for indicating something.
- Select: If you want to edit some markings on the shared screen or whiteboard, use this button.
- Text: This feature will be helpful when you want to type something for your viewers.
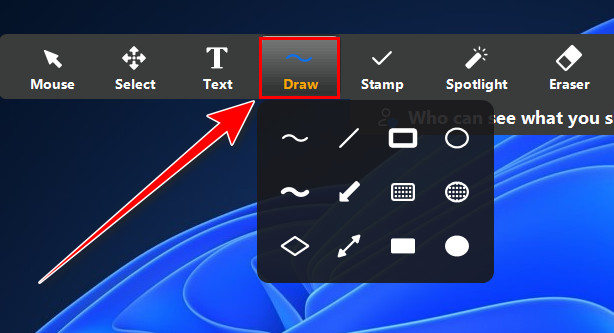
- Draw: You can use the Draw feature when drawing something on your screen. There are several shapes and curved lines on this option.
- Stamp: If you want to add preinstalled icons to your presentation, you can use the Stamp functions like a star, checkmark etc.
- Spotlight: On the spotlight option, you will find three functions Spotlight, Arrow and Vanishing Pen. You can efficiently use them to highlight your points or charts.
- Eraser: This option is commonly applied to remove unwanted parts from your screen.
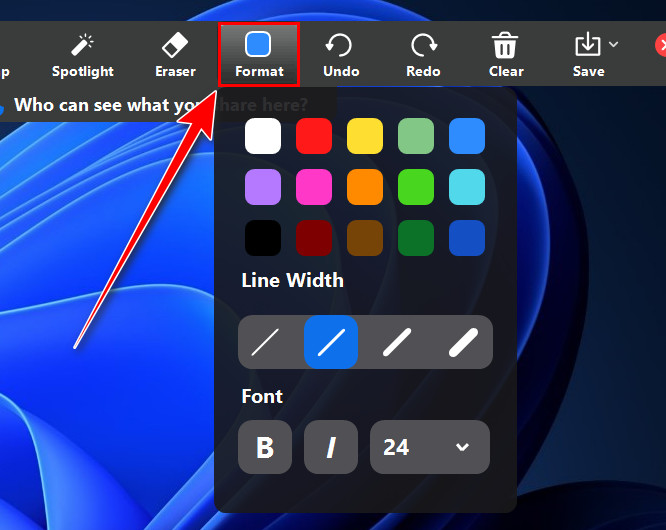
- Format: If you want to change your drawings’ color or format, use this feature.
- Undo: pressing this option will move you one step back to your modifications.
- Redo: This button will bring back your recent undo parts.
- Clear: Remove all the annotations you have composed with the help of this button.
- Save: If you want to save your annotation, you can use this button. There are two types of saving options available, one is PNG and the other is PDF. Choose according to your needs.
- Present your thoughts with the help of all the functions mentioned above.
With Zoom’s annotations and tools, it will be easy to display your thoughts on your presenter screen without hassle.
If you are a participant and want to share your annotation, then select View Options from the Top pane and choose the Annotate option.
Some more guide on how to boost webcam brightness in Zoom?
3. Disable Annotation Tools
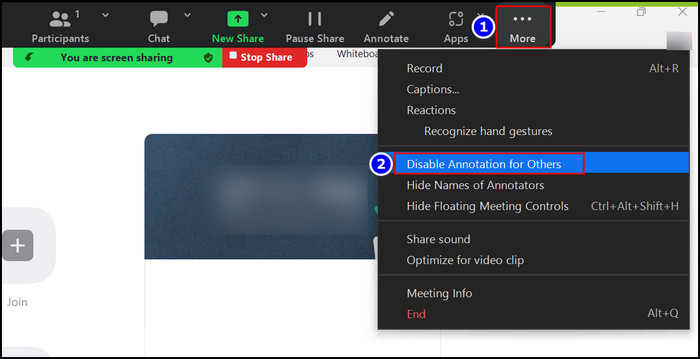
When you are presenting something important in your Zoom meeting and want to disable the annotation function for other participants, you can do that. Just select the More option from the top navigation pane and select the Disable Annotation for Others option.
Here are the steps to disable annotation tools on the Zoom app:
- Launch the Zoom application.
- Start a Meeting on the platform.
- Click on the Screen Share option and Share your desired screen.
- Move your cursor to the top navigation pane.
- Select the More option.
- Choose the Disable Annotation for Others option.
That’s it. Now your Zoom participants will not be able to perform any annotation.
But if you want to disable the Annotation function from your Zoom app, you must open the Zoom Web Portal and move into Settings. Afterward, navigate to the Meeting section and Toggle Off the Annotation option from the In Meeting (Basic) section.
If you are using the Zoom application on your mobile device, follow the next portion, where I displayed the process of using the annotation function on Android and iPhone.
Also related to this guide on how to add Recording Timestamp in Zoom?
How to Annotate on Zoom for Android and iPhone
Zoom is available on Android and iPhone, and the interface is relatively similar on both platforms. To use the Annotation function on your Mobile, you need to open the Zoom app, start a New Meeting and select the Share option. Afterward, choose your desired presentation and touch the Pencil button.
I demonstrate the entire process below, step by step, for your smooth understanding.
Here are the steps to annotate on Zoom for Android and iPhone:
- Touch the Zoom app and sign into it.
- Tap on the New Meeting option.

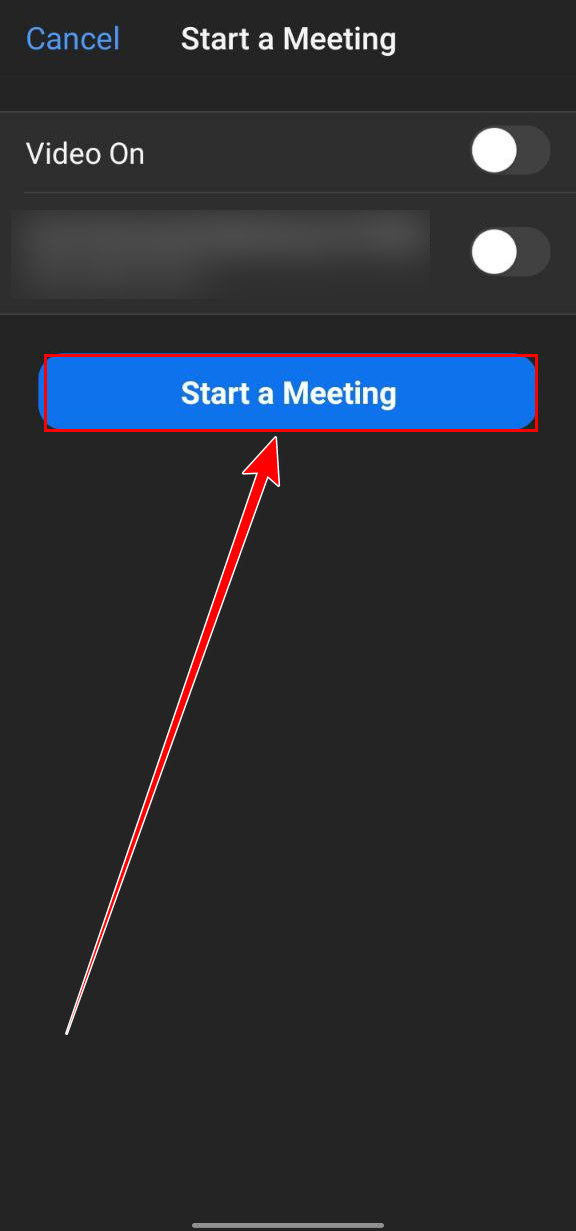
- Select the Start a Meeting button.
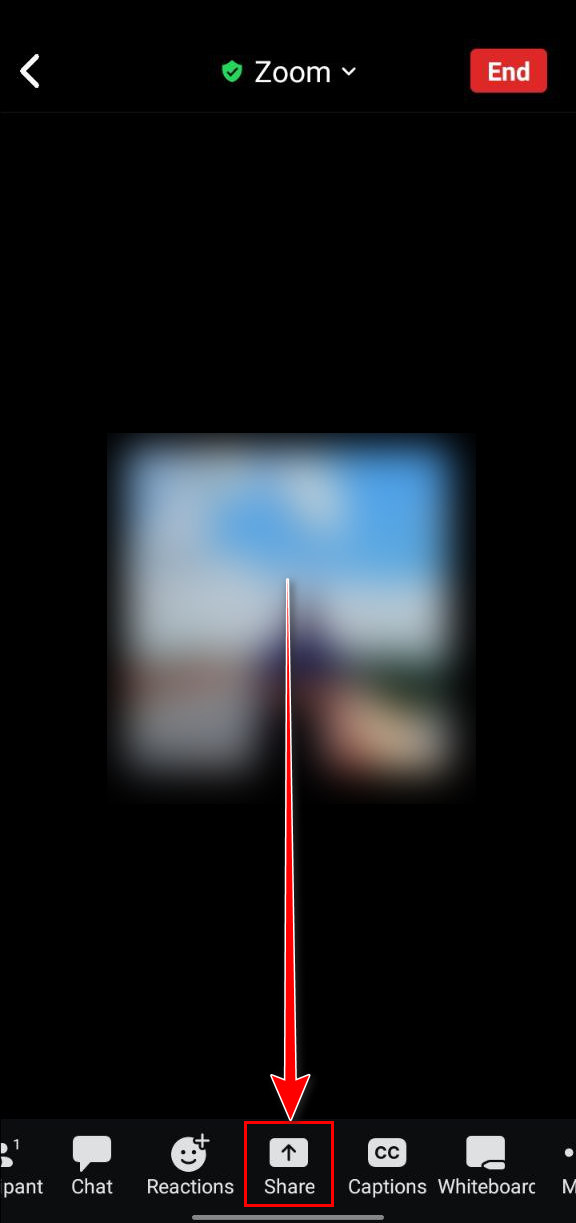
- Swipe the below navigation pane and select the Share option.
- Choose your particular image or chart. Select the Share Whiteboard option if you want to share your points on a whiteboard.
- Touch the Pencil icon, which is the Annotate button for mobile devices.

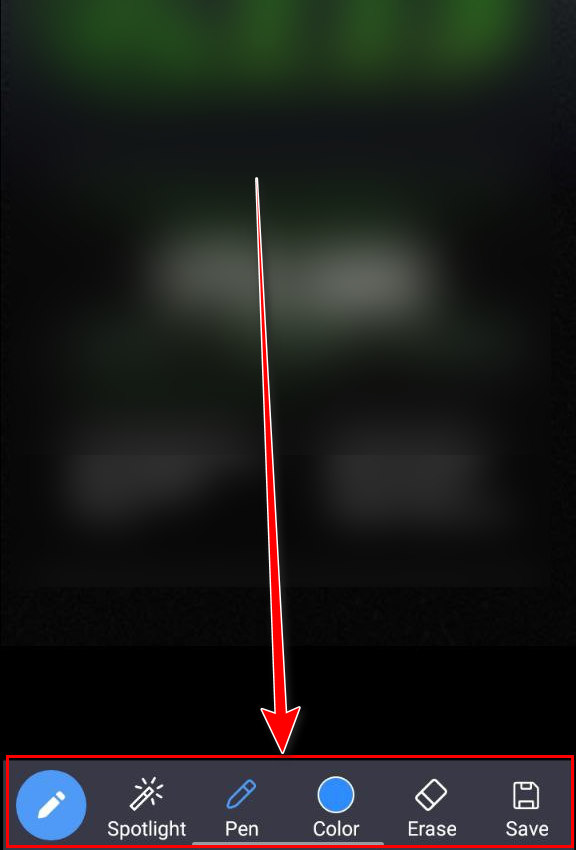
- Use the Annotation Tools to present your thoughts. There are several tools available which are displayed beneath.
- Spotlight: use this option to indicate any specific area on your screen.
- Pen: Two features are implemented on this button, one is Pen, and the other is Highlighter.
- Color: You can choose your desired LINE WIDTH and COLORS from here.
- Erase: Remove undesired annotation parts with the help of this option.
- Save: If you want to save the annotation page, select the Save button.
- Apply the tools according to your demand.
See how easy it is to use the Annotation tools on Android and iPhone. Also, the same feature will be available on iPad.
Keep in mind that the Desktop Zoom app offers more Annotation tools than the Mobile version.
Read more on Limit Framerate when sharing screen on Zoom.
How to Apply Zoom Annotation Shortcuts
As you know, the Zoom application is accessible on Windows, Mac and Linux. Therefore some simple yet functioning shortcuts are available on those platforms. Using those shortcuts will save you some valuable time. Also, your annotation navigation will be very first.
So let’s sort out what those shortcuts are and how you can use them on Zoom.
Here are the shortcuts for annotation on Zoom for different platforms:
On Windows
- Right-click anywhere on the screen to activate the Mouse mode.
- Type the Ctrl + Z buttons to Undo any annotation.
- Press the Ctrl + Y keys to Redo any portion.
On Mac
- Press the Command + Z buttons to Undo.
- Type the Command + Shift + Z to Redo.
- Right-click anywhere on the annotation screen to enable the Mouse mode.
On Linux
- Activate the Mouse mode by Right-clicking on it anywhere on the screen.
Why is There No Annotate Option on Zoom?
When you can’t find any Annotate option on your Zoom, that means your Annotation option is disabled. Also, when the installation process is faulty or due to the corrupted cache folders, the Zoom app sometimes malfunctions. As a result, the Annotate feature doesn’t show up.
Therefore if you want to bring back the Annotate function on your Zoom application, you must enable the feature from Settings.
To enable the Annotation feature on Zoom, you must move into the Zoom Web Portal and select Settings. Navigate to the Meeting section, then Toggle On the Annotation option from the In Meeting (Basic) section.
Additionally, you can clear the cache of the app and try to reinstall the application. After completing these procedures, you will notice that your Annotate feature on Zoom is visible again.
Also, check out our separate post on how to pause your video on Zoom calls?
FAQs
Does Zoom have annotation tools?
Yes, Zoom has an Annotation Tools feature with which you can effectively present your thoughts when you are in a meeting and sharing the screen.
Where is the annotation tool in Zoom?
Annotation Tools are located in the top navigation pane while you are sharing your screen on Zoom. The Annotate icon looks like a pencil, and select it from the top pane to open the Annotation Tools.
Can you Annotate on the free version of Zoom?
Yes, you can annotate on the free version of Zoom. Start a meeting, and share screen, then move the cursor to the top pane and click on the Annotate button.
Final Thoughts
Using the Annotation on Zoom is a forthright process. The easiest and most simple procedures to do that job are stated in this article.
You will also learn how to use the annotations effectively and what annotation tools are available on Zoom. This article will also benefit you if you want to use the Zoom annotation on several platforms like Windows, Mac, Linux, Android and iPhone.
So read this article carefully and use it to achieve your goal. If you have further questions about this topic, let me know in the comment.