Since Oculus Quest is a portable product, it can be connected to smartphones and PCs to enhance functionality. But what if the pairing function suddenly stopped working?
This is a common issue that keeps repeating over time. I faced this problem more than five times in the past two years, but it didn’t take me more than five minutes to solve the problem.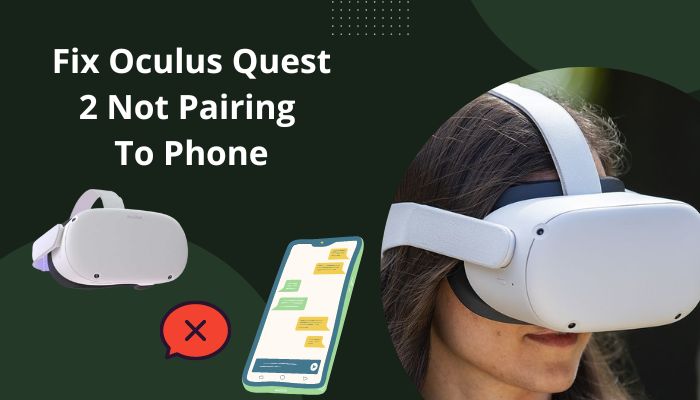
So, just have a sip of your morning coffee and start reading from the following section to begin using your phone to purchase Oculus apps and games, check your friends list, view Oculus Gallery and view live streams from the Headset.
Why is Oculus Quest 2 Not Pairing to Phone?
Apart from this, you need to make sure your headset is powered on and that it’s set up properly for pairing.
This means you need to make sure Bluetooth and Location is turned on in the headset. You can find out how to do that in the next section if you are not sure. Another essential step during the pairing process is entering the pairing code. 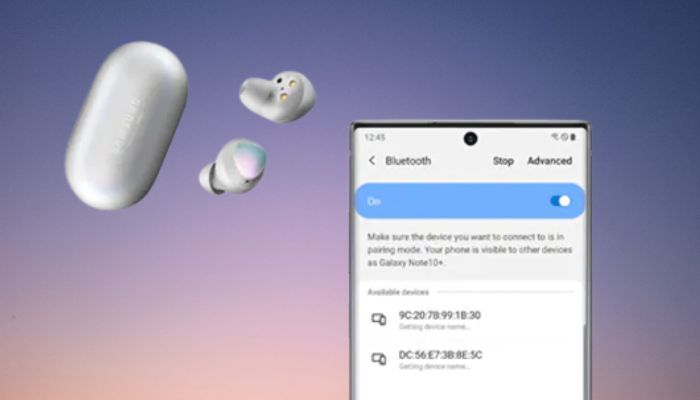
Since this code is fairly long, there is room for error. I recommend double-checking the code digit by digit to make sure that’s not behind the issue.
One point to consider here is that the pairing process is more likely to be successful if you are connected to a Wi-Fi with 5GHz band.
Check out the easiest way to fix Oculus won’t connect to Wi-Fi.
How To Fix Oculus Quest 2 Not Pairing to Phone
Since there are several situations that could lead to this issue, not all of these fixes will work for every cause. You might have made a mistake during the initial setup of your device or phone, or if the device was already set up, it might no longer be visible to your mobile app.
Follow these methods to fix Oculus Quest 2 not pairing to the phone:
1. Turn On Bluetooth and Location Manually
I know what you are thinking right now. Why turn Bluetooth and Location on manually when the app does it automatically?
The answer is that sometimes if an app or service is interfering in the background, the Oculus app’s request to turn on the Bluetooth and location might be ignored. In that case, it won’t be possible to pair the Oculus headset since it relies on these technologies for the connection.
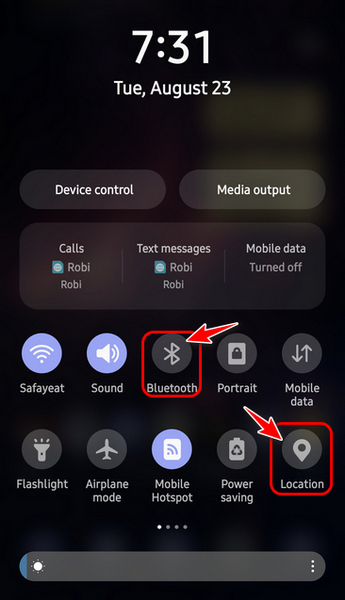
Follow these steps to turn on Bluetooth and Location on your smartphone manually:
- Power on your smartphone.
- Swipe down from the top end to expand the notification panel.
- Look for the Bluetooth and Location toggle represented by the icons in the picture. Tap each of them one by one so that they are highlighted.
- Make sure you are disconnected from any Bluetooth devices before launching the Oculus app.
- Wear your Oculus
- Locate the quick menu at the bottom and select the Quick Settings option.
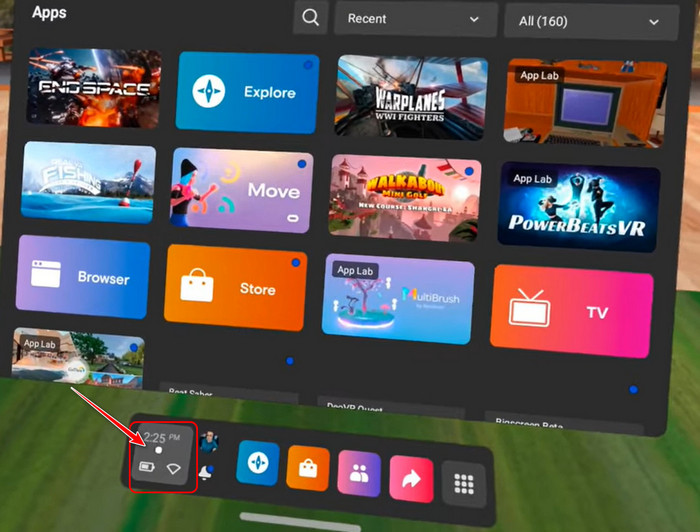
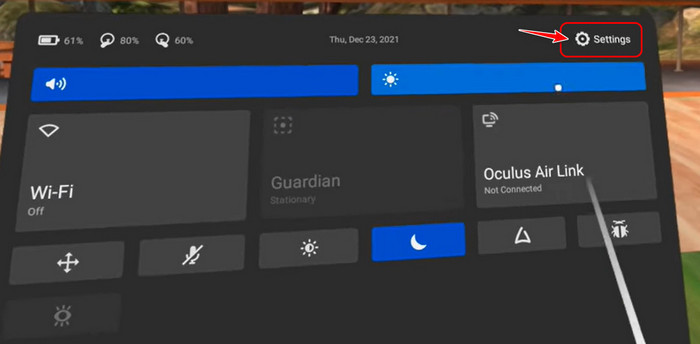
- Select the Settings button at the top right corner of the Quick Settings panel.
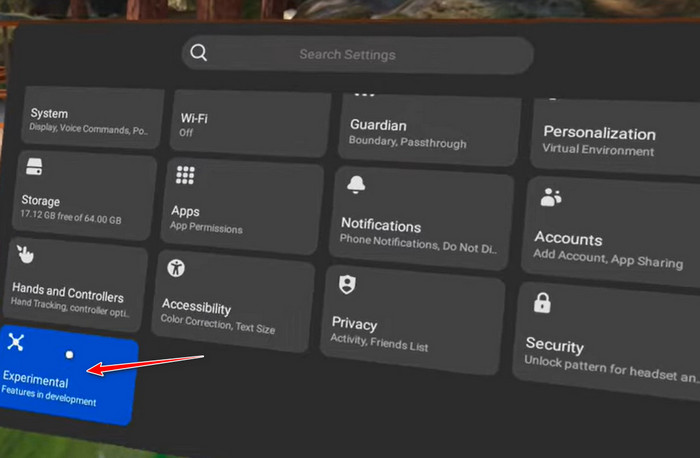
- Look for the Experimental option at the bottom left corner and select it.
- Scroll on the right panel and select the Pair button next to Bluetooth Pairing.
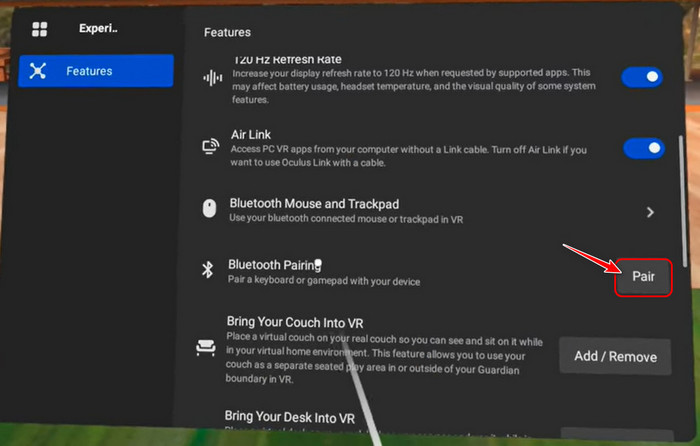
- While the Oculus is on this page, try pairing the phone with the device.
Here is the easiest guide to fix Windows can’t access network drive on Windows 11.
2. Reboot Your Phone and Oculus Quest 2
You must have realized that rebooting is always mentioned if you have read multiple troubleshooting articles for various issues. This is because a restart typically solves problems when the problem isn’t severe or permanent.
Follow these steps to reboot your phone and Oculus Quest 2:
- Turn on your phone.
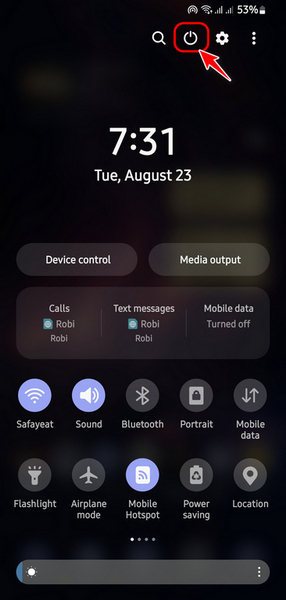
- Swipe down from the top to bring down the notification panel.
- Tap on the Power icon at the top right corner.
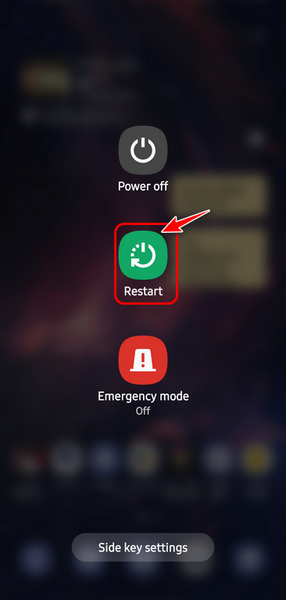
- Select the Restart icon on the new page.
- Locate the Volume down and Power button on your Quest 2 and press and hold them for a few minutes while you are wearing your Oculus headset.
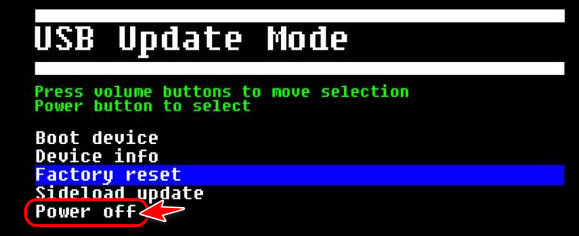
- Let go of the buttons once you see a menu appear in VR.
- Select the Power off option here.
- Turn on your Oculus after a few minutes by pressing and holding the power button.
Find out how to fix Oculus Quest 2 not charging.
3. Remove Oculus Data from Phone
If you are a long-time user of Oculus, there is a very good chance the Oculus app is clogging up your phone’s ROM. Most of those files are unnecessary and can sometimes interfere and cause issues with the app’s functionality.
As a result, it’s your job to keep your phone clean.
Follow these steps to remove Oculus app data from your phone:
- Turn on your phone and go to the app drawer or home screen.
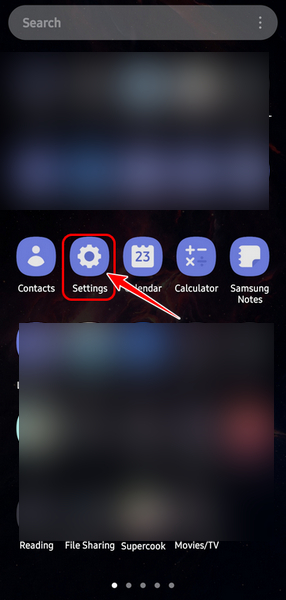
- Locate the settings app and tap on it.
- Scroll and tap on the Apps option once you see it. It might be named something else if you are not on a Samsung device.
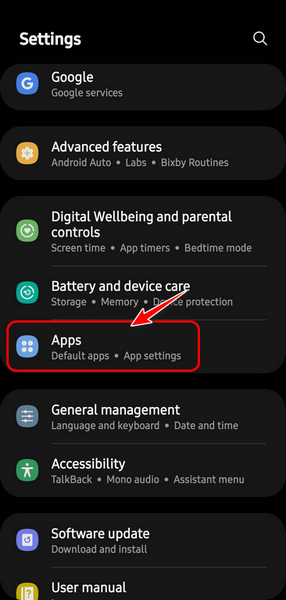
- Scroll and locate the Oculus app in the apps list or search for it if you have the option. Tap it when you see it.
- Look for the Storage option by scrolling and tapping on it.
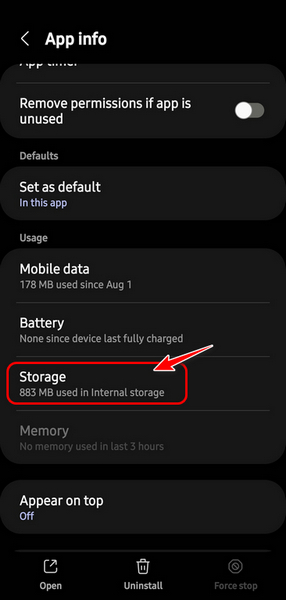
- Tap the Clear data option at the bottom left corner once you are on the next page.
- After you have confirmed the deletion, launch the app. You will be asked to set everything up again and pair your headset.
4. Try Pairing with Another Phone
This method is worth trying because you will be able to tell which device specifically is behind the problem. If the phone is the issue, the Oculus headset should be able to connect normally with a different phone.
However, if it still doesn’t connect, then it’s possible that something is wrong with your Oculus headset. In that case, your only option is to contact the store where you bought it from or leave a message on the Oculus forums and wait for a reply.
What Does the Oculus Phone App Do?
Once you pair a phone to your Oculus, all the settings are going to be synced with each other. This makes it easy to perform specific tasks without touching the headset. 
In addition to that, the Oculus app is also supported for Oculus Rift and Rift S, which means you can manage multiple headsets with a single app.
Since you need an Oculus account for setting up the app, you also have the ability to adjust your account settings and preferences without requiring an Oculus device.
However, there are some privacy concerns related to this app. According to the Play Store, this app can choose to share personal info, messages and device information with third-party companies.
It may also collect information like your location. The good news is that you can always request for the data to be deleted.
Also, check out our separate guide on AirPods not working with Oculus Quest 2.
Final Thoughts
Virtual Reality helps you experience the world in a different way and change your perspective on many things. The Oculus platform, which is officially rebranded as Meta now, is the most prominent contender in this field.
Despite that, you may sometimes run into issues that you can fix by following the methods in section 2. After reading the first section, you must have also realized that the Oculus app provides many useful features.
When I had the same issue, I used method 2 to solve my problem. What about you? Let me know in the comments.
