Who doesn’t like a well-edited video, right? So in order to make a beautiful video, you can use the Windows Movie Maker app.

The Windows Movie Maker can help you create and edit your own video. Because its interface is super simple and unlike the other video editors, you can quickly Arrange, Crop and Add Effects to your video with the help of this application.
However, sometimes while making a video in Windows Movie Maker, several users claim that it takes forever to prepare a video. So I researched this topic and sorted out some simple yet working solutions that can solve your issue.
So don’t skip any part of this article, and let’s find out what those solutions are!
Why Does Windows Movie Maker Take So Long to Prepare Videos?
Windows Movie Maker sometimes takes a long time to prepare a video because it is a non-linear simple video editor, and the video editing task is very memory intensive. Also, when your computer is less powerful, and its capability is minimal, this longer video rendering issue can appear.
There are some reasons why Windows Movie Maker takes a long time to prepare a video. For your easy understanding, I am displaying them below.
Here are the reasons for which the Windows Movie Maker takes a long preparation time:
- Unoptimized Windows Movie Maker app.
- Weak computer processor.
- Unauthorized Viruses and malware.
- Processor-intensive background app.
- Relatively full hard drive.
- Very large video files.
- Alteration of video format.
- A large number of temporary files.
- Faulty installation of the app.
- Old versions of Windows and drivers.
These are the reasons that can cause the issue. Let’s head to the main segment, where I will give some simple functioning methods to resolve the video rendering problem.
Related contents you should read about install ICC profiles on Windows 11 easily.
How to Fix Windows Movie Maker Takes Forever to Prepare Video Issue
You can take several steps to solve the long video preparation time issue in Windows Movie Maker. But the most effective and straightforward methods are displayed in this article. So follow the stated instructions carefully to resolve your problem.
Here are the steps to fix Windows Movie Maker takes a long time to prepare a video issue:
1. Use the File Advanced Option
Several users claim that their issue resolves when they modify the File-Advanced settings. So you must give this function a try.
Here are the steps to use the File Advanced Option:
- Launch the Windows Movie Maker
- Move to the File section.
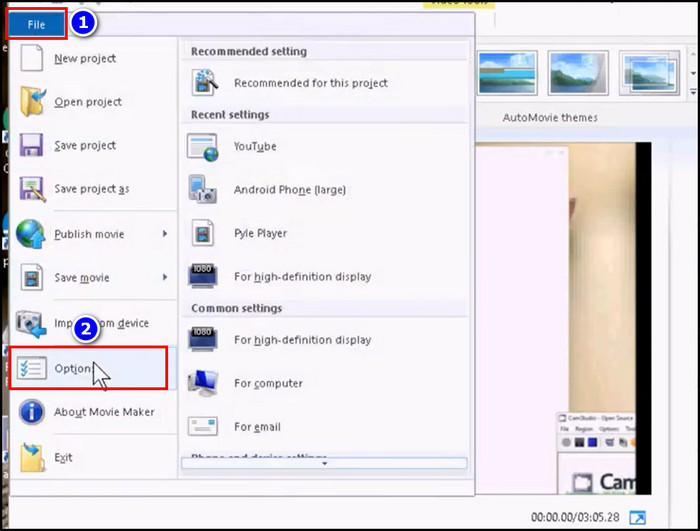
- Select the Options tab.
- Choose the Advanced section from the new appearing window.
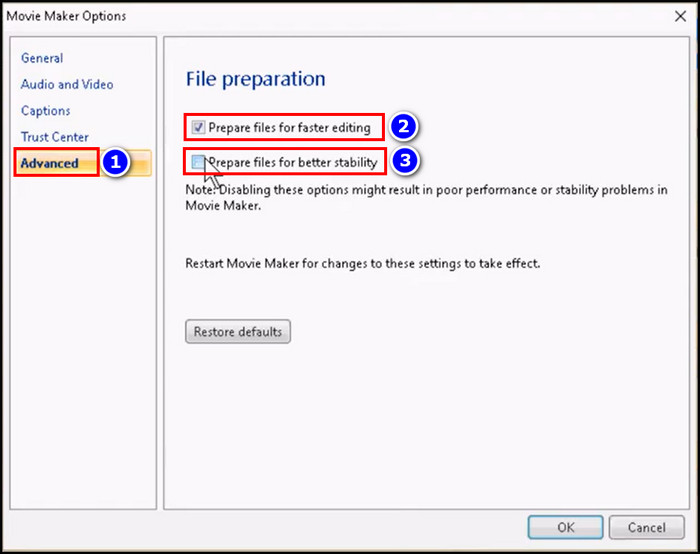
- Uncheck the Prepare files for faster editing and Prepare files for better stability checkboxes.
- Close the app and relaunch it.
Hopefully, your issue will resolve after those changes, but if it persists, continue reading.
2. Uncheck All Programs from the Tool Option
If your Windows Movie Maker crashes due to a long video preparation time and you are finding a way to solve this problem. Then follow the steps given below.
Here are the steps to uncheck all programs from the tool option:
- Open the Windows Movie Maker program.
- Navigate to the Tool section.
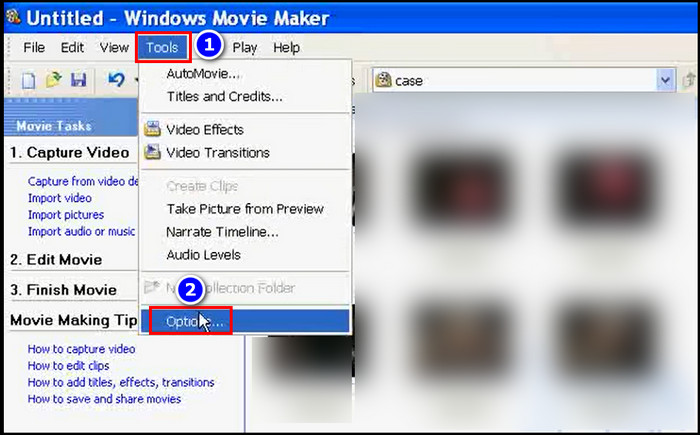
- Click on the Options tab.
- Uncheck all the programs under the Compatibility section.
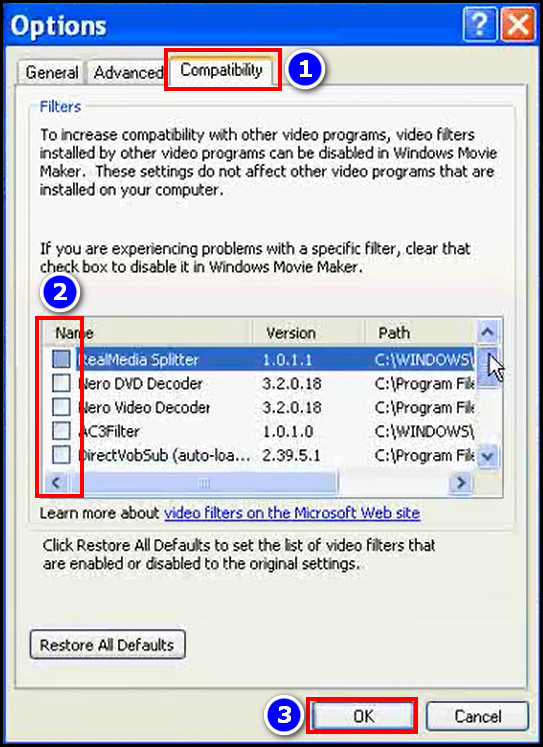
- Hit the OK button.
- Restart the app.
You will notice that your long rendering issue is gone.
You may also like to read fix pointer keeps flickering on Windows 11.
3. Scan and Remove Virus
Some harmful viruses can take up most of your PC’s processing power. As a result, the Windows Movie Maker slows down. Therefore scan and remove those viruses using the Virus & threat protection or other antivirus software.
Here are the steps to scan and remove the virus with Virus & threat protection:
- Move to the Search bar.
- Type Virus & threat protection and select it.
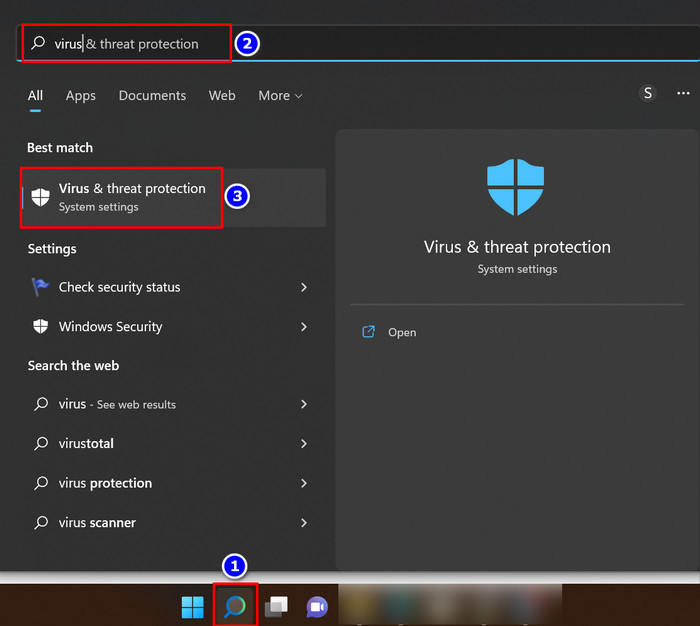
- Click on the Scan options hyperlink.

- Choose the Full scan.
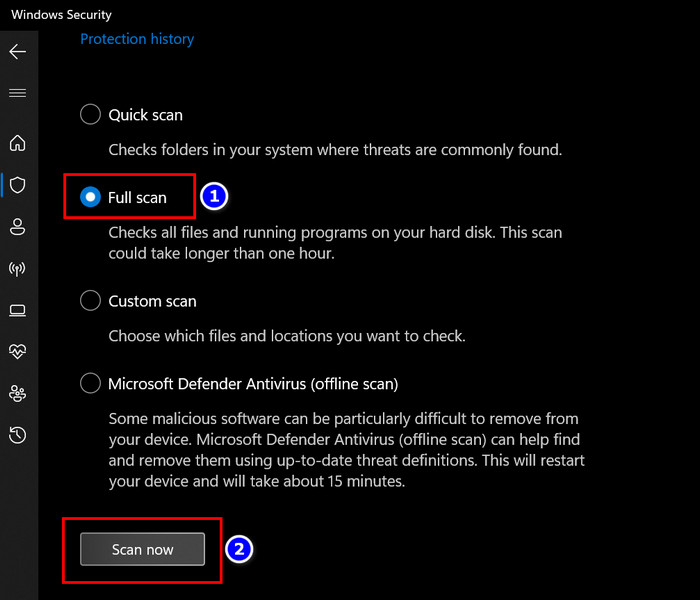
- Click on the Scan now box.
- Remove the virus from your computer after finding them.
Deleting hazardous viruses and malware can resolve your issue.
4. Close Background Apps Using the Task Manager
When some processor-intensive programs run in the background, the Windows Movie Maker can not function properly. Hence it starts to stutter and takes a long time to prepare a video.
Let’s find out how you can close those background programs with the Task Manager.
Here are the steps to close background apps using the Task Manager:
- Press the CTRL+SHIFT+ESC keys to open the Task Manager.
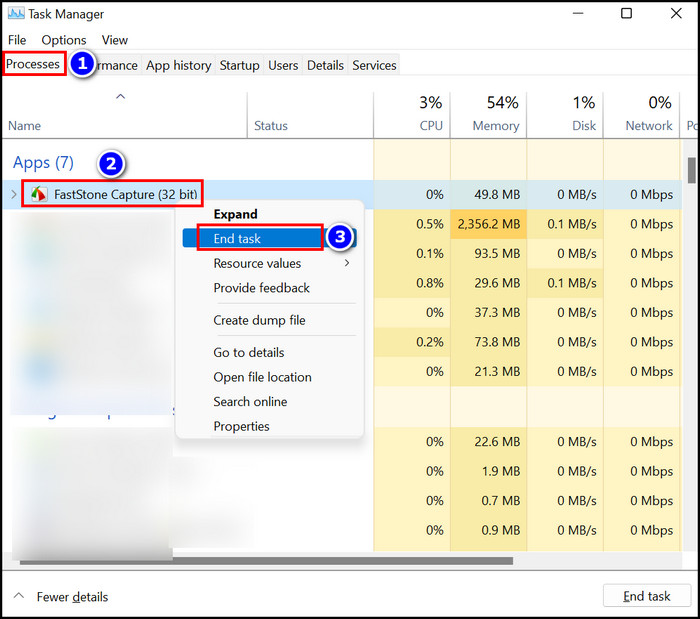
- Select the app that is consuming most of the computer’s power.
- Right-click on it and choose the End task option.
Now check whether your problem is gone or not.
5. Shut Down All Contradictory Programs
If you have multiple programs open on different tabs, you must shut down all unnecessary ones. When several programs run in the background, the Windows Movie Maker doesn’t get enough processing power to complete its operation.
So you must shut down all contradictory programs to make your Windows Movie Maker fast.
6. Free Space from the Hard Drive
When you install the Windows Movie Maker on the Hard Drive, all the files you edited are stored on that drive. Therefore the size of the drive increases rapidly, and your hard drive becomes relatively full.
In those cases, the Movie Maker app can not function properly due to the lack of space in the Drive. So you need to delete some unnecessary files or folders from the installation drive to make your app faster.
Follow our guide to fix sound cutting-out on Windows 11?
7. Keep Pressure Off the Windows Movie Maker
Always remember that the Windows Movie Maker app is not a powerful video rendering app. So when you push the app to its limit, it will malfunction and become very slow when preparing a video.
Therefore, you should keep some pressure off the app and render appropriate videos with it. Never push it to its limit; otherwise, it will become very slow.
8. Cut the Video Files into Small Parts and Edit them
When you try to render multiple large video files in Windows Movie Maker, it slows down sometimes. To avoid such difficulties, you can cut large files into small pieces and prepare one big file at a time.
You can use the Create clips for video files box to make your Movie Maker fast when importing videos.
9. Apply the Same Video Format
Always try to upload the same video format in the Windows Movie Maker. Otherwise, preparing a video can take a long time.
Because when you upload different types of video formats like HD, SD, or MP4. Processing them into one video format and editing them is a graphic-intensive process. So try to use the same video types for rendering them.
10. Uninstall Other Unused Video Editors
Suppose you have several Video Editor apps on your computer, and you don’t use them. Then it is wise for you to delete or uninstall them. Because when multiple video editors are on the same device, one can conflict with others; hence the Movie Maker becomes slow.
11. Update the Drivers
When your Windows drivers are outdated, some programs, like Windows Movie Maker, can not function properly. So you must update the faulty or old driver to resolve the issue.
Let’s see how you can easily update the driver using the Device Manager.
Here are the steps to update the driver using the Device Manager:
- Navigate to the Search bar.
- Write Device Manager and select it.
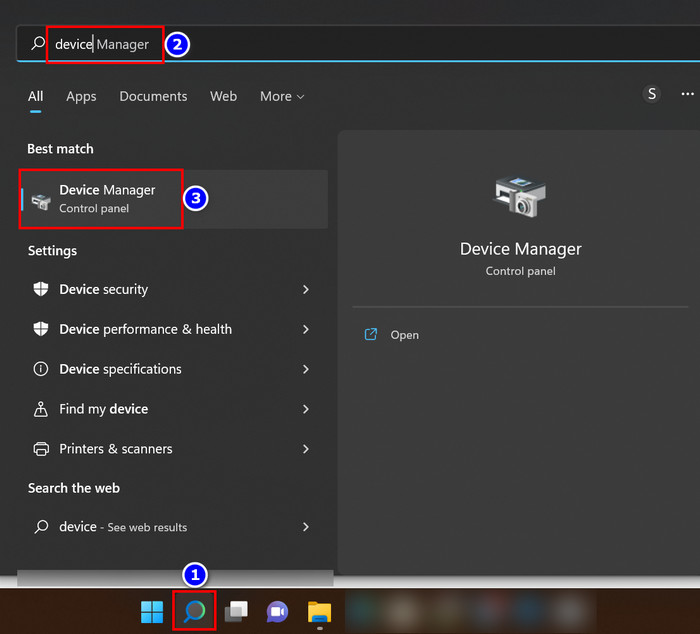
- Expand the Section you want to update.
- Right-click on the desired driver.
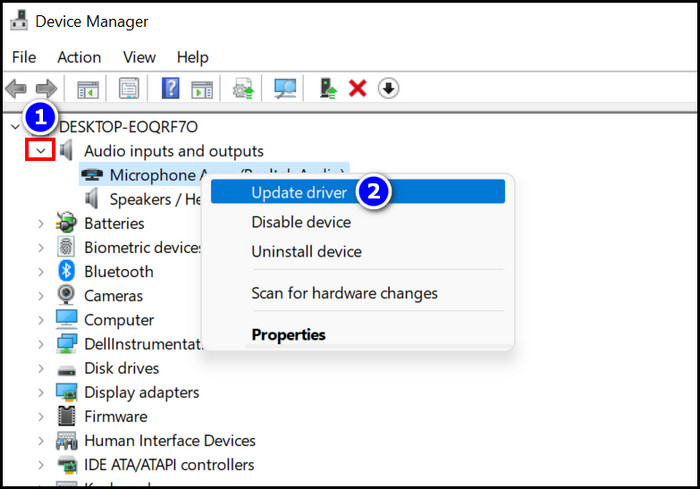
- Choose the Update driver option.
Many users claim that Windows Movie Makers start to work just fine when they update their faulty driver.
12. Delete Temporary Files
A large number of temporary files can create processing issues on a computer. Due to these unnecessary temp files, programs like Windows Movie Maker become very sluggish. So you need to delete those temp files from your computer.
Here are the steps to delete temporary files:
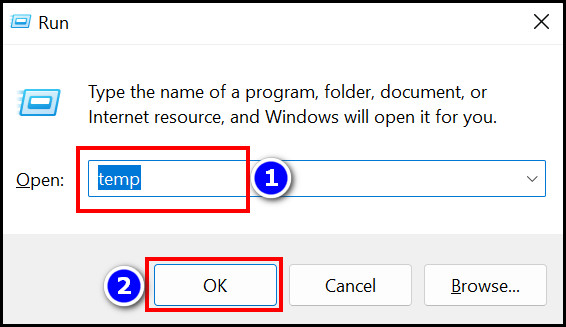
- Press the Win+R buttons to open the Run program.
- Type temp in the box and hit the Enter key.
- Select all the files from the opened folder by pressing the CTRL+A button.
- Hit the Delete key.

- Move back to the Run dialog.
- Type %temp% and hit the Enter button.
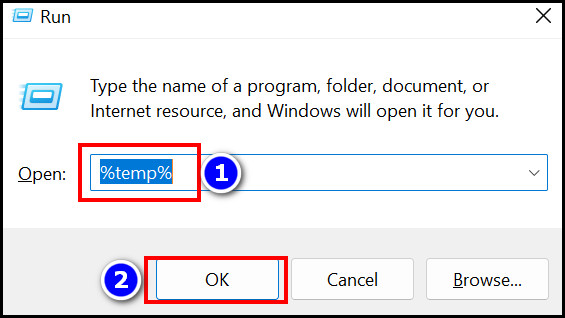
- Select all the files again and Delete them.
After deleting the temp files, Refresh and Launch the Windows Movie Maker to see if it’s OK.
13. Open the Windows Movie Maker in Safe Mode
Sometimes when you open an app in the safe mode, its issue resolves. So for the Windows Movie Maker, you can try out this trick.
Here are the steps to open the Windows Movie Maker in safe mode:
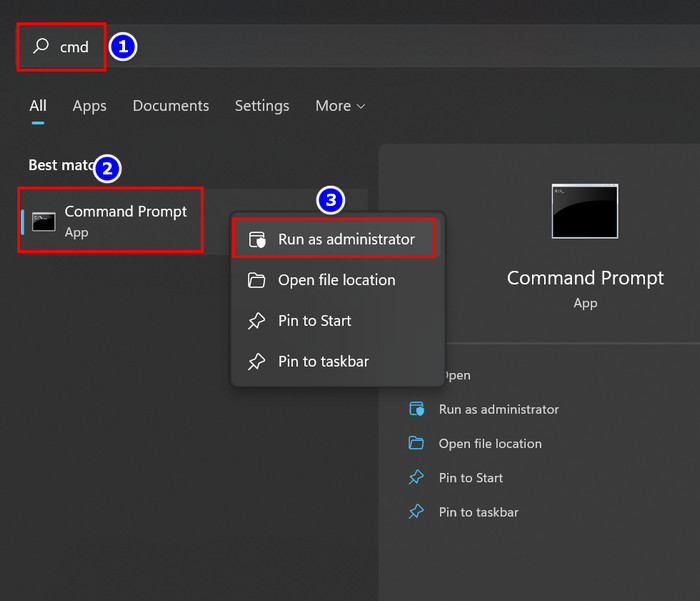
- Move to the Search bar and type cmd.
- Right-click on the Command Prompt program and select the Run as administrator option.
- Copy and paste CD \program files\movie maker in the Command Prompt.
- Hit the Enter key.
- Type exe /safemode and press the Enter button to open the Windows Movie Maker application in safe mode.
You will notice that your slow video rendering issue is resolved now.
But, before that, do check our latest post on fix no audio after Windows 11 update on PC.
14. Update Windows
If your Windows version is outdated, you can face the Movie Maker app slowing-down issue. Therefore update the Windows system if you want to solve that problem.
Here are the steps to update the Windows:
- Press the Win+I buttons to open the Windows Settings.
- Move to the Windows Update section.
- Click on the Check for Updates box.
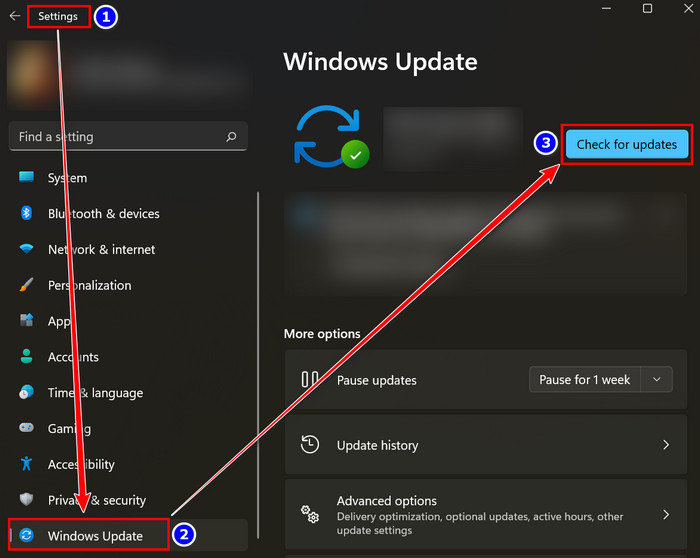
- Update the Windows.
After finishing the update, your Movie Maker app should run just fine.
15. Reinstall the Windows Video Maker App
Sometimes, the program does not run smoothly due to the faulty installation process of the Windows Movie Maker app.
So you should Uninstall the application and Reinstall it to remove your slow video preparation issue.
Some more guides on how to speed up Windows 11 right-click for fast performance
FAQs
Why has my movie maker stopped working?
When an unsupported video effect is installed on your computer, the Movie Maker will stop working. Also, if your computer processing power does not match the movie maker’s compatibility, the app can stop its working process.
How long does it take to export a video in a video editor?
It takes up to 30 seconds to export a video in a video editor, but this time limit can vary for large video files.
Why is my video on the video editor not exporting?
The video editor cannot export a video when your hardware-centric video encoding option is enabled.
Final Thoughts
Windows Movie Maker is a fantastic app that is very easy to handle, and you can compose your desired video with the help of it
But sometimes, you can face slow-down video rendering issues on this application. Don’t worry; follow the instructions stated in this article to resolve your problem. Applying the Advanced File option or unchecking all the Tool Options can solve your issue.
You can also check out the other effective methods in this article to resolve your slow-down video preparation problem.
Let me know how I can further assist you in the comment box.