If you are a user who prefers convenience more than security, Windows 10 auto login is for you. For this purpose, Windows 10 has security features like Windows Hello Face, Windows Hello Fingerprint, Windows Hello Pin, Physical Security key, etc.
But even if these are not activated, your PC recommends setting up a password to protect your PC from unwanted users getting access or for other security reasons.
But if you are in a secure place doing your things and getting interrupted by the login screen, you have come to the right place.
As a power user, I often work on my laptop and need to take the lid down for breaks and take it up to start working again. Follow this guide till the end to activate Windows 10 Auto login as I have.
Check out the comparison between Windows 10 Education Vs Pro.
Why do you need Windows 10 Auto login?
Logging in a few times a day is a hassle for many. And if you have a memory issue, you might easily forget your password or pin. If this happens, you will get locked out and cannot use your device.
If you activate Auto login, you can bypass the login screen and be free from the hassle of using a password every single time.
Also read why won’t Windows 10 install from usb.
How to Activate Windows 10 Auto Login
There are different methods to use Auto login. Some methods are easier and suitable for any kind of user to use, others are a bit advanced, and you might need the least amount of knowledge to perform them.
But do not worry. In this article, I will describe every bit of detail so that you can use these methods easily even if you do not understand them.
Here are the steps to activate Windows 10 Auto Login:
1. Use Windows Settings
This is the standard method to activate auto login in Windows 10. So before delving deeper into any other techniques, it is recommended to try this one first. If you are lucky, then this might be the one you were looking for in the first place.
Here are the steps to use Windows Settings:
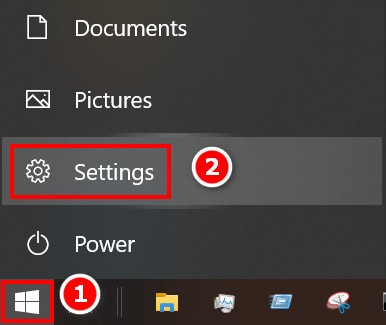
- Click on the Windows icon at your desktop’s bottom left corner.
- Hover your mouse pointer over the Gear icon, and you will see Settings appear beside the icon.
- Click on the You will be prompted to a new page.
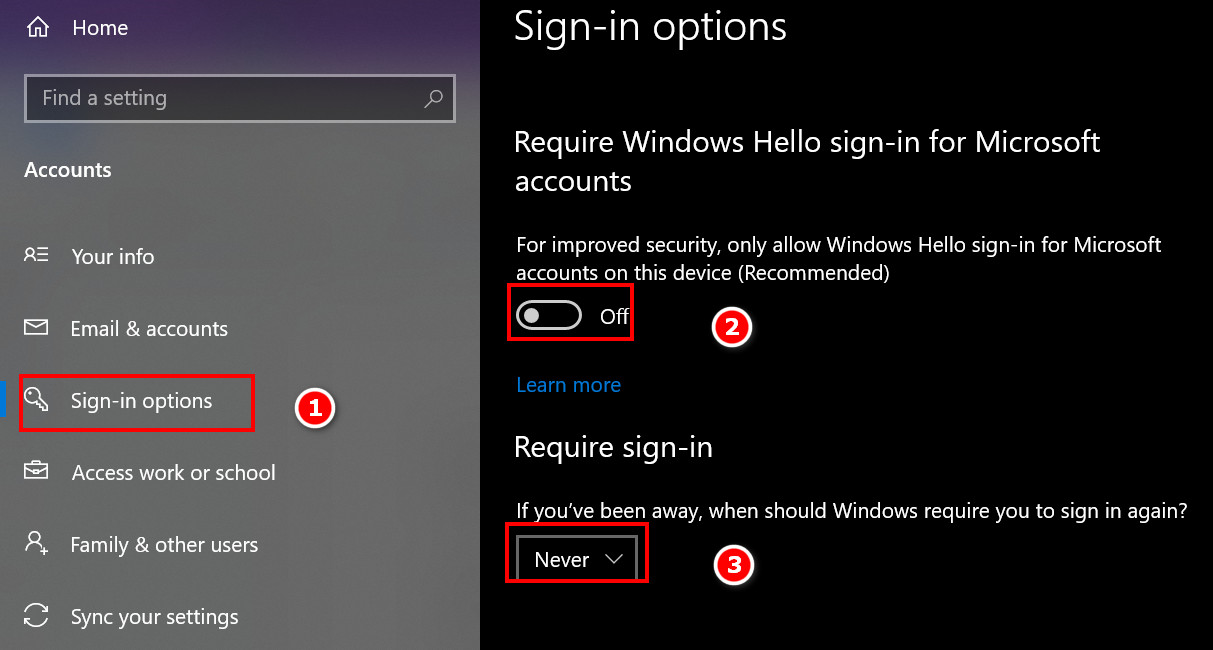
- Select Accounts and click on it to find account-related settings.

- Click on the Sign-in options from the left panel, and some options will appear in the right panel.
- Make sure you toggled OFF the Required Windows Hello Sign-in option.
- Select Never in the Require sign in option under it.
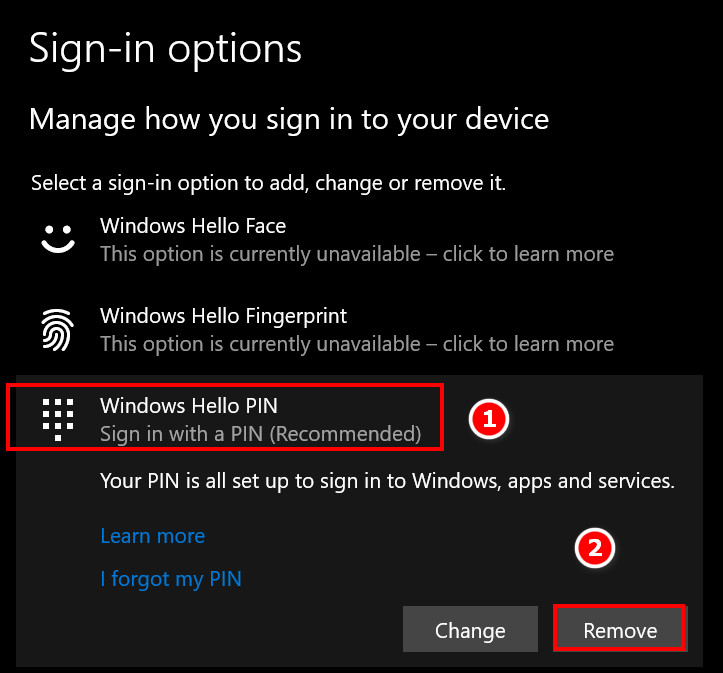
- If you have any Windows Hello options turned on, click on it and select
- Restart your computer and see if it works for you. If not, then try the next methods.
Read more on how to get Windows 10 for free as a student.
2. Use the Registry
This is more of an advanced method and not recommended for people who are not confident in themselves. Tweaking with a Registry is dangerous and might lead to system failure if done incorrectly.
To avoid this scenario, I recommend creating a restore point in case anything goes wrong, and you will be able to revert back.
So before using the registry, follow these:
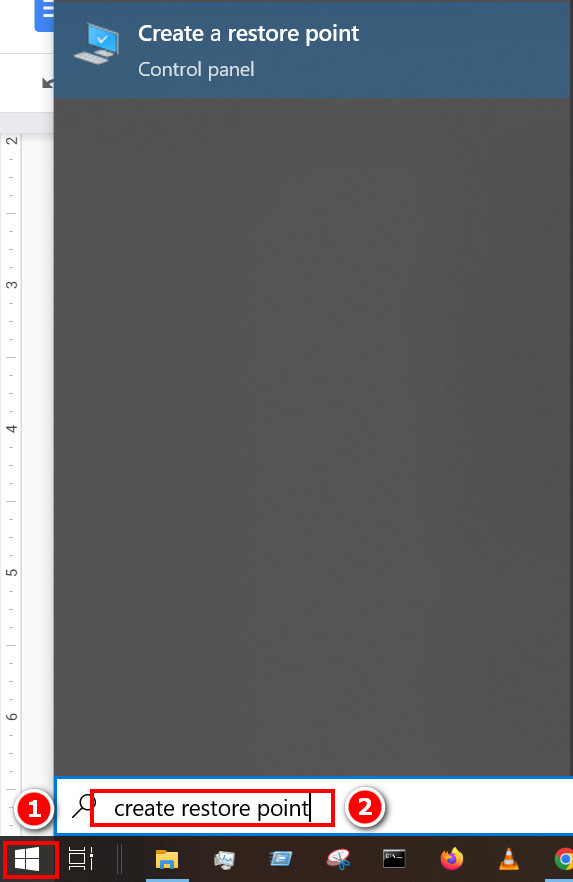
- Click on the Windows icon and, type Create restore point, press Enter.
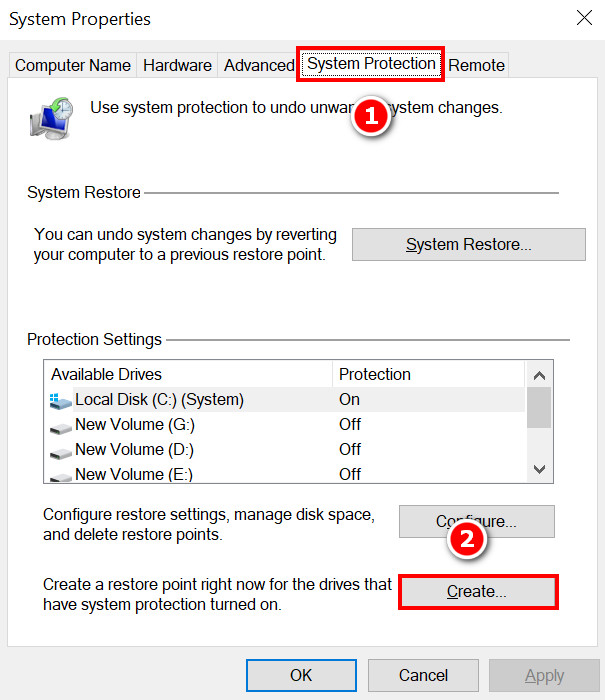
- Select the System Protection tab and then click on Create, located on the lower side of the window.
- A name prompt will pop up. Type a name so that you can remember it clearly afterward. Press enter.
- Wait for a few seconds, and your restore point creation message will be displayed.
Follow our easy step-by-step guide to adjust page file in Windows 10.
Now you are ready to use the Registry Method to use Auto Login without any issues.
Here are the steps to use the registry:
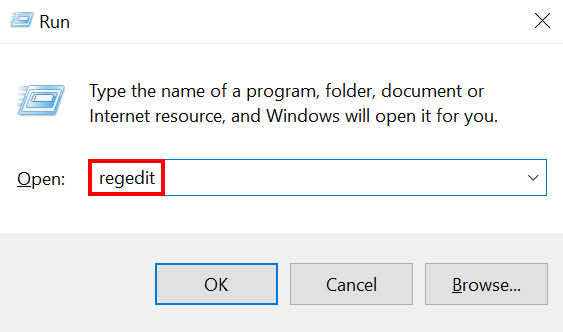
- Press the Windows + R and type regedit then press Enter.
- Click on yes in the User Access Control Panel.
- Locate the HKEY_LOCAL_MACHINE\SOFTWARE\Microsoft\Windows NT\CurrentVersion\Winlogon subkey in the Registry you just opened. Try navigating by clicking on the left panel options.
- Double-click on the DefaultUserName and type your username. Click OK when done.
- Double click on the DefaultPassword and type your PC password then click
- Locate the Edit menu, click on New, and point to the String Value.
- Type AutoAdminLogon in there and then press Enter.
- Double-click on the newly created AutoAdminLogon and a dialogue box will appear.
- Type 1 In the Edit String dialog box and then click OK.
- Restart your computer and see if the login screen still appears.
Also, check out our separate post on what are the disadvantages of not activating Windows 10.
3. Tweak User Account
This method is a rather easier one. In this method, you are to use the Run application to go to your desired window and proceed as follows.
Here are the steps to tweak the User Account:
- Click on the Windows icon located at the bottom left corner of your desktop.
- Type Run and press Enter.
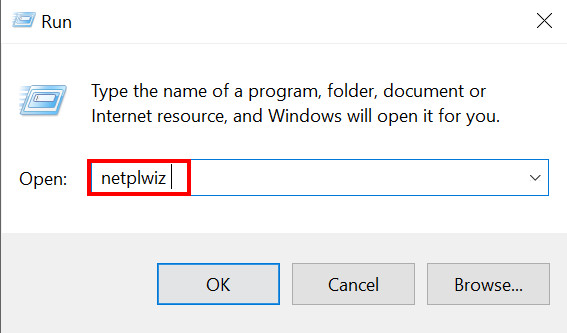
- Type netplwiz in the Run window and press Enter.
- Uncheck the Users must enter a username and password to use this computer option in the Users Tab.
- Click on Apply and then OK.
- Provide your username and password in the confirmation window.
- Restart your computer and see how it feels. Windows will not ask for the password on the start screen.
4. Run Windows PowerShell (Admin)
To use this method, you are required to run some command lines in Windows PowerShell as an administrator.
Here are the steps to run Windows PowerShell:
- Right-click on the Windows icon located at the bottom left corner of your screen.
- Select Windows PowerShell(Admin) from the options.
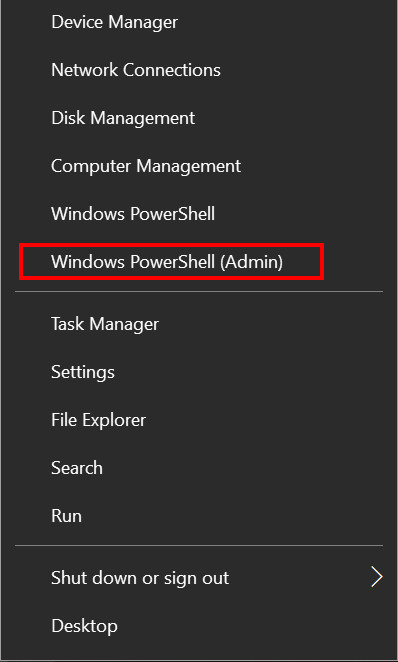
- Copy and paste the following commands there.
reg ADD “HKLM\SOFTWARE\Microsoft\Windows NT\CurrentVersion\PasswordLess\Device” /v DevicePasswordLessBuildVersion /t REG_DWORD /d 0 /f
- Press Enter and the Power Shell will change a registry value for you directly. This takes the password box, so you do not have to enter a password when you open windows.
- See the operation completed successfully in the PowerShell and then restart. Hopefully, it will help you bypass the Login Screen
5. Run Microsoft Provided App for Auto Logon
Microsoft provides a small application to use Auto Logon. It is safe, and anyone can do it.
Here are the steps to run Microsoft provided an app for auto logon:
- Go to Microsoft AutoLogon Documentation.
- Click on Download Autologon.
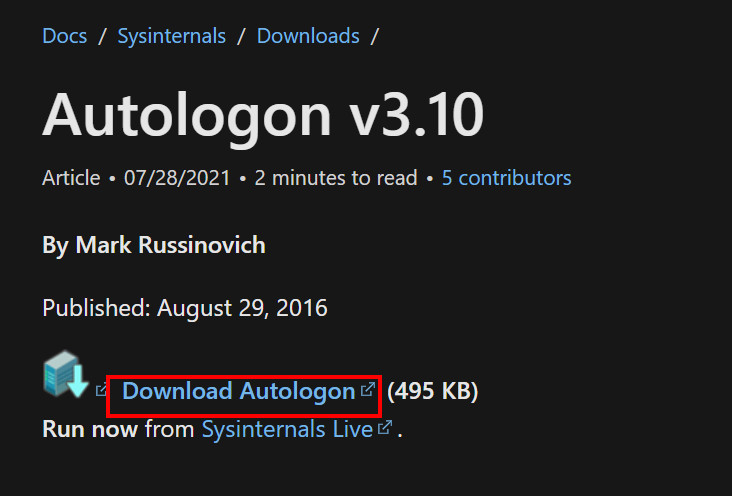
- Double click on the downloaded file. But if the file is in a zipped folder, then use any software to unzip it before proceeding.
- Fill in the dialogue box and provide the necessary information.
- Hit Enter and you are ready to go. The next time windows start, autologon will provide your credentials, and it will skip the start screen.
FAQs
1. Is it safe to use Auto login?
No, it is not safe because if your PC ends up with someone else, they will have full access to all your files. But if you are capable and careful enough, it is safe and does not cause any internal issues with your computer.
2. How to turn off Auto-Login?
Know that it is easily possible to revert all the changes you made to your computer. For the registry value changes, you can just use the restore point you created beforehand to revert all back.
Conclusion
Surely Windows 10 auto login is convenient and saves time for users. But the downside is that your security gets compromised. If you have any confidential information or anything of value, make sure you keep the auto-login off.
It might be a hassle to enter the password every single time, but trust me, it is worth it. So it is my recommendation to keep it on. But you can try these methods to see how it feels to help a person who needs this feature.
I hope you guys have understood the Auto login and everything necessary to turn it on. Do not use it unless necessary. If you have other queries, come to us anytime. Have a good day!