If you know a bit about Windows Task manager and often use it, you might have noticed that there are options to see network usage, CPU usage and Disk usage. If you see your Disk usage stuck at 99% all the time, your Disk is likely to fail at a point.
On my old Desktop, I found this problem as well. The Disk usage was unreasonably high all the time, and ultimately my hard disk crashed.
Then I researched a lot, regretting my mistake, not trying to solve the problem and ultimately found some solutions. Here I am listing all my findings in the hope that you will not meet similar ends to me.
Why is The System Disk Usage High?
Your disk usage might be high because of a lack of reboot, an outdated system, unwanted background services, malware infection, turned–on pager files, antivirus running in the background, physical problems with your hard disk, etc.
The most common of them is the hard disk’s physical problem. If your hard disk is old, it might show signs of retirement. One of them is high disk usage.
Another one is the background services. If your PC runs multiple background services, chances are your disk usage is more than normal usage. This warrants higher disk usage for a longer time and chips away disk life.
Some of us use pager files, i.e., virtual memory, to increase device performance. Essentially it uses a part of the disk as RAM and stores temporary data. So, the disk is being used all the time.
Also, check out our separate post on how to run check disk from BIOS.
Disk Usage 99 at Task Manager
If you have unresponsive windows or any other programs, chances are that your disk usage is already high and cannot go any higher. You should check your disk usage if you encounter a similar problem. You might even see a 99% disk usage at Task manager.
Follow the steps to see disk usage at Task Manager:
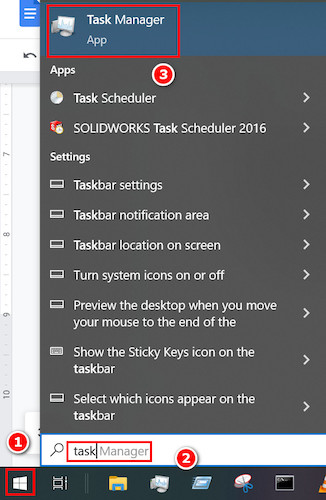
- Click on the windows icon at your computer’s bottom left corner. Type Task manager and click on the best match.
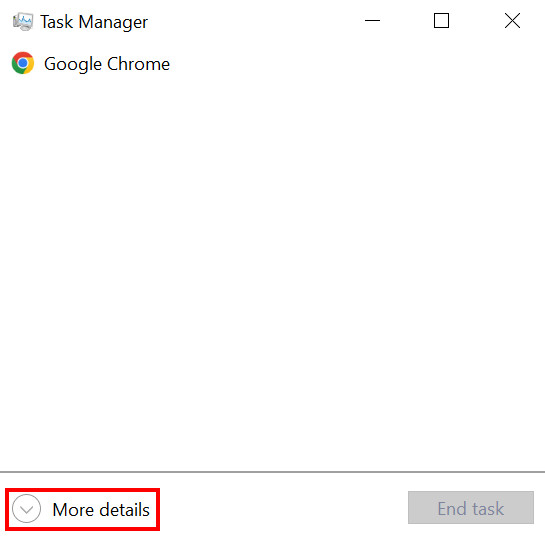
- Select more details located at the bottom left corner.
- Make sure that the Performance tab is selected, and then you will see your Disk usage on the left panel. If you have an SSD installed, you will also see that there.
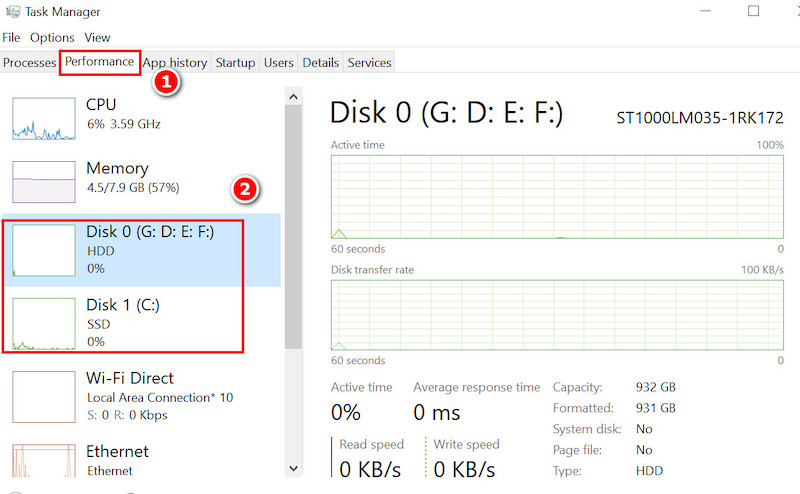
If you see Disk usage at a constant 99%, your disk has serious performance issues. In that case, you need to follow the next steps to solve the problem.
How to Solve High Disk Usage on Your PC
Solving high disk usage problems is not hard but a bit time-consuming. You will need to try the solutions one by one until you find your odd tooth.
Follow the steps below to solve high disk usage on your PC:
1. Reboot Your PC
This is one of the most basic solutions to any PC-related problems. But do not underestimate this one as it might solve your problem.
Doing a reboot restarts windows and related drivers and services. During this process, many essential softwares get checked, and errors might be solved. So, it is recommended to do this before making any system changes.
Follow the steps to reboot your PC:
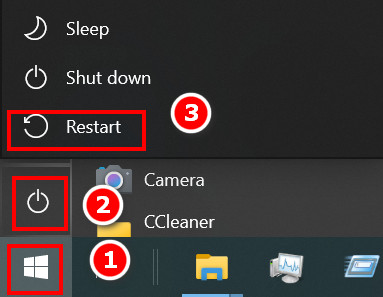
- Press the Windows icon on your keyboard and click on the power button.
- Select Restart, and your PC will shut down.
- Wait for a few minutes, and you will see your PC starting automatically.
Check if your disk usage is back to normal or not. You need to proceed with the next solution if this one is ineffective.
2. Update your System
Keeping your system up to date is a good practice, and it is good for detecting and protecting against malware. Your disk usage might turn to normal once you do so.
Follow the steps below to update your system:
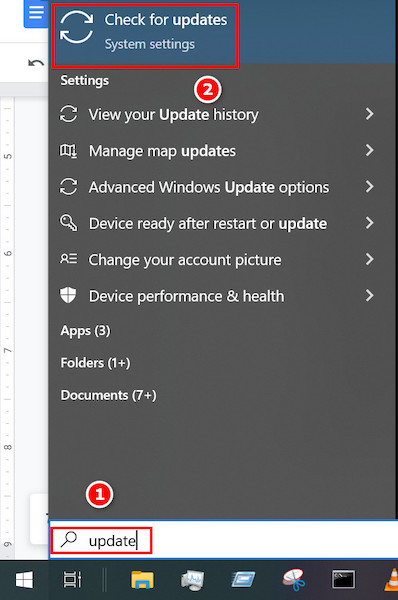
- Press the Windows icon on your keyboard and type update. Some options will appear in the search.
- Select the best results, and you will see the update page.
- Click on resume update if windows are not automatically checking for updates. Wait for some time, and it will download and install the updates available.
Depending on the number of updates and update size, you might need to wait a few hours.
3. Check Your Disk
Using a command prompt to check your disk is a good idea to determine if your disk is corrupted or needs repair.
Follow the steps to check your Disk:
- Click on the Start button on your computer and type cmd. Press Ctrl + Shift + Enter. A UAC window will appear; select yes.
- Type chkdsk and press enter. Windows will check for any disk errors and inform you if any errors are found.
If you didn’t find any errors, then try out the next method.
4. Run Antivirus
Sometimes malware and viruses cause several processes, and it causes the disk to run at full power all the time. So, if you have any antivirus software, make sure to run them once in a while and see if your PC is malware-free or not.
If you find any malware, quickly get rid of it. It is recommended to keep a paid antivirus. But if you do not have any paid antivirus, at least keep windows security turned on to take the least amount of protection.
5. Turn off Antivirus Temporarily
Sometimes heavy antivirus software can cause high disk usage. So, turning them off should help in this case.
Every antivirus has different layouts and settings. So, you should contact your antivirus service provider or any kind of manual to do this. But the commonplace to turn off any antivirus is always in Settings.
6. Turn off Pager Files
Pager files are virtual memories to help boost your device. But a downside is that your device’s hard disk will always be active. So, you should turn it off and see if the disk usage is lowered or not.
Follow the steps to turn off pager files:
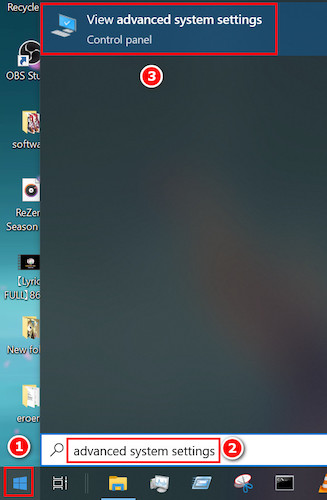
- Click on the Windows icon and type Advanced System Settings. Select the best match. A small pop-up window will appear.
- Make sure you have selected the Advanced tab and then click on the settings under the performance option.
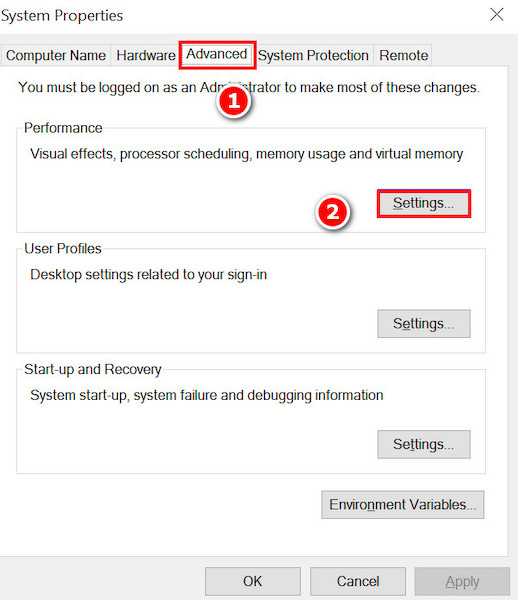
- Select the Advanced tab again and then click on Change.

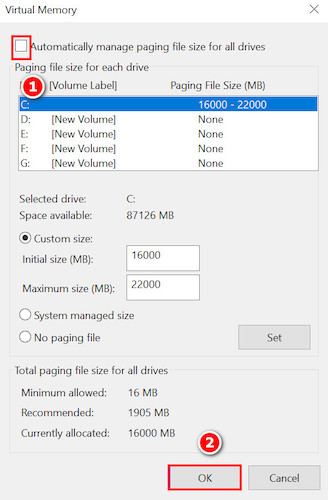
- Tick on the Automatically determine pager file for all drives option and click on OK.
Your PC will ask for a restart and if did not solve your problem, check the next one.
7. Disable Service Host Superfetch
Some users have reported that disabling the Service Host Superfetch service has helped lower their disk usage. So, it is worth giving it a shot.
Follow the steps to disable Service Host Superfetch:
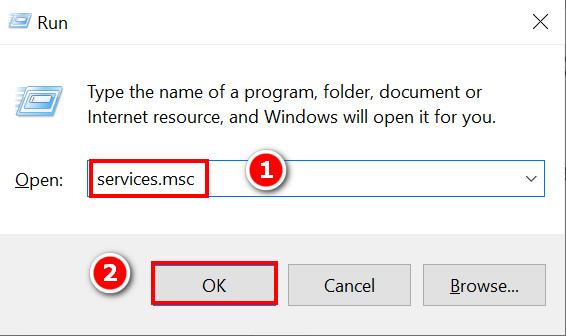
- Press Windows + R and type services.msc in the box. Click on OK.
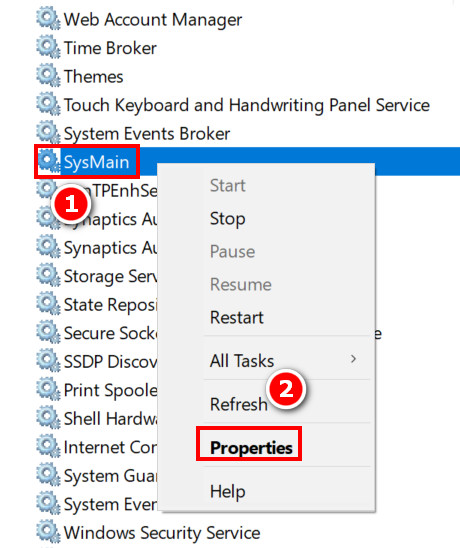
- Find SysMain in there and right-click on it. Select Properties.
- Click on the General Tab and click on Startup type. Select Disabled. Now you just have to press OK.
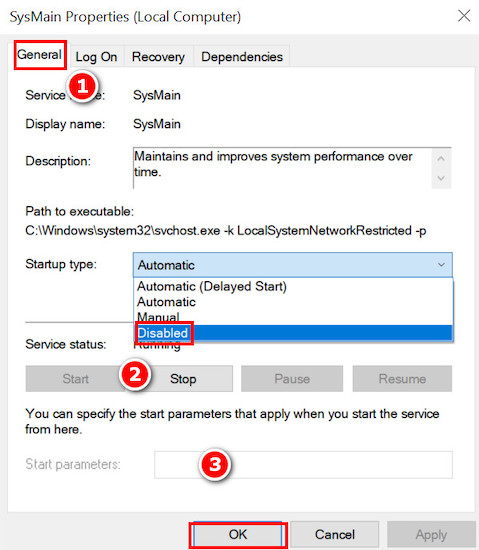
You might need to restart your computer to see the effects. If it does not help, make sure you select the start-up type as automatically as before.
8. Use CMD Commands
There are some CMD commands that will help scan and repair your corrupted disk files. You just need to open CMD in administrator mode.
Follow the steps below to use CMD commands:
- Click on the Start button on your computer and type CMD. Press Ctrl + Shift + Enter. A UAC window will appear; select yes.
- Type these commands one at a time and press Enter after each one.
- SFC /scannow
- DISM /Online /Cleanup-Image /CheckHealth
- DISM /Online /Cleanup-Image /ScanHealth
- DISM /Online /Cleanup-Image /RestoreHealth
- Wait after every command to finish working and finally check if your problem still exists or not.
10. Contact an Expert
If none of the above solutions have worked for you, then it is probably the best option to take your PC to an expert. In the worst-case scenario, you might need to replace your hard drive.
It is advisable to keep backup in clouds or on another backup hard drive for your future necessities.
100 Percent Disk Usage in Windows 11
Suppose you are a windows 11 user and face similar problems; there is no need to worry about this. As said before, the solutions are more or less the same.
So, try the above solutions and see if it makes a difference. If it really does, then you are welcome. But if not, you need to take your PC to an expert. Remember that never try to open up your hard drive as it will render it useless.
Windows 11 interface might be a bit different for you to find the options as those are for windows 10 specifically. But, once you try, you will see more similarities than differences. So, I hope it works for you.
Conclusion
I hope my small attempt to help you guys will bear fruit. I tried my best to include all the necessary information and solutions in the simplest way possible.
If you find any of the solutions hard to follow, just ask me in the comment section. Also, write down which of the solutions worked for you. Furthermore, if you have any suggestions, feel free to write them down.