When certain features stop responding, files become corrupted or a newly installed add-in does not work properly, restoring Microsoft Word to default settings is the most useful trick.
In this guide, I will show you how you can quickly reset Microsoft Word.
Without further ado, let’s have a look.
How to Reset Microsoft Word to Default Settings
There are three ways you can reset Microsoft Word: rename the global template file, delete the Word key from the registry, or use the reset option in the Office app.
Restoring the Office program’s default settings will reset all Office apps like Excel, PowerPoint, Outlook, etc. as well.
Here are the methods to reset Microsoft Word to default settings:
1. Reset from Windows Registry
Modifying the Windows registry is the best way to manually reset MS Word. Simply get to the Word key and delete it. But you must be careful while working with the registry files. Any wrong move and you may lose all your files.
Here are the steps to reset Microsoft Word from registry settings:
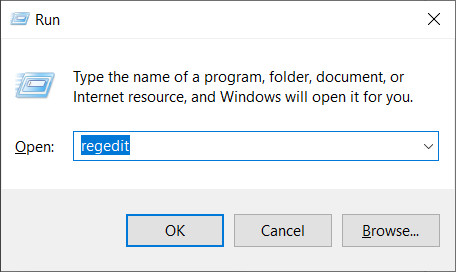
- Write regedit in Run and press Enter.
- Copy and paste Computer/HKEY_CURRENT_USER\Software\Microsoft\Office\16.0\Word in the address bar.
- Select the Word key/folder and press File > Export to back it up.
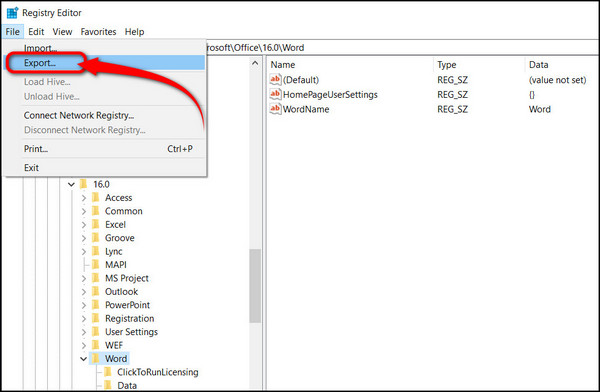
- Keep the Word key selected and right-click on it.

- Click on Delete.
Note: For Word 2016 and up including 365 go to the 16.0 folder. For Word 2013, and 2010, select 15.0 and 14.0 folders respectively.
If any confirmation prompt shows up, click Yes. Next, close the registry editor and restart your computer. Once you are successfully on the desktop, launch Microsoft Word.
2. Rename the Template File
The global template file holds the data for all the user-specific settings. So, if a new template file is generated, the MS Word document will restore to default factory settings. This can also resolve the MS Word copy-paste function not working.
Here’s how you can reset MS Word by renaming the template file:
- Terminate all Microsoft Office programs on your machine.
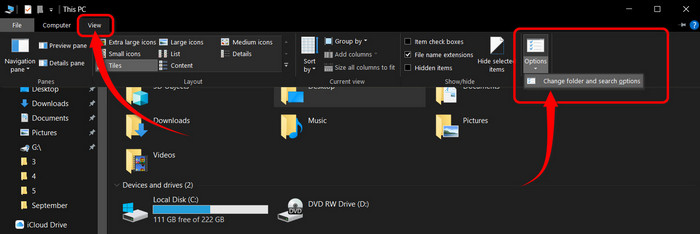
- Click on File Explorer to open This PC.
- Press View > Options > Change folder and search options.
- Switch to the View tab from the Folder Options window.
- Choose Show hidden files, folders, and drives under Hidden files and folders.
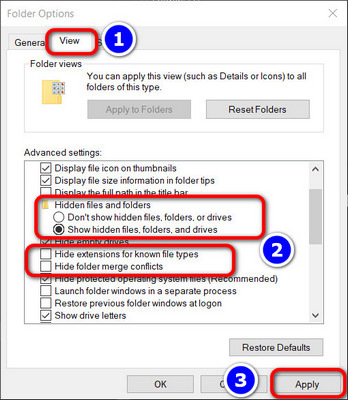
- Uncheck Hide extensions for known file types and Hide folder merge conflicts.
- Click Apply then OK.
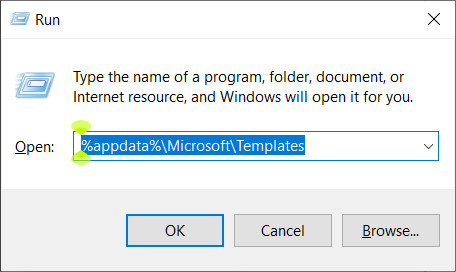
- Open Run by pressing Windows + R together.
- Type %appdata%\Microsoft\Templates and hit Enter.
- Locate Normal.dotm file.
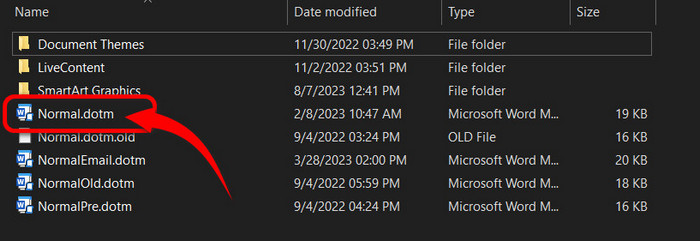
- Rename it to Normal.old.
Launch Office application. Office will automatically generate a new Normal.dotm file with factory default settings.
3. Reset from App Settings
Resetting the entire Microsoft Office suite is another way to restore Microsoft Word.
I’d recommend using any of the previous two options though, as this method will reset other Office applications too.
Here is the process to reset Word by app reset on Windows:
- Type office in the Windows Search bar.
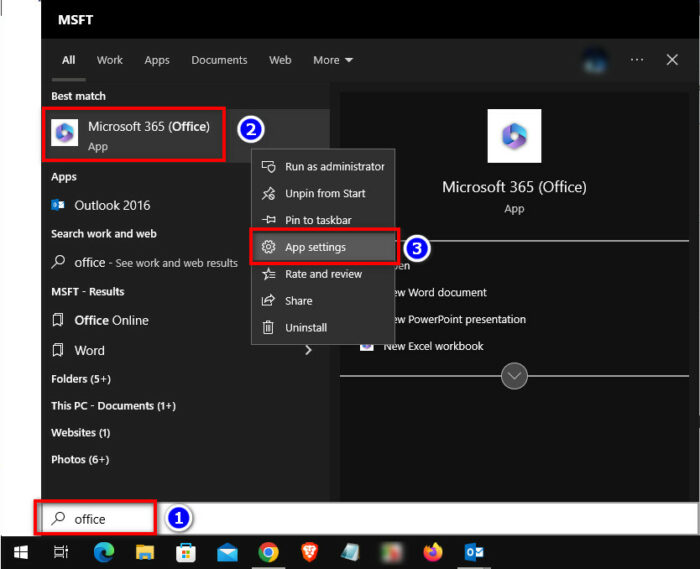
- Right-click on Microsoft Office and choose App settings.
- Scroll down and click on the Reset button.
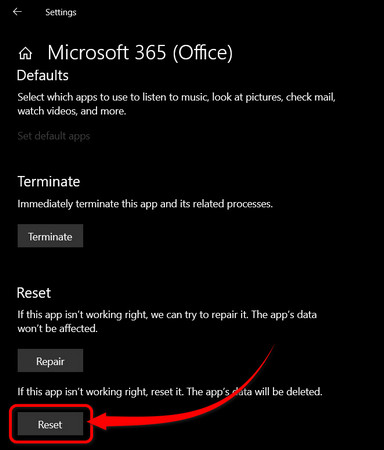
- Confirm again when a message pops up with a warning that all user preferences will be removed.
This will clear all the sign-in details and other user files and revert Microsoft Word and other Office apps to their original state.
Reset to Default in Word for macOS
When it comes to macOS, the only way to reset MS Word is by forcing it to generate a new template file. Also, you need to remove the Office.plist and Word.plist files. FYI, resetting manually can fix Microsoft Word access issues on Mac.
Here’s how to reset MS Word to default settings on Mac:
- Quit each and every Microsoft Office app on your Mac/Macbook.
- Open the Finder app.
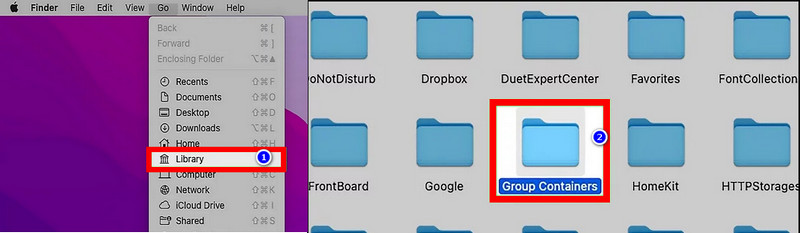
- Hold down the Option key and press the Go button from the top menu bar.
- Choose Library.
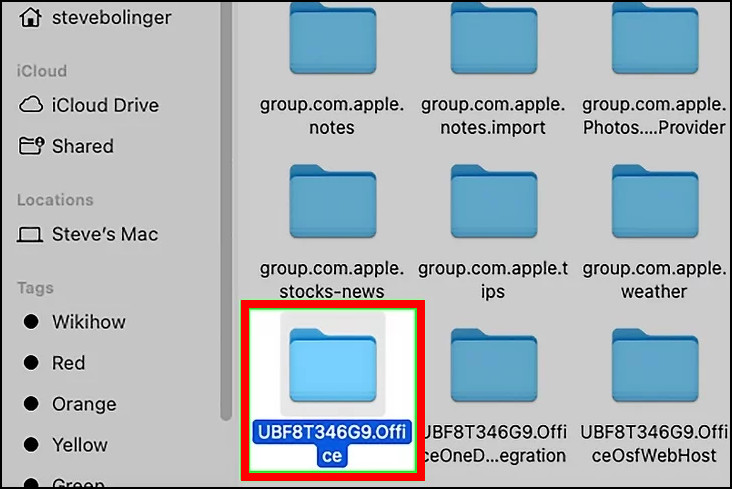
- Locate and open Group Containers.
- Look for UBF8T346G9.Office folder and open it.
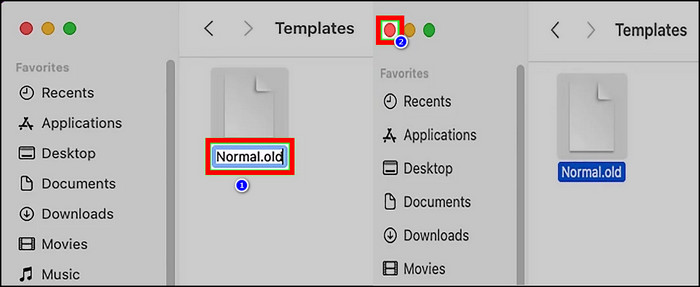
- Go to User Content > Templates.
- Rename the Normal.dotm file to Normal.old.
- Go back to Library > Preferences.
- Find these files: com.microsoft.Office.plist and com.microsoft.Word.plist.
- Drag and drop them on the home screen.
- Delete them afterward.
Close the Finder app and restart your macOS device. You will see that Microsoft Word is successfully reset to its factory default settings.
Closing Thoughts
Removing the Word key from the Windows registry editor is the failsafe method when it comes to resetting Microsoft Word to default settings. This is the approach I always recommend everyone to take. But you can also try other methods as well.
Let me know how it went for you. Did you face any difficulty? Let me know in the comments.