If you are having trouble making Twitch hosting work, do not worry. You are not the only one. Twitch hosting is not working for lots of Twitch users too.
Luckily, I have researched the topic and gathered the solutions that helped others fix the issue. I will describe all the solutions and give you a step-by-step guide in this post.
Why is hosting not working on Twitch?

Hosting is not working on Twitch because of some bugs on the Twitch side. The auto host is supposed to start after three minutes of inactivity, but sometimes it takes more than that due to extra load or processing delay.
Keep reading the post to learn more in detail.
What Is Twitch Hosting?
Twitch hosting enables a streamer to host another channel’s live broadcast on their own channel. Any Twitch streamer can host any other channel. So if you host a channel, Twitch users can see the hosted live broadcast from your channel. You can promote other streamers through this method.
Twitch is the best online streaming platform. With 140 million monthly active users, it is hard for other platforms to come close to it.
Twitch always comes up with innovative features that improve the quality of the platform and benefit its users and streamers. One such feature is the Twitch host mode.
You can host a live broadcast from any other channel in Twitch hosting. So your viewers can see the hosted stream directly from your channel. So, you can’t change the display name on Twitch? Quickly check our epic post to fix twitch error code 403.
You will have your own chat. So it’s an excellent opportunity to react and discuss other streamers on your channel. You can promote other channels, help them grow, and give them a breakthrough if you think they deserve it.
The auto hosting feature also lets you choose multiple channels in advance. When you are offline, your channel will host any live streams from your selected channels.
Hence no traffic gets wasted, and there is always some activity on your channel. It also helps your fellow streamers, friends, team members, or favorite streamers to grow.
Many users face difficulties where the Twitch hosting does not work correctly. I have gathered some fixes and workarounds which will remove the issue.
How To Fix Twitch Hosting Not Working
There is no official fix regarding the problem. But do not lose hope, as some fixes and workarounds are available to address the issue.
These fixes have solved the issue for many Twitch users. So you can be confident that one of the fixes will work out.
But before trying any fix, here is an important tip:
Make sure you are looking at the correct place for Twitch hosting. A new update moved the auto hosting to the small Video Carousel alongside the channel trailer instead of the usual Live section on your channel. Ever been in a situation where your two favorite twitch streamers started streaming at the same time? Check out our epic post to find out how to watch multiple twitch streams simultaneously.
So if you look for the auto hosting at the Live section of your channel, you will not find it and think that hosting is not working.
Also, there are two ways the priority list if auto hosting works. The new way also hosts a channel from the list, but the priority is based on the viewer. So you might see a different channel getting hosted than you expect. Have some time to spare? Check out some awesome solutions to fix the twitch error code 995f9a12 on Xbox.
Here are the methods to fix Twitch hosting:
1. Check if auto hosting is enabled
If auto hosting is not working for you, you should check if it is enabled in the first place.
Twitch auto hosting is enabled by default for Twitch partners, and Non-partners need to enable it manually.
It’s possible that the feature turned itself off after going through an update. And if you find the feature enabled, you can toggle it on-off to re-enable it.
Follow the steps below:
- Open Twitch in a desktop browser or desktop app.
- Login if you are not already.
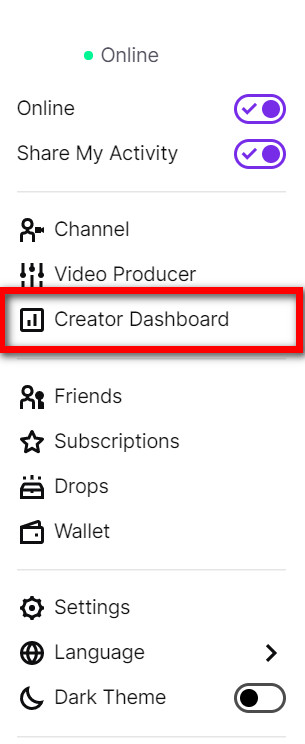
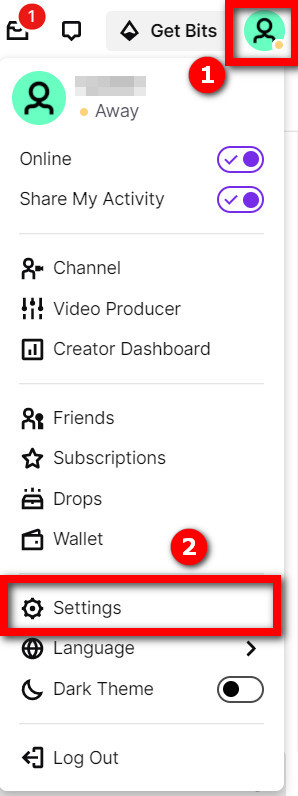
- Click on your avatar from the top-right to open the menu.
- Click Creator Dashboard.
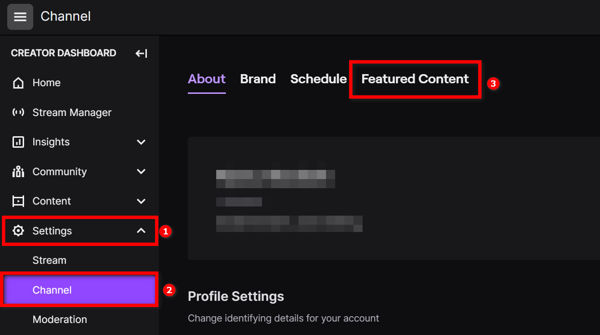
- Expand Settings from the left menu, and select Channel.
- Go to the Feature Content tab.
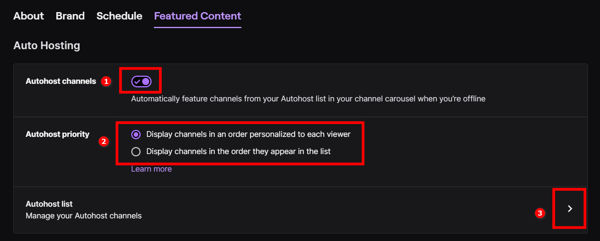
- Check if Autohost Channels is turned on. Also, check the priority options and auto host list.
You can now go through the other fixes. So, your twitch app full screen is not working? You can launch the theatre mode or you can quickly fix this issue by checking our epic content.
2. Wait for 5-10 minutes
Several Twitch users said it takes longer than usual to trigger the Twitch auto hosting. So you should wait for a little longer before attempting to fix it.
Usually, Twitch waits for three minutes after you finish the stream before starting auto hosting. The reason behind this is, you can disconnect from your stream and attempt to reconnect, or you can manually choose to host any channel.
So Twitch gives you a breathing time of three minutes before the auto hosting gets triggered. Did you know? You can check how many warnings have been given to someone on discord using a simple trick mentioned in our post.
But sometimes Twitch takes more than three minutes before it starts the auto hosting. There are reports that it takes 5-10 minutes of inactivity before the auto hosting gets triggered.
Hence you should wait out for 5-10 minutes before you start applying the fixes below.
3. Remove all mods from your channel
As weird as it sounds, removing all the mods from your channel fixed the issue for many users.
The bug which causes Twitch hosting to malfunction might have something to do with the mod commands. Hence removing all the mods fixes the problem. If you are getting a Steam missing file privileges error while waiting for your game to install, you’re not alone. Follow our step-by-step guide to fix this error without installing any third-party software.
Before attempting the fix, make sure you communicate with your mods. Otherwise, they will be super confused about why you removed them all.
Follow the steps below:
- Open Twitch.
- Go to your channel.
- Open the chat box.
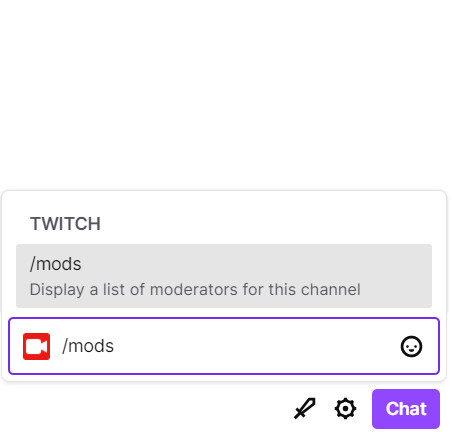
- Type /mods and press Enter. You will see a list of mods on your channel.
- Type /unmod MODNAME and press Enter to remove a mod (replace MODNAME with a mod name from the list). For example, if the name of a mod is kyle, you would type/unmod kyle and press Enter.
- Repeat the previous step for all the mods in the list.
Once you remove all the mods, it’s time to check if hosting works for you. If it works, you can give moderator privileges back to your mods by using the /mod command.
4. Remove all bots and connections from your channel
Bots are essential in maintaining a Twitch channel. They perform the repetitive tasks of the moderators and thus take some burden off the mods.
But there are rogue bots, clients, or programs in Twitch that interfere with the Twitch hosting and cause the issue. If you have multiple bots and other connections in your account, there is a high possibility that one of them has mod access and is the culprit. Follow our step-by-step guide to make twitch overlay. You don’t need Twitch mod commands to make the overlay.
So removing the bots and connections should fix the issue. You should perform this method AFTER you have completed step 3 (unmodded all mods), then it has a high chance of resolving the issue.
Follow the steps below:
- Open Twitch.
- Click on your avatar from the top-right.
- Go to Settings.
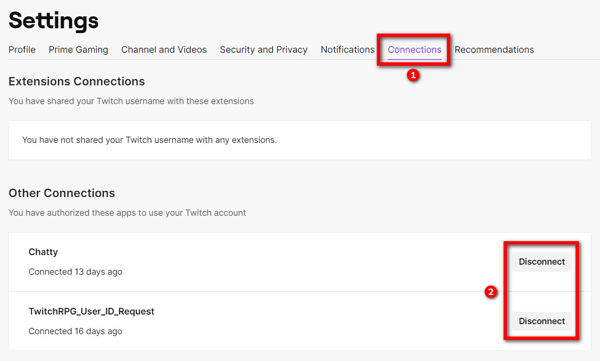
- Go to the Connections tab.
- Take note of the ‘Extensions Connections’ and ‘Other Connections’ list. You will remove all of them, so you’ll need to remember the Connections which are essential for you.
- Remove all connections under ‘Extensions Connections’ and ‘Other Connections’.
- Check if hosting works now.
- Add only the necessary connections one by one, and check if hosting continues to work.
In this way, all the rogue bots and programs with mod access causing trouble will get removed.
Should You Host A Channel On Twitch?
Hosting a channel keeps your channel page busy, as the live stream of other selected streamers is shown. The views and ad revenues of the hosted stream go to the hosted streamer, not you.
Twitch hosting is essentially a way for you to help small streamers or streamers who need a push. If you believe someone is making awesome and unique content, you are a fan of, you can host the channel to give them exposure.
It also lets you express your personality and what you like to watch when you’re not streaming. Many viewers find it helpful to connect to their favorite streamer and know more about them and their choices.
If you ever come across some seriously underrated channel, you should host it to give them a breakthrough. It helps make the platform better, grow a community, and create bonds.
If you have a team or streaming friends, you can host them to keep your channel active and help grow together.
How Do I Enable Hosting On Twitch?
Twitch hosting is a great feature to promote and help grow another channel by hosting their live broadcasts on your channel.
You can manually host a live stream or create a list of channels to auto host from.
Do as follows to use Twitch hosting manually:
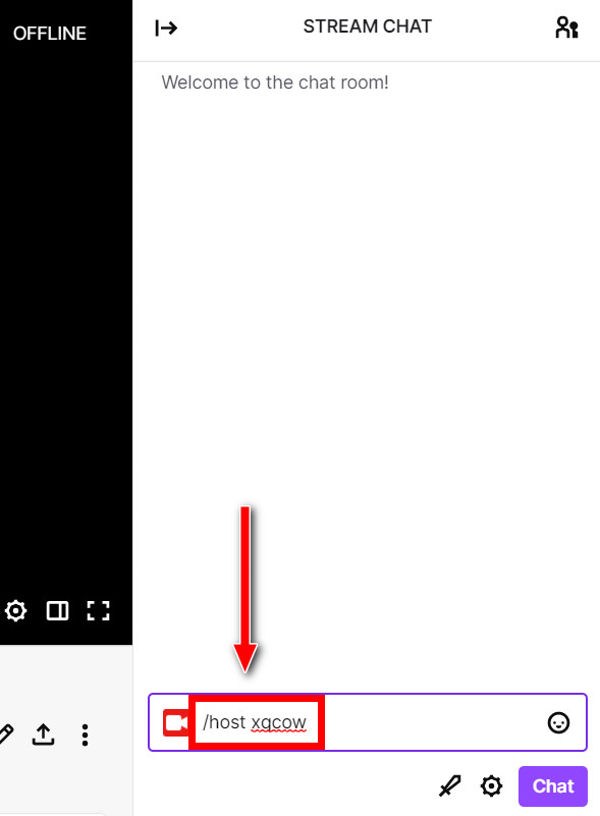
- Go to your chat.
- Type /host CHANNELNAME and press Enter. For example, /host xqcow.
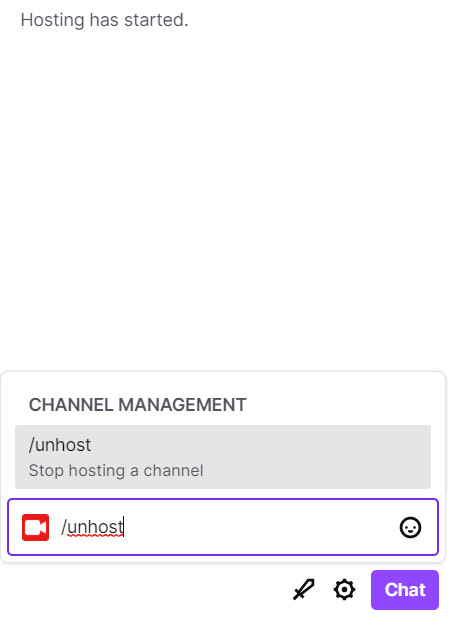
- Type /unhost to stop hosting.
You can change the host channel three times in 30 minutes using the /host command.
Auto hosting allows you to create a list of channels you want to host when you are not live. Three minutes after you go offline, Twitch will automatically pick a live stream to host on your channel based on your priority list or viewer preference.
Follow the steps below to set up auto hosting:
- Go to the Creator Dashboard.
- Expand Settings from the left menu, and select Channel.
- Go to the Feature Content tab.
- Turn on Autohost channels.
- Choose autohost priority. ‘Display channels in an order personalized to each viewer’ prefers each viewers’ choice, whereas ‘Display channel in the order they appear in the list’ prefers your list.
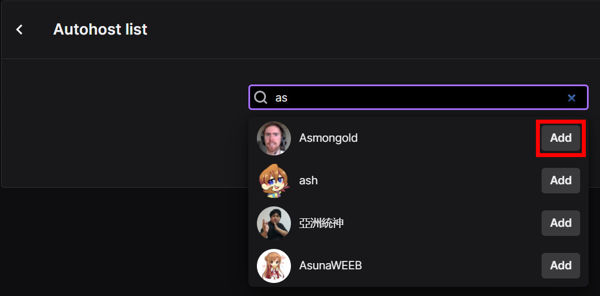
- Click on Autohost List.
- Add channels to the list and change the order as you like.
When you come live again, the auto host will stop immediately. You can override the auto hosting by manually hosting a channel.
The streamer getting hosted will get a notification in the chat and dashboard regarding who started hosting and the number of viewers.
What Is The Difference Between Hosting And Raiding On Twitch?
The difference between hosting and raiding on Twitch is that raid moves the viewers to the raided channel, while hosting keeps the viewers on your channel (even though the hosted channel keeps the views). You also get a separate chat while hosting.
Hosting is essentially embedding another stream on your channel page. So you get to keep the viewers to your channel and have a separate chat while hosting. It helps to discuss and react to the hosted stream separately.
Raiding is proper when you want to redirect your viewers into the raided channel and show support in the chat of the raided channel.
Final Thoughts
Twitch is an excellent platform for online streaming, and over the years, it has grown out to be a big community.
You can help others in your community grow using the Twitch host mode. You can manually host a channel and select a list to auto host from.
Sometimes the host function doesn’t work correctly. Some workarounds are there to fix the issue until Twitch comes up with a solution.