Outlook Room Finder is a unique feature that assists in finding free conference rooms in your organization’s building using the Places service.
While creating a meeting using Outlook calendar, you should see a list of available rooms based on meeting requirements.
However, if the Office 365 rooms do not show up in Room Finder, this article will aid you in showing and using available rooms for Outlook meetings.
Without further ado, let’s begin!
Why is Outlook Room Finder Not Showing Rooms?
Primarily, the rooms are not showing up in the available room list because the room doesn’t exist. If you’re certain about room availability, the rooms are probably missing because they are hidden from the GAL. If the rooms are not added to a room list, you won’t see them in the Outlook Client.
Usually, the list of rooms appears under the Room Finder’s available room list.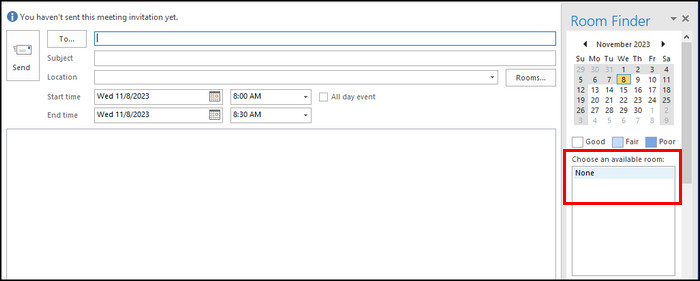
You will see rooms in green if they meet your meeting requirements. Contrarily, the rooms that don’t meet the meeting requirements won’t be available in the room list.
Moreover, the rooms won’t show up in the available room list if you or the administrator hide the rooms from the Global Address List.
Furthermore, You may find the rooms missing when the rooms are not added to a room list.
Consider the following table to understand the reasons behind rooms not showing in Outlook:
| Reasons | Quick Solutions |
|---|---|
| The admin didn’t create a room list. | Ask the admin to create a room list. Or you can create one if you have administrator access. |
| Conference rooms are unreachable. | Assure the rooms fit your meeting requirements. |
| Rooms are hidden from GAL. | Ensure the rooms are discoverable in the Global Address List. |
| No rooms were created for the organization. | Must create rooms for the organization. Otherwise, Room Finder will no longer display meeting rooms. |
| Delay in syncing of newly created rooms. | Wait for 24 hours because new rooms take time to sync and appear in Outlook. |
Now that you know the reasons behind the rooms not appearing in the Room Finder list, move down to the next section to resolve the issue.
How to Fix Room Finder Not Showing in Outlook 365
To fix Outlook’s Room Finder now working issue, create a Room List, add the existing rooms to the Rooms List, and ensure the Rooms are visible in the Global Address List. If that doesn’t help, use the Registry Editor to show the Rooms while creating a new Outlook meeting.
Outlook 365 users can add meetings by navigating to the Outlook calendar tab.
If the Room Finder is selected in the Options group and you still don’t see your rooms, consider the following methods to bring back the Rooms under the available room section.
Here are the methods to fix Room Finder not displaying rooms in Outlook 365:
1. Create a Room List Using PowerShell
Before creating a room list in Office 365, connect your administrator account to Exchange Online PowerShell (EOP).
Remember, you will need administrative access to connect and use the EOP.
After successfully connecting your administrator account, you can create a Room List by executing the following PowerShell command.
New-DistributionGroup <RoomListName> -RoomList -Members $MembersReplace the RoomListName with your preferred room list name. Otherwise, the New Group code won’t work.
2. Add Rooms to the Rooms List
With an Office 365 room list, you can quickly add all your current rooms to the newly created room list.
To do so, execute the following PowerShell command.
Add-DistributionGroupMember <RoomListName> -Member <RoomMailbox>Replace the RoomListName with the previously created room list name and RoomMailbox with accurate information.
In case it didn’t instantly sync with Outlook, don’t panic. Outlook can take around 24 hours to sync the room list updates.
3. Make the Rooms Visible in the GAL
To enable room finder in outlook and access the rooms while creating a meeting, you must ensure the rooms are visible in the Global Address List.
Execute the following PowerShell command to make the rooms visible.
Get-Mailbox <RoomSMTPAddress>Check the HiddenFromAddressListsEnabled parameter. In case you find it $true, set it to $false. It will ensure the rooms are available under the Choose an available room option for all users.
4. Use Registry Editor to Show Rooms
Now, you should see the available rooms in the Room Finder window. However, if you still don’t see the rooms, use the following method to show the rooms while creating Outlook meetings.
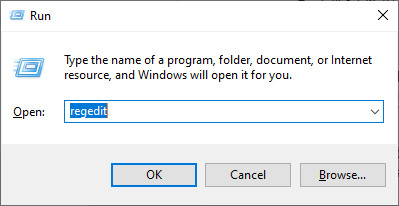
- Bring up the Run dialog box by pressing the Windows + R keys.
- Type regedit and hit Enter. It will open the Registry Editor.
- Navigate to the following address using the Registry Editor address bar:
- Computer\HKEY_CURRENT_USER\SOFTWARE\Microsoft\Office\16.0\Outlook\Options\Calendar
- Right-click on the blank space and go to New >> DWord (32-bit) value.
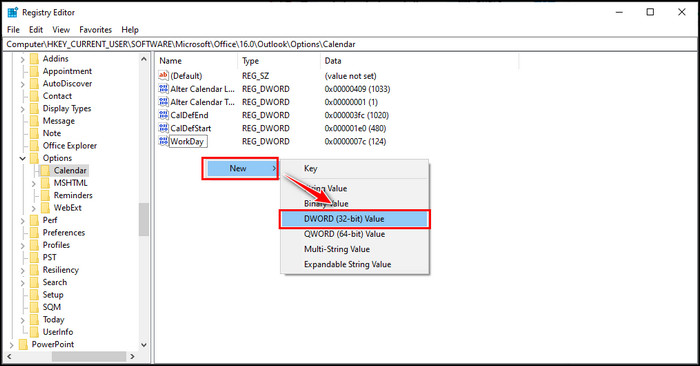
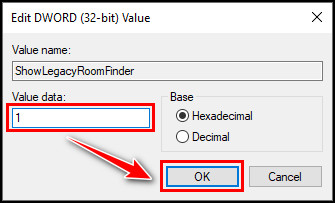
- Rename the new value as ShowLegacyRoomFinder.
- Double-click on ShowLegacyRoomFinder and set the Value data to 1.
- Click OK to update the value data.
Note: The Registry Editor address may vary depending on your Outlook app version.
Close the Registry Editor and restart the Outlook desktop client. From now on, the rooms will be discoverable by all users on the Room Finder while generating a new meeting in Outlook.
Wrap Up
In summary, when the meeting or conference rooms aren’t displaying in Room Finder, you can utilize four methods to resolve the issue.
Simply create a Room List, add all your rooms to that list, make the rooms visible in the Global Address List, and finally, use the Registry Editor to show the available rooms.
Certainly, you will see all the available conference rooms in the Room Finder once you carefully perform the aforementioned methods.