A PC’s Power Supply Unit (PSU) is solely responsible for proper current flow into a computer’s components. Unfortunately, there can be situations when a PSU suddenly stops working, and you don’t have any option to seek help from a professional PC builder.
In such cases, you have to install a brand-new power supply on your own. And so, through this guide, I will teach how to set up a desktop PSU with proper expert tips and suggestions.
Let’s begin!
Check out our recent article on what Power Supply do I have.
How to Install a Power Supply Unit on a PC
Generally, if a computer comes pre-assembled, it doesn’t require installing the power supply separately. However, if you want to upgrade your PC and run a high-end CPU and GPU, you ultimately need to replace the old PSU and get a powerful one. 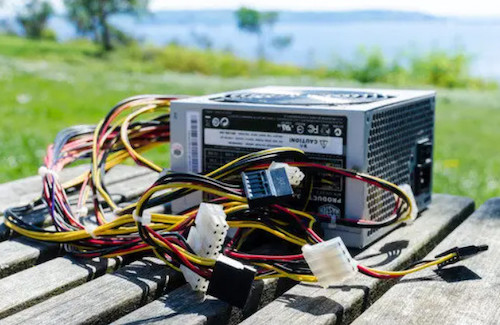
So, knowing how to install a power supply is quite essential. To do so, Use a screwdriver to open the PC case > remove the old PSU > unplug all the PSU cables > insert the new PSU > connect the cables to the motherboard and other components > reassemble the PC case.
Let’s discuss the whole process elaborately below. Follow each step sequentially, and don’t skip any.
Here are the steps to install a power supply on Desktop PC:
Step 1: Shut Down the PC and Remove Cables
Before replacing your faulty PSU, you must shut down the PC properly. Turn off your PC and let it rest for a few moments so that all other PC components cool down.
After that, remove the Power cable from the PC case and detach all the input/output USB wires.
Step 2: Open the Side Case
After turning off your PC, you are safe to open the side panel of your PC case. Use a screwdriver and unfasten all the nuts to remove the side case and get access to the inside of your PC. 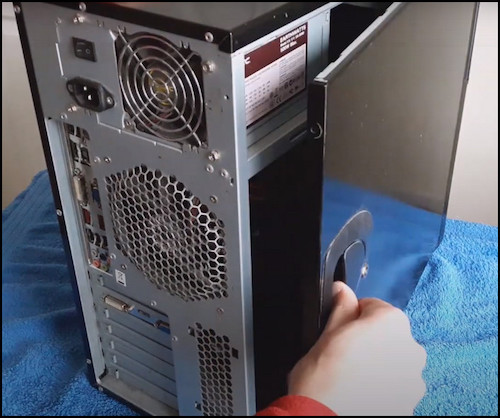
Lay the PC case on its side, with the exposed panel facing up.
Also, check out our separate post on what happens if your Power Supply is too weak.
Step 3: Install the PSU
Once you open up the PC case, you can locate the PSU placement at the top of the case. Remove the Old PSU if you have any.
Take the power brick you want to insert and align it in the case so that four mounting holes fit properly. Make sure that any air-intake fan on the PSU faces toward the center of the case, not toward the case cover. 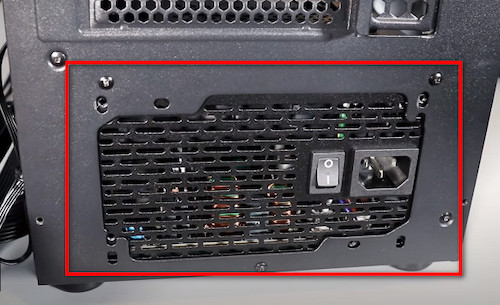
Meaning, the back of the PSU should face the back of the case, while the bottom should face the internal part of the case. Now, carefully hold the PSU in position and tighten the nuts.
Step 4: Set the Accurate Voltage
You must configure the PSU voltage to the proper voltage level for your country. Generally, North America and Japan use 110/115v, whereas Europe and other countries use 220/230v.
So, if there’s a voltage switch on the back of your PSU, switch it to 110v or 115v, according to your region. This will ensure that your power brick provides the necessary power without damaging the delicate components to which it’s turned on.
Follow our guide step-by-step to fix Computer not turning on Power Supply.
Step 5: Insert PSU Cables into Motherboard
After screwing the PSU with your computer case, take the extended PSU cables and insert them in place accordingly.
Usually, one cable goes directly into the Motherboard of your PC. And others fit with the HDD, external disk drives and graphics card. 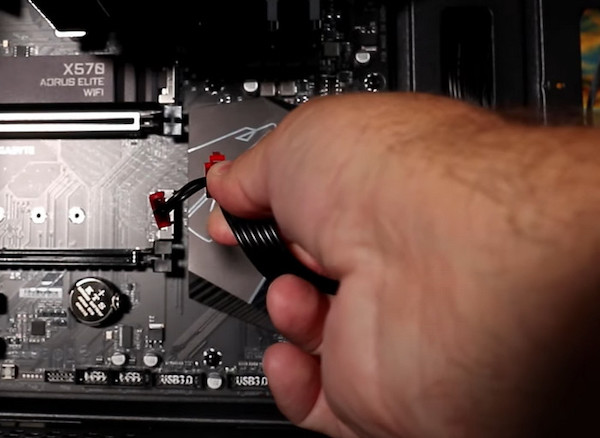
Attach them correctly, and your PSU is ready to run.
Check out the easiest way to fix computer turns on and off repeatedly.
Step 6: Reassemble the PC Case
Finally, put everything back together and reassemble the computer.
Screw the side panel and insert the power cable. Boot up your PC and check whether your desktop power supply unit functions properly or not. 
Go and check our other article on how to know if CPU cooler is compatible with Motherboard.
FAQs
How do I install a computer power supply unit on my desktop?
To install a power supply unit on a desktop PC, turn off the PC > remove the power cable > open the computer case > locate the old PSU > remove the PSU > insert the new PSU > attach the PSU cable to the motherboard and HDD > close the side case.
Why won’t my newly installed power supply turn on?
If you don’t set your PSU’s voltage to match your region’s voltage level, your desktop power supply won’t turn on.
How do I install pc power supply fan up or down?
Setting the power supply with its air ventilation facing down is best. This way, the PSU fan will take in the warm air inside the computer case, and the power supply will exhaust the air through the back.
Final Words
It’s good to learn the accurate techniques to set up a power supply, whether you are super tech-savvy or just an average PC user. Just don’t let the complicated wires scare you, as the installation is pretty easy.
After reading this article, I am fully confident that you can now install your required PSU into your desktop PC without any difficulties.
Still confused or have any suggestions for us? Feel free to comment down below.