If you are a regular gamer of any Origin client’s game, then without hesitation, I can say that you have seen an error message saying, Error syncing Cloud Storage data, Your latest cloud storage data may not be available while trying to run a game.
Since it is a prevalent problem, as a streamer, I have to fix this problem very often, and in my discord server, many gamers asked me to give some solutions to fix this error message. As a fellow gamer, I can’t let you guys down. So I gathered up some solutions and fixes that I use and found on the internet.
I will explain all the problems and the methods to solve them in this article. So, you need to stay calm and follow the methods to rule out the possibilities of every reason behind the Origin cloud sync error. Gamers, hold on to your horses, and go through the whole article to eliminate this problem!
So, you can’t play the games in your origin library? Don’t worry, with our simple guide you can fix origin login issues in under a minute.
Why is Origin Showing Cloud Error Sync?
Origin is showing cloud sync error because the client may be having issues while connecting to the internet or damaged and corrupted cache or game files may also be behind the problem. Even DNS servers also come into play to cause cloud sync errors.
After going through multiple online forums and websites, I have concluded some key reasons behind cloud syncing errors. Most probably, your Origin client or game is also facing the same issues. Before that, check our epic guide to fix Origin’s Failed to load webpage upon startup.
Here are the reasons behind the Origin cloud sync error:
- Damaged DNS cache files often disturb Origin from syncing to the cloud. Even you may need to change the DNS server to fix the issue at hand.
- Corrupted or damaged Origin cache files may cause the problem.
- The game you are trying to run may also contain damaged installation files, which might be tinkering with the cloud sync.
- Outdated Windows or drivers cause the problem to arise too.
- Sometimes Windows Firewall or third-party anti-viruses prevent Origin from syncing with the cloud.
No matter the reason behind syncing failure, I will guide you to fix this problem from your computer and help you enjoy your favorite games again.
How to Fix Origin Cloud Sync Error
Get your computer ready and work from method one and proceed to the next one until you find your computer solution. Without further ado, let’s dive into the solutions. Don’t know how to backup Origin save files? Do Check our epic step-by-step guide.
Here are the methods to fix the Origin cloud sync error:
1. Clear Origin Cache
Origin Cache sometimes becomes corrupted and causes cloud sync error. No need to fear as it is easy to fix.
Here are the steps to clear the Origin cache:
- Click on the Windows key on the bottom left corner of Desktop and type Run, press Enter.
- Type %ProgramData%/Origin in the popup window and press Enter.

- Select all files and folders in that location except the folder named LocalContent.
- Press delete to erase everything.
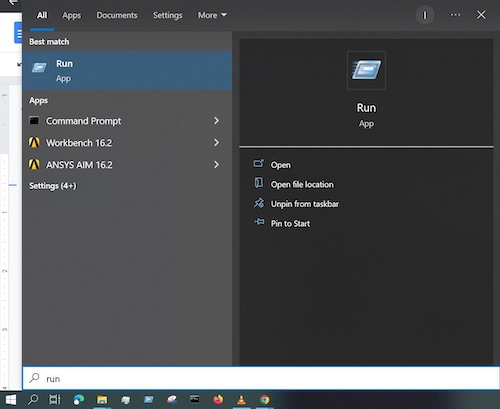
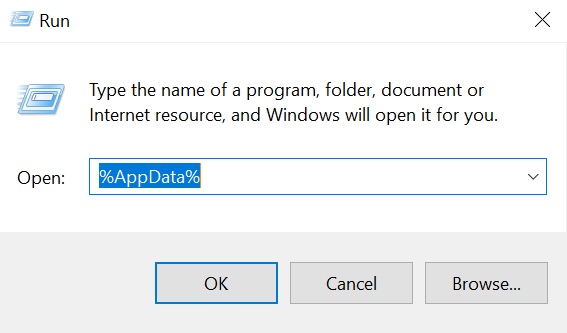
- Open Run again and type %AppData%, then click OK.
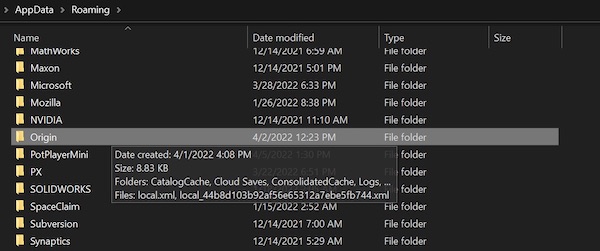
- Locate the Origin folder in the new window and delete it.
Now Restart your computer and see if the problem persists. If yes, then proceed to the next fix.
2. Switch Origin Client Between Online and Offline
This fix does not require in-depth knowledge about anything and is easy to do. You just need to make your Origin client go Offline and then back Online again. So, your Origin games won’t launch? Learn all the possible fixes from our guide.
Here are the instructions to switch Origin client between online and offline:
- Click on the Start menu and type Origin, then press Enter.
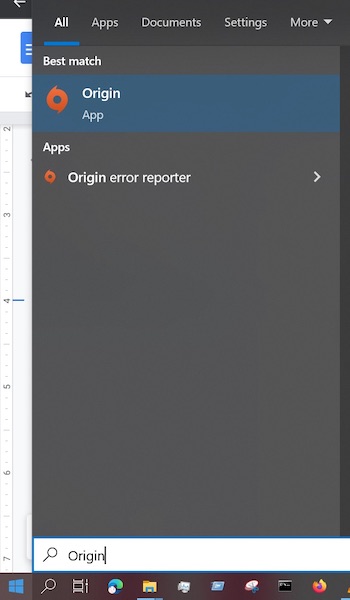
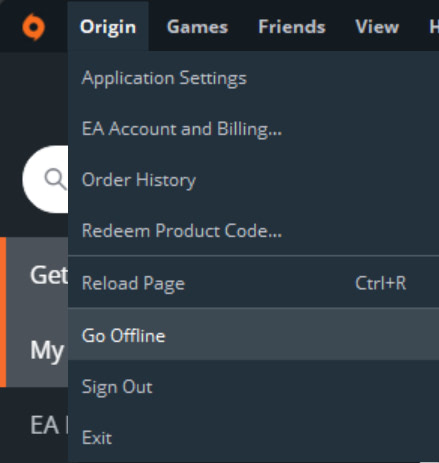
- Click on the Origin option located in the top left corner of your client.
- Select Go offline option from the drop-down options.
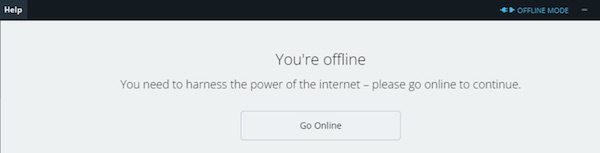
- Origin will show you as Offline.
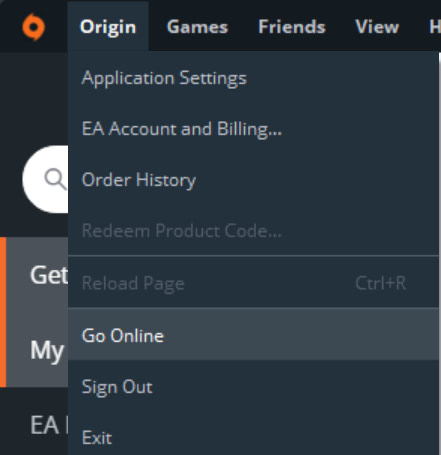
- Again click on the Origin option in the top left corner and select Online.
This should do the trick. But if you are still getting Cloud Sync Error, you are to dive deeper to solve this. No need for concern as we are in this together.
3. Run as an Administrator
Sometimes by default, Origin does not run as an administrator. So it might cause issues where administrator privileges are needed. You can try running it as an administrator to see if that helps.
Here are the steps to run Origin as an administrator:
- Click on the Start menu icon and type Origin.
- Right-click on Origin and select Run as administrator.
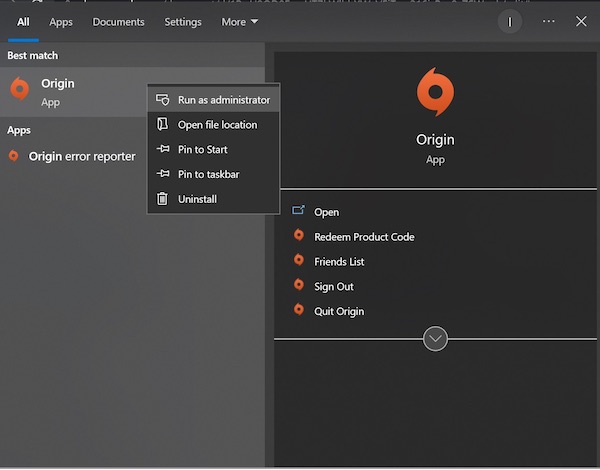
- Select Yes when a User Account Control window pops up asking if you want Origin to make changes to your computer.
It will grant Origin all administrative privileges it needs. But if the error still occurs, then It requires a different solution.
4. Make Origin an Exception
Your antivirus might have blocked Origin and some of its functions, and it is a common problem. You can try ensuring that antivirus does not hamper Origin and treat it as an exception.
Here are the instructions to make Origin an exception:
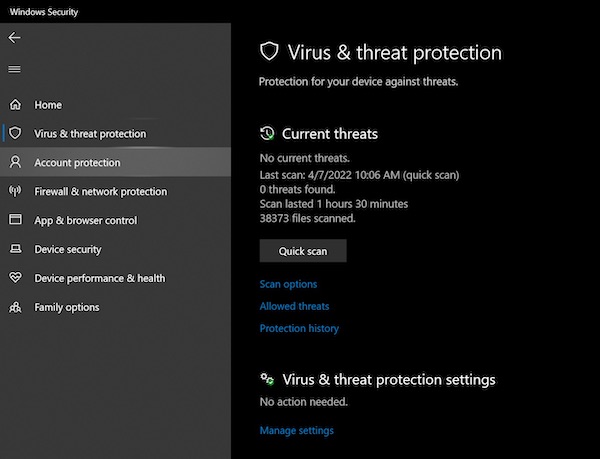
- Go to your Desktop and click on the Shield icon located at the bottom right corner of your desktop, opening up Windows Security.

- Select Virus & Threat Protection at the left and click on manage settings located under Virus & threat protection settings.
- Find Exclusion and click on the add or remove exclusion option.
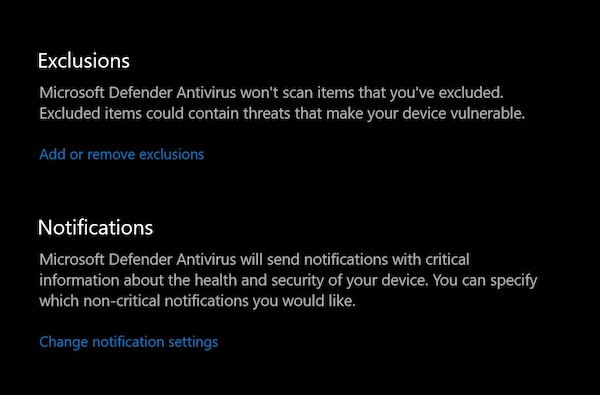
- Select Yes from the popup prompt.
- Click on Add an exclusion and select File from the new window
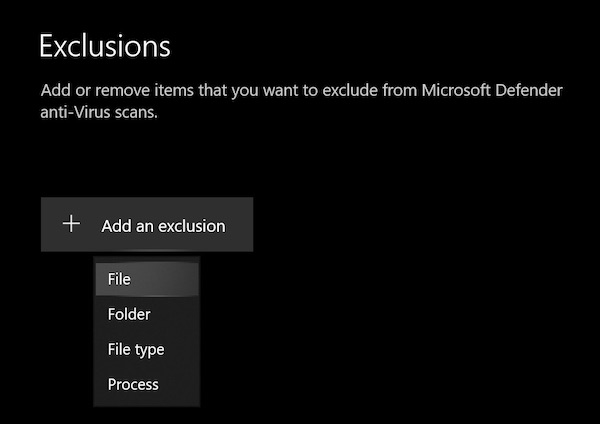
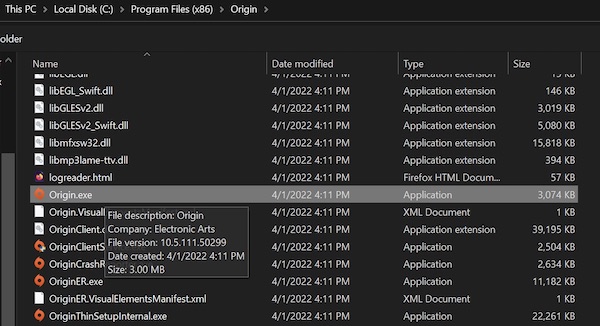
- Navigate to the C:\Program Files (x86)\Origin, which is the default installation folder.
- Find Origin and click on Open.
Now Origin is set to the exception list of your Windows Defender antivirus. Remember Never to select a whole folder while adding exceptions and choose only the intended files.
5. Allow Origin through Firewall
Cloud sync error occurs when the connection between your client and the server is unstable or blocked for some reason. So the problem might come from the Firewall.
Firewall blocks unintended and suspicious connections. But sometimes, it even blocks necessary ones, in which case it becomes necessary to allow it manually.
Here are the steps to allow Origin through Firewall:
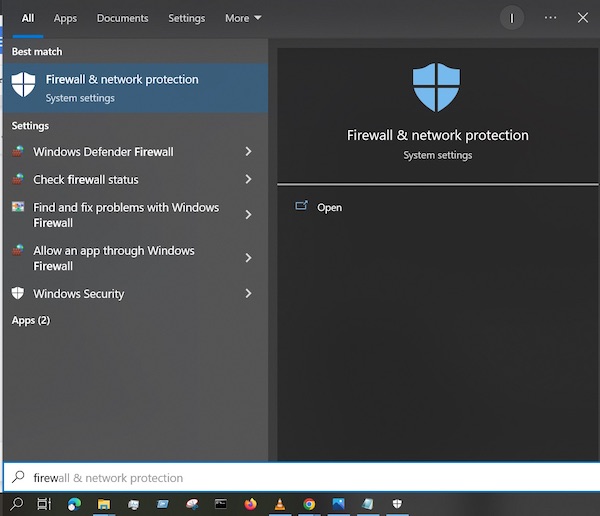
- Click on the Windows icon at the bottom left corner of your desktop and type Firewall and Network protection. Press Enter.
- Find the option Allow an app through the firewall and click on it.
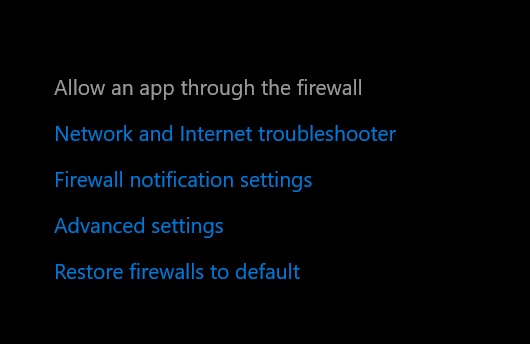
- Click on Change settings located at the top right of the new window.
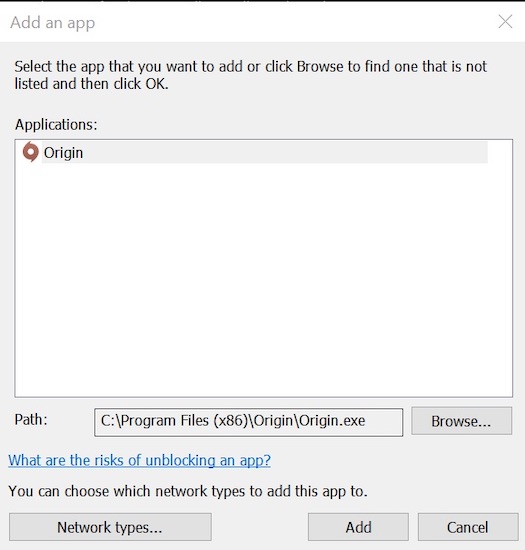
- Click on Allow another app.
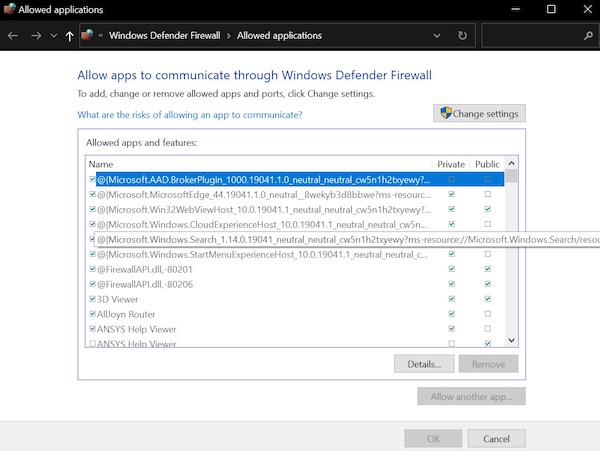
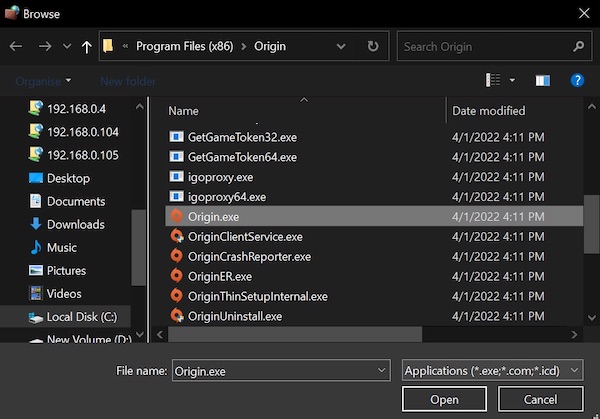
- Now select Browse and go to the installation folder of Origin, which is by default C:\Program Files (x86)\Origin.
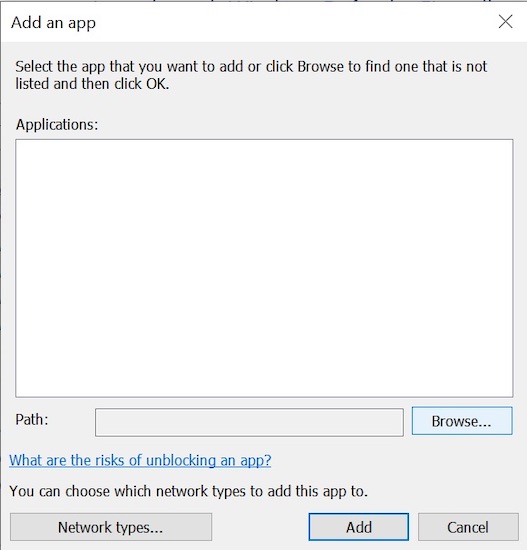
- Click on Origin and select Open.
- Select Add at the bottom right corner.
Now Origin can go through the Firewall, and hopefully, your cloud sync error is solved. If not, there is no need to fear as we are here.
6. Update Windows
Sometimes Outdated Windows causes issues and might cause cloud sync errors as well. Updating your Windows might feel like an unwanted pain, but it has its charms.
Updating keeps most of your Drivers updated, and any corrupted files or drivers are fixed. So it just might be the solution you need right now. If you are a new Twitch streamer, follow the step-by-step process to see followers on twitch.
Here are the steps to update your Windows:
- Click on the Windows icon on your Desktop and type update.
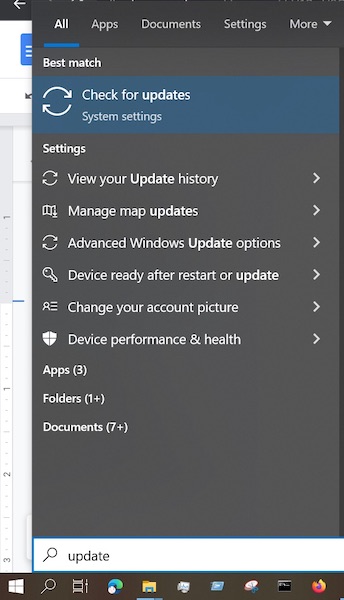
- Press Enter, and it will show you the Windows update window.
- If you are up to date with the latest version of Windows, you will see a green icon checkmark saying You’re up to date.
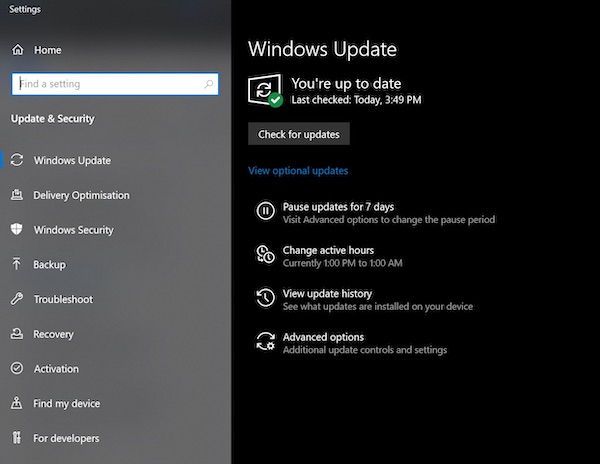
- But if you are not updated, Windows will install the updates and require a Restart.
After a Restart, check if you still face the problem. If not, follow the next fixes.
7. Flush DNS Cache
Flushing DNS clears up any IP addresses and corrupted caches. So flushing might help. For this, you need to use the Command prompt.
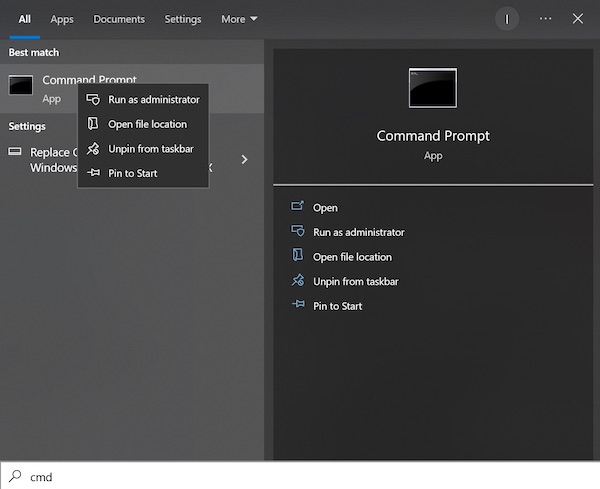
Here are the steps to flush the DNS cache:
- Click on the Windows icon located at the bottom left corner of your Desktop.
- Type cmd and right-click on it.
- Select Run as administrator, and click on Yes on the prompt.
- Type ipconfig /flushdns and press Enter.
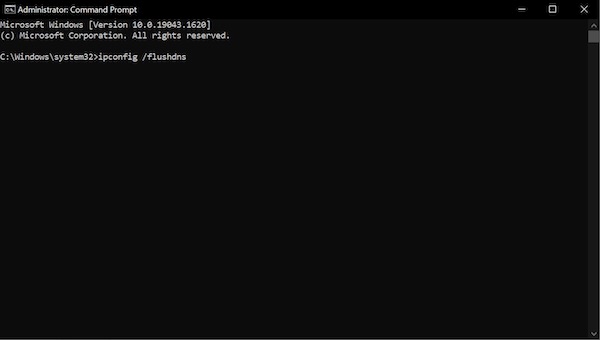
- Again type ipconfig /registerdns and press Enter.
- Do the same thing for ipconfig /release, ipconfig /renew and press Enter after each typing.
Note: Make sure your commands are accurate and executed one after the other.
8. Change DNS server
Changing the DNS server might help if your error is related to your default DNS not working correctly.
Here are the instructions to change the DNS server:
- Click on the Wifi icon located in the bottom right corner of your Desktop. Then select Network & Internet settings.
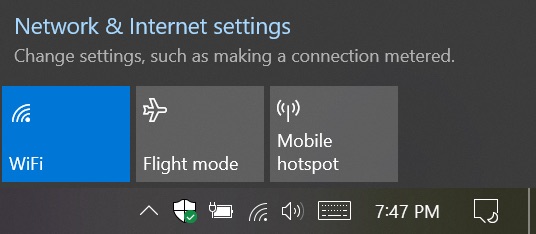
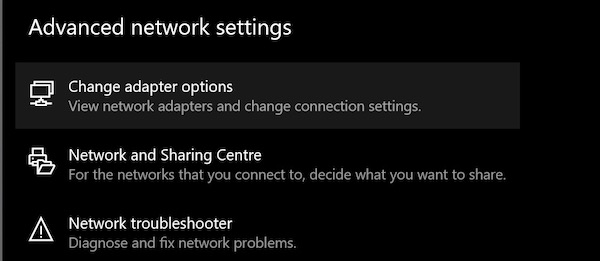
- Locate Change adapter options under the Advanced network settings.
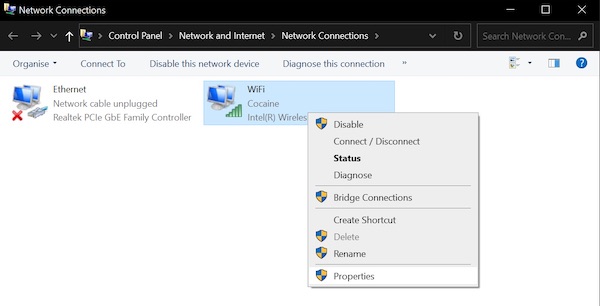
- Right-click on your adapter and select Properties.
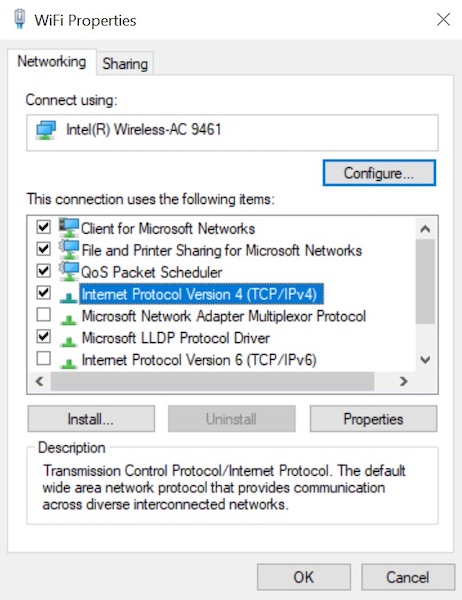
- Select Internet Protocol Version 4 and click Properties.
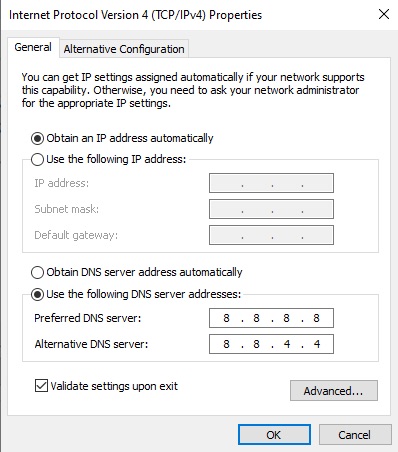
- Click the option saying Use the following DNS server address and type 8.8.8.8 as primary and 8.8.4.4 as secondary.
- Be sure to check the box saying validate settings upon exit and click on ok.
9. Repair The Game in Origin
Origin has a built-in restore option if you have problems with a particular game. So you won’t have a hard time repairing the files.
Here are the steps to repair Origin game files:
- LaunchOrigin on your computer.
- Go to My Game Library and find the game you are having trouble with.
- Right-click on the game and click on Repair from the options.

Wait for the game to complete repair. After the process finishes, you will be able to play your favorite game.
Tip: Do not turn off your computer during the repair. If you are using a laptop, make sure to plug it in while repairing it to prevent unwanted shutdowns.
10. Reboot your Router
Network issues always have to do something with the router. So a normal restart might just solve your problem.
Here are the steps to reboot your router:
- Unplug your router along with all other networking devices.
- Wait for 30 to 60 seconds.
- Plug back in your router and other networking devices.
A reboot solves any temporary router problems along with heating issues, packet losses, and all. So it may solve your cloud syncing problem.
11. Update system drivers
Some system drivers need manually updating. You can easily do so using Device manager, and it just might solve your problem of cloud sync error.
Here are the steps to update system drivers:
- Click on the Windows icon and type Device manager.
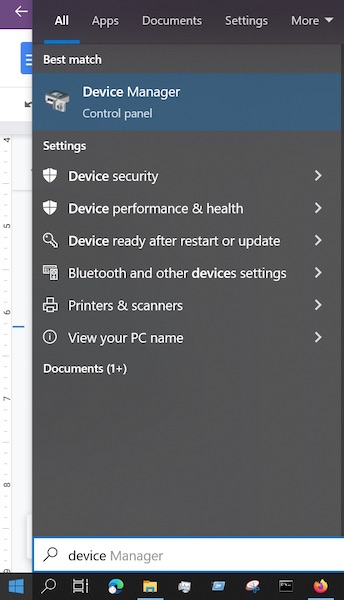
- Click on Network adapter, Display adapters, and then right-click on each of them.

- Select Update driver from the appeared options. In the pop-up window, select Search automatically for drivers.

- Windows will update the best drivers for your device.
12. Delete your temp folder
The temp folder keeps some files so that applications reload faster. But in time, they may be corrupted and cause issues. So deleting them might help.
Here are the steps to delete your temp folder:
- Press Windows + R and type temp, then press Enter.
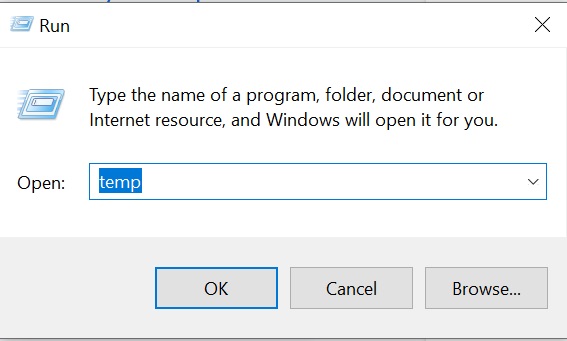
- Now press Ctrl + A and then press delete.
- A window will appear asking if you are sure or not. Click on Yes.
Tip: Remember to Empty your Recycle bin.
13. Reset the Windows Hosts file
Host Files sometimes map wrong IP addresses, which causes cloud sync errors. To solve it, you must configure the Origin client correctly in host files. If you are someone whose Twitch notifications are not working, then our epic post will teach you how to fix them. Quickly check them out.
Here are the steps to reset the Windows hosts file:
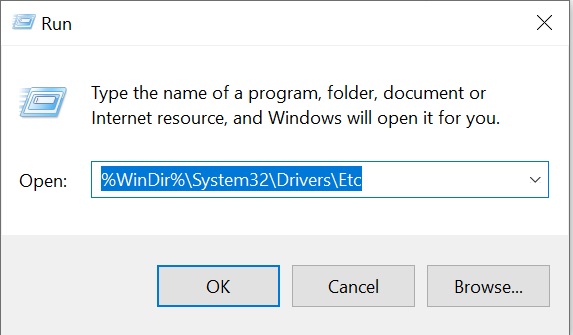
- Press Windows + R and paste the following %WinDir%\System32\Drivers\Etc and press Enter. A new window will open up in file explorer.
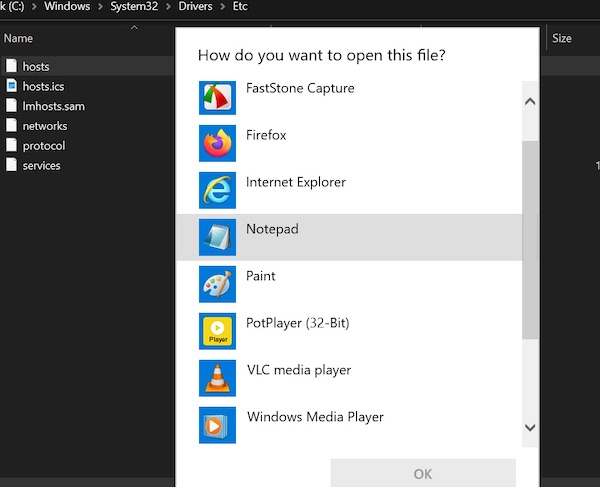
- Locate the hosts file and right-click on it.
- Select Open with and find notepad, and press Enter.
- Press Ctrl + A, then delete.
- Now copy and paste the following lines there and save it using Ctrl + S.
# # This is a sample HOSTS file used by Microsoft TCP/IP for Windows. # # This file contains the mappings of IP addresses to hostnames. Each # entry should be kept on an individual line. The IP address should # be placed in the first column followed by the corresponding host name. # The IP address and the host name should be separated by at least one # space. # # Additionally, comments (such as these) may be inserted on individual # lines or following the machine name denoted by a ‘#’ symbol. # # For example: # # 102.54.94.97 rhino.acme.com # source server # 38.25.63.10 x.acme.com # x client host # localhost name resolution is handled within DNS itself. # 127.0.0.1 localhost # ::1 localhost
Now press Ctrl + S and relaunch your Origin client.
14. Reinstall Origin Client
If none of the above solutions works, your last resort is to uninstall Origin and install from a trusted source. Downloading from the Official Origin website is recommended. Do not try to change the default directories if you don’t know what you are doing.
Here are the steps to Reinstall Origin:
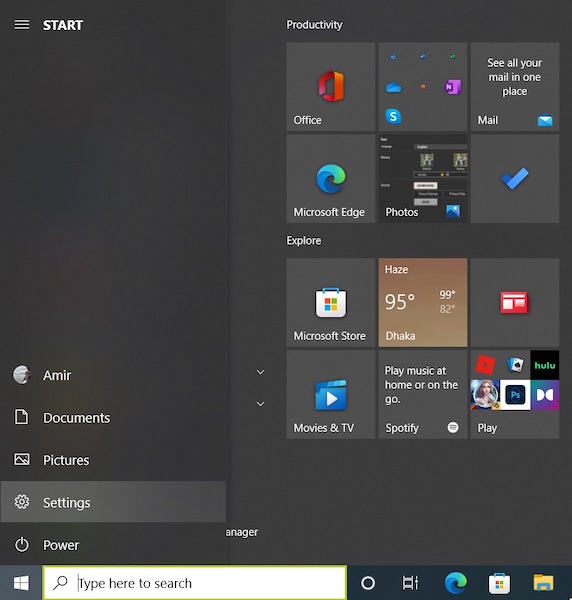
- Click on the cog icon from the Start menu.
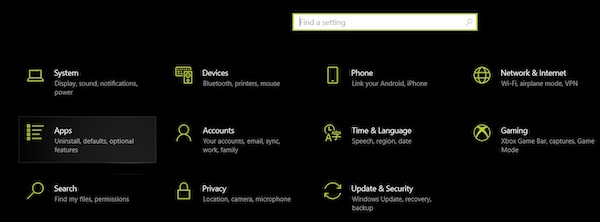
- Go to Apps.
- Search for Origin and click on it to select Uninstall option.
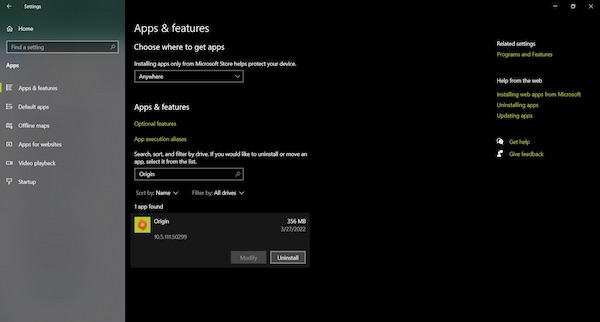
- Follow the instructions to uninstall Origin.
- Clear all the Origin cache and temporary files using above mentioned method.
- Restart your computer and download a fresh copy from Origin’s official website to install it on your computer.
Now you will be able to have fun playing your favorite.
Final Words
In the article, I have tried to squeeze all the working solutions, so you don’t keep any stones unturned and fix the cloud sync error. Let us know which one worked for you, and don’t be shy to share your queries with us. We will try to provide the best solution. Have fun gaming!