Suppose you and a couple of your friends use the same computer. In that case, it is presumable that you have individual user accounts and groups so that you can configure your accounts according to your preferences.
Currently, there are two types of local user accounts, Standard and Administrative, with their pros and cons. So Microsoft introduced user groups that have more powerful administrative access. Here I will explain what you need to do to create and manage your user accounts and groups.
So without further ado, let’s see how you can create local users and groups on your PC.
Follow our guide on how to enable all cores in Windows 10.
What are Local Users and Groups?
Local user accounts are accounts to operate the computer separately without hindering the other users’ files. In contrast, a user group consists of local users with the same access and security rights for a specific purpose.
There are two types of local user accounts Standard and Administrative. The standard user account operates software and programs, opens user files, changes some built-in customization settings, and has very limited administrative access. In comparison, the Administrative user account has full access to the administrative tools settings and files.
You should know that Local user and Groups is a built-in utility with only windows 10 Pro, Enterprise and Ultimate. This tool is unavailable in Windows 10 Home edition. You can add users to a group using Command Prompt, but the Local Users and Groups snap-in tool is better and easy to operate for managing user groups.
There are a couple of ways to access the Local User and Groups utility. So let’s look at how you can open the snap-in utility on short notice.
How to Open Local Users and Groups in Windows 10
Using the Local User and Groups tool, you can easily manage your local accounts. Before this, maybe you were to manage your accounts from the settings app. But the snap-in utility gives you more flexibility to make any changes.
Here are the methods to access Local Users and Groups:
1. Through the Search Box
One of the easiest ways to open the Local Users and Groups in Windows 10 is by searching it. But you need to search with specific keywords.
Follow the steps below to access the Local Users and Groups utility:
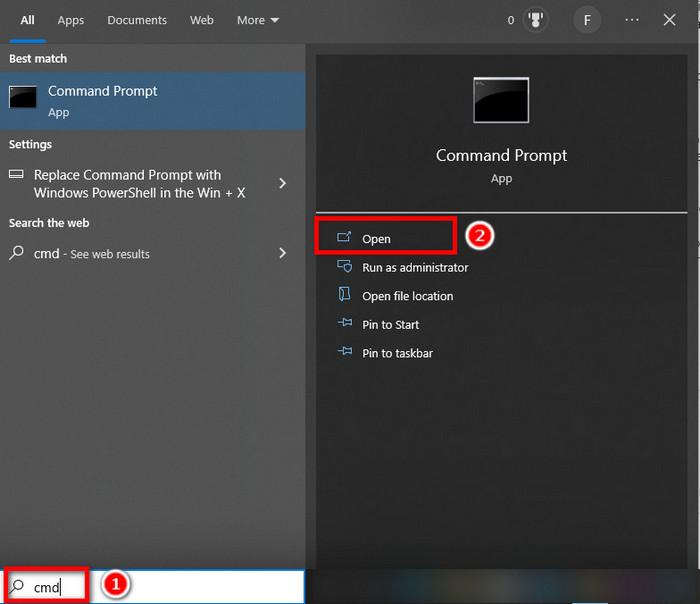
- Press the Windows key or Click on the windows search box in the taskbar of Windows 10.
- Type lusrmgr.msc in the search box.
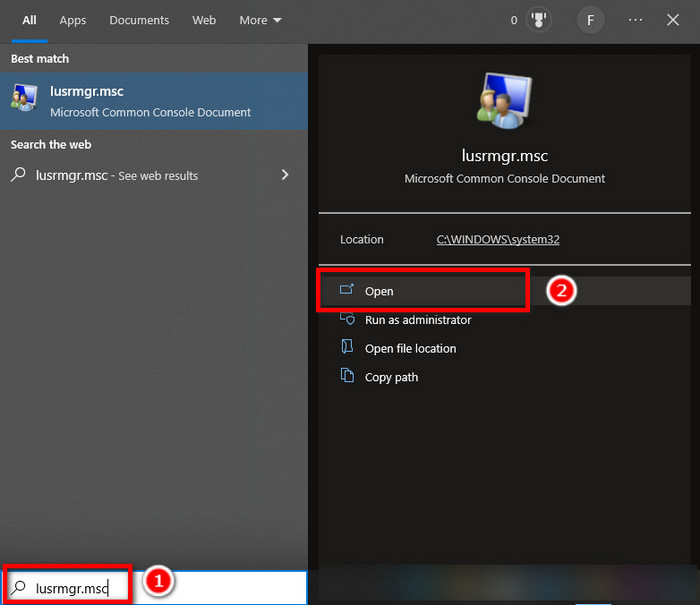
- Click Open to open the snap-in tool.
Down below, I am mentioning more methods for your convenience.
Read more on how to configure Windows 10 auto-login without password?
2. Through the Run Dialog
Run is a powerful tool for opening files, folders, programs, or internet resources. Just type the name in the Run command box and hit OK.
Follow the steps below to open the Local user and groups using Run:
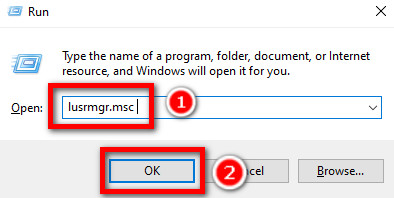
- Press the Windows+R key from your keyboard.
- Type lusrmgr.msc in the command box.
- Hit OK. Within a few seconds, the user account and groups snap-in tool will be opened automatically.
3. Through Computer Management
Another convenient way of opening the Local Users and Groups snap-in tool is through your computer management.
Here are the steps to access the Local Users And Groups utility using computer management:
- Right-click on the This PC icon of your PC. A list will appear.
- Choose Manage from the list, and a list window will appear.
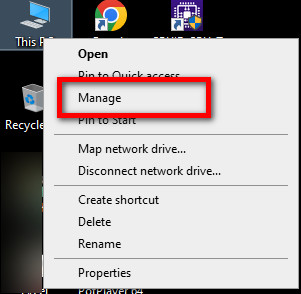
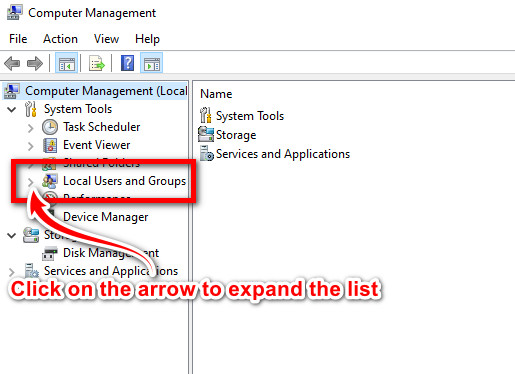
- Look for the Local Users and Groups option at the top left side of the window.
- Click on the Local Users and Groups option.
You should know this method already if you are an average user. I will mention one more way of accessing this tool down below.
Go through our epic guide on how to fix nvidia graphics card not detected in Windows 10.
4. Through Command Prompt
Usually, you may think the command prompt is used for complex tasks only. But it has a wide range of use cases. We can open the Local Users and Groups using the CMD very easily.
Follow the steps below to access the Local Users and Groups using the command prompt:
- Press the Windows key or Click on the windows search box in the taskbar of Windows 10.
- Now, Type CMD and click on the best match result to open the Command Prompt.
- Type lusrmgr.msc in the input field and press Enter.
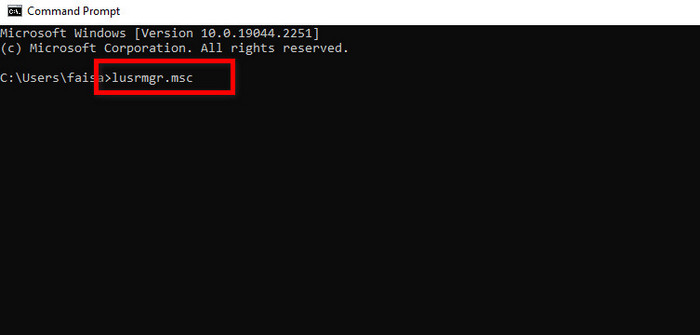
And the lusrmgr window will be open on the screen on short notice.
So use any of these methods to access the Local Users and Groups tool. Now let’s have a look at how you can manage the user account and the groups.
Read more on why is drag and drop feature not working in Windows 10.
How to Manage Local Users and Groups
Once you have opened the Local Users utility, you can make any changes to the existing local users in a group and create a new local group. No need to worry about it. I will explain the methods of making any changes in the next segments.
Add a User to the Group
You can add a user to the group by using Command Prompt. But you need to give the exact commands to execute it successfully. Now I will share a method where you don’t need to use the Command Prompt.
Follow the steps below to add a user group:
- Click on the Local Users and Groups option and expand the list.

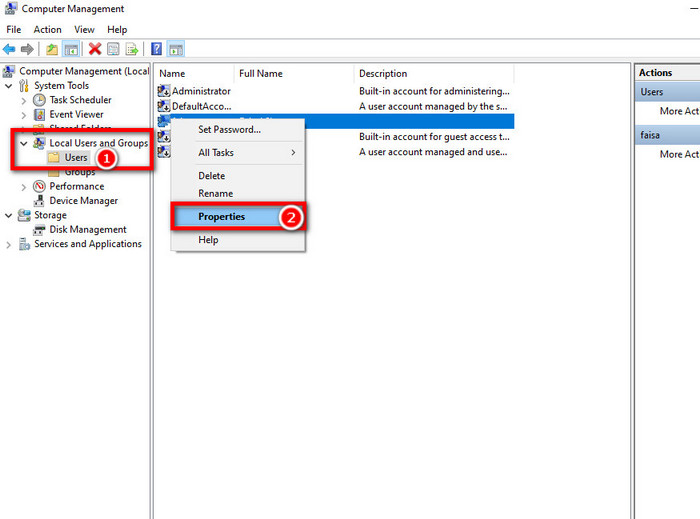
- Click on the User folder, and a list of user accounts will appear in the middle column.
- Right-click on a user that you want to add to a particular group.
- Head over to Properties.
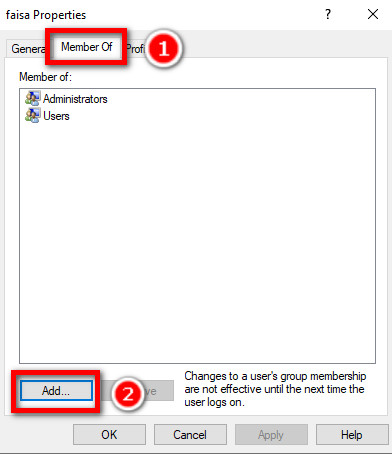
- Select the Member Of tab and click on Add. A new window will appear to select Group.
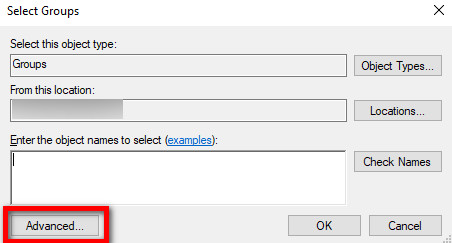
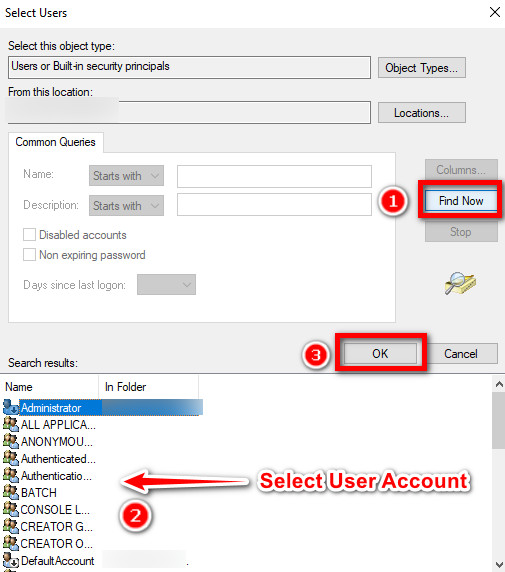
- Click on Advance at the bottom left corner.
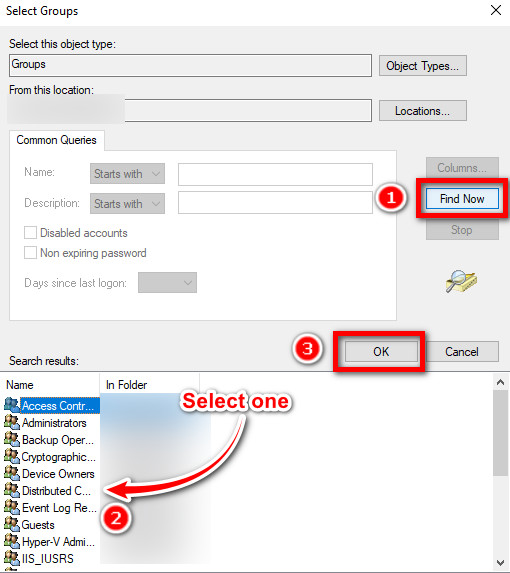
- Select Find now, which will show a list of existing groups at the bottom.
- Click on a group and hit OK.
Done; you have successfully added a user to a particular group. As I said, you can add or remove users from the group using the snap-in tool. So let’s see how you can remove a user from a particular group.
Check out the easiest way on how to sign out of Windows 10.
Remove a User from the Group
The process of removing one user from the group is very simple.
Follow the below instructions to remove a user from a group:
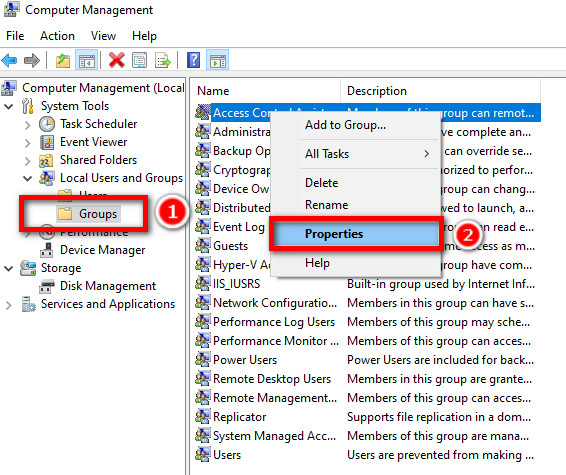
- Open Computer Management and click the Groups folder; the group list will appear in the middle.
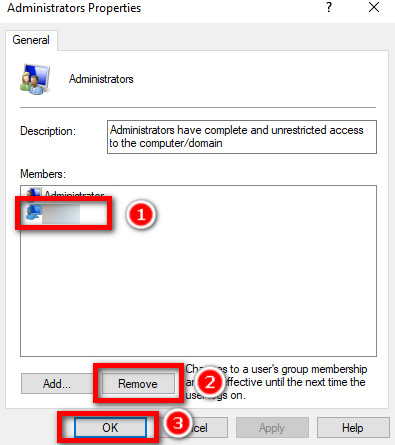
- Select the particular Group and open the properties by right-clicking on it.
- Find and select the user you want to remove.
- Click on the Remove button and hit OK.
The participant will be removed from the group immediately. Now you may want to know how to add a new group to the list. No worries, I got your back. Just go to the next segment.
Add a new Group
Adding a new group is nothing complex for you now, as I will explain it very simply to you.
Follow the steps below to create a new group:
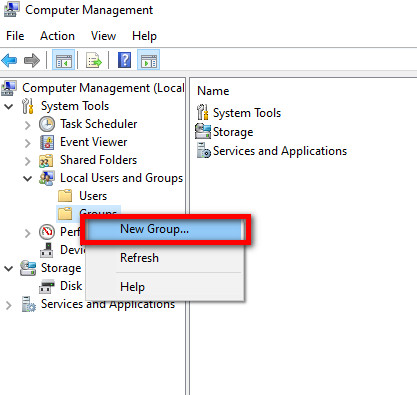
- Open Computer Management and right-click Groups. Select the New Group option.
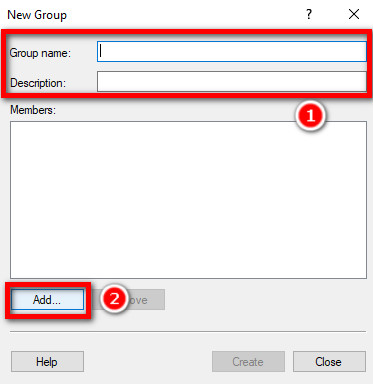
- Enter a group title and description within the New Group window.
- Click the Add button to select a user account to add to the new group.
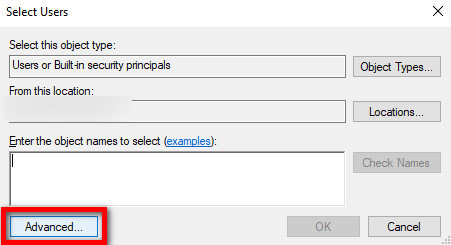
- Select the Advance button at the bottom left corner.
- Select Find now, and a list of existing groups will appear at the bottom.
- Select the user accounts that you want to include in the new group.
- Hit OK and then the Create buttons to complete the task.
Thus you have added a new group to the existing group list. So this was the process of adding or removing members in the group and creating a new group. You might have some questions in your mind right now. Let me answer some questions that may clear up those.
FAQs
How many user accounts can I add to a group?
There is no certain limit to adding users to a group. You can add all local users for a common task in a group without any restrictions.
How many groups can I create?
If you need to create new groups for a specific task with some local users providing administrative privileges, you can create as many groups as you want. Microsoft creates 17 individual groups to perform the standard and administrative tasks smoothly.
Is it necessary to maintain different user accounts for individual users?
Yeah, I think so. An individual user account saves the preferences and files in the specified location that one likes to keep. It is kept separate from multiple users. Everyone may not like the same appearance and other stuff. Here an individual user account can solve this problem without any doubt.
Can I give administrative privileges to a local user account?
Yes, you can, The UAC(User Account Control) allows the administrative privilege to a local user account.
Conclusion
I have described every process you can follow to access the Local Users and Groups snap-in tool. And now you know how you can make any changes without using CMD. For me, the search box is the easiest to access Local Users and Groups.
Please comment below if this article has helped you, and don’t hesitate to comment if I have missed any part here or if you have a better solution for this problem. If you are still facing problems making changes, let us know.