Is the system time of your PC completely out of sync after a BIOS crash or a CMOS battery replacement? Or is it just randomly losing time?
Whatever it is, you probably need to adjust the time and date in the motherboard’s BIOS.
In this editorial, I will explain how you can quickly set the correct date info, regardless of the manufacturer.
Without further due, let’s jump right in.
You may also like to read about how to change default display adapter in BIOS?
How to Change Date and Time in BIOS
The BIOS for different motherboards is designed differently depending on the manufacturer. But the options and functionalities are similar under distinct names, especially the date and time settings.
Brands like ASUS, AsRock, MSI, Gigabyte, HP, Dell etc., have the Date and Time settings under the System tab or menu.
Here’s how to modify the date and time in BIOS:
- Keep pressing the BIOS button on your keyboard while you turn on or restart your PC.
- Navigate to the System, System Info or Main once you see the BIOS splash screen.
- Find and Locate the System Date and the System Time option.
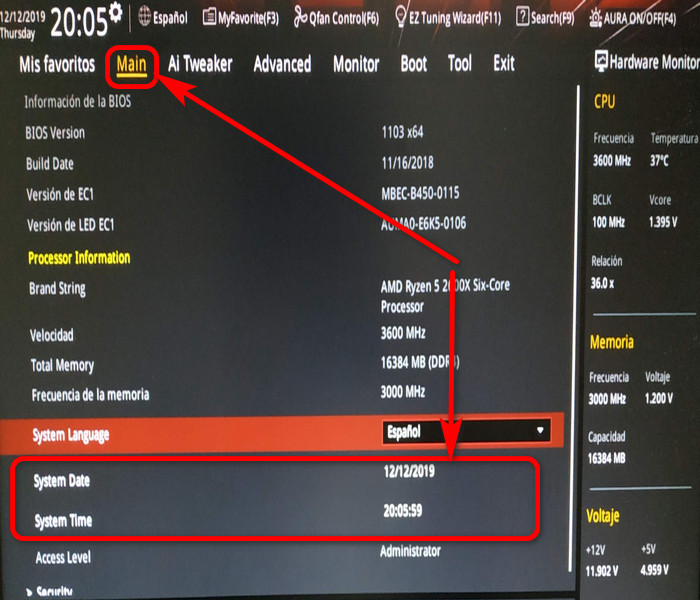
- Press Enter and set the date and time using the keyboard.
- Save and Exit from the BIOS.
This will reboot the system, and if you get into the BIOS again, you’ll notice the date and time you’ve provided.
After updating the date and the time, you may still see the wrong information in the operating system. Under this circumstance, you must provide Windows with the correct date and time.
Related contents you should read on how to fix a PC that won’t Boot to BIOS?
Adjust Date and Time in Windows 11/10/7
As you have modified the time and date in the BIOS earlier, now it’s time to do the same thing in the OS. However, remember you only have to do this if it’s necessary. Microsoft has kept the time and date settings simple, whether Windows 11,10 or 7.
Here is the procedure to adjust the time and date in Windows:
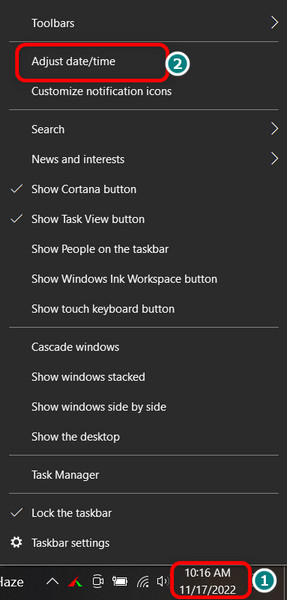
- Navigate to the bottom right of the taskbar and right-click on the visible date and time. For Windows 7, a single left mouse click will suffice.
- Click on Adjust date/time on Windows 11/10 and Change date and time settings on Windows 7.
- Select your Time zone from the next Window. On Windows 11/10, you can sync the time automatically if connected to the internet.
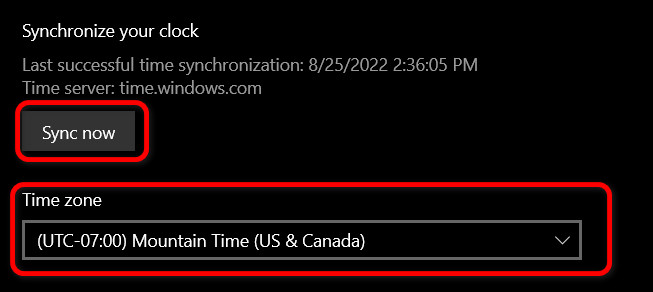
- Click on the Change button to set everything manually.
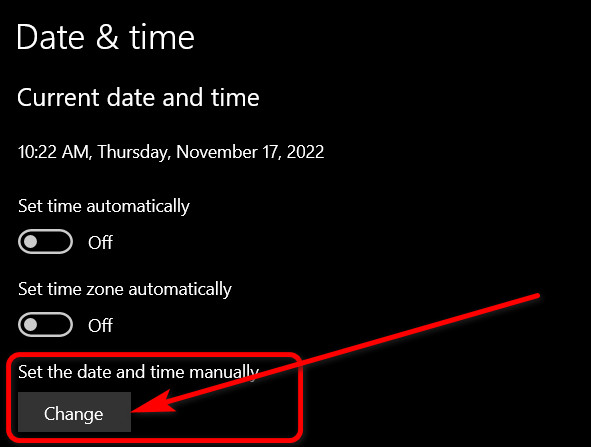
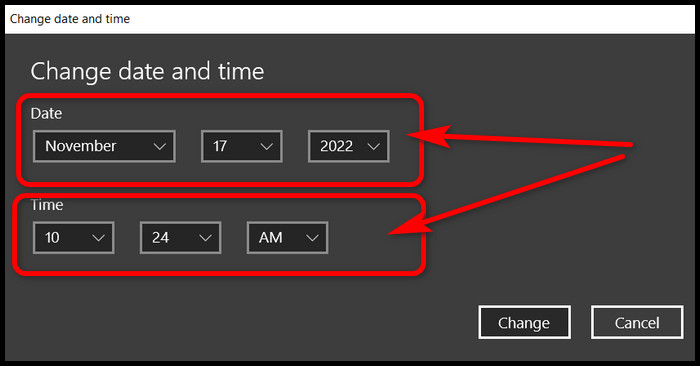
Once the appropriate value is provided, you can close the Window, and your computer will show accurate time data.
FAQs
Why Is My BIOS Date Wrong?
Your BIOS date is wrong due to a faulty or deteriorating CMOS battery. Replace the battery and set the date manually in the BIOS.
Are the Date and Time Stored in BIOS?
Yes, the date and time are stored inside the CMOS chip. It also stores the system configuration info.
Is There a Real-time Clock in BIOS?
Yes, there is a real-time clock in the BIOS. It is also known as RTC (Real Time Clock). The clock is a microchip embedded in the motherboard and powered by the CMOS battery.
Ending Remarks
BIOS date and time must be correct to avoid any weird behavior by the system, such as time resetting each time the computer is powered on. As a result, It may prevent you from connecting to the internet.
This article is all you need to adjust the time and date and get your system up and running.
For more amazing content like this, comment below and visit our website. Adios!