Keeping your firmware up-to-date can be helpful, as BIOS updates improve performance, security, and compatibility with the latest CPUs.
But it’s not always the case because sometimes, BIOS updates can block features you could use before or even break your computer completely. Luckily, you can downgrade to an older BIOS version if the newer one causes issues.
In this article, I’ll explain how to revert your BIOS update by installing the previous version correctly.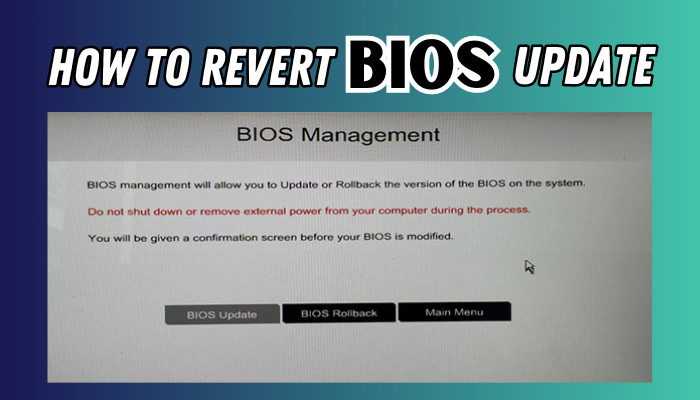
Let’s begin!
Why Should You Downgrade BIOS on Windows Computers?
Downgrading a BIOS update can become necessary if the latest update causes issues such as compatibility problems, hardware malfunctions, or system instability. If your device fails, especially after upgrading the BIOS, simply roll back to a previous version.
Here’s why you should downgrade BIOS on a Windows computer:
- The new BIOS version might not be compatible with your hardware or other installed components.
- The update can have a negative impact on system performance and cause errors.
- You might experience system instability or crashes after a BIOS update.
- BIOS updates can sometimes conflict with existing drivers or software.
- A BIOS update can fail due to interruptions from the power source. It leads to a corrupted BIOS. In such cases, reverting to a known working BIOS version can recover your system.
How to Roll Back BIOS Update
Reverting a BIOS update can be a complex and risky process. To attempt a rollback, you’ll need to download the BIOS version you want to downgrade to. Then, access your computer’s BIOS settings during the boot process and locate the option to roll back to the BIOS version.
However, not all processors are compatible with older BIOS versions. Also, if you don’t perform the BIOS installation process correctly, you can brick the computer.
That’s why below, I’ve provided step-by-step instructions on downgrading BIOS to a previous version.
Here are the steps to roll back the BIOS update:
1. Identify Your Current BIOS Version
You’ll need to check the current BIOS version to revert it to a previous version. You can typically find this information in the BIOS setup menu or using a system information utility.
Here’s how to identify your current BIOS version:
- Right-click on the Start icon from the bottom taskbar and choose Run.
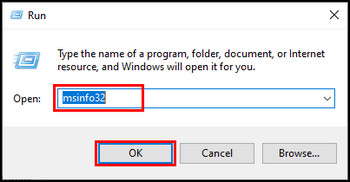
- Enter msinfo32 in the text field and click OK.
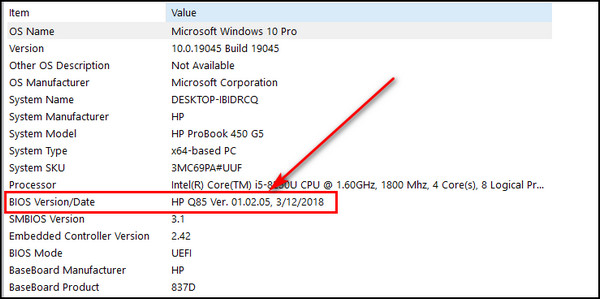
- Note down the BIOS Version.
2. Download the Previous BIOS Version
Now, visit your motherboard or computer manufacturer’s website and download the previous BIOS version for your specific model. Ensure you have the correct and compatible version.
Follow the steps below to download the previous BIOS version:
- Search for your motherboard model number on Google. For laptop users, enter the laptop model.
- Open the official manufacturer’s website (e.g., ASUS, MSI, Gigabyte).
- Go to the Support or Downloads page.
- Search for your motherboard model.
- Download the previous BIOS version you want to downgrade to. Make sure it’s compatible with your CPU.
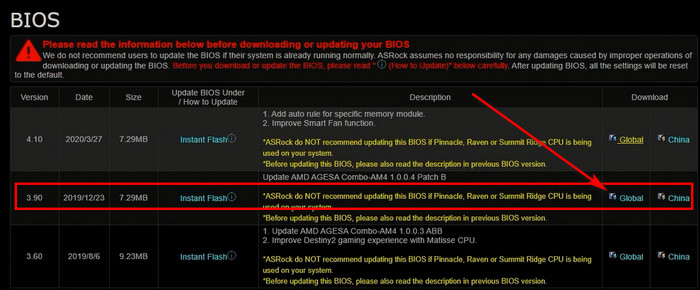
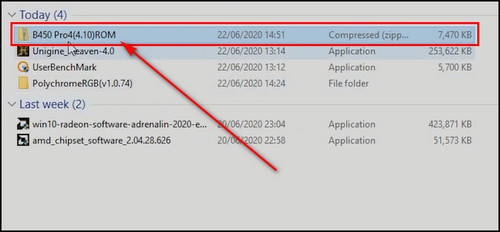
- Extract the downloaded .zip file, and you’ll get the BIOS ROM file.
3. Create a Bootable USB Drive
You need to format your USB drive so it can be used to install the earlier version of BIOS you’ve downloaded.
Here’s the process to create a bootable USB drive:
- Insert a USB flash drive into your computer.
- Right-click on the drive and choose the Format option.
- Choose FAT32 from the File system dropdown and click the Start button.
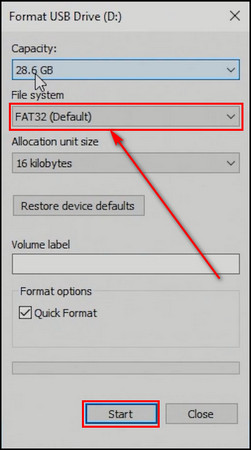
- Click OK to initiate the formatting process.
- Copy the older BIOS ROM file in the USB drive.
4. Enter BIOS Setup
You need to know the BIOS key and press it when your computer is booting up to get into the BIOS mode. You can also boot into BIOS without restarting.
Here are the steps to enter BIOS setup:
- Click on the Windows button on the taskbar.
- Choose the Power option and select Restart.
- Keep pressing the BIOS key when your computer starts to boot up. If you don’t know your BIOS key, I’ve provided it in the list below for different motherboard manufacturers:
- HP: ESC or F10
- MSI: Delete
- Lenovo: F2
- ASUS: F2 or DEL for motherboards & F2 for PCs
- Dell: F2 or F12
- Acer: F2 or Delete
- Origin PC: F2
- Samsung: F2
- Sony: F1, F2, or F3
- Toshiba: F2
5. Downgrade Your BIOS Version
Now, in the BIOS screen, you have to locate the previous BIOS version stored in the flash drive and install it to revert your BIOS updates.
Here’s how to downgrade your BIOS version:
- Go to the Advanced or Tool tab.
- Select Instant Flash or any other flash installation option.
- Choose the downloaded earlier BIOS version and click the Update button.
- Select Yes to start the BIOS installation process.
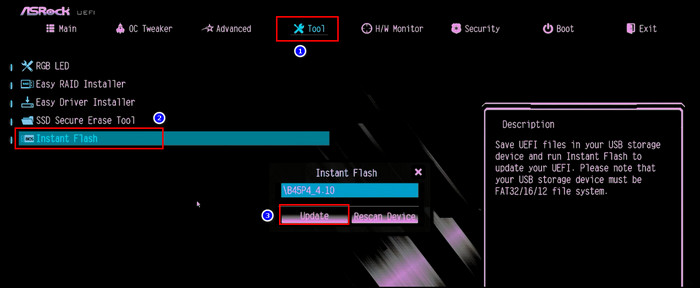
Once the installation is complete, the PC will restart automatically.
6. Roll Back System Firmware Driver
Now, your computer will boot up with the older BIOS version. However, you still need to downgrade the system firmware driver. Otherwise, the driver will show an error.
Here’s the process to roll back the System Firmware driver:
- Right-click the Windows icon from the taskbar and select the Device Manager option.
- Expand Firmware.
- Right-click on System Firmware and select the Properties option.
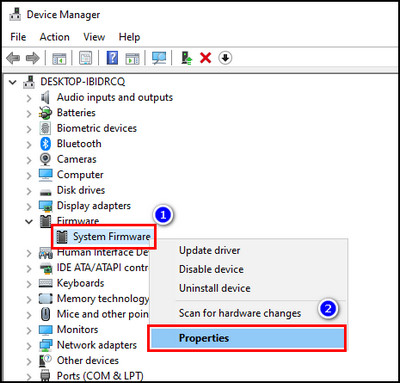
- Proceed to the Driver tab.
- Click the Roll Back Driver button.
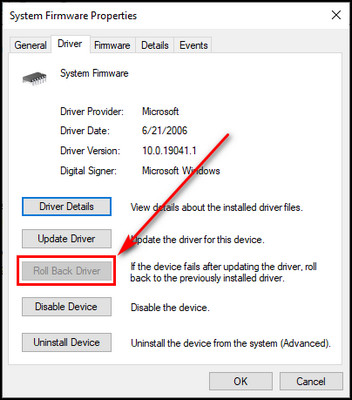
- Select Yes to confirm.
7. Stop BIOS Auto-Update
At this point, your computer will be running on the previous BIOS version you’ve installed manually. But whenever your device restarts, it’ll automatically boot into BIOS and install the latest version.
To fix this issue, just refuse to upgrade the BIOS within 60 seconds when the update prompt shows up. 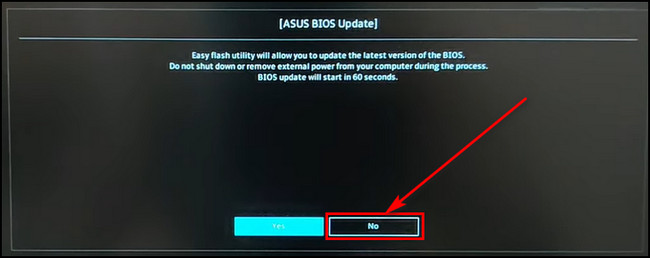
Now, Windows will boot up normally, and it’ll not go into the BIOS mode to update the BIOS version anymore when you restart your computer.
After reverting your BIOS version, if your machine is not operating correctly, simply reset the BIOS settings.
FAQs
Can you reinstall the same BIOS version?
Yes, you can reinstall the same BIOS version. Just download the .zip file for the specific BIOS version and extract it. Insert a flash drive into your computer and copy the extracted file into the drive. Now, open the BIOS mode and install the downloaded version.
How do you reset your original BIOS?
To reset your original BIOS, restart your computer, and when it starts to boot up, keep pressing the BIOS key. Usually, it’s F2 or DEL until you see the BIOS screen. In the BIOS mode, look for Factory Default, Setup Defaults, Reset to Default, or a similar option that changes your BIOS to the initial settings. Enable that option, then save and exit from BIOS.
What happens if you update the wrong BIOS?
When you update the wrong BIOS, your motherboard will stop working altogether. If that happens, you cannot recover it and have to purchase a new one. You can also ask your motherboard manufacturer to send a BIOS chip. It’ll take a few weeks.
Final Thoughts
Reverting a BIOS update may seem complex, but if you proceed with caution and follow each step precisely, you can go back to the previous BIOS version without any issues.
Comment below if you have further questions, and we’ll get back to you.