SATA ports connect all SATA devices (HDD, SSD) to the motherboard to establish transmission with the system.
When the SATA ports are disabled from BIOS, the disk drivers fail to transfer data to the Mobo. If your system’s SATA ports are disabled, this article will assist you in turning on the ports.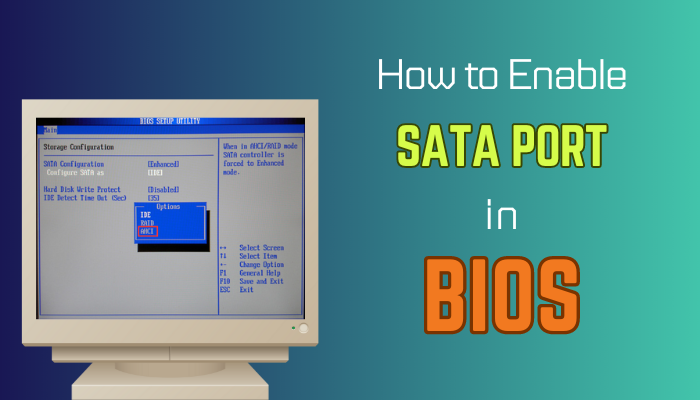
Without further ado, let’s begin!
How to Enable SATA Port in BIOS
To enable the SATA ports, go to the BIOS, find the SATA Configuration Menu or a similar menu, and change the port settings to Enabled. After altering the port settings, press F10 to save and exit the BIOS. Moreover, ensure the correct ACHI option is selected as the SATA Mode.
You can effortlessly enable the ports in four steps regardless of your motherboard manufacturer and the BIOS version. For step-by-step instructions, perform the following procedures.
Here are the steps to enable SATA ports in BIOS:
1. Enter BIOS
To enter BIOS, first, you must restart your computer and then press a specific key during the boot process. You will get only a few seconds to press that button, so identify which key you should press during the booting.
Depending on the motherboard and the BIOS version, you have to press different keys to enter the BIOS. Consider the following table to learn about the BIOS key for various mobos.
Here are the BIOS keys for different motherboards:
| Manufacturers | BIOS Keys |
|---|---|
| HP | F10 |
| ASUS | F9, F10, or Del |
| ACER | F2 or Del |
| DELL | F2 or F12 |
| LENOVO | F2, Fn + F1, or F1 |
| SAMSUNG, TOSHIBA, INTEL | F2 |
| MICROSOFT SURFACE | Volume Up Button |
| MSI, EVGA, GIGABYTE, BIOSTAR, ZOTAC | Del |
Press the relevant BIOS key several times during the boot, and it will take you to the BIOS settings.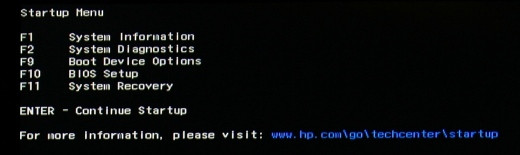
2. Go to SATA Configuration Menu
Once in the BIOS, locate and navigate to the SATA configuration menu. Like the BIOS key, the location of the configuration menu can be under different options.
Depending on your mobo, you may find it under Storage Configuration, SATA Controller Options, or Peripheral Configuration.
3. Enable SATA Ports
Find the SATA configuration menu and look for the SATA port (most motherboards have 4 to 8 SATA ports) you need to enable. Usually, the SATA ports are labeled as SATA-0, SATA-1, SATA-2, and so on.
Choose the port you want to enable and alter the port settings to Enabled. Remember, the ports work in chronological order, meaning your device will prioritize the port that has a lower number.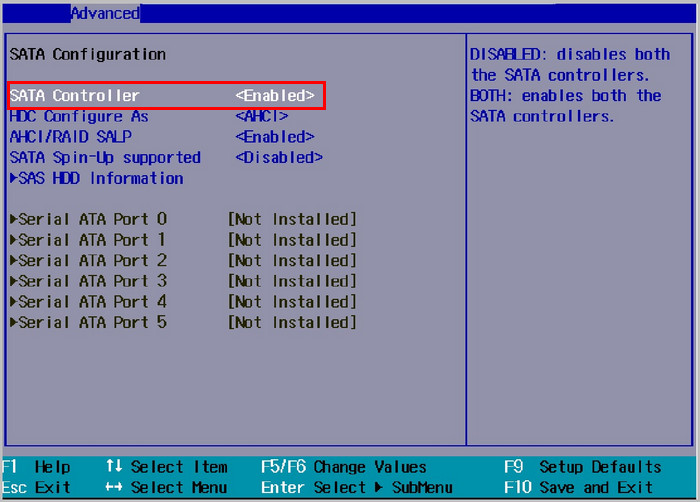
Your BIOS may keep changing the boot order in case you set the wrong port as the front-runner.
4. Save & Exit BIOS
When you’re done enabling the SATA ports, you must save the changes before booting to the operating system.
To save the changes, press F10 or click on Save & Exit. Voila! You’ve successfully enabled the SATA ports from the BIOS settings. Your device will now access the ports and perform accordingly.
In several scenarios, you may need to change the SATA Mode to AHCI (Advanced Host Controller Interface) instead of IDE (Integrated Drive Electronics) to access the full potential of your SATA ports. To do so, simply change the SATA Controller or configuration Mode to AHCI from the SATA configuration menu.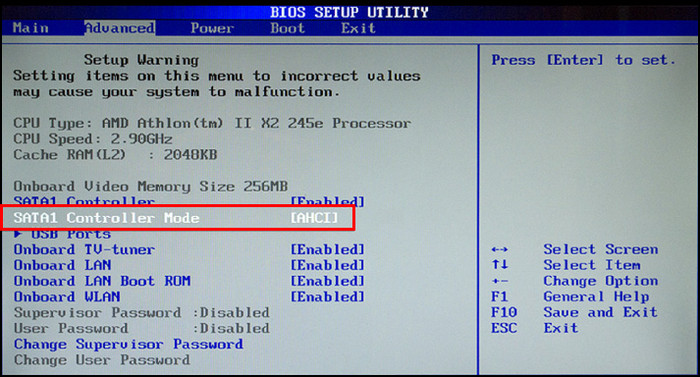
Why Does BIOS Not Recognize the SATA Port?
Primarily, BIOS fails to detect the SATA ports because of loose or incorrect cable connections. If the disk drive doesn’t get adequate power to spin the disk, BIOS won’t recognize the ports. Moreover, the older version of disk drivers and Windows can cause connectivity issues.
Similarly, when BIOS doesn’t recognize the USB, you will encounter BIOS not detecting USB device issues. Fortunately, by considering the following reasons and quick solutions, you can easily resolve this issue.
Here is the table of the reasons why the BIOS fails to recognize the SATA ports:
| Reasons | Quick Fixes |
|---|---|
| Disabled SATA port drivers. | Turn on the SATA ports from BIOS settings. |
| SATA drivers are not correctly installed. | Install the latest version of Windows and update the Disk drivers from Device Manager. |
| Defective data cable. | Use a new data cable or another one from your PC. |
| The drive is not getting power. | Ensure the hard drive is spinning and receiving enough power. |
| Faulty Hard Disk Drive or SSD. | Perform a disk recovery with a disk recovery tool. |
The above methods will fix the BIOS not detecting the SATA ports issue. However, if you’re still struggling to resolve the problem, claim your hard disk warranty and get a new one.
Concluding Words
You can effortlessly alter the port settings from Disabled to Enabled from the SATA configuration menu to turn on and access the SATA ports. Moreover, you should change the SATA Mode to AHCI instead of IDE for better compatibility.
All the steps mentioned above may vary depending on the computer model and the BIOS configuration interface. For more accurate information, check your motherboard’s documentation or contact the manufacturer.