Installing an operating system from a USB device is so simple that most people opt for this method these days.
However, sometimes, people encounter that BIOS may be unable to identify the USB boot drive on some systems, which is a complicated issue.
But don’t worry! In this article, I go over all the potential reasons and fixes for which your PC BIOS might not detect the USB boot device.
Why does BIOS fail to detect a USB device?
The BIOS fails to detect a USB device if the USB port is broken out or loose. To access BIOS, you must plug your USB into a working port. Another reason BIOS doesn’t recognize the USB could be due to an incompatible USB formatting.
On a cold boot, certain BIOSes merely re-enumerate USB drive types. If you modify the partition format structure of the USB drive, you must power off and on some systems.
For example, If the system is constantly on and you use Crtl + Alt + Del or restart to start a USB boot session, the BIOS may not ‘detect’ that the ‘kind’ of partition has changed.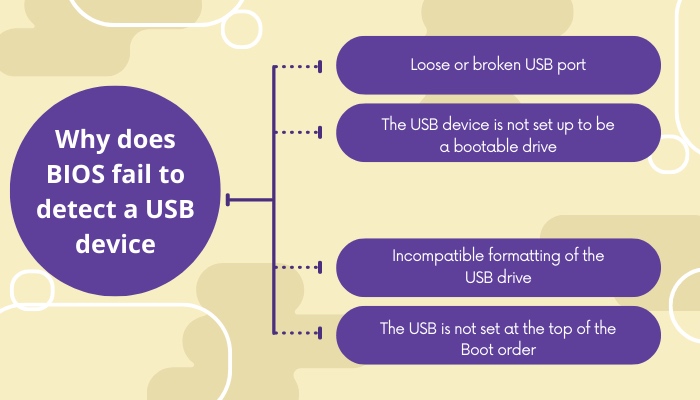
There are several possible causes for this issue. Some are noted below:
- Loose or broken USB port.
- The USB device is not set up to be a bootable drive.
- Incompatible formatting of the USB drive.
- The USB is not set at the top of the Boot order.
How to fix BIOS not detecting USB drive issue?
The main underlying issues must be detected to fix BIOS not recognizing the USB boot drive. Boot device priority should be set to the USB drive, and the bootable drive should be compatible with the computer.
Here are the things that you can do to fix BIOS not detecting USB drive issue:
The Quick-boot menu is an access point for booting a computer. This menu allows a lot of control and features various options for booting and startup, which can come in handy. If your BIOS fails to read the USB boot drive you connected, booting from the Quick boot menu can resolve the issue.
Here is how to boot your device from the Quick-boot menu:
- Press Win + I to access the Settings menu.
- Click on Update & Security.
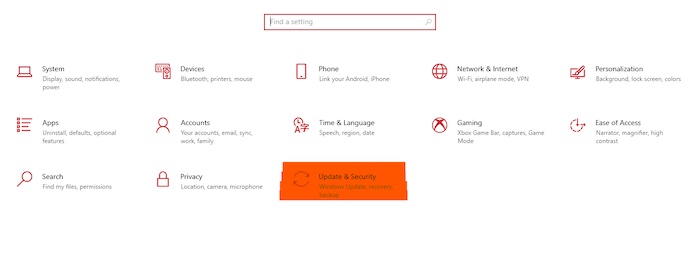
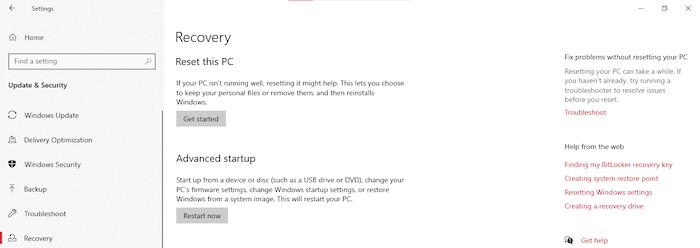
- Select Recovery from the left pane.
- Under the Advanced startup section, Click on Restart now.
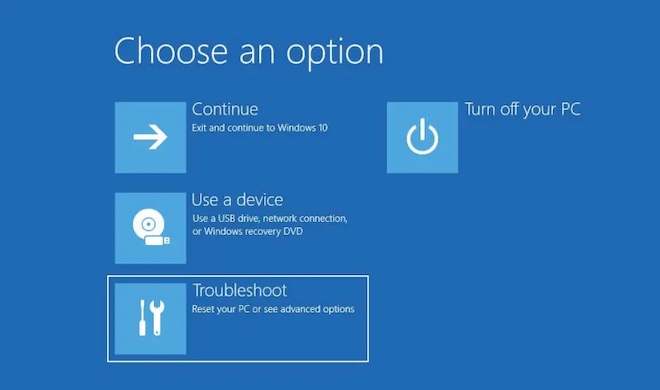
- Click on Use a device from the Advanced Startup Options screen
- Select the desired USB drive
If your bootable USB is compatible with the computer that you are using, it should detect the USB boot drive now. Wait and see if your computer can finally boot from the USB.
2. Set the USB as your boot priority device
The boot sequence refers to the order in which a computer looks for nonvolatile data storage devices that contain program code to load the operating system (OS).
The order in which your computer scans these physical devices for the boot sequence is something that the user may configure. The highest boot priority is given to the first device in the order list.
For example, to start Windows from a CD-ROM drive rather than the hard drive, move the CD-ROM drive higher up on the list of priorities than the hard drive.
The first hard drive attached to the computer is typically where the default setting is located. You need to adjust the boot order on Windows 11/10 to boot from a USB drive.
Before Windows 10 and 11, the only way to go into the BIOS was to reboot your computer and click a unique key like F2 or DEL on your keyboard.
This changed with Windows 10, where a robust recovery system is preinstalled and lets you perform many tasks. One method is to boot into BIOS, which makes it much easier if you keep missing the key.
Follow these steps to set the USB drive as your boot priority device:
- Press Win + I to access the Settings menu.
- Click on Update & Security.
- Select Recovery from the left pane.
- Under the Advanced startup section, Click on Restart now.
- Let the PC Reboot > Look at the Advanced Startup Options page.
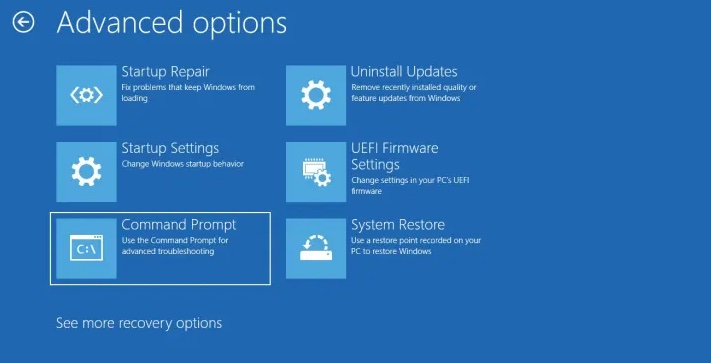
- Select Troubleshoot > Click on Advanced Option.
- Click on UEFI Firmware Settings.
Now your computer will restart, taking you to the firmware settings while booting up.
Follow the given instructions on the Firmware settings window to set your boot priority device:
- Switch to the Boot tab.
- Navigate to the Boot Priority section. You will see all the connected hard drives, CD/DVD ROMs, USB devices, etc.
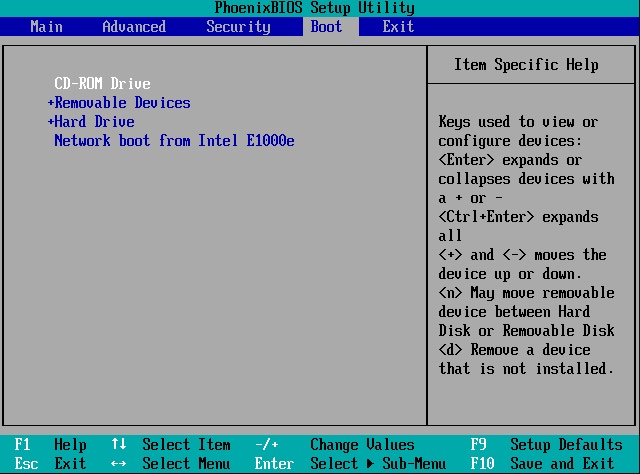
- Click on your intended USB device, and move it to the top of the list by using the arrow keys or the +, – keys.
- Save and Exit.
When you boot it the next time, your computer will follow the boot sequence you have set in your BIOS or UEFI firmware settings.
3. Properly configure the USB device
To successfully boot, more recent operating systems require a compatible USB. If you don’t do so, your BIOS won’t be able to identify your USB drive to boot.
Hence, you have to properly configure your USB boot drive to be compatible with the operating system that you are storing. Moreover, ensure that your USB device’s generation is compatible with your computer for boot purposes.
Here are some criteria according to which you have to configure your USB boot device:
Format the USB drive to FAT32
If you are using UEFI boot mode, your bootable USB drive must be formatted in FAT32 format.
Here is how to convert your USB drive to FAT32:
- Click Win + E to access This PC.
- Right-click on the name of the USB device.
- Click on the Format option.
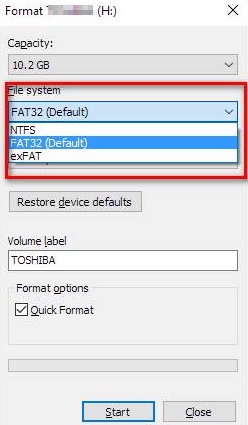
- Select FAT32 (Default) from the popup window.
- Click on Start
After the process ends, your USB drive will be converted to FAT32 format.
Use the Windows media creation tool to make the USB drive bootable
Suppose you are still having issues with Windows 10 bootable USB not being detected or showing up after trying the options that have been provided.
In that case, you can create an installation disc using the Windows 10 media creation tool that is available on Microsoft’s official website. Please proceed in the following order.
First, download the media creation tool. After that, when you run the program, select the option to “Create installation media for another PC,” and then follow the directions on the screen to do this process.
Change your Legacy BIOS Boot mode
You can get into the BIOS screen by clicking UEFI/BIOS Boot Mode or Launch Storage OpROM Policy, and then choose the appropriate mode from the drop-down menu that appears.
Here are the steps to change BIOS boot mode into Legacy:
- Restart your PC > Enter into the BIOS.
- Go to the Boot option.
- Click on UEFI/BIOS boot mode option.
- Select Legacy mode
Choose the UEFI boot option if the bootable disk uses the FAT32 file system. But if it’s NTFS, please select Legacy as the file system.
4. Disable secure boot control
If you’re using a PC with a graphics card, hardware, or operating system that doesn’t support Secure Boot, you may need to disable it.
Secure Boot ensures that your PC will only boot from firmware that has been approved by the PC’s maker. Through the PC’s BIOS options, you can usually disable Secure Boot, but the method of doing so differs from manufacturer to manufacturer.
Please contact your computer manufacturer if you cannot disable Secure Boot following these instructions.
Follow these steps to disable secure boot control:
- Restart your PC > Go to BIOS settings.
- Go to the Boot menu.
- Navigate to the Secure Boot option > Click on it.
- Select Disabled.
These should be adequate to disable the secure boot of your computer. Please contact your computer manufacturer if you cannot disable Secure Boot following these instructions.
In certain circumstances, you might be required to modify other settings inside the firmware.
For example, you might have to enable a Compatibility Support Module (CSM) to support legacy BIOS operating systems.
In addition to reinstalling Windows, you may need to reformat the hard disk using the Master Boot Record (MBR) format to use a CSM.
Conclusion
The order in which a computer searches for nonvolatile data storage devices containing program code is referred to as the boot sequence. The drive at the top of the order list receives the highest boot priority. Set the USB as your boot priority device from the BIOS.
You may need to disable Secure Boot if you’re using a PC with a graphics card, hardware, or operating system that doesn’t support it. Secure Boot may generally be disabled via the PC’s BIOS settings.
So, could you resolve the issue of your PC BIOS not detecting USB?