If you are a gamer like me, there’s no doubt MSI Afterburner is installed on your PC at this moment. Although there are more than a hundred other programs that have similar features, no software is as reliable and resourceful as MSI Afterburner.
Among the various issues, the one I find most annoying is its inability to detect and display the average, minimum and maximum FPS when I’m in a game. After hours of monotonous research, I finally stumbled upon some golden solutions.
So, stop wasting time and read this entire article to get a detailed overview of this issue and how to fix it.
Why Is MSI Afterburner not showing average FPS?
The only requirement for detecting average FPS with MSI Afterburner is to install the RivaTuner Statistics Server (RTSS) and configure it so that the application detection level is low and on-screen display support is enabled. 
Another important point people often ignore is that you must turn on the framerate option in the Monitoring tab of MSI Afterburner for the program to start detecting FPS changes in your games.
If you are worried about whether you are facing issues because you are not using an MSI graphics card, don’t.
The software is supposed to work perfectly with any graphics card, including non-MSI ones.
Check out our separate post on how to Fix MSI Mystic Light Not Working
Follow these steps to install RivaTuner Statistics Server (RTSS):
- Launch the browser and navigate to guru3d website.
- Scroll all the way to the bottom of the page and select the latest version in the Download Locations section.
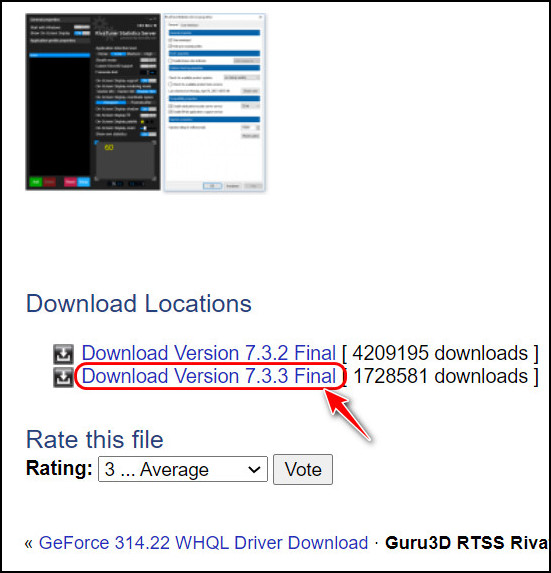
- Wait for your browser to redirect you to a different page, where you need to wait around five seconds before the setup starts downloading.
- Double-click on the downloaded file and follow the instructions to set it up on your device.
How To Fix FPS Average Min and Max Not Showing MSI Afterburner?
Since you already know a little about where this problem is possibly coming from, let’s discuss the methods to get yourself out of this frustrating situation.
Before moving forward, I should mention that if you only want to view the FPS readings of your game, it’s better to switch to an alternative program like FRAPS. MSI Afterburner’s primary purpose is to overclock CPUs and Graphics Cards.
Follow these steps to fix FPS average, min and max not showing in MSI Afterburner:
1. Turn On Benchmark Mode in Rivatuner
Before you can activate FPS counters in MSI afterburner, you need to ensure that benchmark mode has been enabled in Rivatuner.
Follow these steps to turn on benchmark mode in Rivatuner:
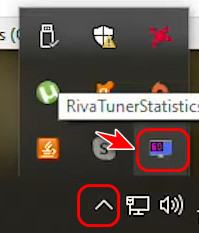
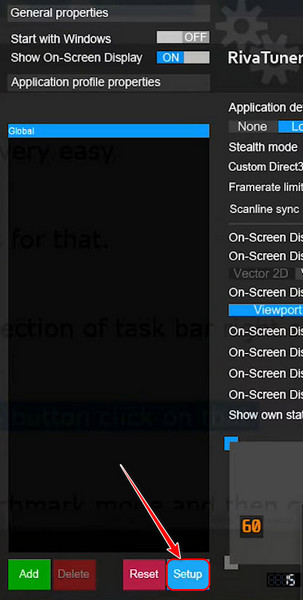
- Locate the small upward arrow icon at the bottom right corner of your taskbar, and click it. Select the Rivatuner icon from the menu.
- Click on the Setup button at the bottom once the Rivatuner program opens.
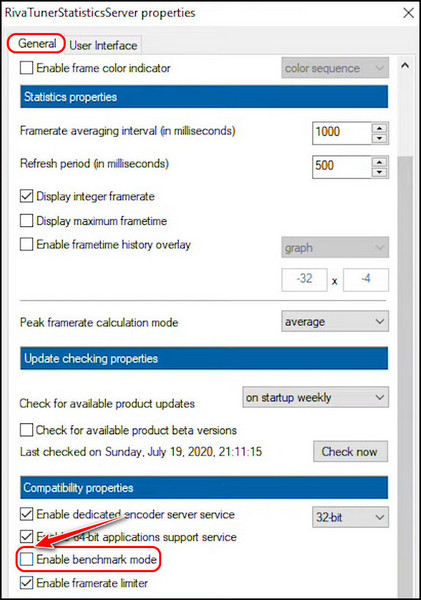
- Switch to the General tab if you are not already on it, and scroll to the Compatibility Properties section. Click on Enable Benchmark mode to make sure it’s checked.
You should immediately see the changes on your display if the MSI Afterburner is configured to show FPS. If you want to modify something, use MSI Afterburner instead of Rivatuner.
2. Enable On-Screen Display for Framerate
The framerate feature is probably turned off if you haven’t configured MSI Afterburner with basic configurations. You need to enable it manually before you can see any changes in the display.
Follow these steps to enable on-screen display for framerate:
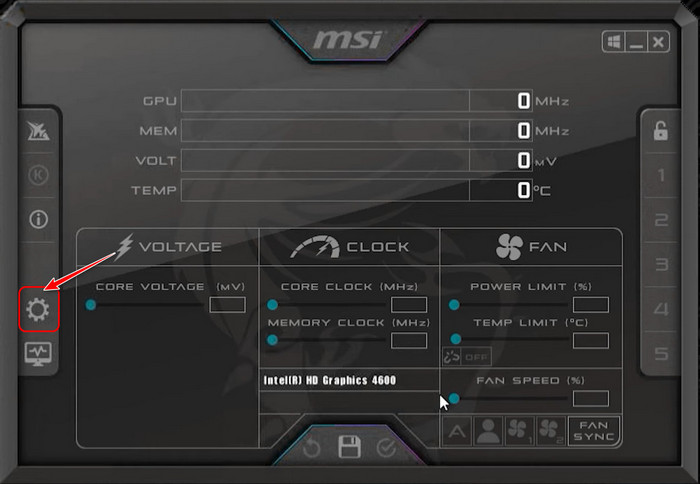
- Launch the MSI Afterburner program and click on the gear icon at the bottom left corner.
- Switch to the Monitoring tab from the navigation menu at the top. After that, scroll to the Framerate Avg option below the Active Hardware Monitoring Graphs section and click it so that a tick mark appears beside it.
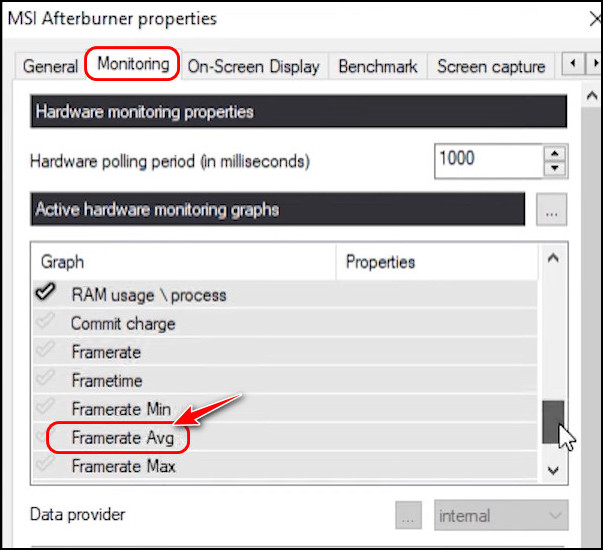
- Locate the Framerate Avg Graph Properties section below and enable the Show the On-Screen Display option checkbox.
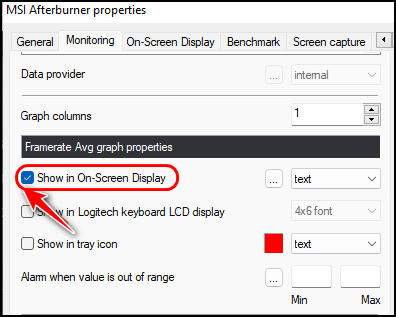
- Enable the checkbox for the Override graph name as well, and type any name for it in the text box beside it.
- Select the 3-dot button next to the Show On-Screen Display you selected earlier.

- Locate the Sizes library section below the Active layout properties Double-click on Size 0.

- Type 100 in the text box on the window and click OK.
- Set 100 as the value for Size 1 as well by following the previous steps.
Also related to this guide is how to Check Ping & Enable FPS Counter – Halo Infinite.
3. Adjust Global Benchmark Hotkeys Settings
It seems unlikely, but some other key combinations might interfere with the functionality if the shortcuts are not configured correctly.
Follow these steps to adjust global benchmark hotkeys settings:
- Launch MSI Afterburner and click on the settings icon at the bottom left corner.
- Switch to the Benchmark section and locate the Begin recording option in the Global Benchmark Hotkeys section. Click on the textbox next to it and press the Num 1 key on your keyboard.
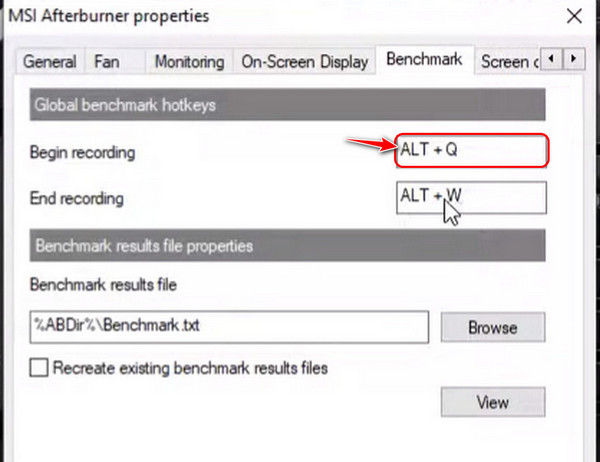
- Repeat the same thing for stop recording, but press num 2 instead of num 1.
As weird as it sounds, this actually works. It is also reported to solve FPS issues with Riva Tuner.
4. Reinstall MSI Afterburner and Riva Tuner from Scratch
If you haven’t been able to solve the problem with any of the previous solutions, there is a strong chance that some of the hardware configurations were set incorrectly and the application’s setup is corrupted.
You have the choice to go through every setting and individually set them to their default values, but that would be time-consuming and inaccurate. That’s why the best solution is to remove the existing programs and install them like new.
Follow these steps to reinstall MSI Afterburner and Riva Tuner from scratch:
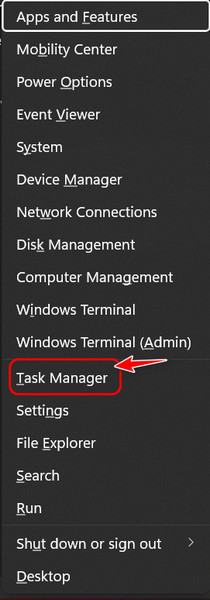
- Press the Windows and X keys at the same time to launch a context menu above the taskbar at the bottom.
- Select Task Manager from the list of options.
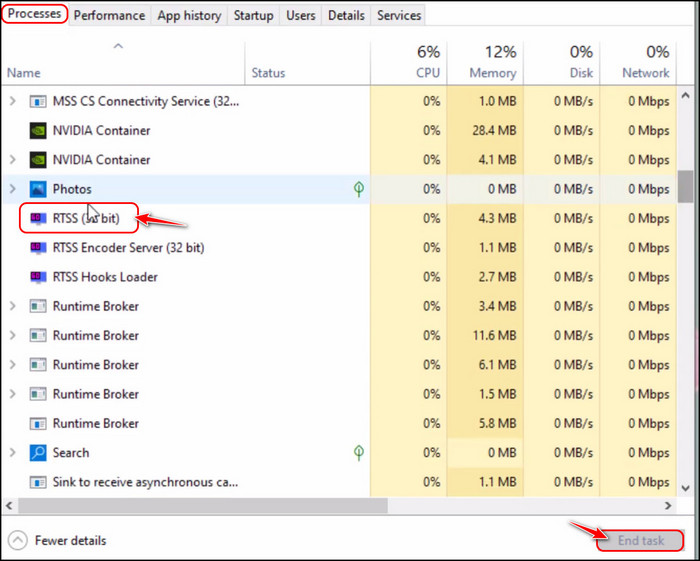
- Switch to the Processes tab from the top navigation panel. After that, locate the RTSS process in the Background Processes section and select it. Click on the End Task button to proceed.
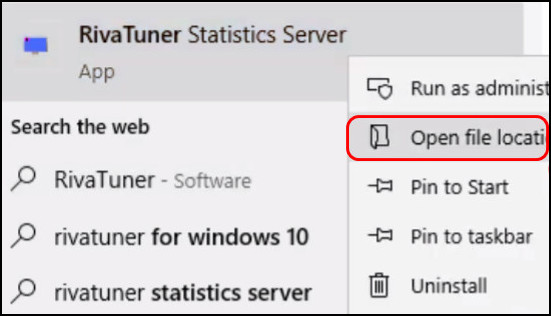
- Search for RivaTuner Statistics Server from the Start menu, right-click on it and choose Open File location.
- Double-click on the View tab at the top and enable the checkbox for File name extensions.

- Locate the RTSS.exe file in the folder and rename it to RTSSa. Make sure it doesn’t have the .exe extension.
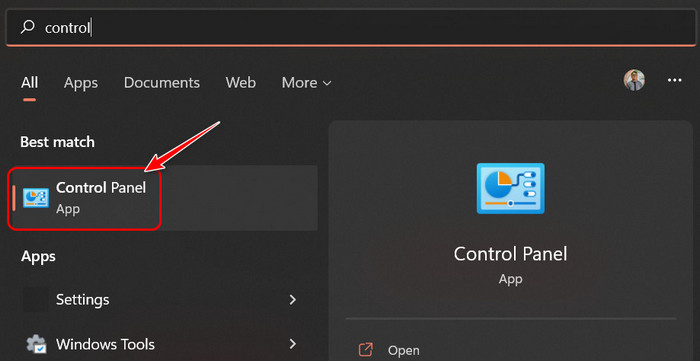
- Search for Control Panel in the Start menu and launch it.
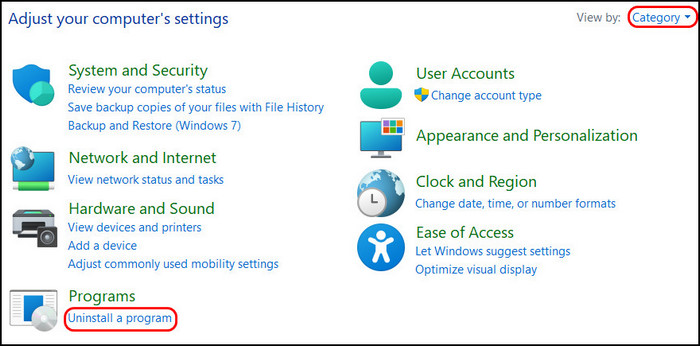
- Select the Category view from the drop-down menu at the top right corner and click on Uninstall a Program at the bottom left corner below Programs.
- Select RivaTuner from the list and click on the Uninstall button at the top menu bar.
- After uninstalling this, repeat the same steps to uninstall MSI Afterburner.
- Launch any browser and navigate to the RivaTuner download page and MSI Afterburner download page one by one and download the latest versions. Note that you should install RivaTuner before setting up MSI Afterburner.
Final Thoughts
Despite being used by more than five thousand gamers around the globe, MSI Afterburner still has some bugs that need to be fixed. That said, none of the issues I faced was a deal-breaker, and it’s still worth it because there’s no other software to rival its tweaking capabilities.
After reading about the possible causes of this issue in the first section, I suggest you use the second method to try solving your problem since it worked perfectly for me.
Let me know if any other methods worked for you in the comments below.