A nifty feature of Gmail is the spell checker. Whenever you start composing an email and make spelling mistakes, Gmail will denote it and show the correct spelling when you click on it.
But, like most things, it’s not perfect. And sometimes, the feature that’s supposed to fix our spelling needs fixing itself.

Lucky for us, repairing the Gmail spell check doesn’t take much effort. You just need to check a few things; that’s all. And here, I’ve explained everything that you need to check.
In this article, I’ve described why your Gmail spell check has stopped working and provided all the step-by-step processes that will resolve this issue indefinitely.
Let’s begin!
Why is Spell Check Not Working on Gmail?
Although the Gmail spell checker is enabled by default and runs smoothly most of the time, on some rare occasions, it doesn’t function correctly.
Spell check stops working on Gmail mainly because the spell check feature is disabled, your browser is having problems regarding cache, or the browser extensions might be corrupted.
Below I’ve listed all the factors that can stop Gmail spell check.
Here are the reasons why Gmail spell check is not working:
- The Gmail server is down.
- The spell check feature is disabled in Gmail.
- The spell check feature is disabled in the browser.
- Corrupted cache files in the browser.
- Installing unnecessary extensions in the browser.
- Outdated browser.
- Bad internet connection.
Now that you know why Gmail is not correcting your spelling mistakes, let’s fix them one by one.
Check out the easiest way to Fix Gmail Error 007
How to Fix Spell Check Not Working on Gmail
To fix the spell check feature on Gmail, you just need to check a few settings in your Gmail account and the browser. You’ll also need to check the Google server, disable extensions on the browser and remove cache files.
Below I’ve described all the methods step by step that you need to do to solve the spell check problem on Gmail.
Here are the steps to repair spell check not working on Gmail:
1. Check Gmail Server
Sometimes, the spell check stops working due to the Google server and has nothing to do with your configuration. If Google’s Gmail server faces an outage or is disrupted, the spell check functionality won’t work correctly, and you cannot do anything but wait.
So, before you start changing your settings, open Google Server Status and check if the Gmail server is currently available or not.
2. Enable Spell Check from Gmail Settings
The Gmail spell checker is turned on by default. But if you have accidentally disabled it, then this feature is obviously not going to work. Let’s check and make sure the Gmail spell-checking functionality is enabled.
Here’s how to turn on spell check from Gmail settings:
- Open your browser and log in to your Gmail account.
- Click on the Gear icon at the top right and select See all settings.
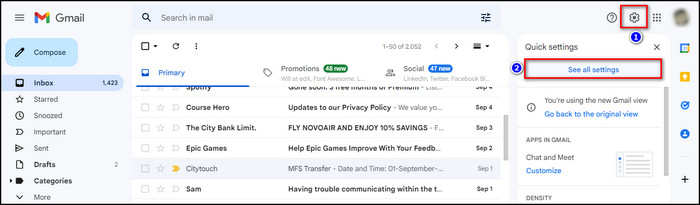
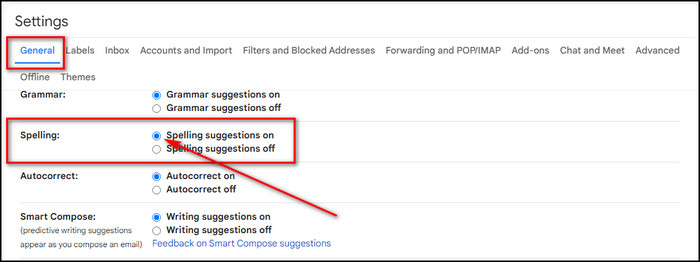
- Go to the General tab.
- Make sure Spelling suggestions on is checked in the Spelling section.
3. Enable Spell Check in the Browser
The spell check feature might not work for you in Gmail because this functionality is turned off in your browser. You need to go to the browser settings and enable it.
Here are the steps to enable spell check in Google Chrome:
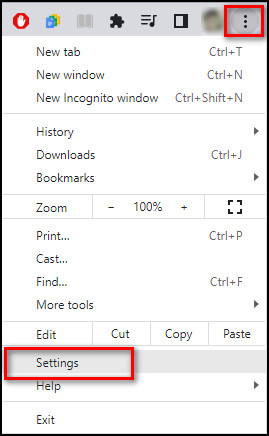
- Open Google Chrome.
- Click on the three dots at the top right and choose Settings.
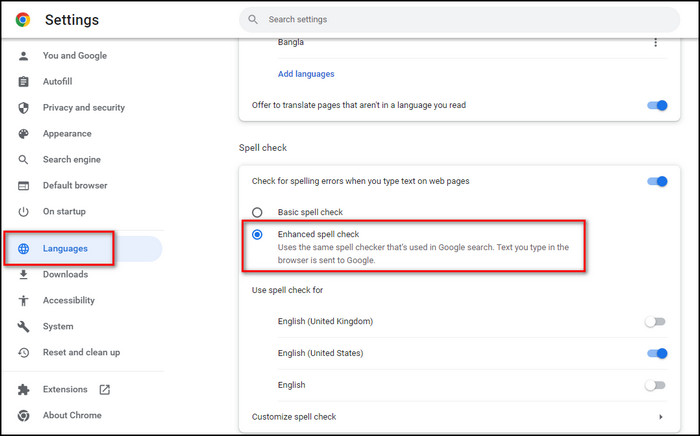
- Select Languages from the left sidebar and check Enhanced spell check.
Here’s the procedure to enable spell check in Microsoft Edge:
- Launch Microsoft Edge.
- Click on the three dots at the top right corner and select Settings.
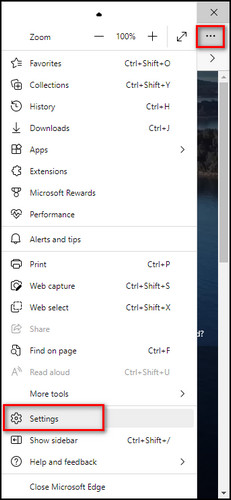
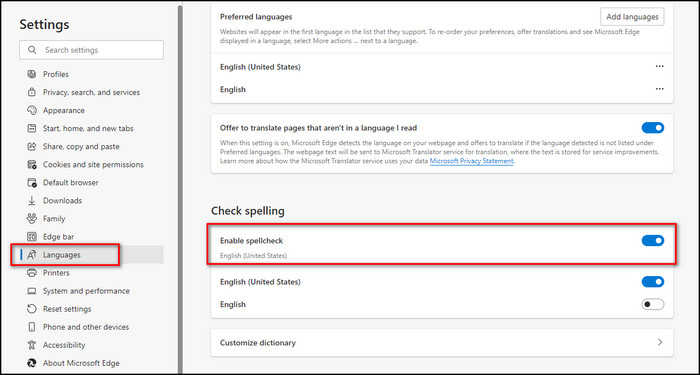
- Move to the Languages tab from the left sidebar and toggle on Enable spellcheck.
Here’s how to enable spell check in Mozilla Firefox:
- Open Mozilla Firefox.
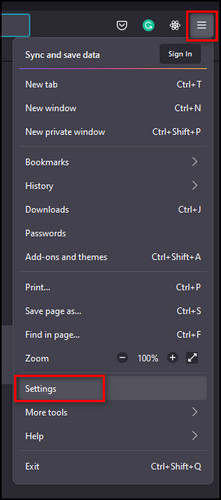
- Open application menu from the top right corner and select Settings.
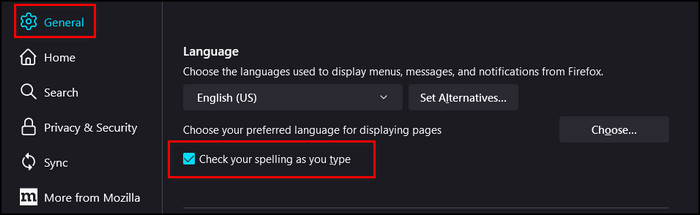
- Go to the General tab and ensure Check your spelling as you type is checked.
4. Enable Spell Check when Composing Emails
You can turn on the spell check feature when you start writing your email. Gmails provides this ability in the Compose email options.
Here are the steps to turn on spell check when writing an email:
- Open your browser and sign in to your Gmail account.
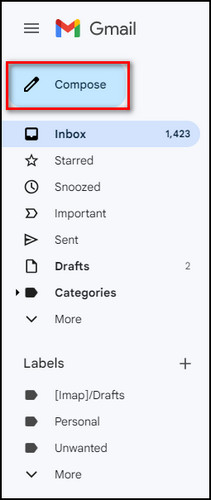
- Click on the Compose button.
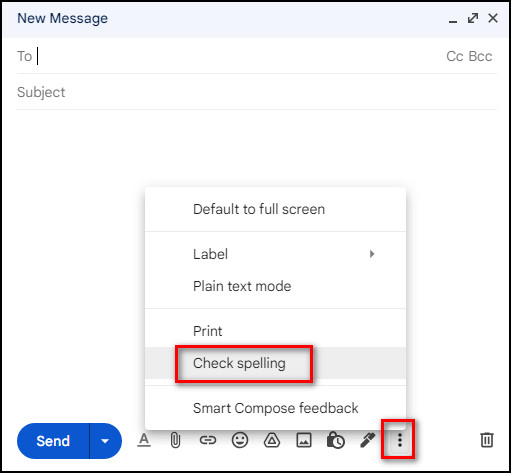
- Click the three dots at the bottom right and choose Check spelling.
After these steps, start composing your email and any spelling errors you make while writing it; the Gmail spell checker will automatically fix them.
5. Restart Browser
Occasionally, your browser gets bugged out and cannot perform regular tasks like the spell checker stops working on Gmail. In that case, you need to close your browser and reopen it.
Before reopening the browser, ensure it’s not running in the background. If you don’t know how to do that, just follow the steps below.
Here’s how to restart the browser correctly:
- Close your browser by clicking the X icon at the top right.
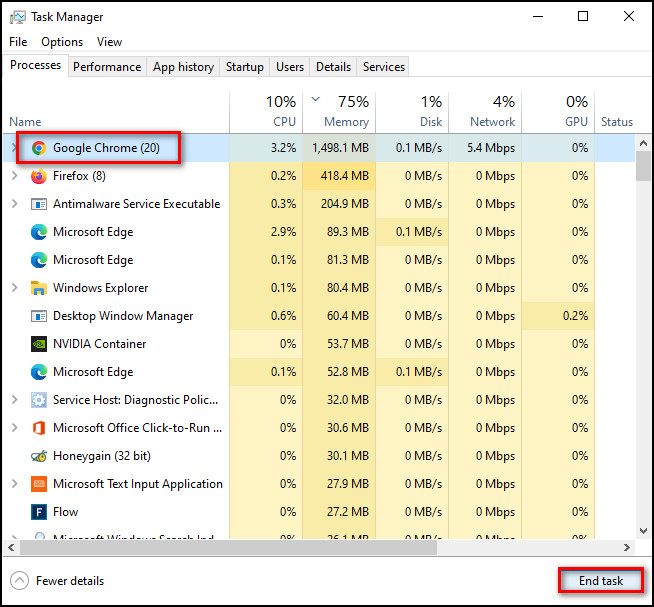
- Press Ctrl + Shift + Esc to open Task Manager.
- Choose the browser if it’s running and click on End task.
- Relaunch the browser.
6. Restart Device
When you start your device, some processes might not run correctly, causing bugs or glitches in your applications; as a result, the Gmail spell checker stops working. And restarting your device will fix it.
Note that you need to actually Restart your computer, not Shut down, and turn the device back on again.
Because of the Fast Startup feature, all the processes may not stop when you simply shut down and turn the PC back on immediately, and the corrupted process may still be running.
But restarting will completely eliminate all the operations, and everything starts from scratch.
But, before that, you can check our latest post on gmail Is not showing email content on iPhone.
7. Turn off Browser Extensions
Sometimes when spell checker extensions such as Grammarly or LanguageTool are running in the background, Gmail’s default spell checker might not work.
So, if you want to use the native spell checker for Gmail, you need to disable the spell-checking extensions in your browser. Also, it’s a good idea to disable the extensions you don’t often use to run the browser without any problems.
Here’s the procedure to disable extensions in Google Chrome:
- Launch Google Chrome.
- Click the three dots at the top right to open the browser menu.
- Select More tools > Extensions.
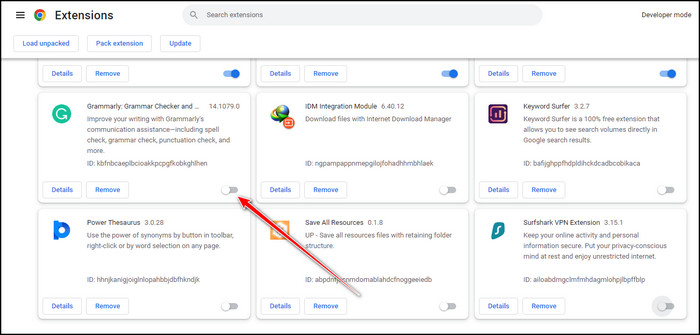
- Toggle off the extensions you don’t want.
Here are the steps to disable extensions in Microsoft Edge:
- Open Microsoft Edge.
- Click the three dots at the top right and select Extensions.

- Choose Manage extensions.
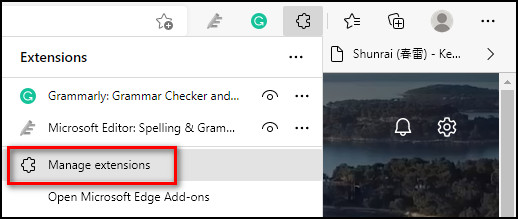
- Toggle off the extensions you don’t need.
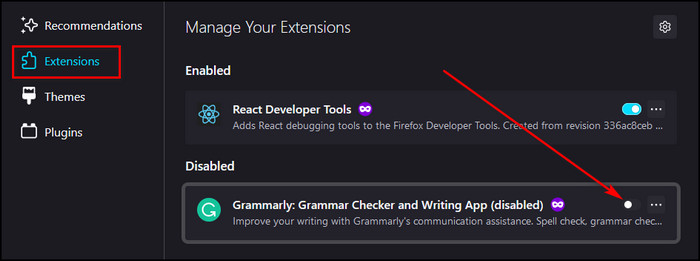
Here’s how to disable extensions in Mozilla Firefox:
- Start Mozilla Firefox.
- Open application menu from the top right corner and select Add-ons and themes.
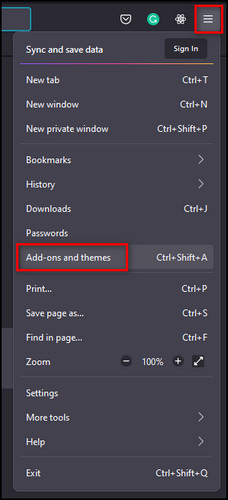
- Go to the Extensions tab and toggle off the extensions you don’t use.
8. Check Internet Speed
If your internet connection is too slow, the Gmail spell checker won’t function correctly and thus will be unable to check your spelling.
Go to speedtest.net or fast.com and check your download and upload speed. If it is less than 100kbps, the Gmail spell-checking feature won’t work.
9. Update Browser
If you are using an older browser version, you might not be able to use some features that the browser offers, such as the spell check feature. Just update your browser, and this will get resolved.
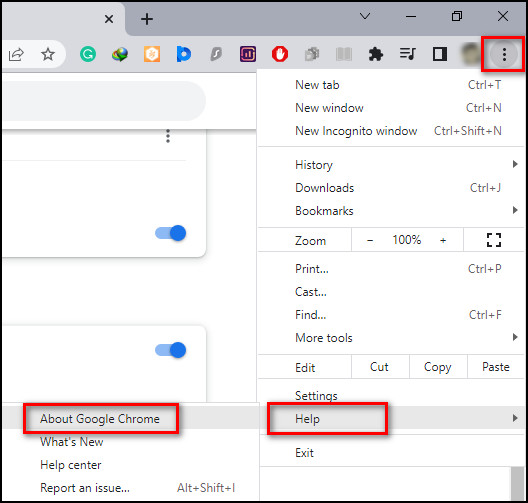
Here’s how you can update Google Chrome:
- Start Google Chrome.
- Click on the three dots at the top right.
- Select Help and click About Google Chrome.
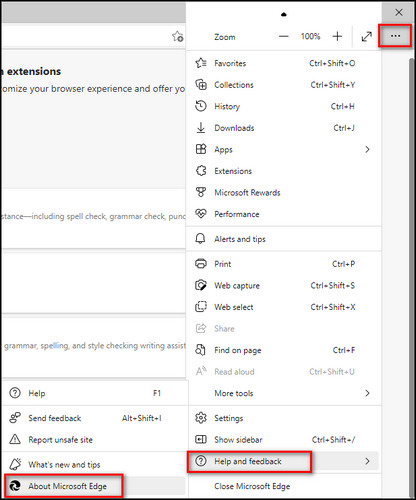
Here are the steps to update Microsoft Edge:
- Open Microsoft Edge.
- Click on the three dots at the top right corner.
- Select Help and feedback > About Microsoft Edge.
Here’s the procedure to update Mozilla Firefox:
- Launch Mozilla Firefox.
- Open application menu from the top right corner.
- Go to Help > About Firefox.

Now your browser will check for an update, and in case an update is available, your browser will download and install it automatically. Otherwise, it’ll say the browser is up to date.
10. Reset Browser
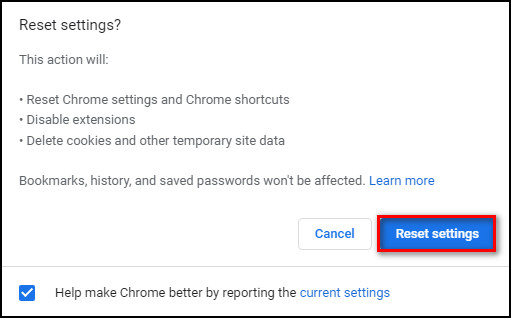
If you are still unable to use the spell checker, as a last resort, you can reset your browser. It will reset your browser settings and shortcuts, disable all the extensions, and delete cookies and temporary site data.
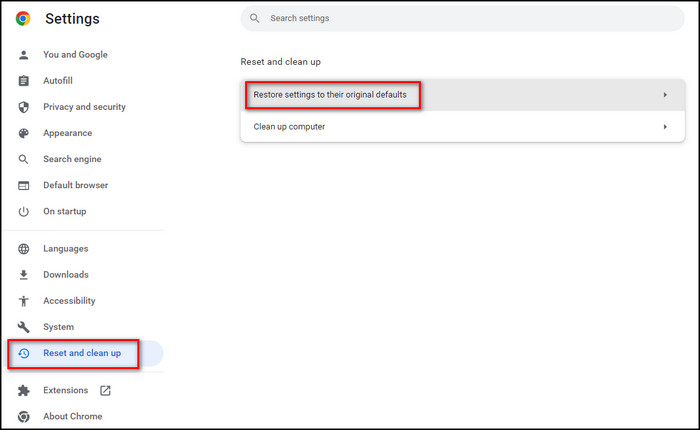
Here’s how you can reset your Chrome browser:
- Open Google Chrome.
- Click on the three dots at the top right and select Settings.
- Choose Reset and clean up from the left sidebar.
- Select Restore settings to their original defaults.
- Click on the Reset settings button.
Here are the steps to reset Microsoft Edge:
- Launch Microsoft Edge.
- Click on the three dots at the top right corner and choose Settings.
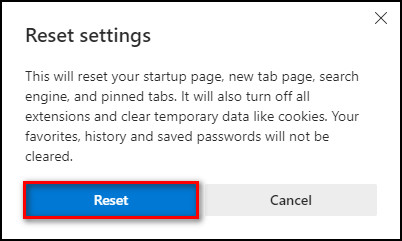
- Go to Reset settings > Restore settings to their default values.
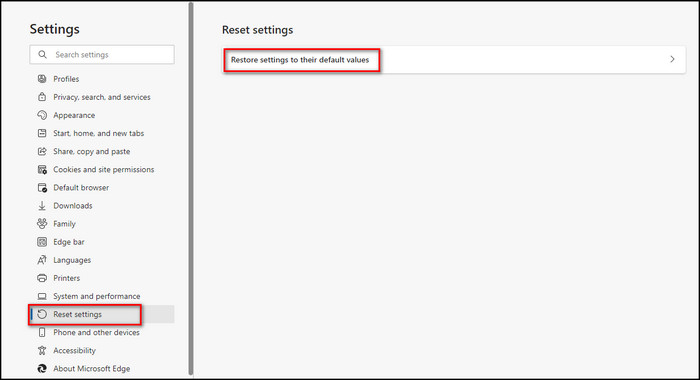
- Click on the Reset button.
Here’s the procedure to reset Mozilla Firefox:
- Start Mozilla Firefox on your device.
- Open application menu from the top right corner and select Help.
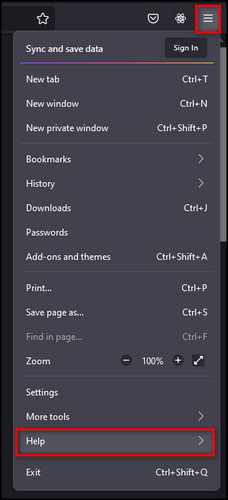
- Choose More troubleshooting information.
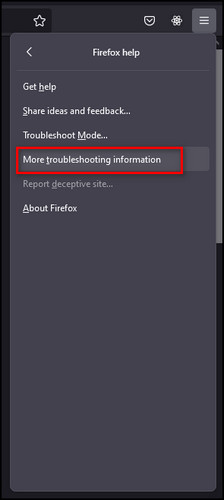
- Select Refresh Firefox.
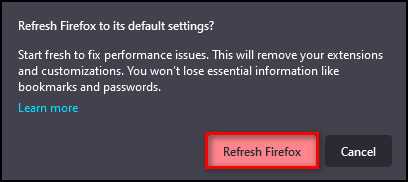
- Click on the Refresh Firefox button.
Remember that resetting the browser won’t remove your bookmarks or favorites, history and saved passwords on the browser.
Follow our guide to fix Gmail 78754 failure on Outlook
FAQs
How do I turn on auto spell-check in Gmail?
To turn on auto spell-check in Gmail, you need to log in to your Gmail account, select Settings > See all settings > General and check Spelling suggestions on in the Spelling section.
Why is my Gmail not spell checking?
Your Gmail is not spell checking because the spell check feature is disabled. You have to open your browser, sign in to your Gmail account, select Compose, click the three dots at the bottom right and choose Check spelling.
Why is my Google spell-check not working?
Your Gmail spell check is not working might be because the Gmail server is disconnected, the spell check feature is disabled in Gmail or the browser, using slow internet or using old browser versions.
Final Thoughts
As mis-spelling is a general human problem, a spell checker is a must-need feature when writing emails. And Gmail’s built-in spell-checker is the absolute best.
But as good as the feature is, it is still prone to problems and sometimes stops working.
And here, I’ve described exactly what you need to do when Gmail spell check doesn’t work and have explained why you are facing this issue so you won’t have to encounter this problem again.
Let me know if you have any other problems regarding other email features. See you in the comment section.