Advanced Host Controller Interface, or AHCI, is a technical standard for an interface that enables software to communicate with Serial ATA devices. It transfers data between system memory and SATA storage.
What it does is enhance the transfer speed of your SATA devices tremendously. So, enabling AHCI is the right choice.
It should have been enabled in most modern devices by default. But if you are using some machine that does not have this turned on, you can do so manually.
Here I will let you know the methods to activate AHCI on your Windows 11. You just need to follow my instructions carefully, and you will enable it successfully without any issues.
So, let’s get started.
Follow our guide to fix blue screen on Windows 11.
How to Enable AHCI on Windows 11
Enabling AHCI in Windows 11 is no tough job. You only need to follow my instruction very carefully, and you will be able to enable it in no time.
Here’s what you have to do to activate AHCI:
1. Turning on AHCI using Registry Editor
You can easily enable the AHCI by using the Registry Editor. Though the Registry Editor is a sensitive place to mess with, as long as you follow my instructions to the point, you can easily turn AHCI on.
Follow the steps to turning AHCI on using Registry Editor:
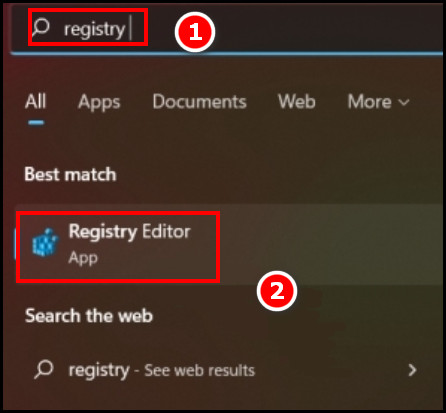
- Click on the Search icon located in the middle of your taskbar. A search bar will open.
- Type Registry, and you will see the Registry Editor come up as the best match. Click on it.
- Navigate to the following location
HKEY_LOCAL_MACHINE\SYSTEM\CurrentControlSet\Services\iaStorV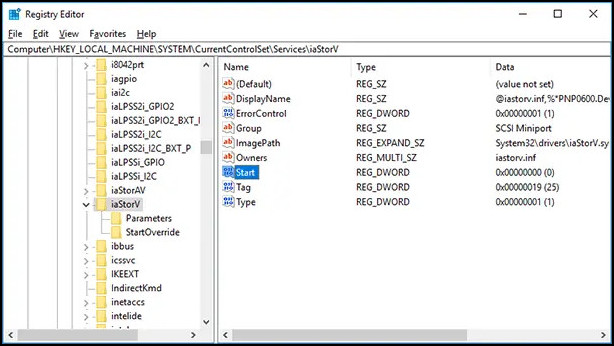
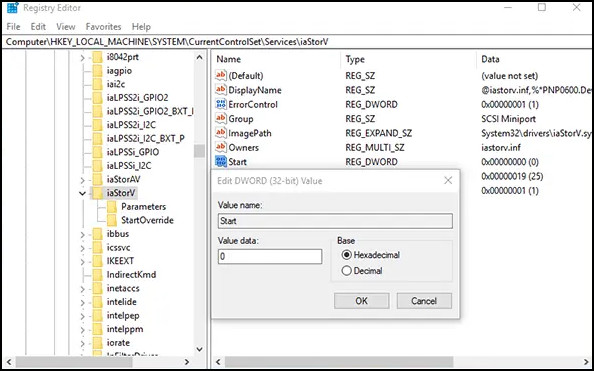
- Look for the DWORD named Start and double-click on it to modify its value to 0.
- Select OK. The DWORD value will be changed to 0. You will need to change some more key values.
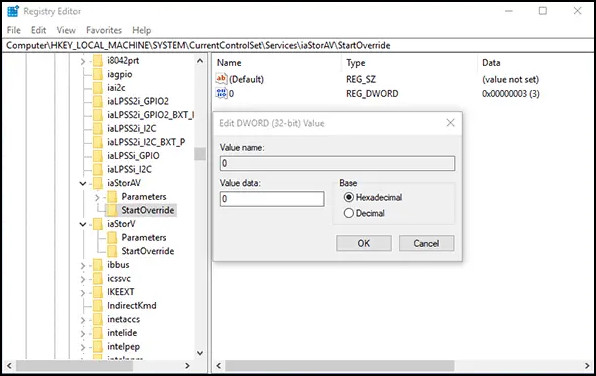
- Navigate to HKEY_LOCAL_MACHINE\SYSTEM\CurrentControlSet\Services\iaStorAVC\StartOverride and double-click on the 0 DWORD. Set the value to 0.
- Go to the location HKEY_LOCAL_MACHINE\SYSTEM\CurrentControlSet\Services\storahci and again set the Start DWORD value to 0.
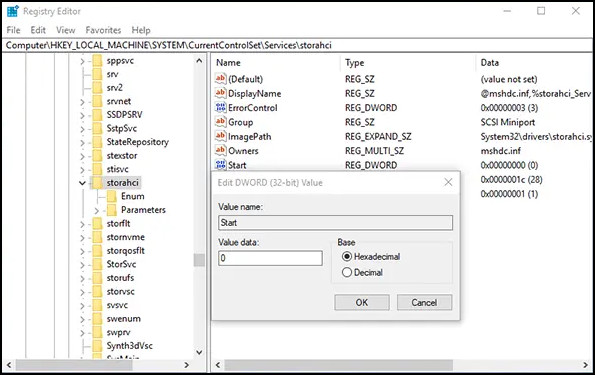
- Check if you have the folder named StartOverride in the following location HKEY_LOCAL_MACHINE\SYSTEM\CurrentControlSet\Services\storahci\StartOverride. If there is any folder with the same name, change the File named 0’s value to 0.
After doing the modifications as instructed, close Registry Editor and do a restart, you might need to ruen on AHCI from the BIOS settings after the restart. In the BIOS, you will find SATA Configuration in Storage Configuration. Change it from IDE to AHCI.
Finally, you will be able to enjoy the real SATA storage speed.
Also, check out our separate post on how to fix PC won’t go to sleep in Windows 11.
2. Use CMD
The Command Prompt can also be used to turn on AHCI in your Windows 11. You only need to copy and paste the commands I provide and press enter. It will do the trick.
Follow the steps to use CMD:
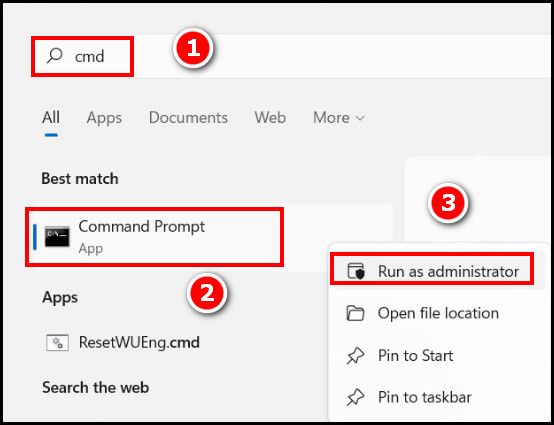
- Click on the search icon located in the middle of your taskbar. Type CMD and you will see the Command Prompt under the best match section.
- Right-click on the CMD and select Run as administrator. This will open CMD with administrator privileges.
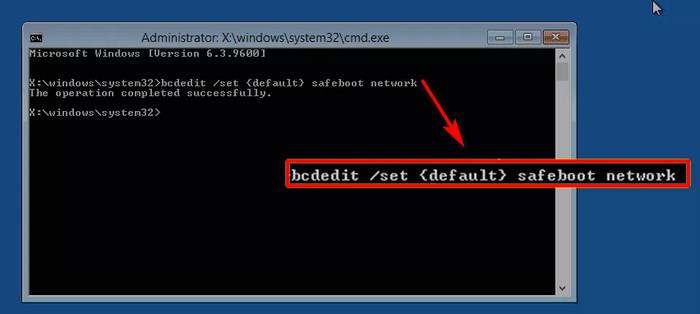
- Type the following in the command prompt bcdedit /set {current} safeboot minimal and press enter.
- Wait for a few minutes, and then restart your computer.
- Enter the BIOS setting by pressing the keys designated by your manufacturer before windows boots. Usually, it is the delete key, the Esc key or the F5 or F12 keys. Yours might be different based on your manufacturer and motherboard model.
- Search for Advanced options once you have successfully entered BIOS.
- Make the SATA Mode into AHCI. Save the settings and reboot your windows.
This will turn your AHCI mode on for the SATA devices, and you will experience the new height from your old hardware.
Here is the easiest guide to fix drag and drop not working on Windows 11.
Why Do You Need to activate AHCI?
You need to activate AHCI to reduce your booting time tremendously. Additionally, you can use your SATA device more effectively as the read/write speed will increase and only be capped at the SATA broadband, and you will be able to enjoy the hot plugging of hard drives.
If you are not using AHCI by default, chances are that you are using the older IDE. It takes much longer to communicate between your computer and the SATA storage, which results in a longer boot time. Using AHCI solves the long-time boot issue.
Again, your SATA storage has a certain read/write speed, and it also depends on the communication system that is AHCI.
The hot-plugging feature is the addition of more components to the running computer without any significant changes to the machine or processes. This feature comes with the new SATA mode.
Also read on how to update drivers on Windows 11.
FAQs
How do I turn AHCI mode on?
You can turn AHCI mode on by Registry Editor or Command Prompt. But either of the options might require you to change the mode from the BIOS. If that is the case for you, you need to find SATA mode from the BIOS under advanced settings. Then switch the mode to AHCI.
Can I initiate AHCI after installation?
Yes, you can initiate AHCI mode after the installation of windows. But you have to follow the proper steps to do so. You might need to either change the Registry keys or enter commands in the Command prompt to start the process, as I mentioned in the article.
Should SATA mode be AHCI or IDE?
While the IDE as SATA mode is more stable for older hardware, it is much slower compared to the AHCI mode. Modern hardware comes with the AHCI mode enabled. This is due to the speed AHCI mode offers even with the same SATA devices. So, the SATA mode should be AHCI.
Is AHCI faster than IDE?
Obviously, AHCI is much faster than IDE. IDE is much older and slower than the AHCI mode. This is why most of the newer technologies support AHCI mode. Though all they do is transfer data between system memory and storage, the newer one has much more efficient and faster data transmissibility due to the construction of the interface itself.
Conclusion
Users without AHCI mode running windows 11 will notice that their performance speed is much lower than those with the enabled ones. If you do not have AHCI enabled, you should check from the BIOS and turn it on to your compatible system.
The methods mentioned above might seem overwhelming. But I tried my best to keep it simple. Still, if you did not understand any part of the above, feel free to contact me in the comment section below.