A well-developed game can transform us into a beautiful imaginary world. But to play a game, you must have a graphics card that can process the game data and gives you a fantastic gaming experience.
 However, there is a question circulating on the internet: Do you need to uninstall GPU drivers before installing a new game card? The answer is NO; you don’t need to uninstall old Nvidia or AMD drivers if you install a new graphics card.
But if you are facing issues on your computer for not uninstalling the old drivers, read this article. Because here, I easily explain what you should do when you want to install a new graphics card.
So without skipping, read the entire article to find out.
Let’s start!
What are GPU Drivers & Why are GPU Drivers Necessary?
GPU driver is the medium that connects your Graphics Card to your computer’s Operating System. For your graphics card to operate smoothly, you just need a GPU driver that can read out your game card configuration to the PC’s system; hence you can play the game.
When you don’t have a GPU driver, you can see lag, buffer, stutter, frame drop and game crash issues on your computer.
So, Why are GPU Drivers Necessary?
Yes, GPU drivers are necessary for the PC and the Graphics card. NVIDIA or AMD graphics drivers are developed in such a manner that it connects the computer to its graphics card.
GPU drivers are also necessary to optimize gaming performance. When you don’t install your specific graphics drivers into your PC, you can experience some lag, buffer, frame drop or game crash issues.
So to avoid that, you must install the most updated and suitable GPU drivers on your PC.
You may also like to read about best graphics settings for Genshin Impact.
Do I Need to Uninstall Old Graphics Drivers Before Installing New Card?
If you want to install a new game card of the same company, like Nvidia to Nvidia or AMD to AMD, then you don’t need to uninstall the old drivers. But if you are replacing the Nvidia with AMD, you must uninstall the old driver and install the new one for smooth performance.
But sometimes, when replacing the Nvidia card with a new and powerful Nvidia graphics card, you can experience some issues. Because often old versions of GPU drivers are not optimized enough to give you boosted performance.
So it is safe to uninstall the drivers and install the new ones in those cases.
Therefore, for your assistance in this article, I am displaying several easy and quick methods to uninstall and install the Nvidia and AMD drivers.
Read them properly to solve your GPU installation issue.
How to Uninstall Nvidia Drivers on Windows 11/10
Uninstalling the Nvidia drivers is a very straightforward process. You can easily uninstall the Nvidia driver from the Control Panel or the Device Manager on your computer. Also, you can use a third-party uninstaller application to uninstall the Nvidia driver from your computer.
Let’s see how you can use those options to complete your uninstalling process.
Here are the steps to uninstall Nvidia drivers on Windows 11/10:
1. Use the Control Panel
With the help of the Control Panel, you can easily uninstall the Nvidia drivers. Let’s head over and see the steps briefly below.
Here are the steps to use the control panel to uninstall the Nvidia drivers:
- Move to the Search box.
- Type the Control Panel and select it.

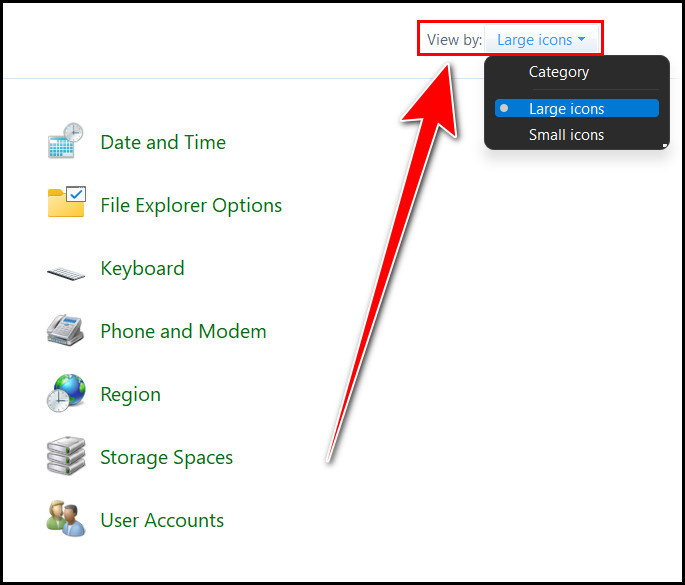
- Change the View by section to the Large icons option.
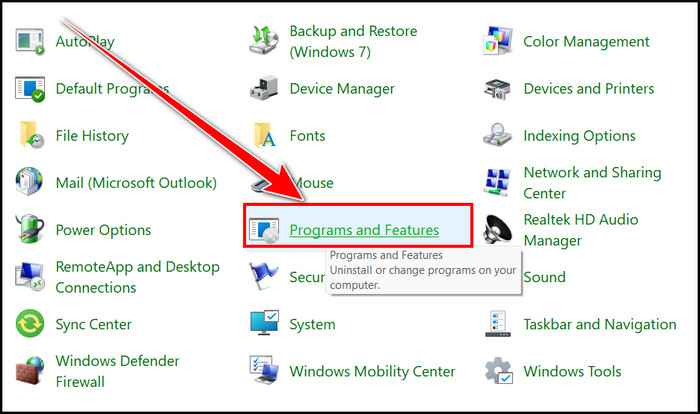
- Click on the Programs & Features option.
- Right-click on the NVIDIA Graphics Driver and choose the Uninstall/Change option.
- Select YES when the confirmation window appears.
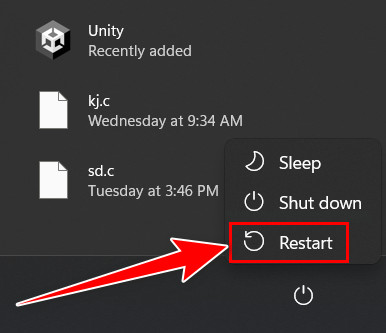
- Restart your computer.
See how easy it is to uninstall the Nvidia drivers using the control panel.
2. Use the Device Manager
Using the Device Manager, you can quickly uninstall the Nvidia graphics drivers. Follow the instructions to complete the process without hassle.
Here are the steps to use the device manager to uninstall the Nvidia drivers:
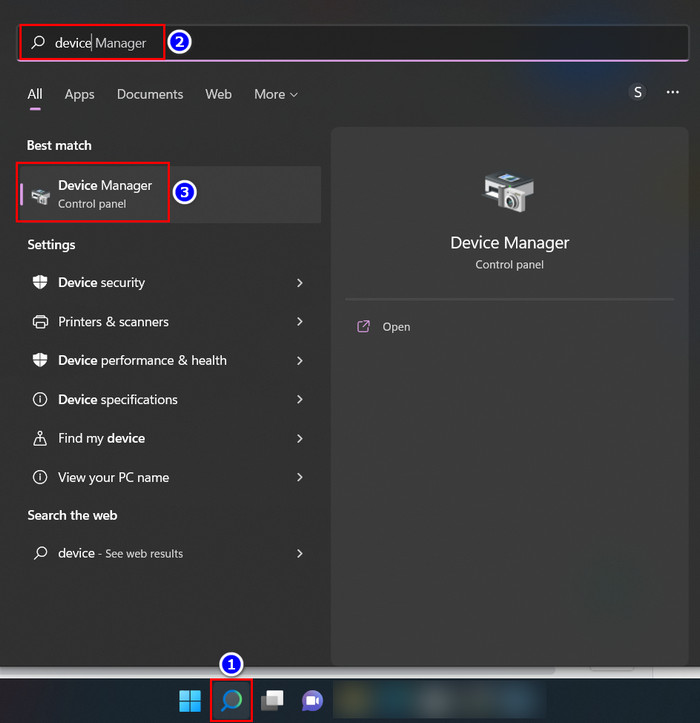
- Navigate to the Search box and type Device Manager, and select it.
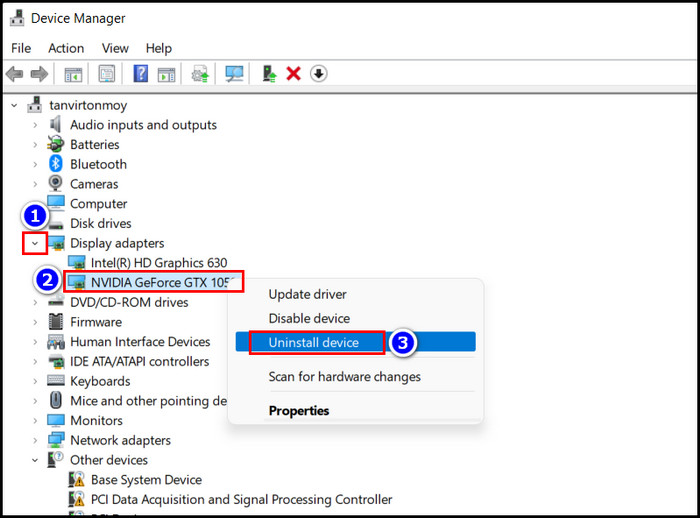
- Expand the Display adapters section.
- Right-click on the NVIDIA Geforce GTX driver.
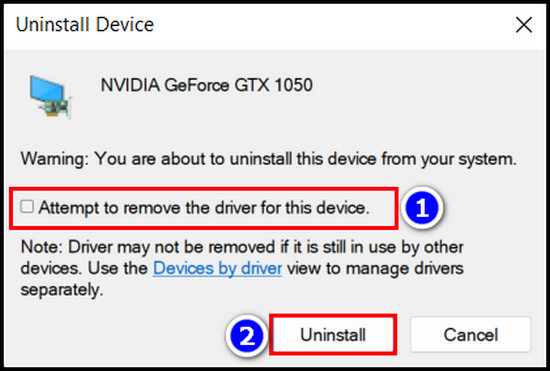
- Choose the Uninstall device option.
- Click on the Uninstall box when the confirmation window appears.
- Restart the PC, and you are all set.
With these simple yet effective steps, you can easily uninstall Nvidia drivers from your computer.
3. Use a Third-Party App
I displayed two quick methods above; those two ways are swift to operate. Although I don’t recommend it, you can use a third-party uninstaller to remove the Nvidia drivers from your computer if you want.
Here are the steps to uninstall the Nvidia drivers using a third-party app:
- Download apps such as IO Bit Uninstaller or Driver Easy.
- Launch the application.
- Find the drivers under the NVIDIA name.
- Select the Uninstall option when you find them.
- Restart your computer.
The selected drivers will be gone from your device.
Also, check out our separate post on why do graphics cards have memory?
How to Uninstall AMD Drivers on Windows 11/10
You can uninstall the AMD drivers using the Control Panel or Device Manager on your Windows 11/10 computer. Using the AMD Cleanup Utility Software, you can also remove or delete your AMD drivers from your Windows PC without facing any difficulties.
Read on to find out how you can complete those actions without difficulties.
Here are the steps to uninstall AMD drivers on Windows 11/10:
1. Use the Device Manager
Device Manager can help you to uninstall AMD drivers from your computer. Read along to find out the process.
Here are the steps to use the Device Manager to uninstall the AMD drivers:
- Move to the Search option, write Device Manager, and click on it.
- Click and expand the Display adapters section.
- Right-click on the AMD driver, which is installed on your device.
- Select the Uninstall option.
- Choose the Uninstall option from the pop-up window.
- Restart the PC.
The installed AMD drivers are removed from your computer.
2. Use the Control Panel
You can use the Control Panel utility to uninstall the AMD drivers. The whole process is displayed beneath for your assistance.
Here are the steps to apply Control Panel to uninstall the AMD Drivers:
- Go to the Search box.
- Type Control Panel and choose it.
- Select the View by section and change it to the Large icons option.
- Choose the Programs & Features tab.
- Right-click on the AMD Driver and choose the Uninstall option.
- Click on YES when a pop-up window appears.
- Reboot your PC.
You will notice that AMD drivers are uninstalled from your PC.
3. Use the AMD Cleanup Utility Software
It is always safe to use AMDs own Cleanup Utility Software to uninstall its drivers. Follow the instructions to complete the process.
Here are the steps to use AMD Cleanup Utility Software to uninstall the drivers:
- Download the AMD Cleanup Utility Software from their official website.
- Launch the software.
- Enable the Safe Mode.
- Click on the OK button when the AMD Driver Uninstall window pops up after some time.
- Restart the computer after removing every AMD Driver.
These simple steps will remove every AMD Driver from your device.
How to Install a New GPU on your Computer
If you have already brought a new GPU, installing it into your computer casing is not a big deal. You can simply complete this process with some quick steps. I will assist you in that matter, so follow through.
Here are the steps to install a new GPU on your computer:
- Remove the old GPU drivers from your device, as I have already shown in the above segment.
- Open your PC casing.
- Find the PCI-E slots from the bottom side of the motherboard.
- Install the GPU in the best-suited spot.
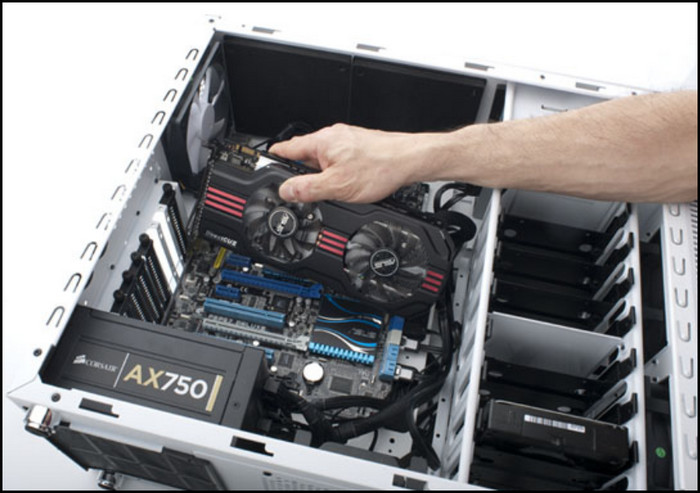
- Line up the GPU with the PCI-E slot and press the GPU toward the Motherboard until you hear a click.
- Clip the PCI-E slot sometimes, which is automatic.
- Close the computer casing.
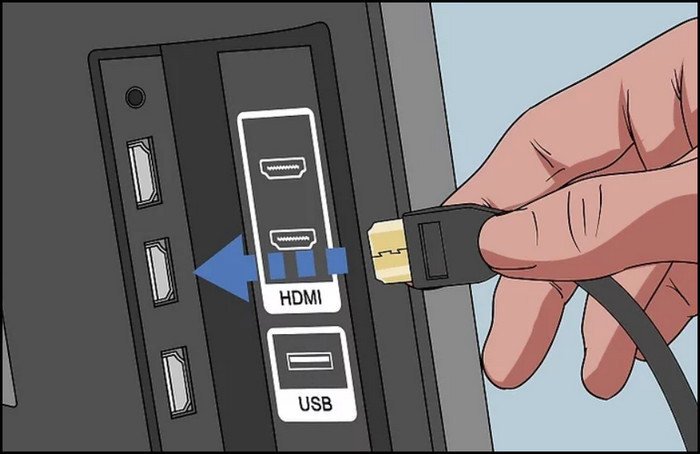
- Connect the HDMI cable and Reboot your computer and you are all set.
With the help of these simple steps, you can easily install a new GPU on your computer. Read on to learn how to install GPU drivers on your PC and complete the installation process.
How to Clean Install GPU Drivers on your PC
After installing a new GPU, it is time to set up new Drivers on your computer. Follow the instructions to learn how to Clean Install GPU drivers.
Here are the steps to clean install GPU drivers on your computer:
- Go to the Official Website of NVIDIA or AMD to download the driver.
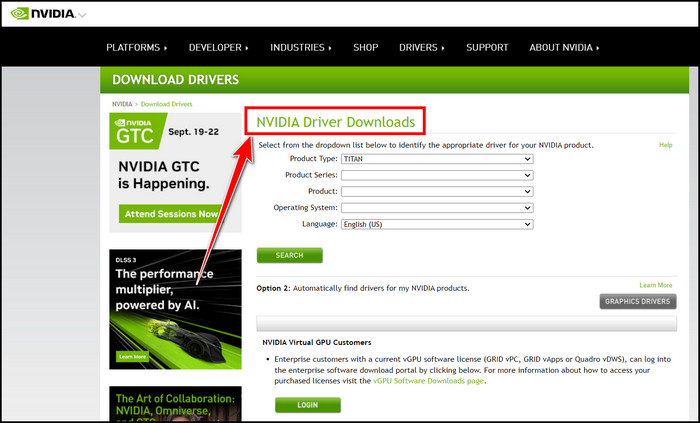
- Fill up your GPU information.
- Download the appropriate updated drivers.
- Install the Drivers when the installation window appears on your screen after the download is finished.
- Restart the PC.
You are all set; the new GPU drivers are installed on your PC.
Follow the next segment if you want to know what to do when you have already installed the new GPU card on your computer before uninstalling the old drivers.
What if You’ve Already Installed your GPU into your PC?
You can face issues such as Game Crush, Pixel Drops and Buffering when you install your new GPU before uninstalling the old drivers.
If that’s the case with you, you can manually download NVIDIA GeForce Experience or AMD Radeon Graphics driver installer. With these two applications, you can Check for updates and download them to resolve the problem.
Also, you can manually update the old GPU drivers to do that read on the stated methods.
Here are the steps to update the GPU drivers with Device Manager:
- Go to the Search option.
- Type and select the Device Manager program.
- Expand the Display adapters section.
- Right-click on the GPU driver and choose the Update driver option.
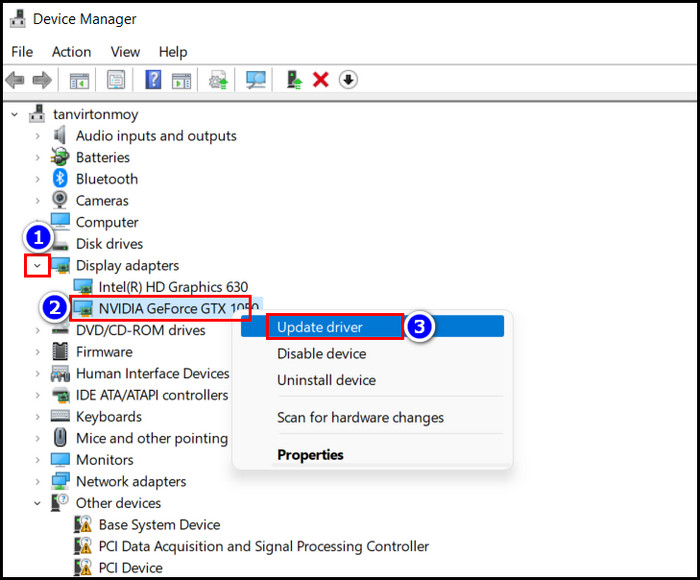
- Update the GPU driver and wait for installation.
- Reboot your computer.
Check whether your issue is resolved or not. If it persists, you can use the Scan and Troubleshoot PC option to solve your problem.
FAQs
Should I uninstall the graphics driver before installing the new one?
No, it is not mandatory to uninstall the graphics driver before installing a new GPU. But to be safe, you can uninstall the old driver, install the new GPU, and then install the new Drivers to achieve the best experience.
What happens if I uninstall the Nvidia graphics driver?
When you uninstall the Nvidia graphics driver, your system will return to the default system graphics driver.
Can I just install a new graphics card?
Yes, you can install a new graphics card on your PC and run it within a few minutes. But when you face some graphics-related issue, you can update the driver with Device Manager to resolve it.
Wrapping Up
Do you really need to uninstall drivers before installing a new GPU? If that’s your question, you have already found an easy and clear explanation in this article.
Additionally, I demonstrate how you can uninstall GPU drivers and install them easily in this content. Also, for your assistance, there is some extra explanation about the topic I stated here. So read and follow them properly to learn and solve your issue.
Let me know your afterthoughts in the comment below.