Groups in Outlook are a great way to send emails or share files with a large group. For example, if you manage 60 people from manufacturing, groups make mailing all of them at once easier for you.
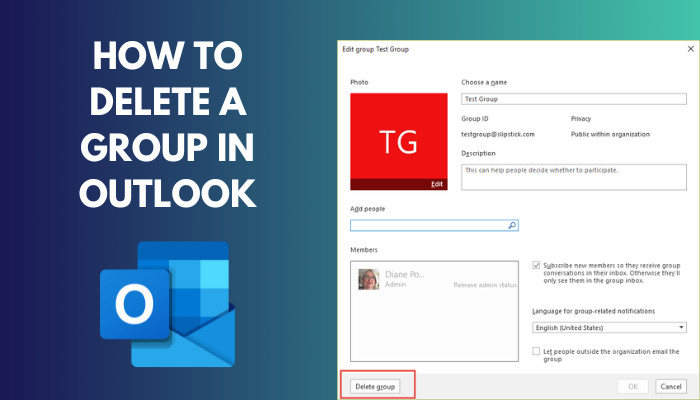
But what if a group that you created is no longer in use? To avoid sending the wrong emails to this group, you should delete the group.
Today I will lay out the steps to delete groups in Outlook in this article. Without further ado, let’s get started.
Check out our separate post to solve Outlook rules not working in Windows 10.
How to Delete a Group in Outlook
You can find the Groups below Inbox in the left pane in Outlook. When you expand it, the list of groups you created is opened. From here, you can remove the group.
Important to know: Before removing a group, ensure the emails, calendars and shared files are backed up. When you delete a group, you remove everything present there.
Here are the steps to delete a group in Outlook Desktop and 365 versions:
Outlook 2013 up to 2021
The recent versions of Outlook share similarities in the interface with the versions going back to Outlook 2013. The placement of the Groups and the steps to delete them are the same.
Here I will be using Outlook 2016 as a reference. If you are on a different version, just follow along.
Here are the steps to delete Groups in Outlook 2016:
- Open Outlook from the Start Menu.
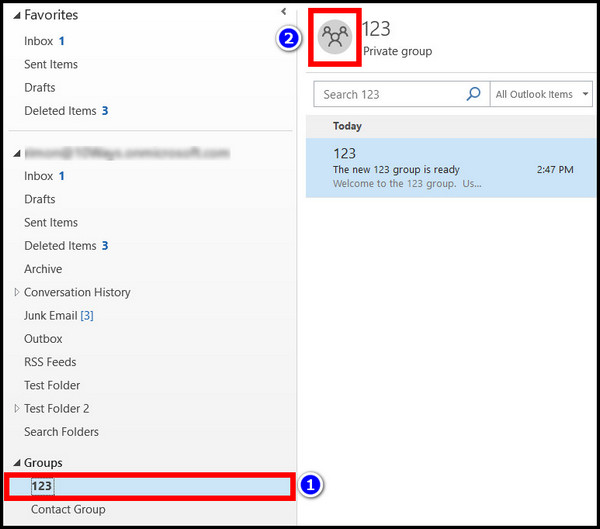
- Expand the Groups tab present in the left pane.
- Select the group you want to remove and click on the group icon.
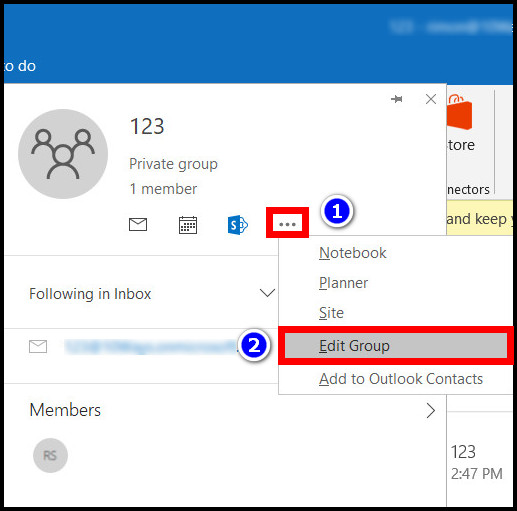
- Click on the three-dot menu and go to Edit groups.
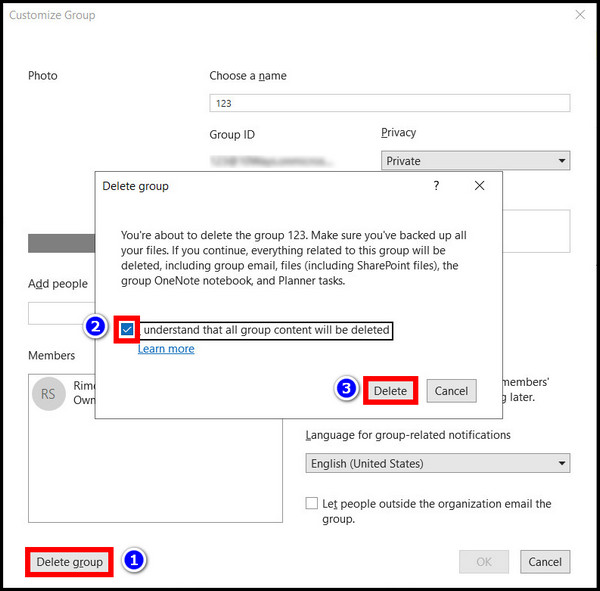
- Press the Delete group button at the bottom of the Edit Group window.
- Accept the confirmation in the dialog and press the Delete button.
The selected group in Outlook is removed. If you expand the Groups tab now, you will not see the specific group present.
Go through our epic guide on how to recall an email in Outlook.
Outlook 2010 and earlier
In Outlook 2010, you can create Contact Groups using the members from your contacts. Similarly, removing them, too, is fairly straightforward.
Let’s take a look.
These are the steps to remove Groups in Outlook 2010:
- Open Outlook 2010 from the Start Menu.
- Click on Contacts from the left pane.
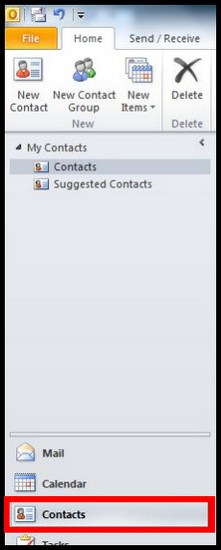
- Click on the group to highlight it.
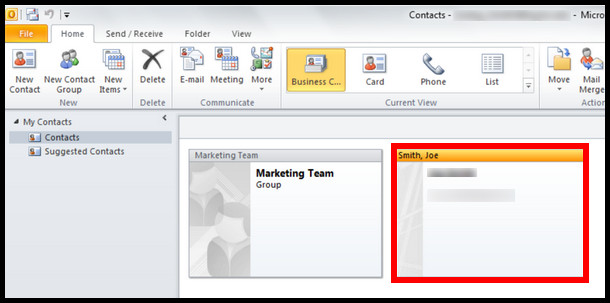
- Press on Delete at the top ribbon menu.
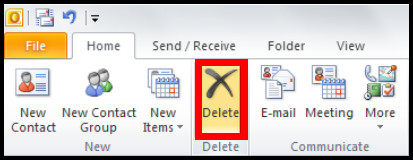
The group is removed along with all its contents.
You may also like to read: add Outlook calendar to Apple calendar.
Outlook Web App
The Outlook Web App, also known as OWA, provides you the option to delete existing groups. These steps are also similar to other desktop applications.
Here is how you can delete groups in Outlook Web App:
- Go to Outlook.com.
- Enter your email and password.
- Click on Groups to expand and select the group to delete.
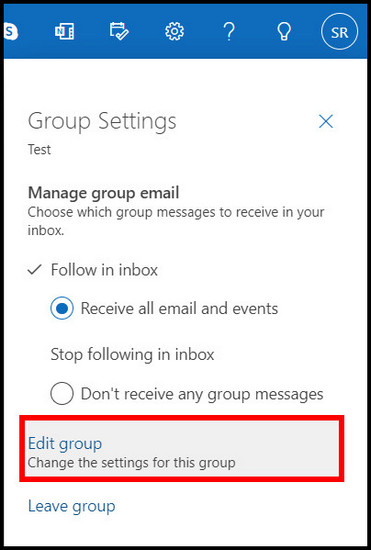
- Press on the three-dot menu and click Settings.
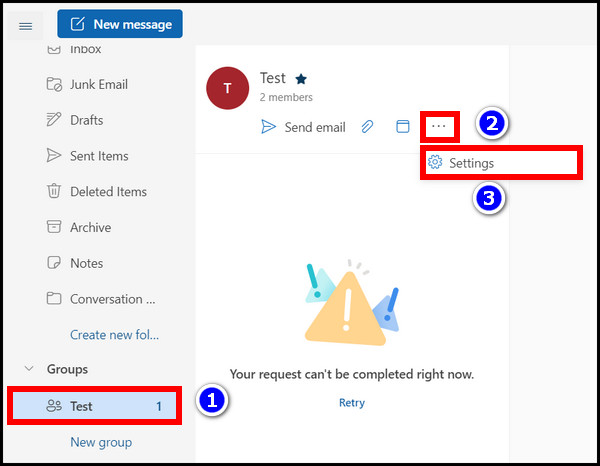
- Click on Edit Group in the right tab.
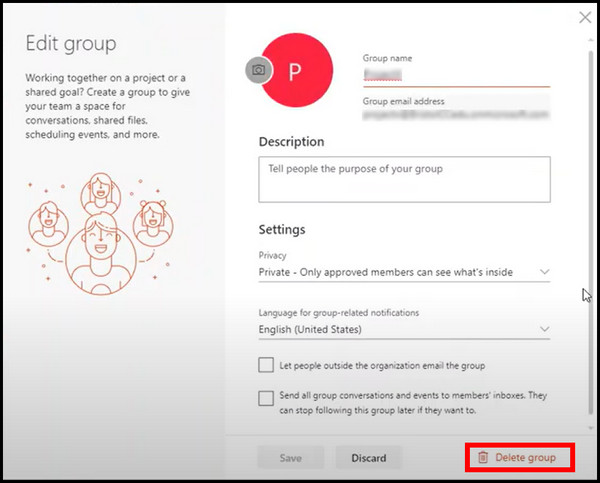
- Press the Delete Group button at the bottom.
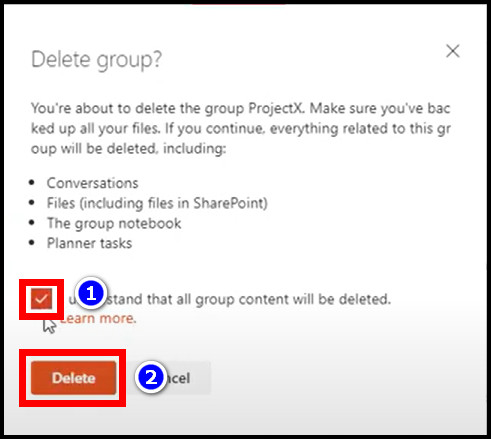
- Accept the confirmation and press Delete.
Now click on the Groups tab again. You will not see the previous group anymore.
Read more on how to add rules in Outlook.
Office 365
Office 365 is similar to Outlook OWA. If you have used this in the past, you will feel right at home.
You can also delete groups from Outlook 365. However, the administrators and group owners can only remove the groups.
To do this, you have to go to the Office 365 Admin Panel.
These are the easy steps to delete groups from Outlook 365:
- Go to the Office 365 Admin Panel.
- Log in using your credentials.
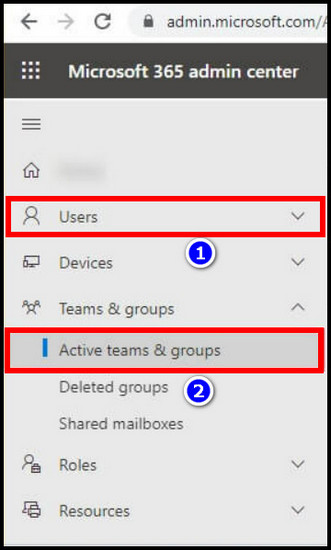
- Go to Active teams and users present under the Users tab.
- Click on the group you want to remove.
- Press the three-dot menu and click on Delete team.
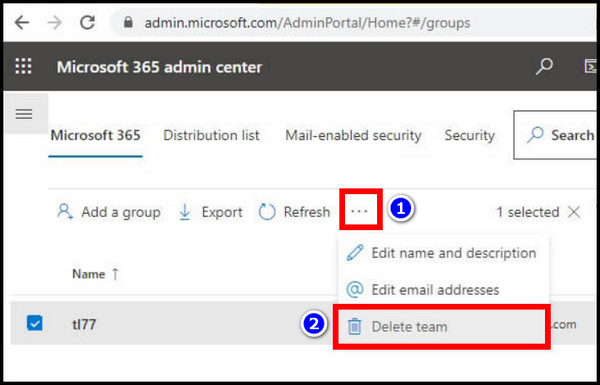
- Check the tickbox next to the confirmation and select Delete.
Once you follow the above steps correctly, the selected group will not show up anymore.
Follow our guide on how to use advanced find in Outlook.
Frequently Asked Questions
How do I permanently delete a group in Office 365?
You can permanently delete a group from the admin panel of Office 365. To do that, go to Users > Active team and groups > Select group > Select Delete under more options.
How do I add and remove an Outlook group?
To remove an Outlook group, go to Group > Select group > Edit Group > Delete.
Final Words
So, in this article, I have explained how you can remove a group in Outlook. I have covered all the versions that support this process.
Removing a group that is no longer used is good practice. For the safety of your organization’s data, you should delete the groups and their members.
That’s all for today. I hope you learned something new about Outlook here.
Signing out.