Are you tired of counting your zillion of list items? Or have you tried putting a unique ID for each list item?
Don’t worry. After going through this article, you will be able to add and show unique IDs for your SharePoint list and library items. Moreover, I will show the procedure for creating a custom ID.
Tag Along!
What is a Unique Identifier, and How Does It Work?
A unique identifier in the SharePoint list is a unique ID that SharePoint automatically generates for each item in a list. The ID generated for each item is unique, which won’t apply to other items even after deleting the previous items. You can enable it for your lists and documents.
The working procedure of the unique identifier is straightforward. Once the unique identifier is enabled, SharePoint generates a unique number (ID) for each item added to a SharePoint List or Library.
To learn more about the differences between lists and libraries, check another post about the difference between SharePoint lists and libraries.
Consider the following discussions to understand the advantages and disadvantages of the unique identifier or the ID column.
Benefits of the Unique Identifier
- Each ID number is unique, and they aren’t recycled ever. Once SharePoint assigns an ID number for an item, it will never be used for other items, even after removing the main item.
- ID numbers increment automatically. If the ID number of the first item is 1, the second one will get the number 2 and keep increasing for each item.
Drawbacks of the Unique Identifier
- The unique ID numbers only apply to the specific list or library, which restricts you from referencing it on other lists or libraries.
- Tracking documents using the ID column only works within the same document library. It will restrict you from tracking documents of other sites or libraries.
How to Add and Display a Unique Identifier (ID Column)
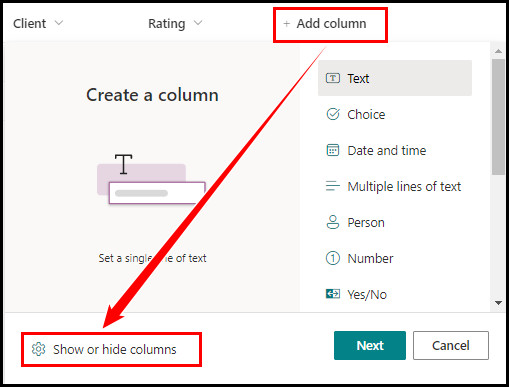
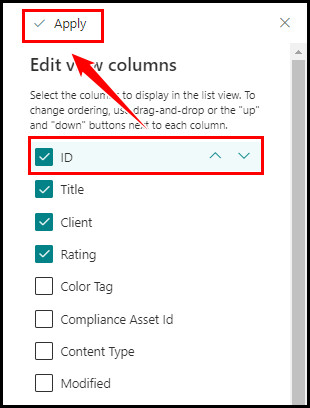
If you want to display a unique identifier for your list items, go to your list and navigate to +Add column > Show or hide columns. In the new window, check the ID field checkbox and select Apply from the top bar. You can adjust the position using the arrow signs next to the ID field.
The settings and procedures differ slightly depending on the SharePoint view (Modern and Classic). Check the following methods for step-by-step instructions.
Here are the steps to create and display a unique identifier in SharePoint:
- Open SharePoint and go to your list.
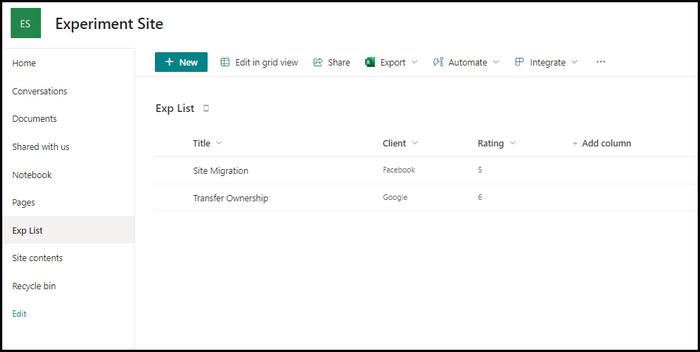
- Click the +Add column and select Show or hide columns from the context menu.
- Check the ID field checkbox and select Apply. Use the arrow sign to adjust the field position.
- Click the All Items and choose Save view as to save the changes.
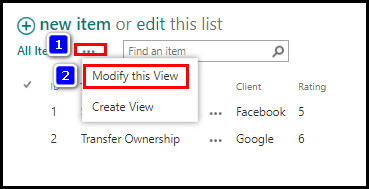
- Open your SharePoint list and switch to the SharePoint Classic View.
- Click the horizontal three dots next to All Items, and select Modify this View.
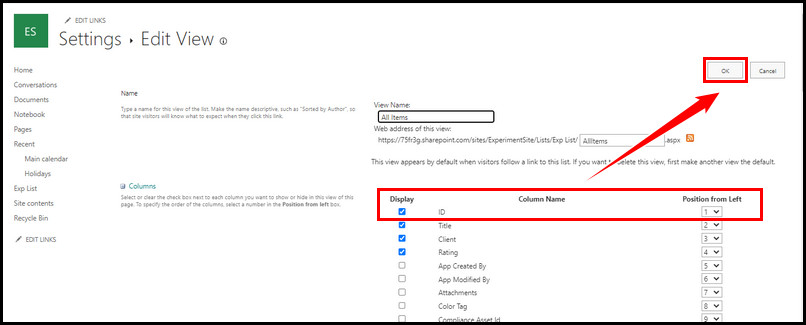
- Check the ID field checkbox, adjust the position, and select OK to save the changes.
After performing the above steps, you can see the column ID in your SharePoint list. Moreover, you can change the settings and position anytime.
To create a custom ID for your SharePoint lists or libraries, add a new column, change the formula, select the Single line of text for the Data Type, and Click OK. Then move to Power Automate, create a new flow, and connect it with the existing list or library.
With a few modifications to the flow, you can quickly set up the automated procedure. For brief instructions, go through the following procedures.
Follow the subsequent process to create a custom ID for lists or libraries:
Set Up the List
- Click +Add column, choose Number, and click Next.
- Name it as Increment Number and click Save.
- Click +Add column again, select See all columns type, and click Next.
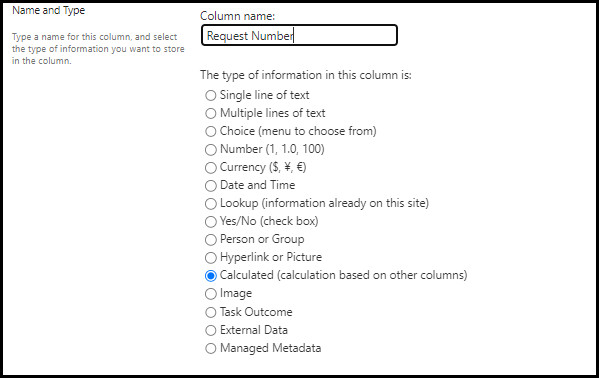
- Name it as Request Number, and select Calculated (calculation based on other columns).
- Add =”1000″&[Increment Number] in the formula field, and select Single line of text for the Data Type. Change the value of “1000” according to your need.
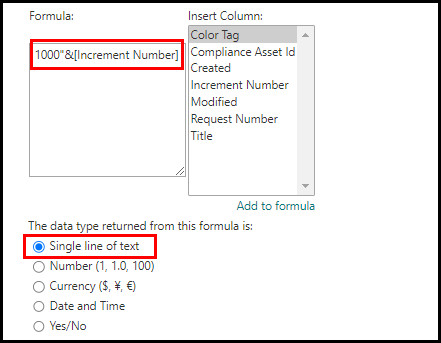
- Click OK to save the changes.
Create the Flow
- Go to Power Automate.
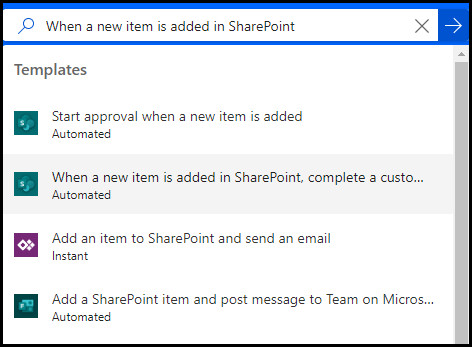
- Search for When a new item is added in SharePoint, complete a custom action, and select the template.
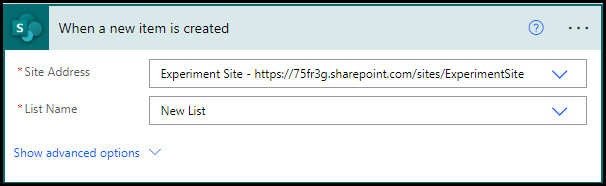
- Select your SharePoint Site address and List name from the dropdown menu.
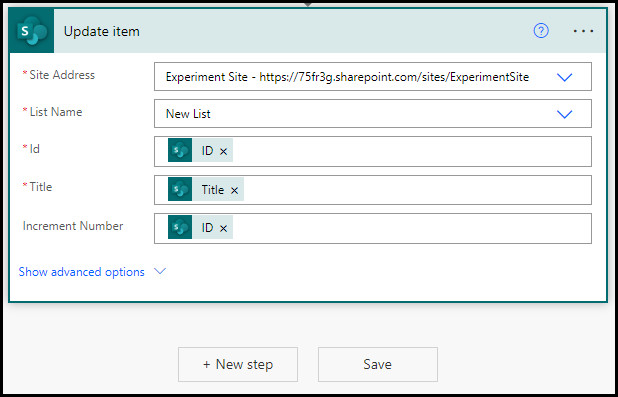
- Click + New step, search for update item, and select the update item action.
- Add Site Address and List Name.
- Ensure the includes the following fields set.
- Id: ID
- Title: Title
- Increment Number: ID
- Click Save to complete the flow.
Once you successfully create the above flow, whenever you create a new item for that list, it will automatically increase the Request Number field.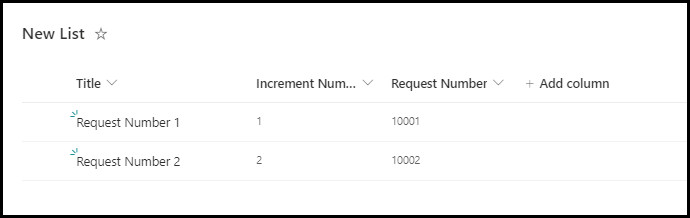
How to Rename Unique Identifier Column
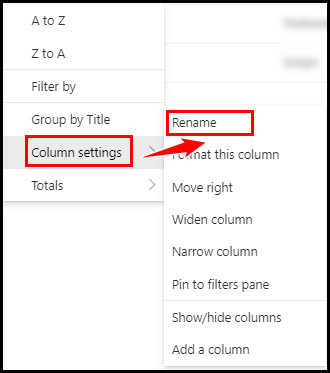
By default, the unique identifier column name is ID. If you find this name boring or misleading, you can change it whenever you want. Click the ID header, then go to Column settings > Rename. Type a new name in the Rename Column box and click Save to apply the changes.
Sometimes, you may be unable to edit columns in the SharePoint list. Check out another post on why you can’t edit columns in the SharePoint list.
Go through the following procedure to update or change the default ID column name.
Here’s how to rename the unique identifier column:
- Click the ID column header.
- Navigate to Column settings > Rename.
- Enter a new name for the column.
- Click Save to update the name.

It will instantly rename the ID column to the new name you set for that column. Use this method for renaming all your list columns to represent the column field with a proper name.
Frequently Asked Questions
Can I use the document ID feature to display Unique ID fields?
Yes, you can use the document ID feature to display a unique ID for your documents. Navigate to Site Actions > Site Settings > Site collection features. Locate Document ID Service and click Activate to turn on the document ID feature.
Can a SharePoint list generate a unique ID?
Yes, the SharePoint list can generate a unique ID for each item on the list. The ID is unique for each item, and other items will never be able to use the same ID.
What is SharePoint item ID?
SharePoint item ID is a unique feature for lists and libraries. It automatically generates a custom ID number for each SharePoint list item.
Wrap Up
Using the unique identifier in SharePoint list and libraries, you can create a custom list to track purchase orders, help desk tickets, risks, action items, etc.
Creating a unique custom ID is easy to accomplish. Use the Power Automate application to create a flow that can trigger an action for each list entry.
Need more information regarding the unique identifier feature of SharePoint? Let me know in the comment below.