Users use Microsoft Word heavily for text-writing documents. But over time, MS Word has grown with multiple features like various formats and layout designs, the option to insert screenshots, create flowcharts, and so on.
If you have to explain long sequential steps of a task, there is nothing better than visualizing the process & relationship with a flowchart.
In this article, I will guide how you can make an easy flowchart diagram in Microsoft Word 2021.
Let’s dive in.
How to Create a Flowchart in Microsoft Word without Template
A flowchart illustrates the straightforward process if you want to provide actionable information in a Word document. MS Word has a built-in option to create & arrange workflow, process, or decision-making diagrams.
You can manually use basic symbols to produce your own Word flowchart template. Or you can also use SmartArt, which comes with Word. SmartArt is a ready-made flowchart template to create a flowchart in Word on Windows 10 or 11. The SmartArt section is discussed in the later part of this article.
Here are the ways to build a flowchart in Microsoft Word with basic symbols:
1. Create a New Blank Document
Run your Word Document. To make the flow diagram simple and easy, make a blank document page. Usually, when you first launch Word, you will get the option from there. If MS Word is already open, click on the File tab from the top left corner > New > Blank Document.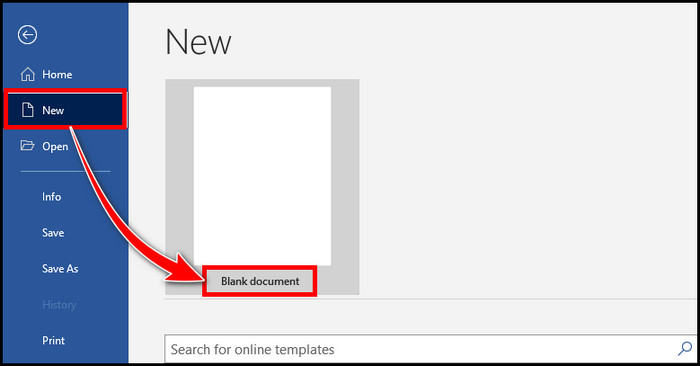
2. Add New Drawing Canvas & Gridline
As the flow drawing contains shapes, lines, arrows, etc., organizing the figure on a canvas will be easy. The canvas will ensure the illustration outline is positioned with an attractive backdrop. Moreover, some connector lines require a canvas to work.
Here is the process to put a new canvas for creating a perfect flowchart in Microsoft Word:
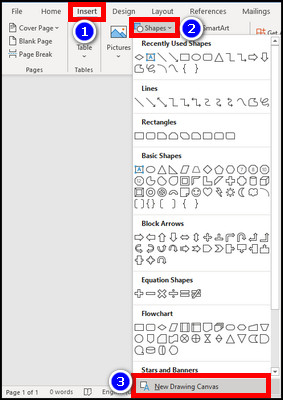
- Click on the Insert tab from the top ribbon.
- Choose Shapes from the Illustration group.
- Select New Drawing Canvas from the bottom.
You can also use gridlines to ensure the shapes are sized and placed properly. To showcase the gridlines on Word, go to the View tab from the top. Then tick the Gridlines checkbox from the Show group.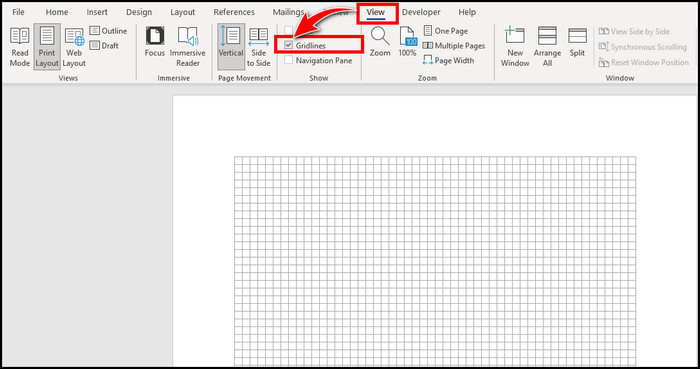
Gridline will help with the placement of your shapes properly, but you don’t want them when you print. However, you want to print with gridlines from Excel, which will be easier to read.
3. Place Shapes for Diagram
Now, it’s time to add shapes to build the flowchart. Go to the Insert tab from the top ribbon > Shapes > navigate to Flowchart and choose your desired shape. Click and drag anywhere in the blank document to add the shape. Continue adding the shapes to complete your flowchart.
Oval’s flowchart name is Terminator, and suitable for a start and end point of a flowchart. The Rectangle (Flowchart: Process) should be used for single steps in the process. The Diamond is suited for a decision action. This is named Flowchart: Decision.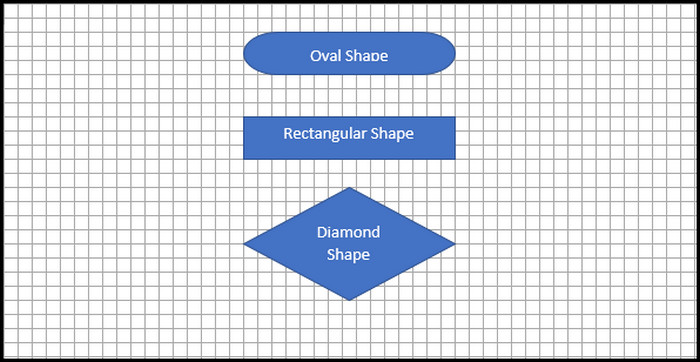
I’d recommend aligning the text in Word first and then placing the shapes. This will ensure your flowchart will be in the perfect place.
4. Customize the Shapes
Usually, you will need two Oval shapes and multiple Rectangle and Diamond shapes. You can set up a proper-sized shape. Then you can copy-paste the shapes to duplicate to avoid some extra clicks & time.
You can also change the shape’s fill color, outline color, or effects like shadow/ glow to make the flowchart more attractive.
To do that, select a shape and go to the Shape Format tab from the top. You can select a single shape or press the shift key on the keyboard & select multiple shapes to edit the color or modify the shape size at once. Make the shape bigger enough to fit all the text inside it.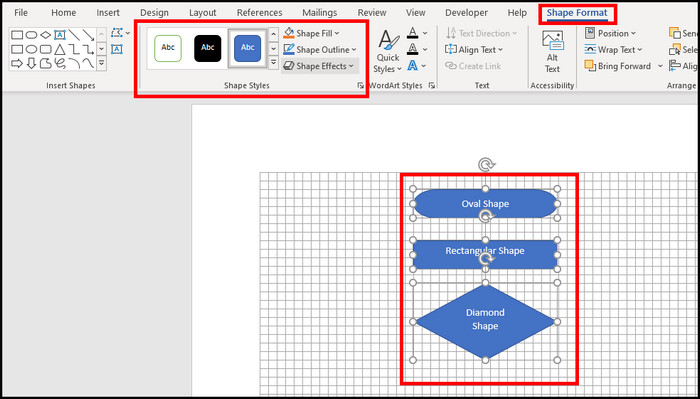
5. Insert Text Inside the Shapes
You have finished the flowchart structures, and now it’s time to add the text to the boxes. To insert text in the diagram shapes, you can select a shape and start writing on it. And voila! The shapes will be filled with your desired words.
You can also select a shape > Right-click > choose Add text to insert your message in the flowchart.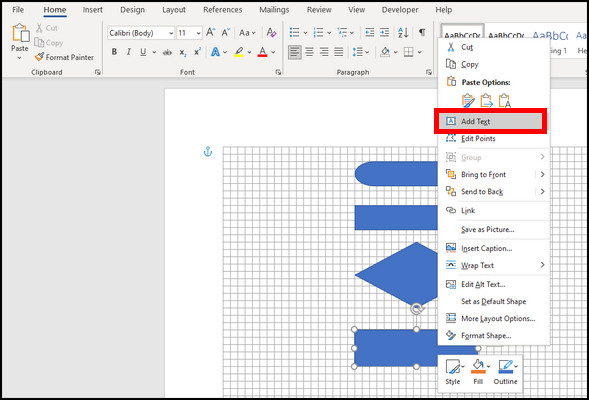
6. Draw Arrows to Complete the Process Step
The flowchart is almost complete. It’s time to add arrows to connect the sequence of the process. To add arrows, head to the Insert tab > then select Shapes > pick Arrow from the Block Arrows and draw them to connect and finish the flowchart.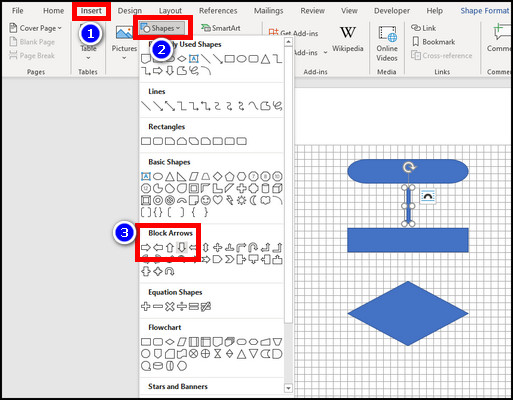
Your flowchart diagram on Microsoft Word is ready. Make one doc without a flowchart and the other one with a flowchart. Then compare the two documents in Word to check which one is more appealing.
But did it take some time that you don’t have to spare? Does Microsoft Word have a flow chart template? Stick with the article to learn this.
How to Insert Flowchart with SmartArt in MS Word
Do you want to create a flowchart, process chart, or organization chart but don’t want to hassle creating your own?
Microsoft Word’s SmartArt is there for you. It’s a pre-built template for your flowchart in MS Word to produce a visual representation of your ideas. If the templates work & fit for you, then why not use them with lesser time?
So, how do you create a flow chart with SmartArt in Word?
Here are the methods to build a flowchart in MS Word with SmartArt:
1. Make a Flowchart with Pictures
Want to set up a flowchart in Word with images? Don’t worry. Microsoft Word’s SmartArt allows you to design flowchart diagrams with pictures perfectly.
Here are the steps to create a SmartArt flowchart in Microsoft Word:
- Open a blank document in MS Word.
- Go to the Insert tab.
- Click on SmartArt from the Illustrations group.
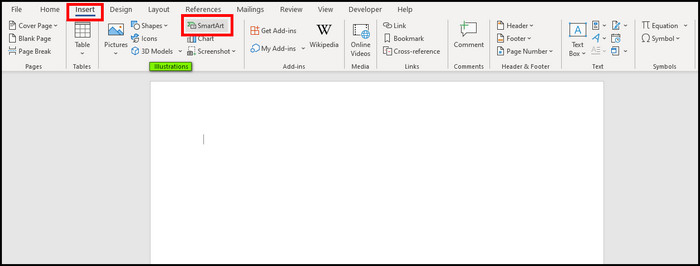
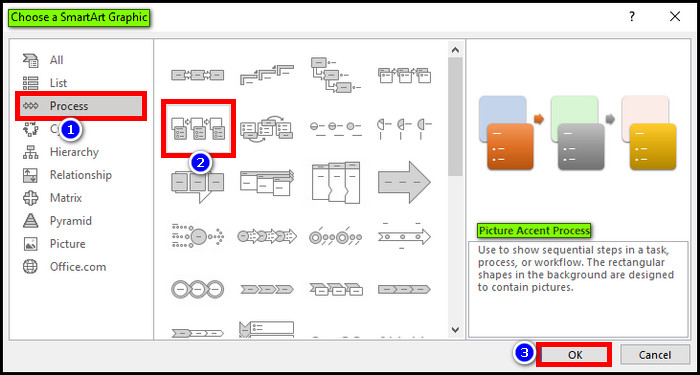
- Select Process from the left pane and Picture Accent Process from the right.
- Hit OK.
You will see a flowchart template placed on your Word document. To attach a picture, click on the picture icon, choose your image, and select Insert.
To input text, click on the text pane from the top left corner of the SmartArt Design tab. You can also click on the text area inside the SmartArt graphic and enter your text. Add text after you have placed all the boxes to remove future inconvenience.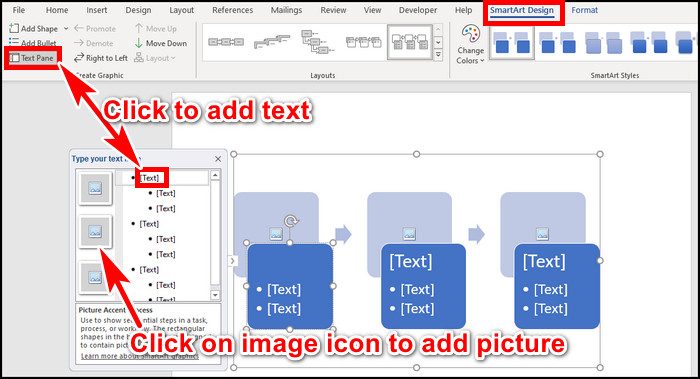
2. Insert, Remove, or Move Shapes in the Flowchart
Have you missed adding one box? Or want to delete the extra boxes? Don’t worry. In Word, you can do all these things without any hassle.
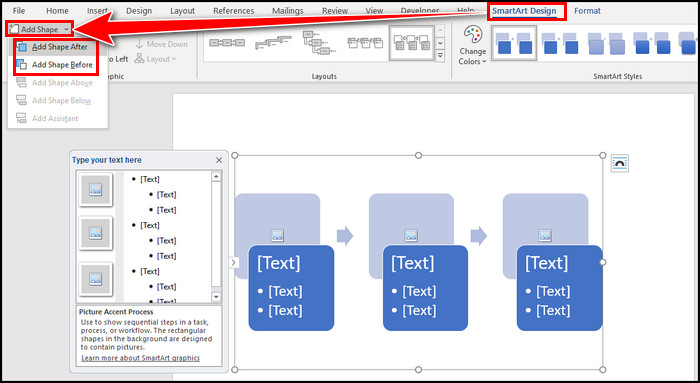
To insert a new shape,
- Go to the SmartArt Design tab.
- Click Add Shape’s down arrow from the top left corner in the Create Graphic group.
- Pick your desired option to add the shape Before or After.
To remove an unused box or shape, select the text box area and hit Backspace or Delete key on your keyboard.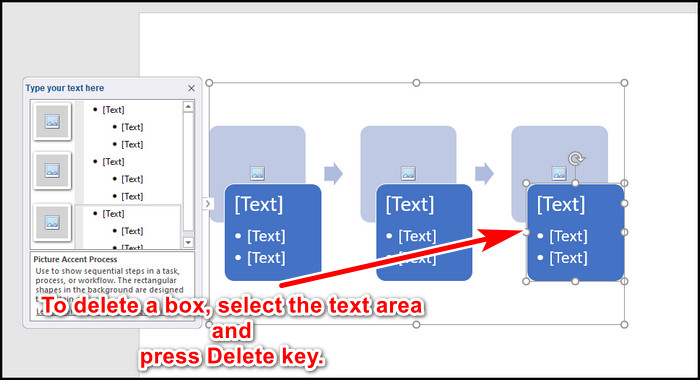
If you need to rearrange or move the shapes, click on the box you want to relocate. Then drag it with the mouse to the new place. You can also use the CTRL+Arrow keys to move the boxes preciously.
3. Customize Shape Colors
You can also change the shape’s color of your flowchart. Select a SmartArt graphic and head to the SmartArt Design tab. Click on the Change colors from the SmartArt Styles group from the top. Hover your mouse cursor on the different color combinations and select what you want.
To change a box’s background style or color in your flow chart, right-click on the SmartArt graphic and select Format Shape from the bottom of the context menu. Expand Fill from the right side and customize as you like. To change the style or color of a box’s border, expand Line and personalize it to your taste.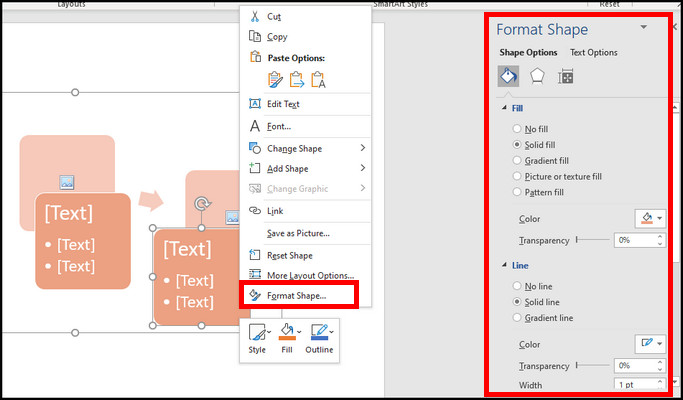
Additionally, you can adjust various effects like line style, polished, or intense effects to your flow diagram shapes to make it more unique. From the SmartArt Style group, beside the Change Colors, you can use SmartArt Style for the flowchart.
Last but not least, you can use the Format tab to get more customization options like Shapes, Shape Styles, WordArt Styles, etc.
FAQs
Where do you find MS flowchart templates?
If you want to skip manually building a flowchart, you can use the SmartArt that comes with Word. SmartArt includes various flowchart templates. You can use those to appeal to your diagram visually. This also allows you to edit the diagram as you like.
Does Excel have a flowchart template?
The flowchart is available in both Microsoft Word and Excel. To access the flowchart in Excel, navigate to Insert tab > click on Illustrations > select SmartArt > Process > pick a template and hit OK. This will put a flowchart template on the Excel sheet.
Is it easier to create a flowchart in Word or Excel?
Compared to MS Word, adding a flowchart in Microsoft Excel is easier and more convenient. Formatting or resizing is much easier on Excel for the gridline. However, you can display the grid line in Word too.
How to fit a big canvas into a smaller flowchart?
If your canvas gets too big after completing your flowchart, select the canvas borderline, right-click on it, and select Fit from the context menu. You can also select Expand if any extra shapes are required later.
Final Thought
To develop a flowchart in Word, create a canvas in a blank document with enabling gridline. Then insert shapes and use arrows to interconnect the boxes, add texts, adjust colors, themes & styles, and make it a perfect flowchart in your Word document.
In this article, I guided you step-by-step to form a flowchart. If you have any further queries, please leave a comment.