A tree diagram has many paths and forms, like a real tree and its branches. It helps to make quick decisions at a glance. And, if you ask how to create a tree diagram in MS Word, you can draw this diagram too.
Though MS Word is a great word processor with various features, its diagramming features are limited to a tree diagram maker. But it will do the job.
This article will show the quick process of creating a tree diagram using Microsoft Word to represent a visual event series.
Let’s dive in.
Download The Practice Book »How to Create a Tree Diagram in MS Word Using Shape Library
To draw a Tree Diagram using Microsoft Word, you can use free shapes to make it from scratch. You have to insert similar shapes, include text inside those, and add arrows or lines to interconnect them. The whole process can be monotonous and time-consuming as you have to do everything manually.
The process is similar to creating a flowchart in Word. But then, what is a Tree diagram?
A tree diagram is like a decision tree. It displays a series of events and a variety of outcomes. Each path acts like tree branches. Hence, the “tree” part comes in. The diagram can effectively handle a diverse array of possible outcomes. It’s quite handy for probability exercises.
Here are the steps to draw Tree Structures in MS Word using the shape library:
1. Prepare the Canvas
First things first. You have to open a blank document to add gridlines. I recommend doing this to ensure all shapes get perfect-sized to make the structure attractive.
To add gridlines in Word to prepare drawing a tree diagram:
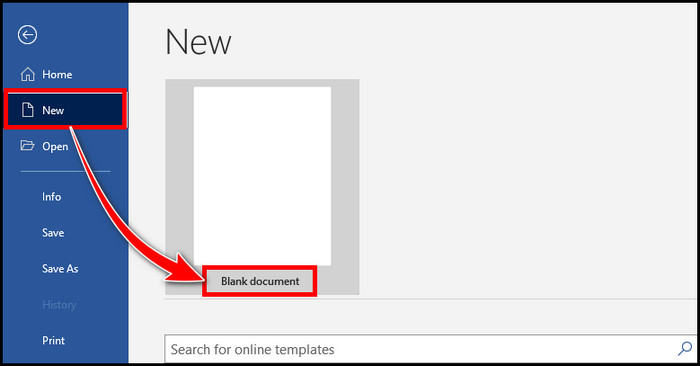
- Launch the Word Desktop app and create a blank document.
- Go to the View tab and tick Gridlines.
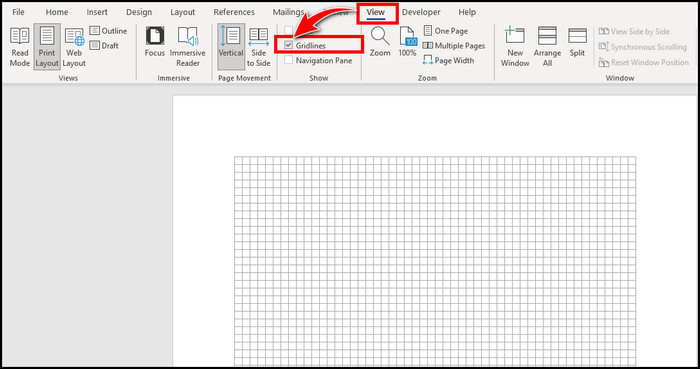
You will see the page is filled with gridlines. It will guide you about the shape’s length and height. It is for making the diagram but not for printing, as printing tree diagrams with gridlines will make it harder to read. But it’s convenient when you print from Excel with gridlines.
2. Draw, Customize, and Organize The Shapes
Now, it’s time to place the shapes for the tree chart. When I manually make a tree diagram, I always use the Rectangle: Rounded Corners shape. But you can pick the non-rounded version if you prefer.
Draw the shapes along with me:
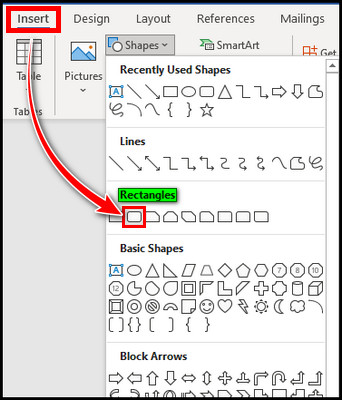
- Navigate to the Insert tab.
- Click Shapes and select Rectangle: Rounded Corners under the Rectangles section.
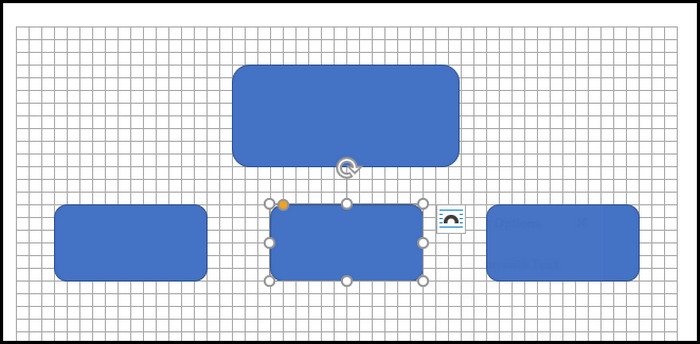
- Position your mouse cursor, click, and drag diagonally downwards to draw a shape.
- Repeat the process and make several shapes for the tree diagram.
After making the shapes, if you require, you can still modify the fill color, outline color, or effects of the shape to make the tree line unique.
To customize a shape for a tree diagram, select the Shape Format tab, select the shape/s, and edit the shape style or color. Ensure the shapes are big enough to fit your content text. 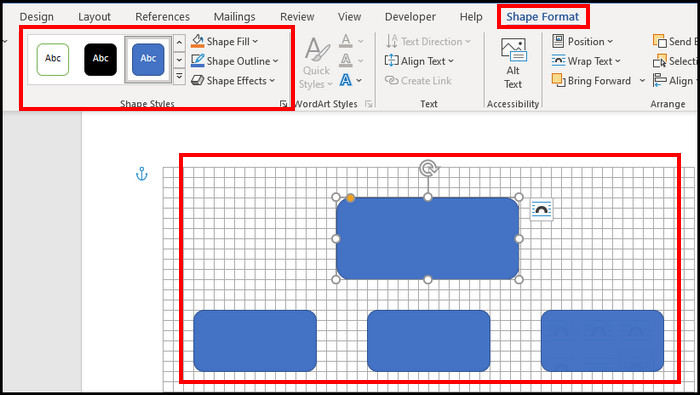
Now that the shape customization is done, you must organize the shapes to finish the barebone structure. After completing the layout of the tree diagram, it will be easier to add text in those shapes.
Select a shape and drag it to a convenient place to reposition it. You can also rotate it if it fits your purpose. Repeat the process and build the diagram structure. Depending on your need, the tree diagram can be horizontal or vertical. 
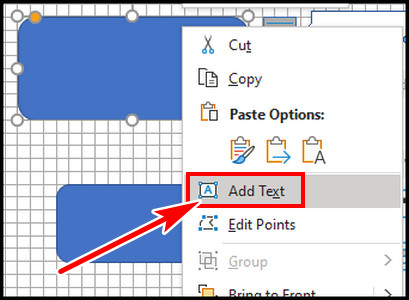
3. Name the Shapes
You formed the tree structure, and now it’s time to insert text in the shapes. The process is straightforward. Select a shape and start writing to add text to the tree diagram shapes. The text will be inserted in the figures. You can select the text and change its size, color, or style. 
Alternatively, you can right-click on a shape and select Add Text to insert the names.
4. Add Connections with Arrows
You are on the verge of finishing your tree diagram. The last thing is to connect the shapes with arrows or lines.
To interconnect the tree shapes with arrows, go to the Insert tab > click Shapes > and pick the line arrow or block arrow. Draw them and establish suitable connections for your tree diagram. 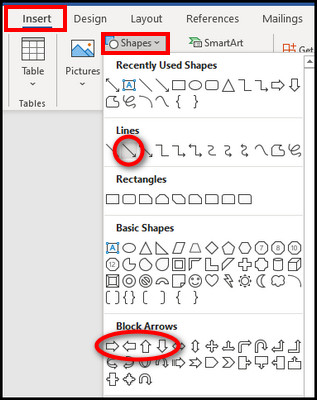
If the line arrow seems too thin, you can increase the weight to make it thicker. 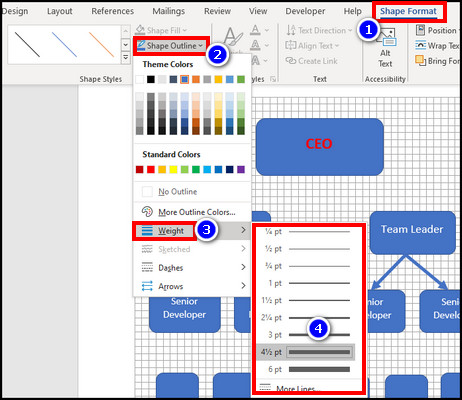
Go to the View tab and untick the gridline. And you are done.
But is it too labor-intensive for you? Any tree diagram in the Word template? Keep reading for a faster process.
Use SmartArt Graphics to Make a Tree Diagram (Alternate Way)
You can quickly insert and finish a tree diagram template in your work using the pre-built SmartArt Diagrams in Word. You can also make a timeline in MS Word with SmartArt as it contains various templates.
Follow the process below to make a tree diagram in Word using SmartArt:
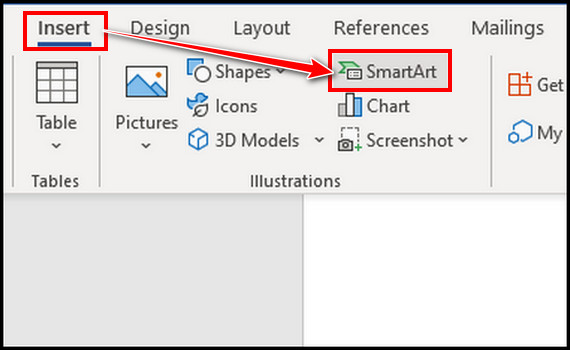
- Open Word and go to the Insert tab.
- Click on SmartArt from the Illustration group.
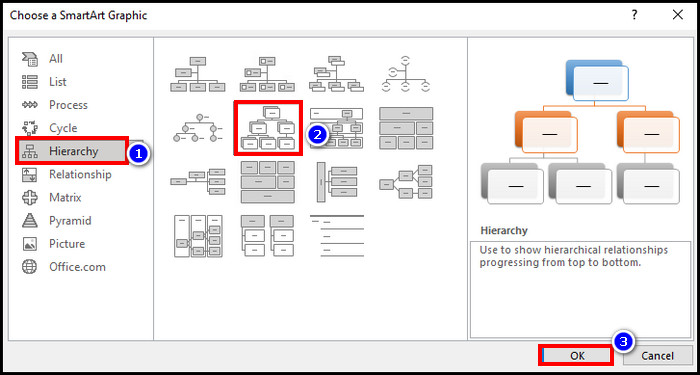
- Select Hierarchy from the left and then pick a diagram from the middle that fits you.
- Hit OK.
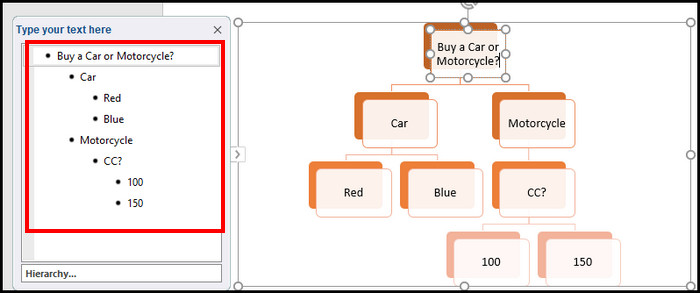
- Click twice on Text in the diagram to edit the text.
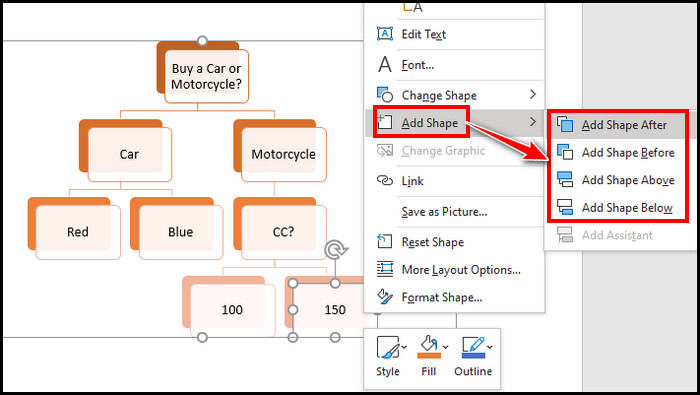
- Right-click on any shape and select Add Shape to insert more shapes.
Final Thoughts
The tree diagram is helpful for decision-making and also great for maintaining work documents. You can easily create a tree diagram in MS Word to pair it with other documentation and share it with others. So what are you waiting for? It’s time to plant a digital diagram.
Have a nice day!