Microsoft’s PowerPoint is a part of the office suite program, mainly used for presenting information with slides rich in multimedia and texts. With PowerPoint, the presenter can share their ideas, opinions, sales pitch, meeting details etc.
But you have to be careful while presenting slides in PowerPoint with images. Because you can’t directly present sensitive pictures, you must blur them. Sometimes you may need to blur the whole or part of the picture in PowerPoint.
So, how can you blur an entire image or part of it in PowerPoint?
That’s the primary purpose of this article because I have included all the steps to blur an image in PowerPoint. So, take a cup of coffee and start reading till the end.
Let’s begin!
You may also like to read about Enable Automated Kiosk Presentation on PowerPoint.
Why Do You Need to Blur Images in PowerPoint?
You need to blur images while using PowerPoint to keep the slide distraction-free and only highlight the texts. Other reasons for blurring an image in PowerPoint are adding interest, removing focus from an element on a slide, or creating interesting backgrounds.
Sometimes you may need to blur some parts because that image might contain sensitive information. PowerPoint is a great app for presenting your work with slides. With PowerPoint, you can share your ideas, meeting details, thesis work, or plans with creative slides.
Images are the main key parts of the slides because those will add extra attention and details to your slides. So, you must add images to the PowerPoint presentation slides. But you should blur images if that image causes distraction.
Sometimes, you want to blur some sensitive information in an image, like card number details on a credit card, home address on a picture, or someone’s face. In PowerPoint, you can easily blur any image you want by adding Artistic Effects.
Related contents you should read about how to get PowerPoint Design Ideas & use it?
How to Blur the Entire Image in PowerPoint
PowerPoint is not an image editor, but you can do basic editing to improve your presentation. You should blur it to cover sensitive or distracting images. To blur an image in PowerPoint, you can use Artistic Effects to do it. Select the image and add blur effects, and it will do the work.
To know the procedure in detail, follow the below methods.
But before that, go through our epic guide on Keyboard and Mouse work in BIOS but not in Windows.
Here are the methods to blur the entire image in PowerPoint:
1. Blur an Entire Image
Sometimes images can create a distraction while giving PowerPoint presentations, which is why you should blur images. You can blur any image in PowerPoint, and the steps are straightforward., Therefore follow the below steps to know how to do that.
Here are the steps to blur an entire image in PowerPoint:
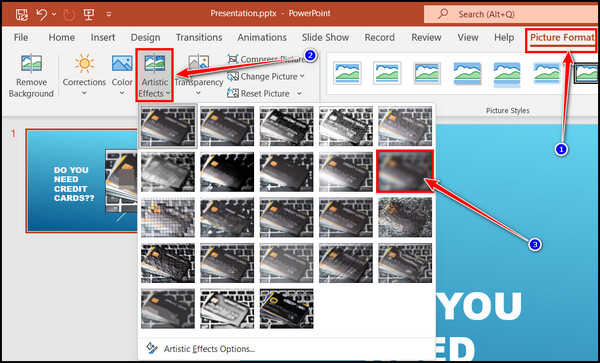
- Click on the image to select it.
- Click on the Picture Format tab on the Toolbar.
- Click on Artistic Effects, and you will find lots of effects.
- Look for the Blur effect and select it.
After selecting the effect, the image will be blurred.
Some more guides on how to add or Load a PowerPoint add-in?
2. Change the Degree of Blurring Effect
You can also customize the blurring effect, like increasing or decreasing the blur effect, as per your requirements. So, follow the steps below to increase the image blurring effect’s radius in PowerPoint.
Here are the steps to change the degree of blurring effect in PowerPoint:
- Click the Artistic Effects again and click on the Artistic Effects options. It will open a Format Picture pane on the right side.
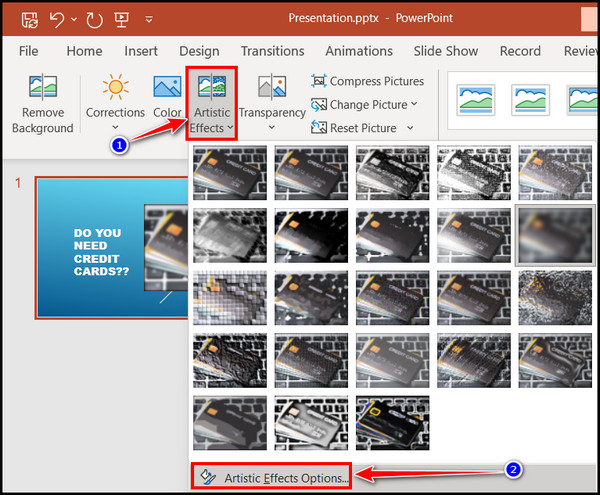
- Click and drag the Radius bar to increase or decrease the blurry effect.
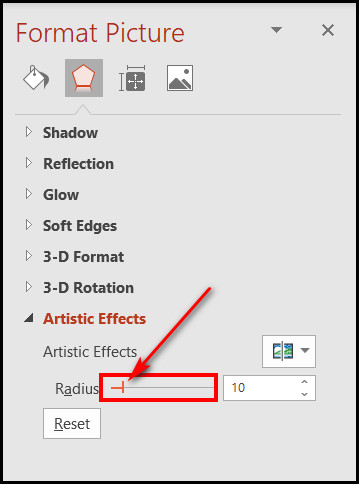
To increase the blurry effect of that image, drag the radius bar forward. Dragging the radius bar backward will decrease the blur effect.
Check out the easiest way about Microsoft Teams Channel email not working.
How to Blur Part of an Image in PowerPoint
If you don’t want to blur the entire image, you can only blur a specific part of an image in PowerPoint. Though it’s tricky, I will make all the steps buttery smooth for you. Sometimes you only need to blur faces or numbers in an image, and you can do that easily by blurring parts of an image.
First, select a suitable shape to cover the part you want to blur. Then you must fill the shape with soft edge effects by matching the surrounding colors. So, follow the steps below to blur part of an image in PowerPoint.
Also, check out our separate post on where is the Command Button on a Keyboard?
Here are the steps to blur part of an image in PowerPoint:
- Click on the Insert tab from the Toolbar ribbon.
- Select Shapes, and you will see many shapes.
- Choose one shape that is suitable to cover the portion of the image you want to blur.
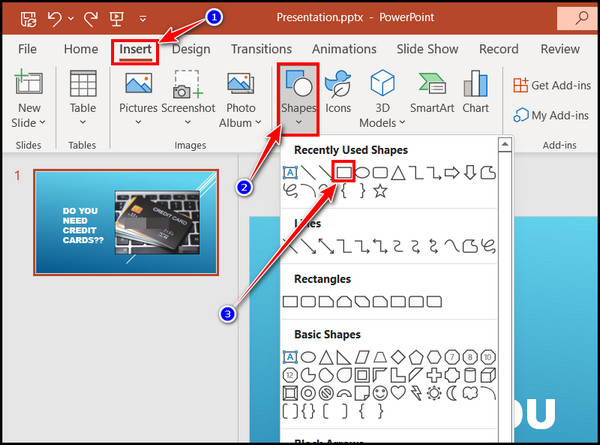
- Draw the shape and place it over the slide image part that you want to blur.

- Select the shape.
- Click on the Shape Fill option from the Shape Format tab.
- Choose Eyedropper from the context menu.
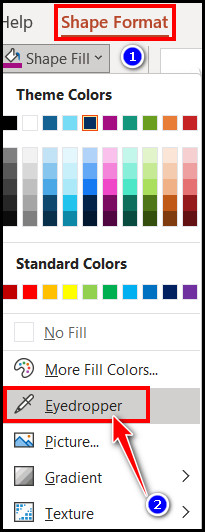
- Use the eyedropper to pick the right color from the background to make the shape blend in with the surroundings.
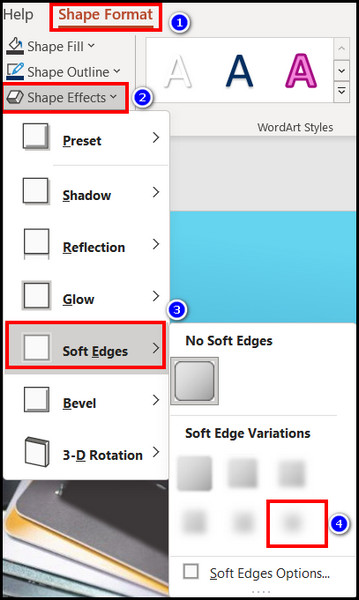
- Click on Shape Effects and choose Soft Edges.
- Choose one effect from the Soft Edges Variations.
Pro Tip: To create a custom shape choose Freefrom: Shape or Freefrom: Scribble by going to Insert > Shapes.
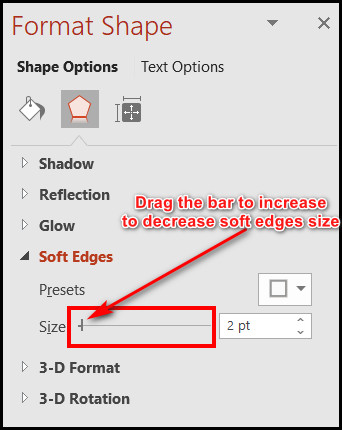
You can also modify the Soft Edge effect. Select the shape after applying the Soft Edges effect and select the Shape Format tab. Navigate to Shape Effects > Soft Edges > Soft Edges Options and drag the Size bar to increase or decrease the soft edges.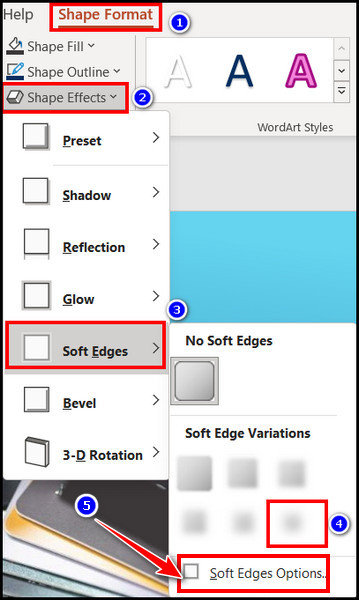
FAQs
How can I blur part of an image in PowerPoint?
To blur an image in PowerPoint, click Insert and select Shape. Draw the shape around the area you want to blur. Click Shape Fill from the Format tab and fill the shape with a color similar to the selected area.
How do you blur a picture on slides?
Select Artistic Effects from the Picture Format menu. Choose the Blur option from the drop-down menu of Artistic Effects. You can increase or decrease the blurring effect by navigating to the Artistic Effects > Artistic Effects options.
Can I blur pictures using Shape in PowerPoint?
You can blur pictures by inserting Shape and adding Soft Edges effects to the shape.
Final Words
PowerPoint is an excellent app from Microsoft for making presentations. You can adjust the slides and add attachments like images, shapes, text boxes, 3D models, smart art, charts, etc. Adding an image and making it blurry is also possible in PowerPoint.
In this article, I have given the complete guideline so that you can blur any image or part of an image in PowerPoint. I hope you read till the end and successfully blurred an image in the PowerPoint slide.
Please let me know by commenting in the comment box if you need further assistance in PowerPoint. See you in the next article. Peace out!