Secure validation is designed to ensure the integrity and authenticity of the BIOS firmware. It protects the system against unauthorized modifications or malicious attacks at the firmware level.
If the BIOS cannot pass this verification step, it indicates malware or a compromised system, leading to instability and data breaches.
That’s why, in this article, I’ll provide the methods to overcome the secure boot verification problem.
Let’s begin!
Why Are You Getting the Secure Boot Verification Problem?
You cannot get past the security validation BIOS recovery due to a mismatch between the firmware version and the designated motherboard. Even though the circuit board model specification says it supports the BIOS version, it actually doesn’t.
Despite compatibility claims, the patcher fails to recognize the accurate firmware version integrated into the motherboard, causing the problem.
The relationship between the BIOS and motherboard demands precise synchronization for seamless functionality. In cases where the firmware version falls short of the motherboard’s specifications, the secure verification error 0x1A shows up.
To address this issue, cross-verify the firmware version against the motherboard’s requirements before proceeding with any updates or installations.
How to Fix the Secure Boot Violation Problem on Windows
The Verification failed: (0x1A) Security Violation error typically occurs during the installation of an operating system when it detects a problem with the installation process. In the same manner, I’ve got the error when using the Ventoy bootable USB drive.
Fortunately, temporarily deactivating the Secure Boot option from the BIOS while installing the OS has solved my security validation issue.
For your convenience, I’ve described all the processes below that will resolve the issue.
Here are the methods to fix the Secure Boot violation problem on Windows:
1. Disable Secure Boot
Secure Boot is a security feature in UEFI that ensures only digitally signed firmware and operating systems loaders are allowed to execute during the boot process.
In some cases, Secure Boot may prevent the system from booting if it encounters unauthorized or incorrectly signed firmware. Disabling Secure Boot temporarily will allow you to update the BIOS firmware with the correct, approved version.
Here are the steps to disable Secure Boot:
- Reboot your computer.
- Press the BIOS key (usually Del, Esc, F2, F10, or F12) to enter the BIOS/UEFI during the startup process. If you’re unsure which key to press, refer to your device’s manual.
- Navigate to the Security or Boot menu from the top bar.
- Look for the Secure Boot or Secure Boot Control option and set it to Disabled.
- Press F10 to save the changes and confirm it with Enter.
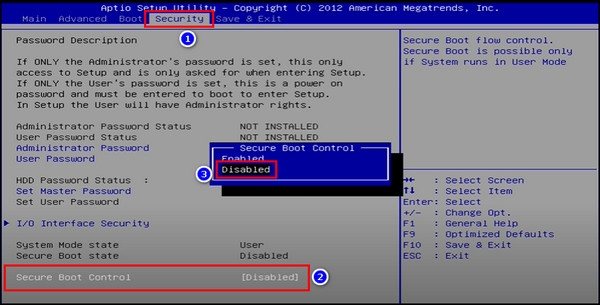
Sometimes, the Secure Boot option can be grayed out, preventing you from modifying it. In that case, first, you need to set the BIOS password, particularly the Supervisor password, from the Security tab in the BIOS menu. Then, you can disable Secure Boot.
2. Reset BIOS to Factory Settings
If incorrect or corrupted settings are in the BIOS, it can lead to issues during the boot process, including failures in secure validation. Resetting the BIOS settings to their default values can eliminate any problematic configurations.
Here’s how to reset BIOS to factory settings:
- Press the BIOS key when the system boots up. For Lenovo, Dell and Acer motherboards, it is F2.
- Move to the Exit tab from the top menu.
- Select the Load Setup Defaults or Reset BIOS Settings option.
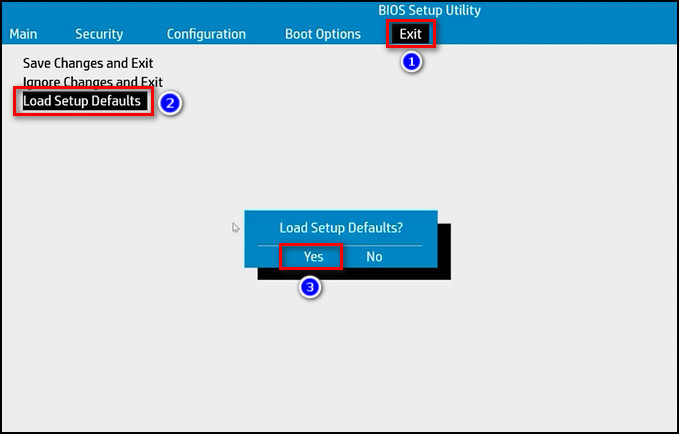
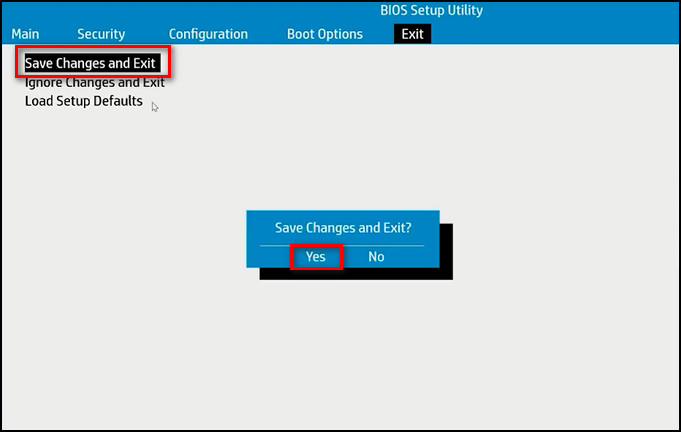
- Save the changes and exit the BIOS screen.
You can also jumper reset BIOS by clearing CMOS.
3. Update BIOS/UEFI Firmware
Outdated or buggy firmware can cause various issues, including problems with secure validation. Updating the BIOS/UEFI firmware ensures you have the latest software with bug fixes, security patches, and improvements.
Here’s the process to update BIOS/UEFI firmware:
Identify your current BIOS Version
- Access the BIOS/UEFI mode.
- Look for System Information to find your current BIOS version.
Download the Updated BIOS Version
- Visit the official website of your computer or motherboard manufacturer.
- Proceed to the Support or Downloads section.
- Enter your model number to find the latest BIOS update. Download it to your computer.
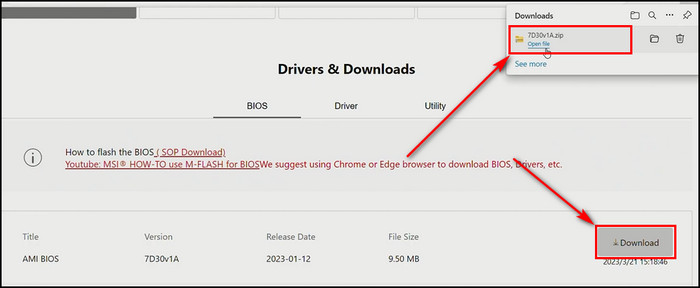
- Extract the downloaded BIOS setup file.
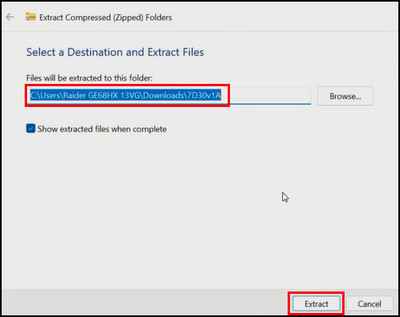
- Double-click on the renamer tool to rename the file.
Create A Bootable USB Drive
- Insert your USB drive into the PC.
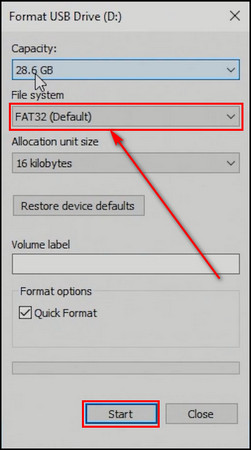
- Right-click on the drive and choose Format.
- Select FAT32 for the File system and click on Start.
- Move the extracted BIOS installation file into the flash drive.
- Remove the USB drive.
Update The BIOS
- Connect the flash drive to your computer.
- Turn on the PC and go to the BIOS screen.
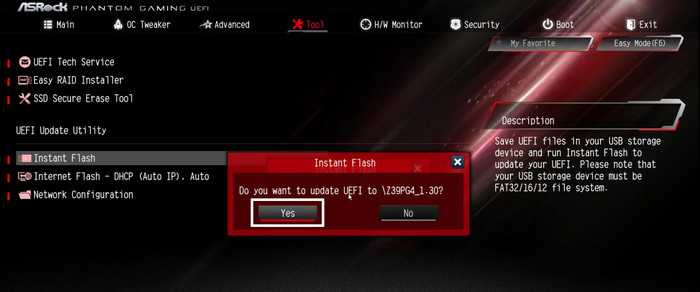
- Go to the Tools tab and select Instant Flash.
- Highlight Yes and press Enter.
Be patient, and do not power off your computer during the update. Your PC will automatically restart once the new firmware version is installed.
You can also use the Flashback button on your motherboard to flash or update BIOS quickly.
After the update, if your system doesn’t operate correctly, simply revert the BIOS update and roll back to a previous version.
Final Thoughts
As you can see, simply by modifying the Secure Boot configurations, resetting the BIOS setting, and updating the firmware, you can easily troubleshoot the security violation issues. Now, you can ensure a secure and functional BIOS.
Comment below if you have further questions, and we’ll get back to you.