Although clearing the CMOS using the jumper pins may not be the best way to reset a BIOS, sometimes, it can become the only sensible way to do so. But, since every motherboard has its own spin on the CMOS jumper pins, it can be hard to follow a BIOS reset guide that doesn’t match your system.
To resolve such a dilemma, this article will provide users with a complete tutorial on jumper reset BIOS that should give you a general idea regardless of your motherboard manufacturer.
So, without wasting any more time, let’s get started.
How to Clear CMOS & Reset BIOS Settings Using Jumper Pins
Before we get into the main topic, let’s get the basics out of the way: What is a CMOS jumper pin?
The clear CMOS jumper is a two or three-pin connector, which is usually located near the CMOS battery. It can be used to reset the BIOS settings without having to power on the computer. Check the motherboard’s manual to know more about it.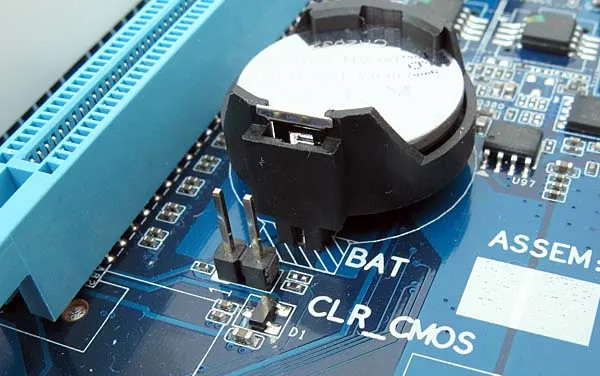
To be honest, there are many different ways to restore a BIOS directly from the motherboard. But, since CMOS pins are commonly found on most motherboards, resetting BIOS via jumper is generally the preferred option, which I’m going to elaborate on in a step-by-step manner.
Here’s how to reset BIOS using jumper pins:
Step 1: Turn off and Unplug your PC
- Completely shut down your computer. Don’t put your PC to sleep or hibernation mode.
- Disconnect the power plug from the PC case.
Step 2: Locate the CMOS Jumper Pins on the Motherboard
- Open the side panel of your computer case.
- Find the CMOS jumper pins, which should be located next to the CMOS battery on the motherboard.
![cmos-jumper-pins]](https://10pcg.com/wp-content/uploads/cmos-jumper-pins.jpg)
Note: The CMOS jumper pins’ location can vary depending on the manufacturer and is usually labeled as CLR_CMOS, CLRPWD, JBAT1, or something similar. Furthermore, it can either be a two-pin or a three-pin jumper based on how old or new your motherboard is.
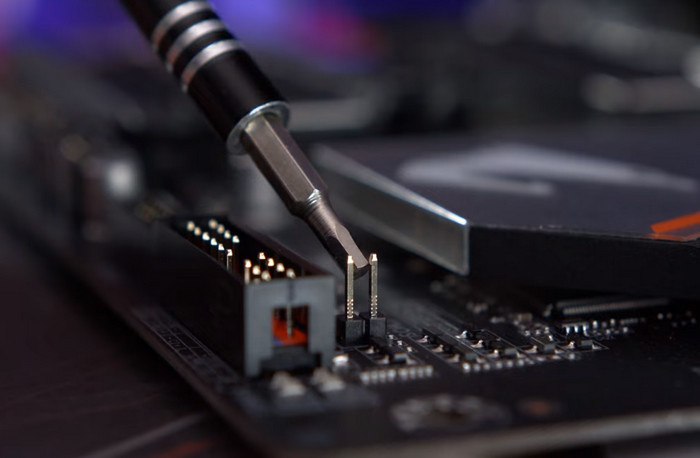
Step 3: Move the Jumper Cap or Short the Jumper Pins
- For a three-pin setup:
- Move the jumper from the default position, which is usually pins 1 and 2. So, move the jumper and set it on pins 2 and 3.
- Wait a few minutes and put it on the default pins.
- Move the jumper from the default position, which is usually pins 1 and 2. So, move the jumper and set it on pins 2 and 3.
- For a two-pin setup:
- Take a flathead screwdriver or something conductive.
- Use it to short the two pins for around 10 to 15 seconds.
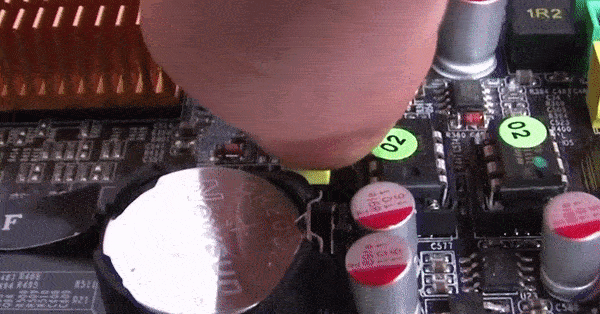
Expert tip: You might also need to take out the CMOS battery for a few minutes and put it back in. This should help clear all the CMOS data and residual electricity.
Step 4: Re-assemble and Power On your Computer
- Plug in the power cable and turn on your PC.
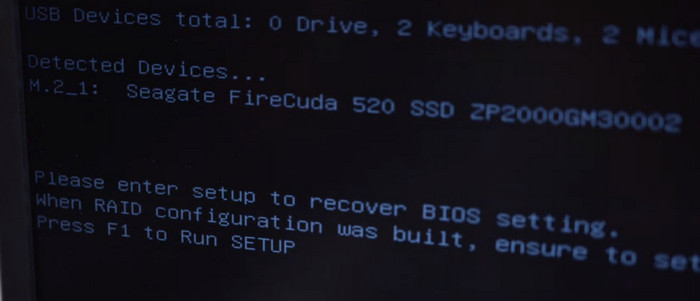
- Check if the BIOS has been reset. While powering up your device, the monitor should display that the default BIOS settings have been applied.
Done! Now, since all the user-made changes to the BIOS have been removed, you might need to enter BIOS Utility again to make some changes according to the hardware configuration.
For instance, if you had XMP profiles or customized ASPM in BIOS, you’ll need to reapply those settings manually from the BIOS menu.
Since this method is so straightforward, you might be wondering how to jumper reset BIOS on a Lenovo or Dell laptop as well. Unfortunately, laptops don’t usually have a jumper pin to clear CMOS settings. However, some laptops do offer a clear BIOS button on the motherboard.
Why Should You Reset BIOS Using CMOS Jumper Pins?
Clearing the CMOS using the jumper pins is most effective when your PC won’t boot into BIOS or can’t turn your PC on for unknown reasons. This method basically forces the BIOS to reset to the default factory state in case you can’t or don’t want to restore the BIOS from the BIOS menu.
For example, if you forgot the admin password or your PC got stuck in a boot loop due to an unwanted change in the BIOS settings, resetting the CMOS using the jumper cable is the only viable option to recover the device.
I mean, let’s be honest. It’s not very uncommon to forget important passwords, especially the ones that we don’t use very often, like the BIOS password. And when this happens, you don’t really have any choice but to delete the BIOS password by using the CMOS jumper pins.
But that’s not all. It is also a great way to troubleshoot hardware issues while building the PC, recover a bricked device, or revert any unwanted changes made in the BIOS that can cause system instability.
Wrapping Up
To sum it all up, you’ll need to disassemble your PC and use the jumper pins to clear the CMOS with a screwdriver. Some BIOS will have a button or a switch to perform the same task, so use them accordingly.
Anyway, whether you got locked out of the BIOS due to an admin password or just want to recover a bricked PC, following this article should set you on the correct path to do so.
Have a good one!