Numerous people around the globe use the Microsoft Outlook program for its automated mail merging and forwarding capability.
Suppose you are concerned about your email ID’s privacy or want notification for important emails on your primary email account. Therefore the email forwarding features of Outlook can help you.
However, the manual email forwarding process can consume your valuable time, unlike the automatic one. In addition, you can quickly set up the automated email forward system on your Outlook account. By creating a New Email Forwarding Rule, your job can become easier.
Let’s head toward the main segment, where I will display the quickest and most functioning ways to automatically forward emails on various Outlook platforms.
Don’t skip any part of this article; read on to learn!
Also read how to add new Mailbox in Outlook easily.
How to Automatically Forward Emails in Outlook App
To forward emails automatically in the MS Outlook program, you must Create a New Email Forwarding Rule. After making the Rule specify your desired functions and Enter an Email ID to which you want to forward those emails. Enable the Forwarding option to complete the same action on the Web version.
Follow the methods below to complete the automatic email forwarding process on Outlook 2021, 2016, 2013, 2010, and 2007. Since the interface and functions of those Outlook apps are relatively similar for Creating New Rules.
Here are the methods to forward emails automatically in the MS Outlook app:
1. Create a New Forwarding Rule for all Emails
Creating a new rule for forwarding all emails is very simple. You just need to move into the File section and select the Manage Rules & Alerts option. Thereafter, create a New Rule and choose the Apply rule on messages I receive option and specify the Forward process; that’s it.
Let’s see the entire process step by step.
Here are the steps to create a new forwarding rule for all emails in Outlook:
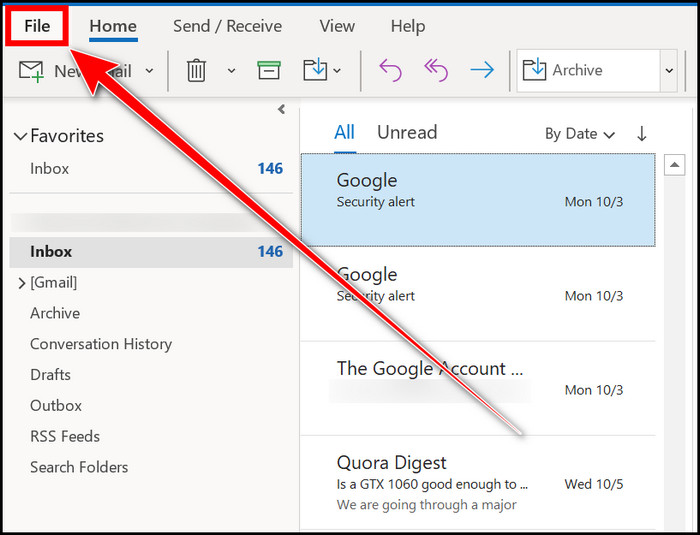
- Open the Outlook app.
- Move into the File section.
- Select the Manage Rules & Alerts option from the Info section.
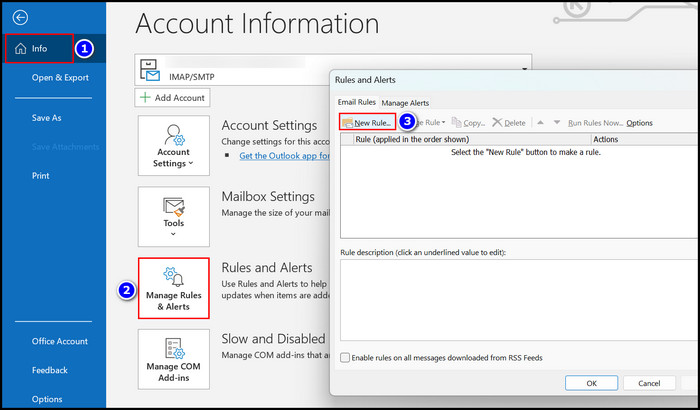
- Click on the New Rule option.
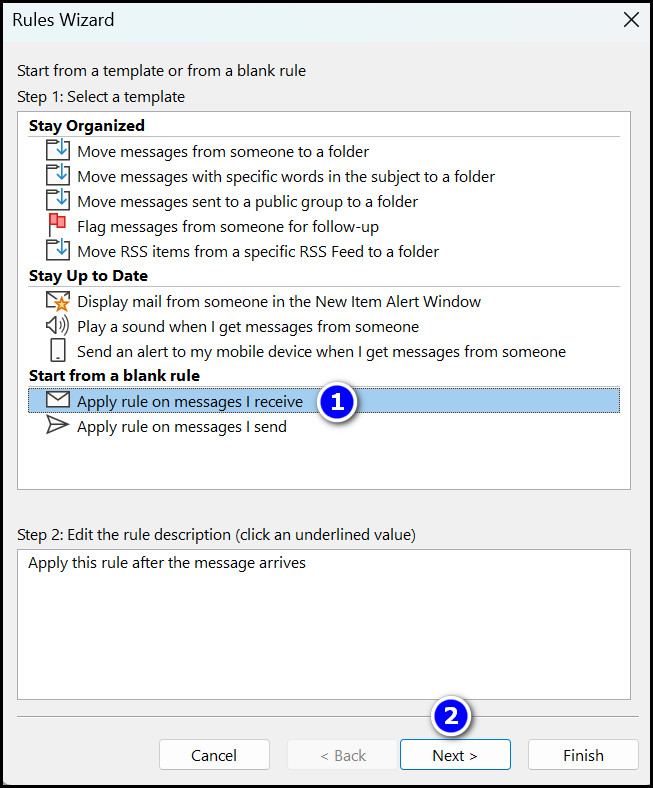
- Choose the Apply rule on messages I receive option and press the Next button.
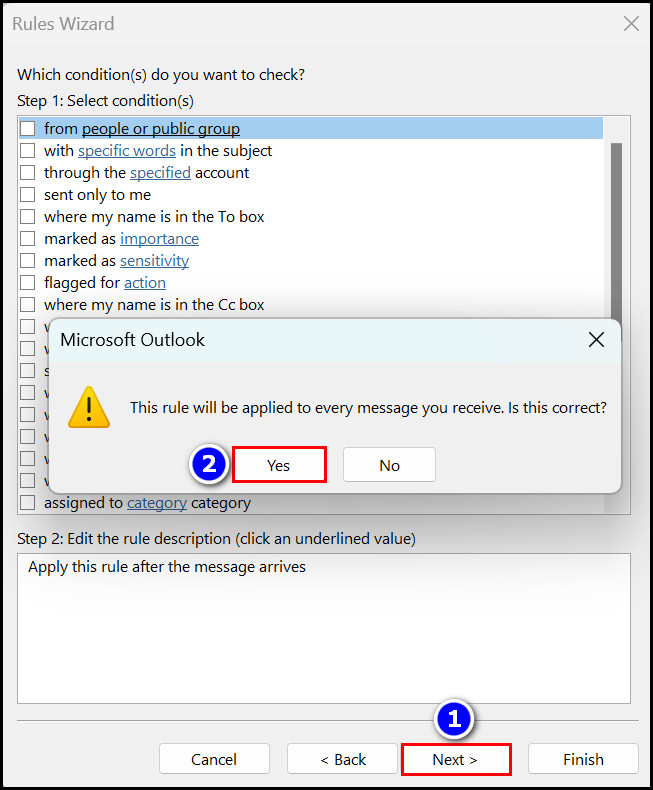
- Hit the Next button again and click on the Yes option when a popup message says, “This rule will be applied to every message you receive.”
- Select the Forward it to people or public group checkbox.
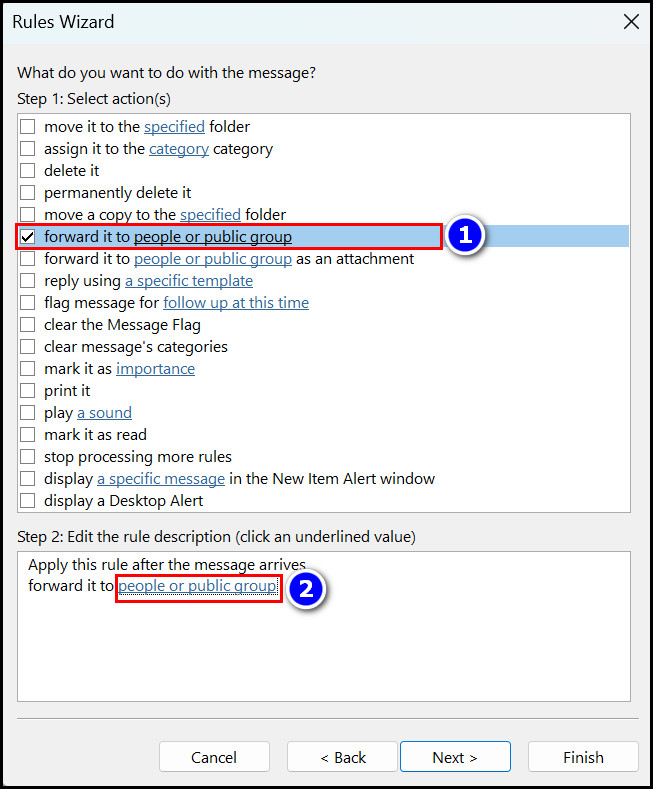
- Click on the people or public group hyperlink from the Rule description box.
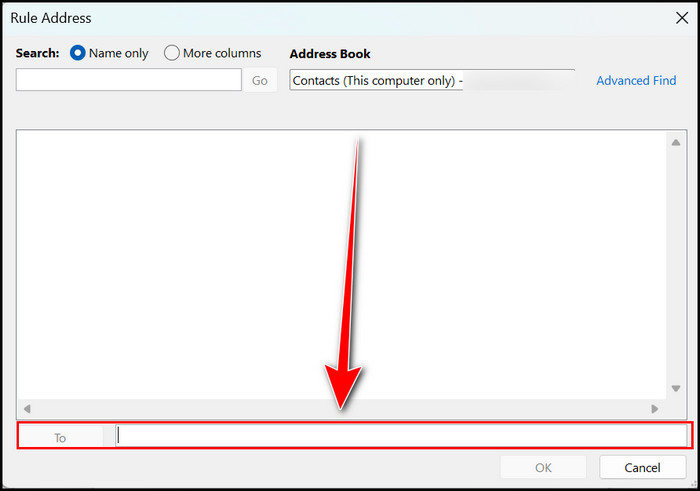
- Type your email account in the To box and press the OK button.
- Select the Next button.
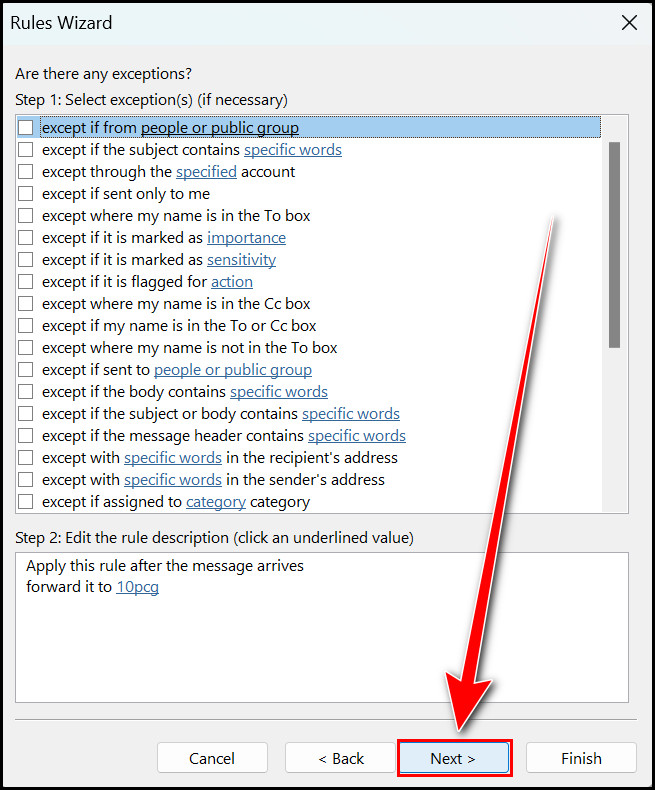
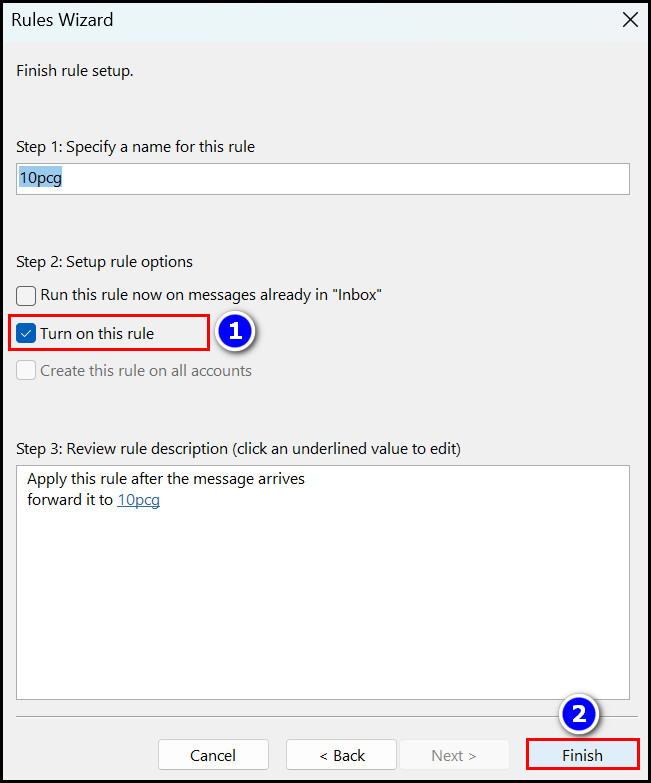
- Hit the Next key again and press the Finish button.
When you are set up, all the emails will forward to the email ID you provide.
Read more on why Outlook rules not running automatically on shared mailbox.
2. Forward Specific Emails with a New Rule
You must right-click the email if you want to forward specific person or group emails to your primary account. After that, choose Rules > Create Rule options, click Advanced Options, select a particular email account, and Finish the email forwarding process.
Read on to understand the entire process more clearly.
Here are the ways to forward specific emails with a new rule in Outlook:
- Launch the Outlook app.
- Select the particular email and right-click on it.
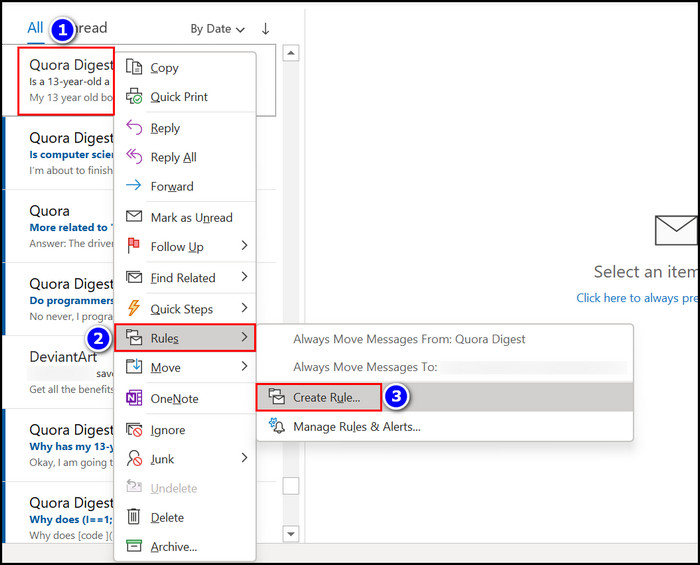
- Choose the Rules > Create Rule options.
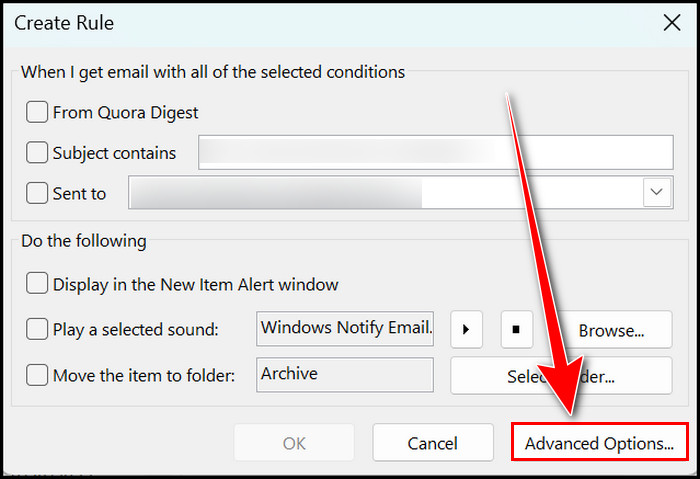
- Click on the Advanced Options box.
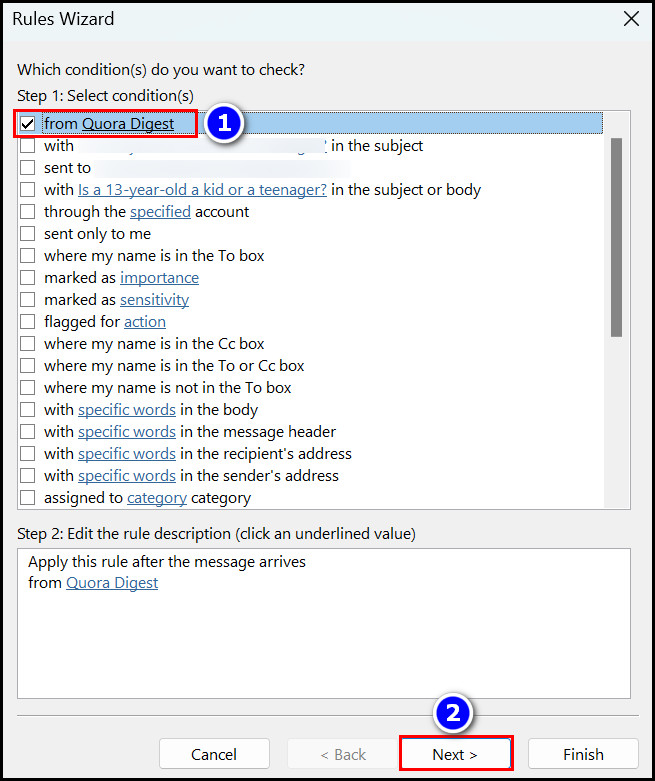
- Enable the first checkbox that says From X and hit the Next button.
- Choose the Forward it to people or public group checkbox.

- Move into the people or public group hyperlink from the description box.
- Provide your primary email into the To box and press the OK key.

- Hit the Next key and again the Next button.
- Finish the operation.
From now on, all the emails from the specific email id will forward to your given primary account.
Follow our guide to fix Outlook zoom add-in not working.
3. Forward Emails with Shortcuts
If you have limited emails and want to forward them to a specific account, use the built-in Forwarding option. You can complete this action by simply right-clicking on the selected emails and choosing the Forward option.
Follow on to learn how you can forward an email in Microsoft Outlook.
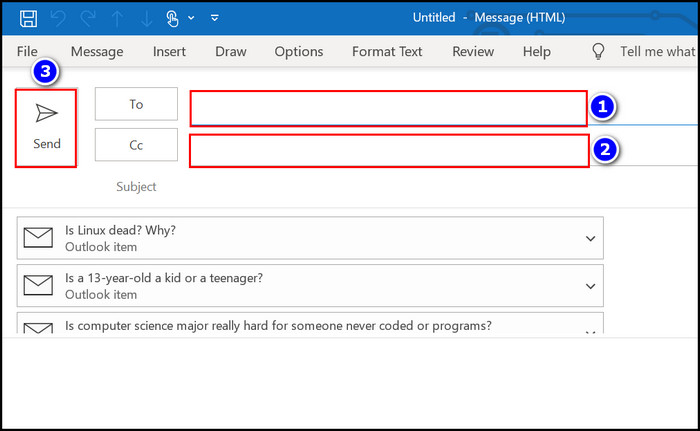
Here are the procedures to forward emails with shortcuts in Outlook:
- Open the Microsoft Outlook Program.
- Select multiple emails by holding the CTRL key and left-clicking them that you want to forward.
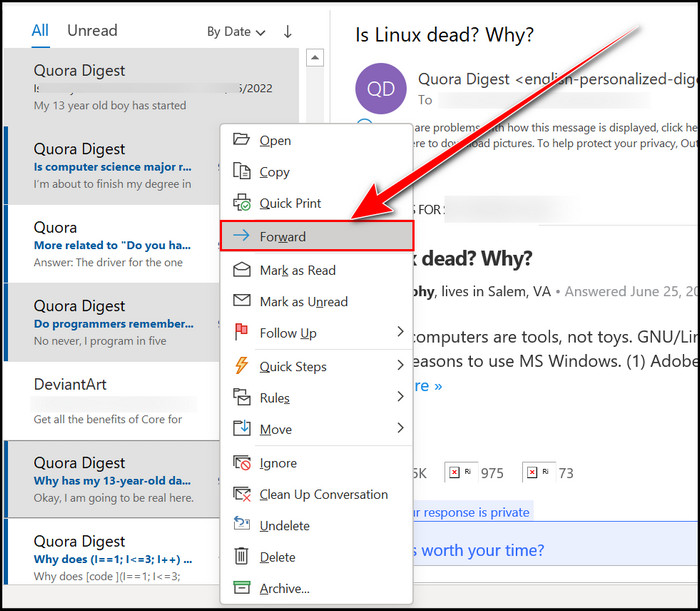
- Right-click on them and select the Forward option.
- Enter the email number into the To box and Send them.
After completing these simple steps, your selected emails will forward to the account you specify.
Read the next segment to learn how to forward emails automatically in Outlook Web or 365.
Follow our guide step-by-step to add signature to Outlook 365.
How to Forward Emails Automatically in Outlook 365 or Web
You can automatically forward all emails to a particular email account. Also, you can forward some specific emails to a particular email account via Outlook 365 or Web. To complete those actions, use either the Add new rule option or the Forwarding Email option.
Here are the steps to forward emails automatically in Outlook 365 or the Web:
1. Forward all Emails Messages to a Particular Account
With the help of the Mail Forwarding option, you can easily set up the auto-forward email system for Outlook web and 365.
Follow the instructions to finish the procedures.
Here is the process for forwarding all emails to a particular account:
- Sign in to the Outlook Web or 365 accounts.
- Click on the Settings(Gear) icon.
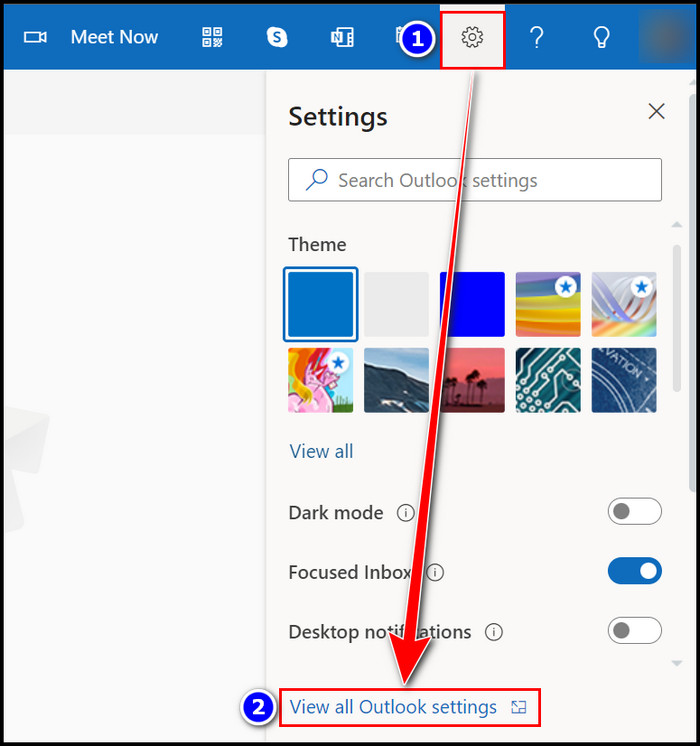
- Select the View all Outlook settings option.
- Move into the Forwarding section from the Mail tab.
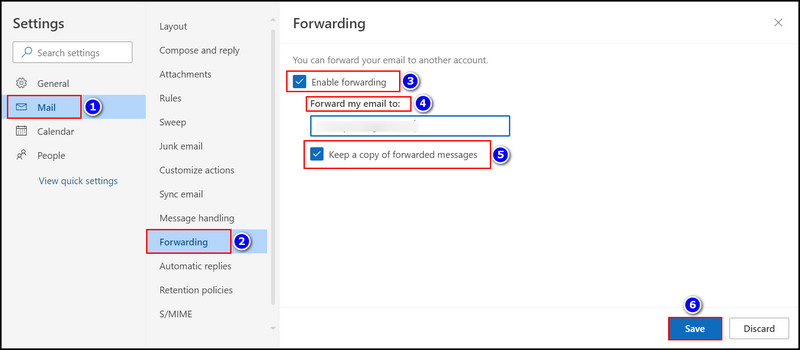
- Check the Enable forwarding checkbox.
- Provide an email account in the Forward my email to box.
- Enable the Keep a copy of forwarded messages option.
- Click on the Save option.
That’s it; all the emails will now forward to the given email account.
Also read how to add someone to a distribution list in Outlook.
2. Create a New Rule for Auto Forward Specific Emails
In order to forward specific emails to the desired account, you can create a New Rule and specify your forwarding demand. Read to learn the process.
Here are the steps to create a new rule for forwarding emails in Outlook web or 365:
- Log in to the Outlook Web or 365 accounts.
- Select the Settings(Gear icon) option.

- Choose the View all Outlook settings option.
- Navigate to the Rules section.
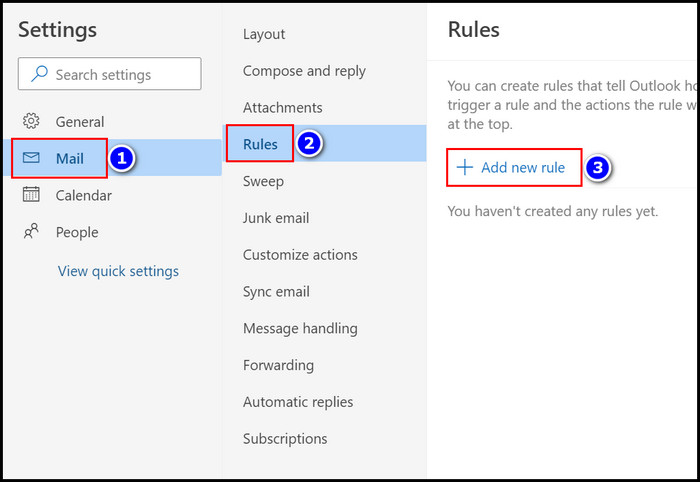
- Click on the Add new rule option.
- Name the rule.
- Select From option from the Add a condition box and include the specified email sender accordingly.
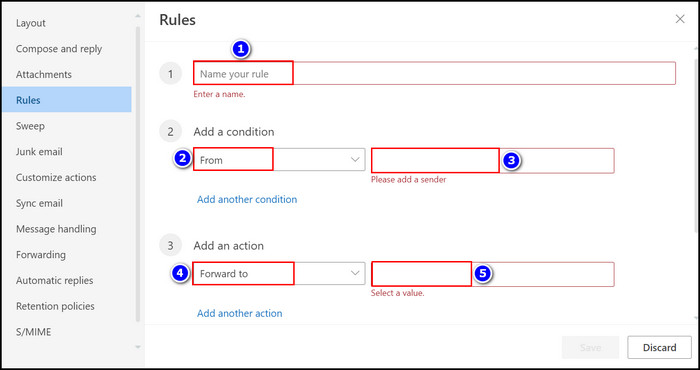
- Choose the Forward to option from the Add an action box and provide an email id for forwarding.
- Check the Stop processing more rules box.
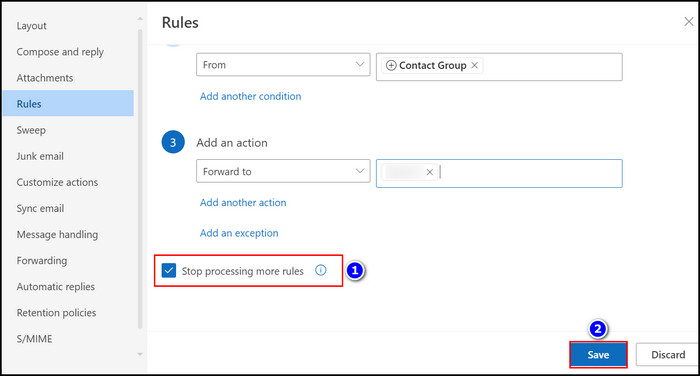
- Hit the Save button when you are all done.
Immediately you will notice that your emails from specific senders are now forwarded.
Find out how to add picture on Outlook email.
How to Redirect Emails Automatically in Outlook 365 or Web
You can automatically redirect emails in Outlook, and that operation’s procedures are pretty simple. To complete the Redirect operation, select the Settings option and Add a New Rule, then choose the Redirect to option from the Add an action section and you are all set.
Read on to find out how you can easily redirect emails in Outlook 365 or the Web.
Here are the methods to redirect emails automatically in Outlook Web or 365:
- Sign in to Outlook Web or 365 with your credentials.
- Choose the Settings option.
- Move into the View all Outlook settings option.
- Select the Rules section.
- Choose the Add new rule option.
- Set up a Name for the Rule.
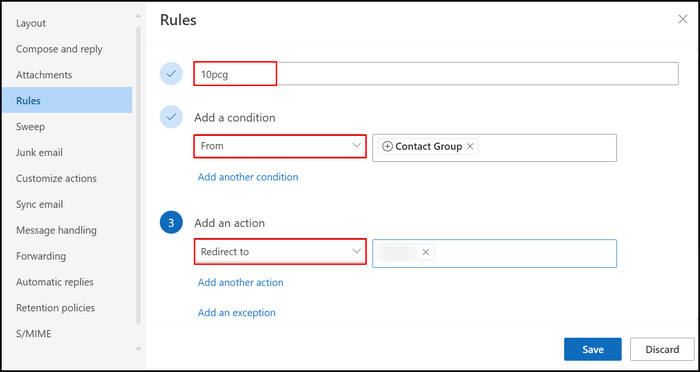
- Choose From option for the Add a condition box and select a sender according to your redirection. You can choose multiple senders here.
- Select the Redirect to option from the Add an action box and provide an email for redirection.
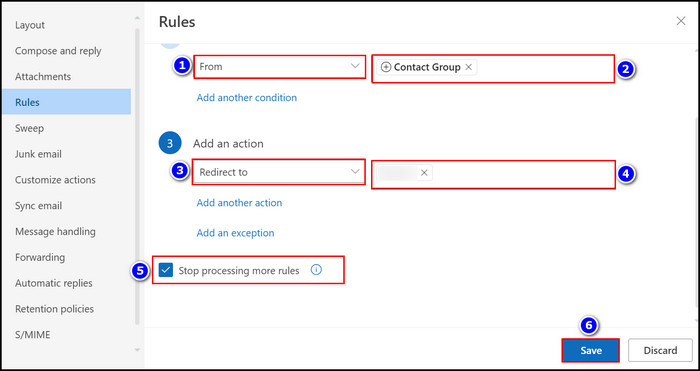
- Enable the Stop processing more rules checkbox.
- Press the Save key.
You successfully redirect emails to your Outlook account.
Quickly check our epic post on how to add profile picture in Outlook mobile app.
What is the Difference Between Email Redirecting and Forwarding?
When you forward an email, the sender location of that email changes, but when you redirect the email, the sender remains the same as before. That is the main difference between redirecting and forwarding emails on the Microsoft Outlook program.
I displayed the difference with a chart, so follow on to know.
Here is the chart of forwarding and redirecting email differences:
| Redirecting Emails | Forwarding Emails |
|---|---|
| Actual sender location remains the same. | The sender location becomes changed according to the forward location. |
| When you reply to a redirect message, it will go to the actual email sender. | When you reply to a forwarded message, it will go to the Forwarded location. |
| It can take a long time. | It is a fast process. |
Upon knowing the differences, you should use the best-suited option for yourself.
Check out our recent article on mark all messages as read in Outlook.
FAQs
Can Outlook emails be forwarded automatically?
Yes, you can forward Outlook emails automatically by creating a New Rule. If you use the Outlook Web or 365 platforms, move to Settings, then View all Outlook settings options, enable the Forwarding checkbox, and provide your email id.
Can you divert emails to another email address in Outlook?
Yes, you can divert emails to another email address in Outlook via two processes: the Forward and Redirect options.
How do I automatically forward emails from Outlook?
Follow the instructions to forward emails automatically from Outlook:
- Launch the Outlook app.
- Navigate into the File tab.
- Click on the Manage Rules & Alerts option.
- Select the New Rule option.
- Enable the Apply rule on messages I receive option and hit the Next key.
- Press the Next button and choose the Yes option.
- Enable the Forward it to people or public group box.
- Select the people or public group hyperlink from the description.
- Provide an email account in the To box and hit the OK key.
- Choose the Next button.
- Press the Next button and press the Finish button.
Wrapping Up
From the content, you learn that you can easily modify your Outlook application to forward emails automatically to your specified email account.
You can Create a New Rule or Enable the Forwarding checkbox if you are on the Outlook Web to auto-forward emails. The process is very simple and easy to follow, which I demonstrated in this article. So carefully trace those methods for your benefit.
I am always keen to solve your problems, so if you have any questions related to this topic, ask in the comment.