Starlink brings decent internet connection to remote and rural areas where broadband internet fails to serve.
Starlink’s internet has a significant impact on people living in such places.
The Starlink kit comes with a standard mounting option, but it might not be a permanent solution for everyone.
So, several official mounts and aftermarket or DIY mounts are available.
This post will guide you through the different Starlink official and DIY mounts for Starlink Dishy.
After reading the post, you will clearly know which Starlink mount is best for your needs.
So keep reading the post till the end.
Starlink Official And DIY Mounting Options
As Starlink is a satellite internet connection, you get a dish that connects to satellites.
The dish requires a clear sky view to get a decent signal from the satellites.
As such, mounting the dish correctly is crucial. If you miss mounting the dish correctly, there is a high chance you will not receive optimal internet.
Since Starlink uses low Earth orbit satellites, the dish must communicate daily with multiple satellites. Hence the dish often moves and reorients itself towards the satellite. That’s why the dish needs a wide field of view to ensure it can connect to the satellites properly. Trees, foliages, and electric poles are usually obstructions.
Depending on the house structure, obstruction in the surrounding areas, mounting place, and budget, you will need to use different mounting options.
The Starlink kit comes with a four-legged mount by default. The mount costs nothing extra, is strongly built and is lightweight.
The default mount is good enough for testing purposes or as a temporary solution. Most users would want a more permanent solution with a rigid mount.
There are different types of official mounting options available from Starlink. There are aftermarket options and adapters if you want to be cost-effective or need more flexibility.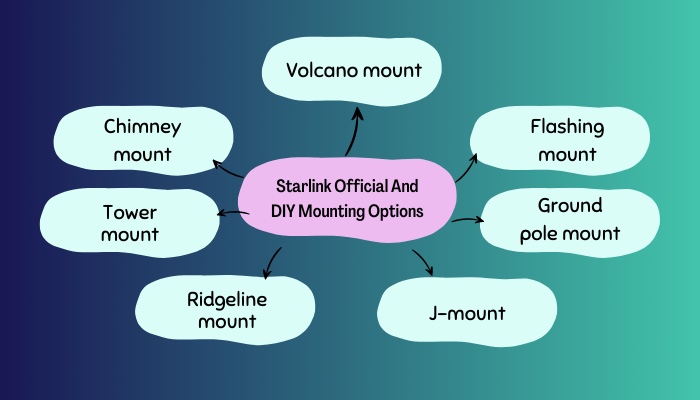
Here are the Starlink official and DIY mounting options:
1. Volcano mount
Volcano mount is officially available from Starlink. It is made for use on shingled roofs. You would drill the volcano mount onto the shingles for a permanent fit.
Decent quality sealants are included with the volcano mount to seal the drilled holes.
Since it needs drilling, the volcano mount is unsuitable for roofs with tiles, slate, and clay. There is no extra tube/stem with the volcano mount, so only the Starlink dish tube will give it some height.
That’s why if the Starlink dish needs more height to get an obstruction-free view, consider the J-mount or flashing mount.
Also, check out our separate post on does Starlink internet have data caps or limits.
2. Flashing mount
A flashing mount is a permanent solution to installing Starlink on the roof.
For most users, installing Starlink on the roof is the best option. Many people worry about leaks on the roof resulting from heavy rain or snow. The flashing mount is perfect in such scenarios.
The flashing mount will provide a water-tight seal on the roof, as it would install under the top shingle layer. It also means the installation will be strong and a more professional-looking one.
The official Starlink flashing mount comes with storage for extra cables. There is no scope to mount the Starlink dish directly to the flashing mount as the latter only provides the base.
You need to buy the Starlink volcano mount along with the official flashing mount to make it work.
A flashing mount is also available as an aftermarket option. If you decide to go with an aftermarket flashing mount, you need to buy a J-mount or something similar to mount the Starlink.
If the roof in your house does not have shingles, a flashing mount is not the perfect choice.
3. Ground pole mount
If installing Starlink on the roof does not remove obstructions to the dish, you need to consider the ground pole mount.
The ground pole mount is available from Starlink (about 8 feet in height) as well as third parties. You would install the ground pole by digging deep into the Earth to make it rigid.
You can also go DIY and use a 2″ diameter pole and Starlink pipe adapter to use as a ground pole. Pipe adapters are available officially from Starlink.
The official Starlink pipe adapter will attach to poles with a diameter of up to 2.5″. The pipe adapter will slide over the pole, then the screws will hold it in place.
Ground poles are an option when you do not want to mount Starlink on the roof/walls. You must take care to route the cable from the top into the ground and then to the router.
Go and check our other article on Starlink for gaming-is it good or bad.
4. J-mount
J-mount is the most versatile option for mounting Starlink. You can use J-mount on the roof, walls and any plane.
J-mount is a standard option used for mounting dishes of other facilities. That’s why it is widely available on the market and is quite affordable.
But since it is not specifically made for Starlink, you would need some DIY to make it compatible. The diameter of the J-mount pipe should be around 1.5″ to make it work with Starlink. You must also buy an adapter to connect it to the Starlink tube.
If your Starlink dish needs more than 2-4 feet to get a clear sky view, J-mount will not work. But J-mount is the best choice when the roof of your house or any external wall has enough clearance for a Starlink dish.
5. Ridgeline mount
Ridgeline mounts are suitable for those who do not want to drill holes into the roof.
Flashing mounts require drilling on the shingles to attach the mount to the roof. If you don’t like that, a ridge line mount or non-penetrating roof mount is the one to get.
Ridgeline mounts are held to the roof using external weights like sandbags or blocks of concrete. So you need to source it yourself.
Previously Starlink used to sell ridge line mounts, but recently they have discontinued it. So you need to look at aftermarket options.
Ridgeline mounts also do not have a mast. So you need to buy mounts like the J-mount to use the Starlink dish with the ridge mount. To protect the roof from the metal, you can buy a pad that will sit between the two objects.
As you can see, you need to outsource quite a few items to make it work with Starlink. If you have the budget for that, ridge line mounts are decent options. Also, you can move the ridge line mount around since it is not drilled into place.
A flashing mount will do the job fine if you don’t need such flexibility or want something cheaper.
Also read on how long is the waitlist for Starlink.
6. Tower mount
If the surroundings of your house or the roof do not give a clear view of the sky, you need to mount the Starlink dish at a great height using a tower mount.
Also, a tower mount is the first option if the Starlink dish needs to be installed far away from any buildings.
It will be a more involved process than just a DIY solution, so you need to seek professional help to install a long tower. A pipe adapter or J-mount is required in order to mount the Starlink dish at the top of the tower.
As you would need to ask the professionals to install the tower, it will be pretty expensive.
7. Chimney mount
Mounting the Starlink dish on the chimney is suitable if the roof does not give enough height for an obstruction-free view.
Roofs made of slate, clay or other materials cannot use drills to secure the mount. So roofs without shingles need a chimney mount.
Chimney mounts use stainless steel clamps that go around the chimney.
To secure the Starlink dish on the chimney mount, you would need a pipe adapter like the one available in the Starlink shop. Aftermarket pipe adapters will also work just fine. Check the pipe diameter the chimney mount can fit.
The installation will depend on the type of chimney you have, the size of it and the chimney mount you buy.
Quickly visit the links to find out does Starlink offer satellite phone service.
Final Thoughts
Starlink dish needs to have a clear sky view to connect with satellites without issues.
Most users would mount the Starlink dish on the roof of their house as it clears obstructions like trees and foliage.
Depending on the roof material and user preference, there are different options like flashing mount, volcano mount, ridge line mount or chimney mount.
J-mount is decent enough and affordable if the small height gets enough clearance for the Starlink dish.
To mount Starlink dish on the ground or away from any buildings, ground pole mount or tower mount are to be considered.