You are watching football on TV & your child comes into the room & starts watching with you. During the half-time break, you start switching to channels & a cartoon channel shows up. That’s the time your children will insist you stay on that channel.
This indicates, until you don’t see anything, you have no idea what’s going on, & when you see it, you want to try it. SharePoint’s security trimming is a feature to hide SharePoint items used for security reasons, which is covered in this article. So let’s dive in.
The thing that comes to mind after hearing trim, is hair trimming. Well, today’s not the day we are talking about cutting beards or mustaches. It is SharePoint security trimming. So what is that?
Security trimming in SharePoint is a feature by which only handpicked users will be able to access specific items, whereas it will be invisible to others. This means only exclusive users will know the SharePoint item exists & others will have no clue.
For example, you can create a site for HR management or a site where only top leaders are members for confidential files. Alternatively, you can externally share files in SharePoint & create an individual site to manage them.
Now you can set different permission levels in SharePoint to contribute or read & manage access to those sites’ contents. But it’s not rare, you can grant permission to some unauthorized users by mistake.
So instead of creating multiple permission levels & changing group permissions, you can hide specific Sharepoint items such as SharePoint site navigation, files, pages, or even a web part to keep these utterly anonymous to others.
For this, we have to use the audience targeting feature in SharePoint for security trimming. So the users that are selected for the HR management site by audience targeting, only will find the site by searching, but others won’t find the site & their search results will be different. Let’s proceed with how to use audience targeting to restrict visibility to others.
In the beginning, you have to ensure security trimming is enabled in SharePoint. To verify that,
- Go to the SharePoint site & click on the gear icon from the top right side.
- Select Site contents & then go to Site settings.
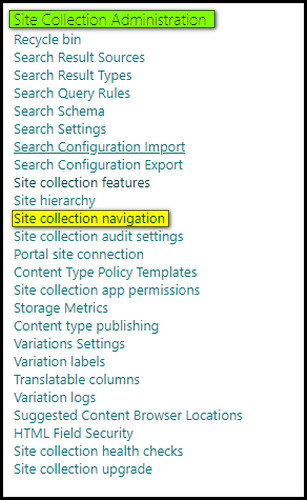
- Click on Site collection features under Site Collection Administration & Activate SharePoint Server Publishing Infrastructure.

- Go back to the site settings page & select Site collection navigation from Site Collection Administration.
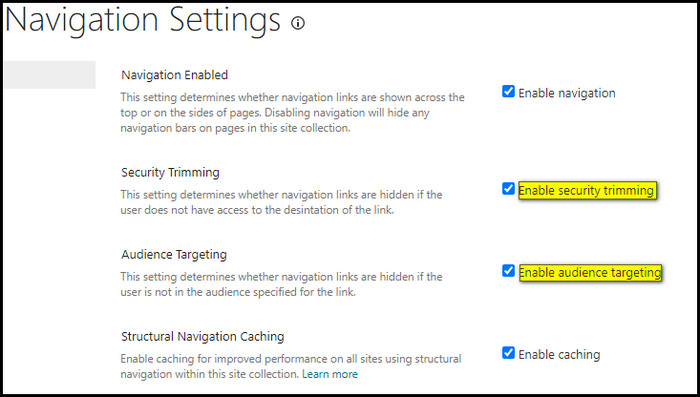
- Ensure security trimming & audience targeting are checked & hit OK.
Now, it’s time for security trimming. Here, I will show you to hide navigation links in the menu for one of my Communication sites,
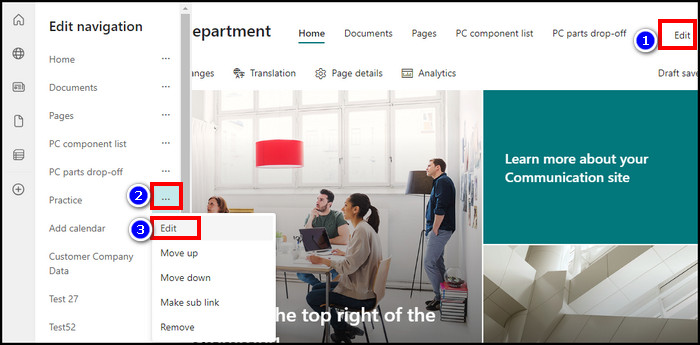
- At first, I go to the SharePoint Communication site & then click on Edit from the top ribbon navigation.

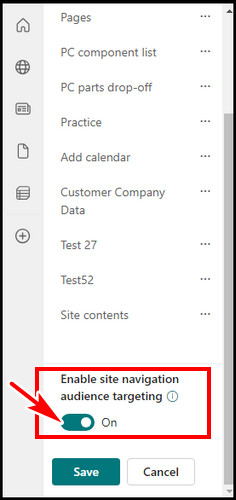
- Then, I toggle on the Enable site navigation audience targeting from the bottom left & hit Save.
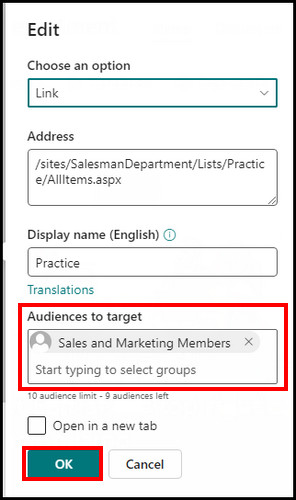
- After that, I click Edit again from the top & then the horizontal ellipsis for the navigation I want to set for security trimming. Then pick Edit from that list.
- Now, input the authorized group member in the Audiences to target box & hit OK.
Similarly, by setting audience targeting, you can secure trimming for pages, library, or web parts. To get an idea, I’m showing steps to set the target visibility of a SharePoint site’s web part.
- Click on Edit from the SharePoint Home page to edit the page.

- Select the web part & hit edit web part.
- Turn on Enable audience targeting.
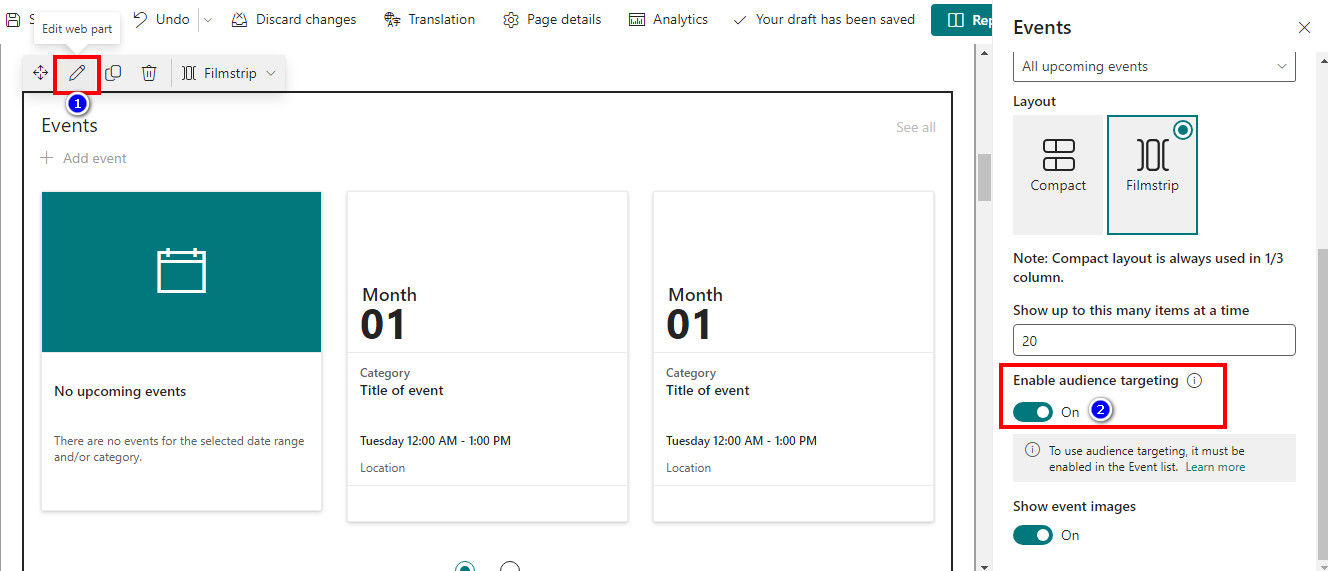
- Hit Republish from the top right.
- Insert new content in the web part & you will be able to set the target audience for that web part.
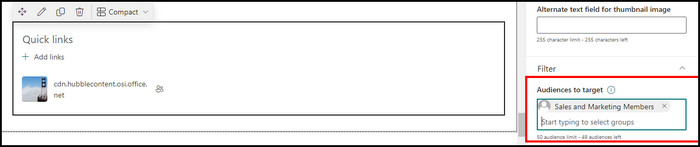
So, in this case, only sales and marketing members will be able to see this. Thus, we security trimmed the quick links web part from other users using the target audience feature in SharePoint.
FAQs
How do I check SharePoint security?
There is an option to check permissions per user from SharePoint’s site settings. Navigate to SharePoint site settings > select Site permissions under Users and Permissions. Click Check Permissions from the ribbon. Input a name & hit Check Now.
How is SharePoint access controlled?
Generally, with a set of permissions, users can get authorization for what they can do. Can they edit or just read? It works like a role-based membership, where the site owner or admins set permissions for users & restrict access from unauthorized content.
Does SharePoint have an antivirus?
When a Microsoft 365 subscriber uploads files in SPO, OneDrive, or Teams, the content automatically gets scanned by a built-in virus protection engine. MS uses a common virus detection tool for this & is available for all members.
Conclusion
Hiding the most sensitive content from others is more reliable than setting individual permission per group, in my opinion. With SharePoint’s audience targeting, we can perfectly use this concept for SharePoint’s pages, site navigation, or web parts.
In this article, I explained how you can take advantage of the target user feature & protect your confidential files in a more secure way.