Ever wondered why there is a hissing noise coming out of your PC, although you’re onto something basic? Or is it that your system is running hotter than usual?
The good news is that you can handle both paradigms by tinkering with the fan speed at a certain temperature bracket in the BIOS. Also known as the fan curve.
This write-up will help you adjust the fan settings for the best performance, noise levels and thermals.
Let’s dive right in.
See our most recent post on why your BIOS settings won’t save.
Adjust Fan Curve in the BIOS
Tweaking the fan settings in the BIOS is the most effective method for creating a fan curve. It rarely fails and glitches out. Hence, helps to achieve the optimal balance between the temperature and loudness of the system.
Note: Press the assigned key, such as F2, F10, or Del, to get into the BIOS. This button may vary depending on the manufacturer.
Here are the steps to set a new fan curve in BIOS:
- Enter the main splash screen by pressing the BIOS switch while booting up the PC.
- Navigate and access the Hardware Monitor (MSI), QFan Control (ASUS), Smart Fan (Gigabyte), or HW Monitor (AsRock).

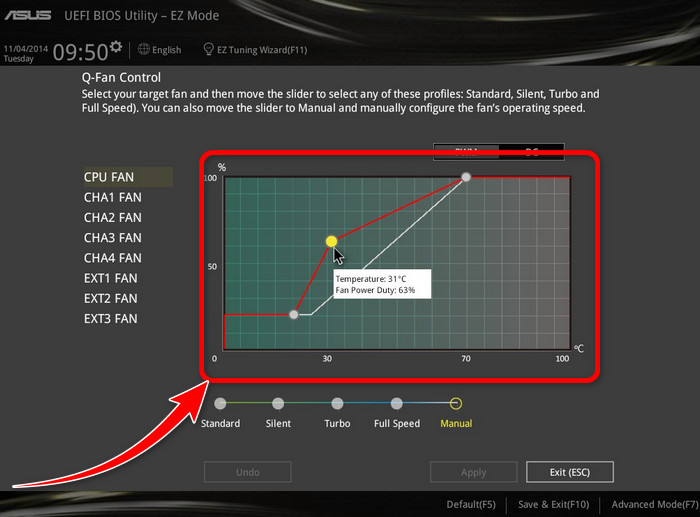
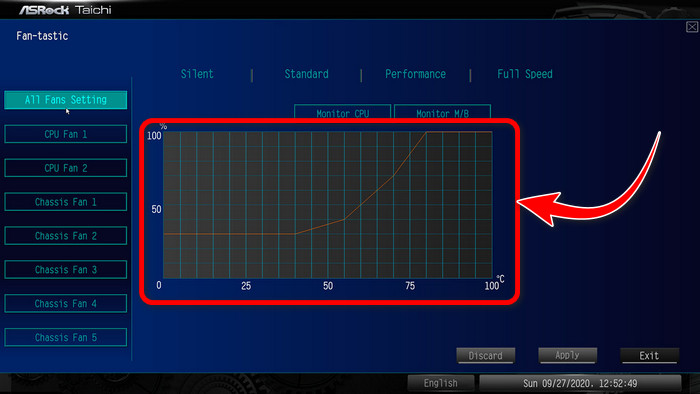
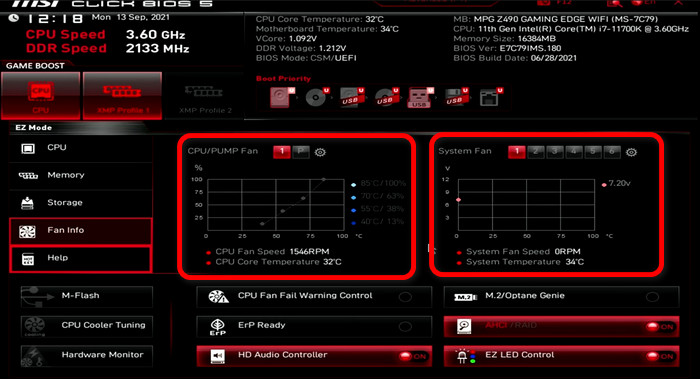
- Select the fan you want to control and press Enter. A new screen with a 2D graph will come up.
Note: X and Y axis interpret temperature in celsius and fan speed in percentage or RPM, respectively.
- Grab the little dot pointers and place them according to your preference. They set fan speed according to a temperature, such as 40% fan speed at 60-degree celsius.
- Repeat this process for the number of fans you want.
- Save and Exit.
Reboot your PC and check whether the new fan curve works to your liking. You may have to try it out multiple times to find the sweet spot. Eventually, you’ll achieve a lower noise profile with excellent system thermal performance.
However, if you find BIOS settings too intimidating, additional softwares are available to modify fan settings.
Follow our step-by-step guide to fix Gigabyte BIOS ID check error.
Set Fan Curve Using Third-Party Program
Free softwares like Fan Control, MSI Afterburner etc., lets you control all the fans installed on the system, including the CPU cooler, GPU and system fans.
However, these programs may get reset anytime due to a glitch. In that case, you have to set your profile all over again.
Here are some brilliant softwares to adjust the fan curve:
Fan Control
Fan control is a brilliant piece of freeware developed by some talented developers. The UI is self-explanatory, showing you all the active fans on the system right off the bat.
You can label your fans to recognize them quickly and adjust the speed (RPM) with a slider. It gives you full control over the fans.
Impressive right? Wait till I show you the fan curve implementation.
Here is the process of creating a fan curve:
- Click the lemon plus (+) button from the bottom right of the application window.
- Choose Add “Graph” fan curve with a mini graph icon. It will open a mini-card named Graph.
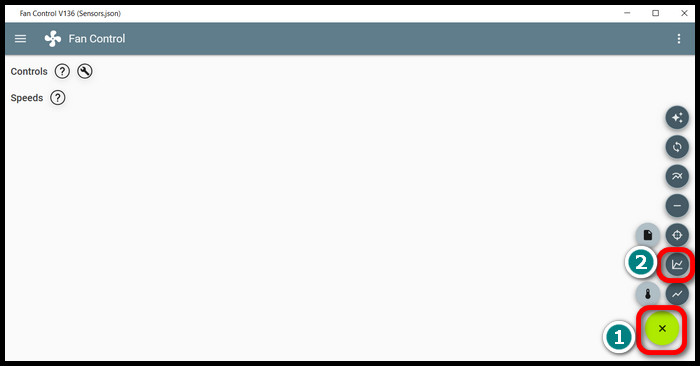
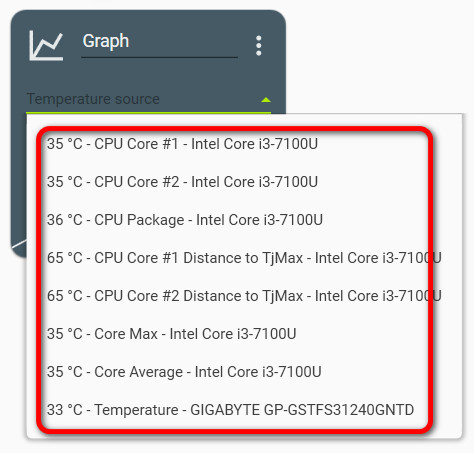
- Choose a temperature source such as CPU, GPU, system fan etc.
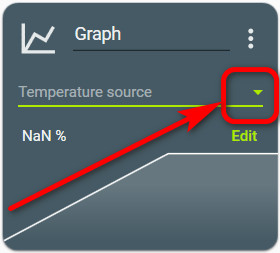
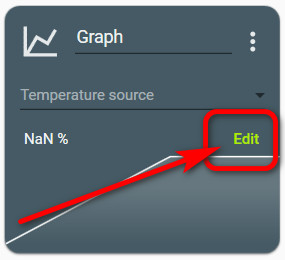
- Select Edit, and a new screen with a graph will come up.
- Click on the graph line to add a new pointer. Add as many as you need.
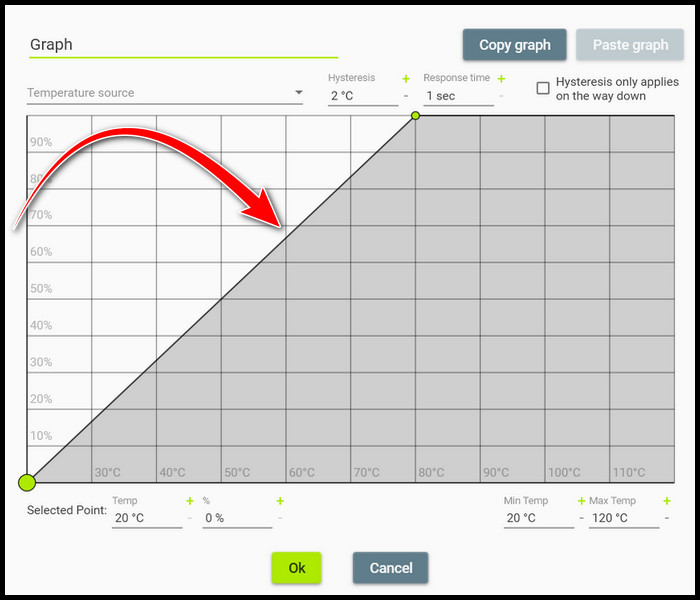
- Move the pointers and set the fan speed against the temperature.
- Press OK.
- Select the ellipses (three-dot) icon from the top right corner of the main window.
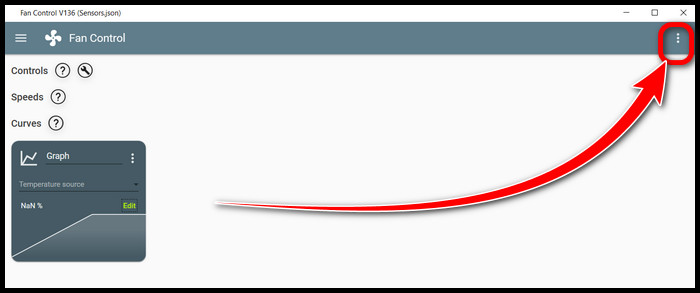
- Choose Save configuration.

And you have successfully created a new fan curve from scratch. It will work for a targeted fan of your system.
Check out our recent article on PC keeps restarting before BIOS.
MSI Afterburner
For the GPU, MSI Afterburner has been a no-brainer for a long time. It’s an essential software, especially if you own a gaming pc. You can achieve unprecedented dB levels and thermal performance from your graphics card.
Here’s how to modify the fan settings with MSI Afterburner:
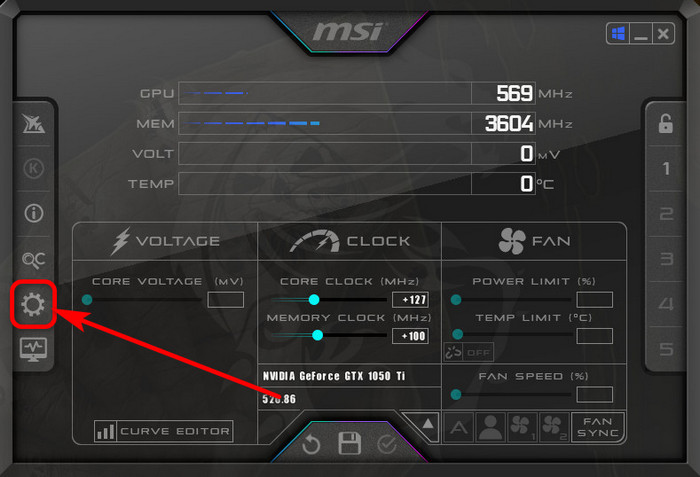
- Click on the gear icon from the left pane.
- Switch to the Fan tab from the new window.
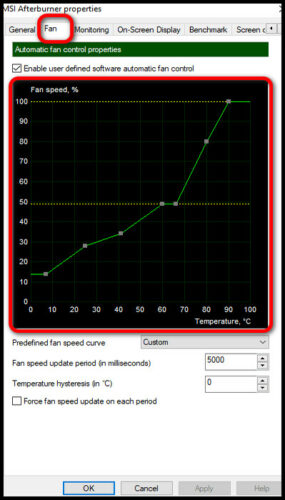
- Move the dot points around and place them according to your preference. I recommend keeping a fan speed of 20% at 0-35-degree and 100% at 80-degree celsius.
- Click Apply once you finish setting up the fan curve.
Run GPU stress tests and graphically demanding games test the new fan profile. If everything works, then leave it as is.
You see, it may seem like only the GPU will perform better, but it affects the whole system’s performance.
But before that, go through our epic guide on why black screen after BIOS update.
Why Is Fan Curve Important?
You know, a computer generates heat while undertaking resource-heavy tasks. It’s strongly perceivable when you play graphically intensive games like Cyberpunk 2077. Besides, if you use your machine for heavy liftings, such as 3D rendering on Blender, it spits heat like a dragon! 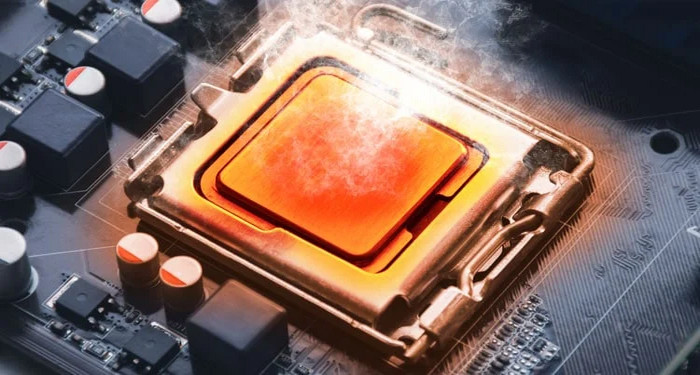
See, most of the heat comes from your CPU and the GPU. Moreover, heat cripples the performance of any component of a computer. It’s reversely proportional. Makes sense why there are multiple fans on AIOs and GPUs, right?
Yes, fans on these components start to spin like a tornado to keep them cool and prevent thermal throttling. 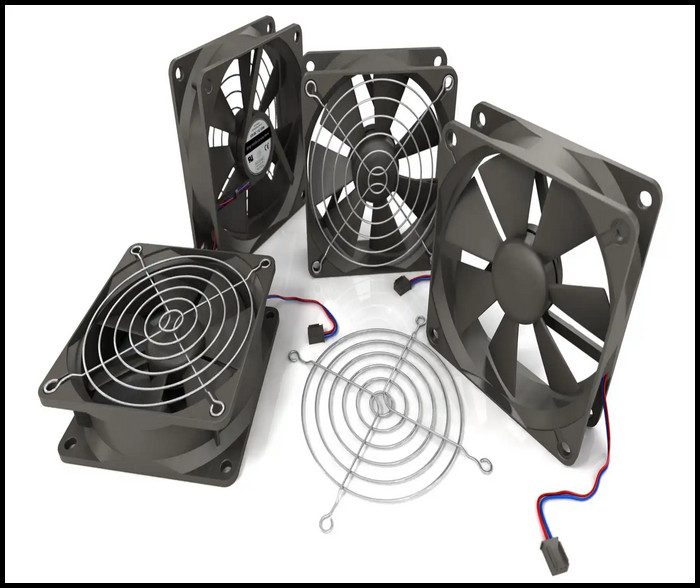
So, that solves the problem, right? Wrong!
There’s another elephant in the room — noise. Extreme fan speed elevates the dB level, which can jeopardize your work, such as streaming, video editing or recording.
What to do now? Seems like every solution creates a new problem. Luckily setting a custom fan curve mitigates all these issues.
Basically, a fan curve lets you find an optimal state where the noise level and the temperature will be at a minimum. As a result, your system will be at it’s peak performance without disrupting the ambiance and keeping the temperature in check. 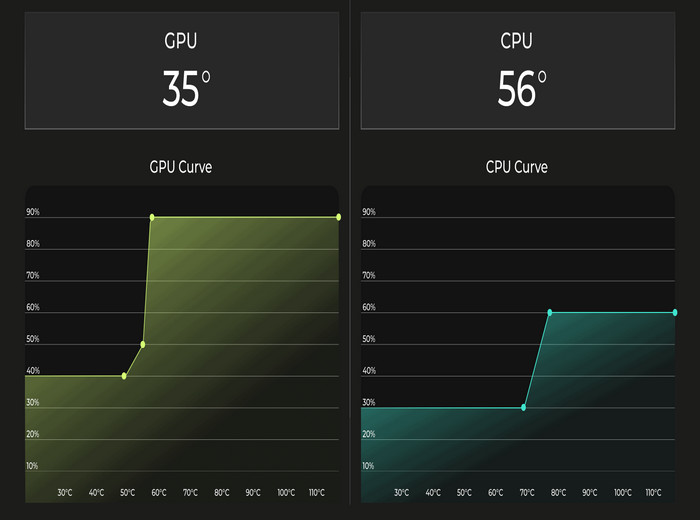
Find out how to run check disk from BIOS.
Ending Remarks
Fan curve may seem tedious, but it all pays off once you tune your system to the right values. There’s nothing to lose; rather, achieve better performance and temperature.
This guide serves as the best guide to achieving an optimized system.
For further queries, comment down below and let me know. Ciao!