Writing the same Welcome message, warning, or confidential information in your emails repeatedly becomes repetitive and wastes time. It’s where Outlook’s Quick Parts and AutoText features come into play.
These features allow you to save text blocks, images, and other objects with unique names. Later, you can use these names to quickly insert the texts and objects in your emails.
In this article, I’ll explain the methods to create and use Quick Parts and AutoText in Microsoft Outlook.
Let’s begin!
How to Create Quick Parts And AutoText in Microsoft Outlook
To add Quick Parts in Outlook 365, go to the Insert tab when composing an email. Highlight your text, and select Text > Quick Parts > Save Selection to Quick Part Gallery. Choose Text > Quick Parts > AutoText > Save Selection to AutoText Gallery to create an AutoText.
You can also use these steps to make Quick Parts in Outlook 2016, 2013, 2010 & 2007 editions.
Below, I’ve provided the method to construct AutoText and Quick Parts in Outlook.
Here are the steps to create Quick Parts in Microsoft Outlook:
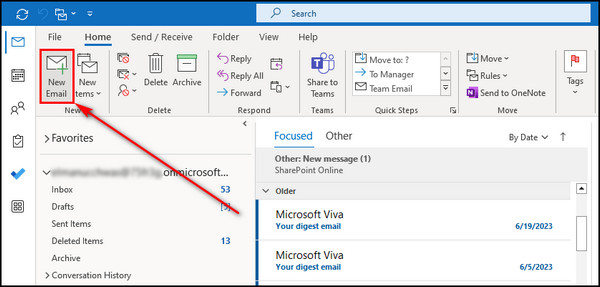
- Launch the Outlook app on your desktop.
- Click the New Email button from the top left corner.
- Compose your reusable building block content.
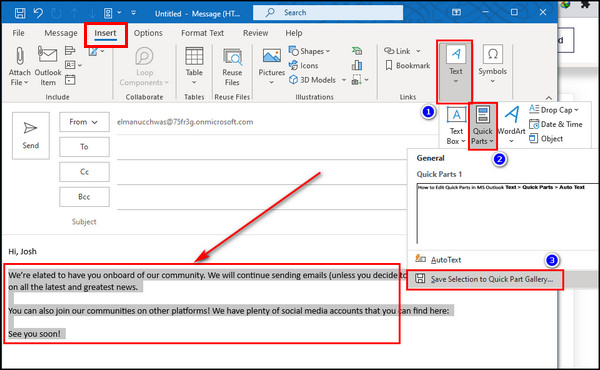
- Proceed to the Insert tab.
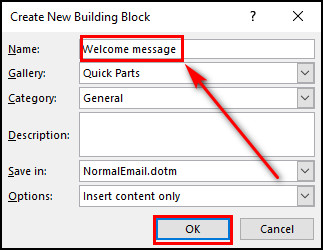
- Choose Text > Quick Parts > Save Selection to Quick Part Gallery, and a new dialog box will open with the following attributes:
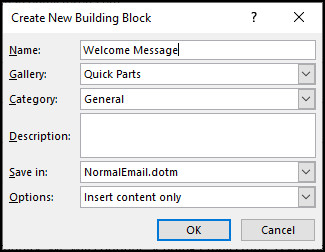
- Name: You can insert building blocks by name in your emails. So, choose a meaningful and short name for your Quick Parts to save time.
- Gallery: Choose the gallery where you want to keep your reusable text blocks. In Outlook, you can use several galleries.
- Category: This option is like subfolders inside your reusable building block gallery. It helps to organize your Quick Parts. By default, the Category is set to General.
- Description: Add some details of the Quick Part you are creating.
- Save in: Choose NormalEmail.dotm for this field so the Quick Part you create will be usable in all your emails and items inside Outlook.
- Options: This field has Three choices — Insert content only to inject just the Quick Part, Insert in its own paragraph to put your Quick Parts in a separate paragraph, and Insert content in its own page to include the Quick Part in a different page. You are more likely to use the last option in Microsoft Word.
- Click OK to save your new Quick Part.
If you want to create an Outlook AutoText, select the text block you often use, then choose Text > Quick Parts > AutoText > Save Selection to AutoText Gallery. You’ll see the same attributes of the Quick Parts. 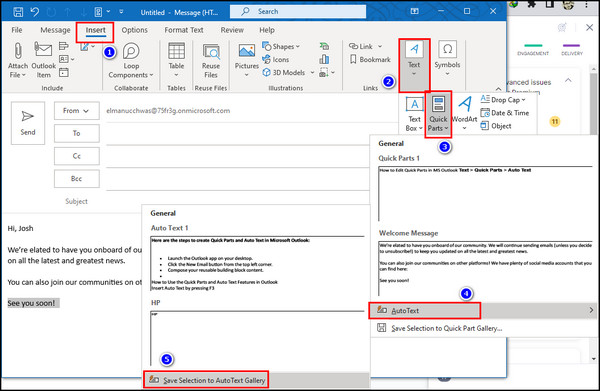
How to Use the Quick Parts and AutoText Features in Outlook
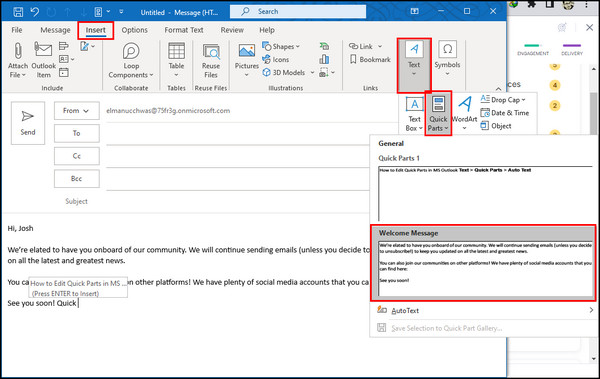
You can insert Quick Parts and AutoText simply by typing their unique names and then pressing Return when you get the Press ENTER to Insert suggestion. Additionally, after writing the reusable text block name, you can use the Outlook AutoText shortcut key, F3.
Follow the methods below to use the Quick Parts and AutoText features in Outlook:
1. Use Shortcut to Insert Quick Parts & AutoText
F3 is the keyboard shortcut for Quick Parts in Outlook. It is the fastest method to inject your Quick Parts when writing an email.
Here’s the process to use a shortcut to insert Quick Parts & AutoText:
- Compose your email and place the cursor where you want to inject your AutoText or Quick Part.
- Enter your reusable text block name and press F3 on the keyboard. Outlook will insert the Quick Part or AutoText after the cursor.
2. Press Enter to Auto-Complete Quick Parts
Like the shortcut key, you can press Enter to quickly insert Quick Parts and AutoTexts into your email.
Here’s how to press Enter to auto-complete Quick Parts:
- Open a New Email window in Outlook.
- Start typing your Quick Part or AutoText name.
- Press Enter on the keyboard when you see the Press ENTER to Insert suggestion to add your reusable text block.
3. Insert Quick Parts from the Gallery
All your reusable text blocks, whether Quick Parts or AutoText, are saved in their own gallery. So, to insert Quick Parts in your message, open the associated gallery and select the text block.
Here are the steps to insert Quick parts from the gallery:
- Place the cursor where you want to add your Quick Part when composing a new email.
- Go to the Insert tab.
- Select Text > Quick Parts.
- Choose the text block you want to insert.
To insert an AutoText from its gallery, proceed to the Insert tab, select Text > Quick Parts > AutoText, and choose your text block. 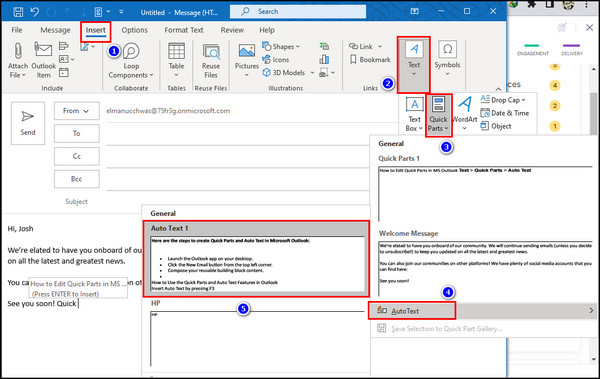
How to Edit Quick Parts in Outlook
After creating a Quick Part, select Edit Properties to change its attributes. Additionally, to modify a reusable block’s content, insert it into an email, edit it as needed, and save it with the same name. Outlook will replace the old Quick Part with the updated content.
Below I’ve provided the methods to edit Quick Parts in Outlook:
1. Rename and Modify Quick Part Attributes
After creating a reusable building block, you can change its properties from the gallery where you’ve saved the Quick Part.
Here’s how to rename and modify Quick part attributes:
- Select New Email from the Home tab in Outlook.
- Move to the Insert tab.
- Select Text > Quick Parts, and you’ll see a list of all the reusable text blocks you’ve saved in the Quick Parts gallery.
- Right-click on the text block you want to modify and choose Edit Properties.
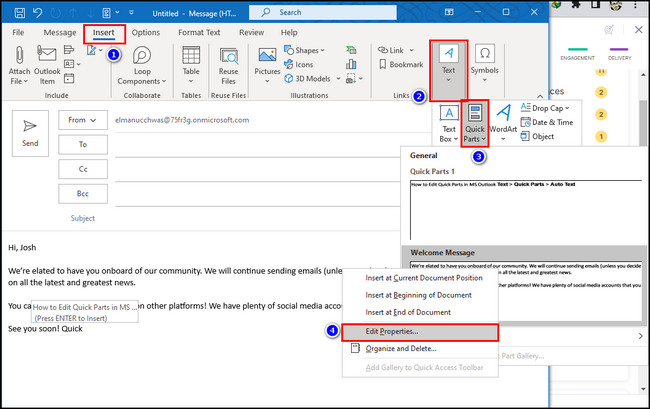
Now, you can rename the Quick Part, change its Gallery & Category, and define how to incorporate it in your emails.
2. Change the Content of a Quick Part
In addition to changing the properties of a Quick Part or AutoText, you can also modify its content.
To change the content of a Quick Part:
- Add the Quick Part in a new Outlook email window.
- Update its content.
- Highlight the text block once you’ve modified it.
- Choose Text > Quick Parts > Save Selection to Quick Part Gallery.
- Input the same name as the Quick Part you’ve updated in the Name attribute.
- Click OK after selecting other attributes.
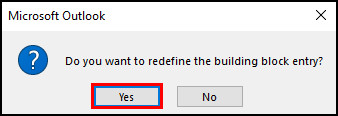
- Select Yes when a confirmation message pops up.
3. Delete Quick Parts
When you no longer use a reusable text block, remove it from your gallery to keep your Quick Parts and AutoText lists organized.
Here’s how to delete Quick Parts:
- Open a New Email dialog box in Outlook.
- Go to the Insert tab and select Text > Quick Parts.
- Right-click anywhere on the Quick Parts Gallery and select Organize and Delete.

- Choose the Quick Part or AutoText you want to remove and click the Delete button.
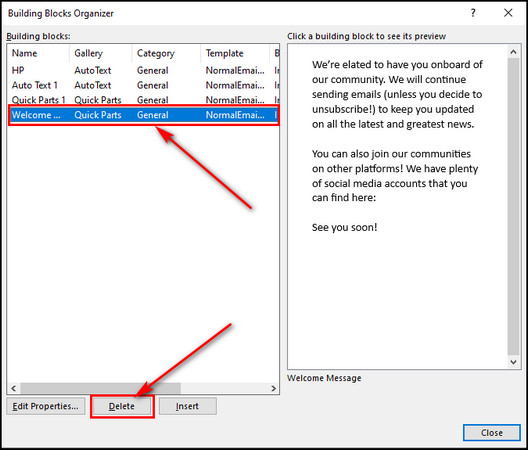
- Select Yes to confirm the deletion process.
4 Pro Tips & Tricks for Outlook Quick Parts You Should Know
In Outlook, back up and restore your Quick Parts, by keeping the NormalEmail.dotm file safe from Microsoft Templates. Also, transfer the file to another computer to use reusable text blocks in that device. To quickly access Quick Parts, customize the Ribbon to add it to the Message tab.
Here are the 4 pro tips & tricks for Outlook Quick Parts you should know:
1. Copy Quick Parts to Another Computer
By copying the NormalEmail.dotm file, from one device to another, you can transfer all your Quick Parts and AutoTexts to that device.
Follow the steps below to copy Quick Parts to another computer:
- Open Windows Explorer and go to the following directory:
C:\Users\User Name\AppData\Roaming\Microsoft\Templates.
- Copy the NormalEmail.dotm file.
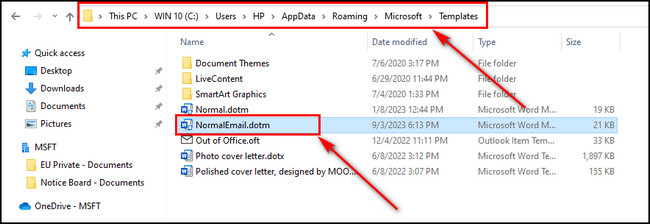
- Go to the exact location as described above from another computer.
- Save the NormalEmail.dotm file in that directory.
2. Add Quick Parts to the Quick Access Toolbar
If you always use Quick Parts, add them to the Quick Access Toolbar to easily access and use your reusable text blocks.
Here’s how to add Quick Parts to the Quick Access Toolbar:
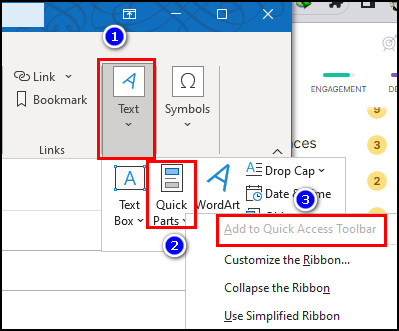
- Open a New Email in Outlook.
- Proceed to the Insert tab.
- Click on the Text button.
- Right-click on Quick Parts and choose Add to Quick Access Toolbar.
Now, the Quick Parts option will be available on the toolbar in the Insert tab. You can also include the AutoText option in the Quick Access Toolbar.
3. Add Quick Parts to Outlook Message Tab
You’ll have to go to the Insert tab to use the Quick Parts. But if you want to access them much faster, you can add the option in the default Message tab. So, when you open a new email, the Quick Parts option is right on the toolbar.
To add Quick Parts to the Outlook Message tab:
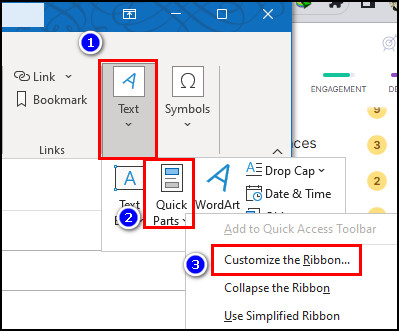
- Select New Email in Outlook.
- Go to the Insert tab.
- Click the Text button.
- Right-click on Quick Parts and choose Customize the Ribbon.
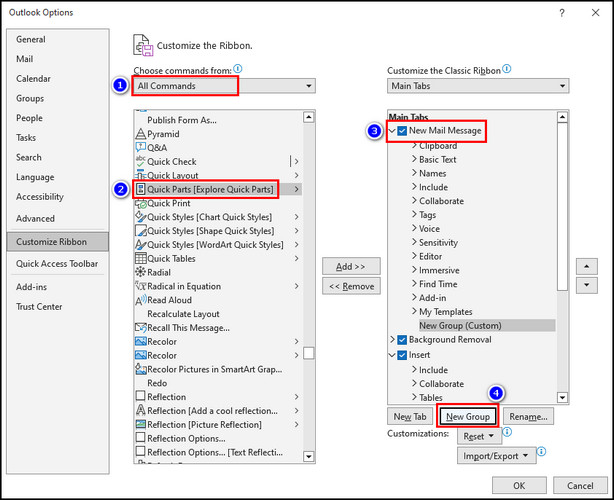
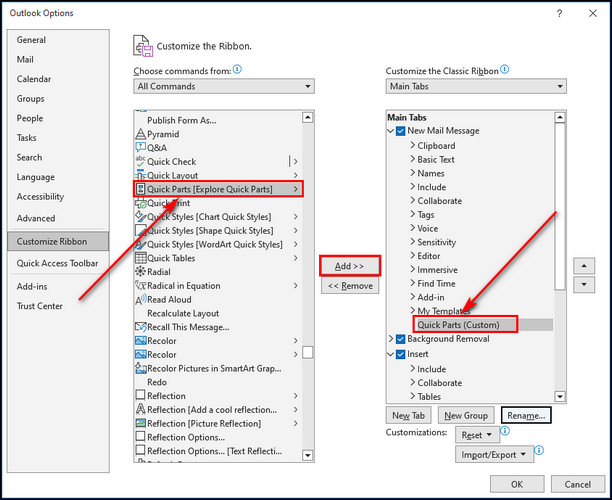
- Select All Commands from the Choose commands from dropdown and select Quick Parts from the list below.
- Expand New Mail Message from the list on the right and click the New Group button.
- Choose the New Group and click Rename.
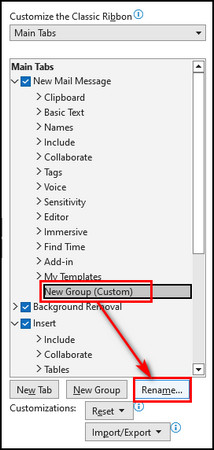
- Input Quick Parts as the name and click OK.
- Click the Add button in the middle and then OK.
After these steps, the Quick Parts option will be available in the Message tab toolbar.
4. Back-Up and Restore Outlook Quick Parts
As I’ve explained before, all your Outlook Quick Parts and AutoTexts, along with your custom styles, are saved in the NormalEmail.dotm file in the following location:
C:\Users\User Name\AppData\Roaming\Microsoft\Templates.
So, if you want to back up your Quick Parts, just make a copy of the NormalEmail.dotm file in a safe location, and when you want to restore the text blocks, move the file to the above-described directory.
Quick Parts vs. AutoText: When to Use Which Option?
The main difference between Quick Parts and AutoText lies in their storage location. Quick Parts text blocks are kept in the Quick Parts gallery, while AutoText entries are in the AutoText gallery. When creating a new building block, you can choose the gallery.
Quick Parts and AutoText represent two distinct categories in Outlook. Though both features store various content snippets, they serve specific purposes.
When to Use AutoText
AutoText is ideal for compact text snippets, such as abbreviations for company or personal names. So, you can quickly insert them into your message just by typing the abbreviations.
When to Use Quick Parts
Quick Parts is better suited for storing large blocks of text, including tables and images.
FAQs
What is AutoText in Outlook?
AutoText represents a frequently used building block that houses both text and images. You can create and modify these building blocks using the Building Blocks Organizer.
Where are the Quick Parts of Outlook 365?
Quick Parts and AutoText are saved in the NormalEmail.dotm file in Outlook 365, which is stored in C:\Users\User Name\AppData\Roaming\Microsoft\Templates. These features allow users to save frequently used text and snippets to easily insert into emails.
What is the difference between Quick Parts and AutoText in Outlook?
AutoText is suited for short text snippets, like abbreviations for company or personal names. It allows you to incorporate them into your message with just a simple abbreviation input. On the other hand, Quick Parts is more suitable for saving large sections of text, including tables and images.
Why is the Outlook Quick Parts option missing?
Outlook Quick Parts option is missing can be due to either the app not closing correctly or a corruption in the NormalEmail.dotm file. Update your Outlook version, and try creating a new reusable building block to check if the issue persists.
Final Thoughts
Quick Parts and AutoText are powerful tools in Outlook that simplify your email writing process and improve productivity.
By following the processes provided in this article, you can create reusable text blocks to save time, maintain consistency, and communicate more effectively.
Comment below if you have further questions, and we’ll get back to you.