You recently upgraded to Windows 11, and everything’s working perfectly except for the graphics card. If you are an NVIDIA graphics card user, you are not the only person to face this issue.
While other graphics cards like AMD Radeon can also cause similar issues, there are more users with NVIDIA who are stuck with this problem.
Don’t worry, it’s not the end of the world, and if you follow this guide from start to finish carefully, it won’t be long before you start using your NVIDIA GPU for all your gaming/multimedia needs. So, grab some coffee and start reading already.
Check out our separate post on can i use a freesync monitor with an Nvidia Card.
Why Is My NVIDIA Graphics Card Not Being Detected?
Your NVIDIA graphics card is not being detected because it’s disabled in BIOS. On the other hand, outdated or corrupted drivers will also cause this problem. If this isn’t the case, something may have gone wrong with the GPU installation, so you may need to reassemble everything.
NVIDIA GPU manufacturers shouldn’t be blamed for this detection issue since all the causes listed here apply to all GPUs. As a result, if your Radeon graphics card also faces a similar issue, then the reasons would still be the same.
Here is a list of reasons why your NVIDIA graphics card is not being detected:
- Improper installation of GPU – Windows can only detect your graphics card when it’s installed 100% correctly. If the GPU weren’t inserted properly into the card slot, no amount of software corrections would be able to make Windows detect your GPU.
- Failed Windows Updates – Although Windows Updates are less error-prone these days, they are still not completely reliable. Since these updates can modify core system drivers, like the audio or GPU, it’s important to ensure your updates go smoothly to prevent issues.
- GPU Disabled in BIOS – Every PC has a BIOS mode that can configure hardware directly, so your Windows will not be able to detect your GPU as long as you don’t enable it in BIOS.
- Outdated BIOS – While BIOS updates aren’t released frequently like other software, it’s important to ensure that it is always kept up to date so that nothing disrupts its communication with hardware components, like the GPU.
- Incompatible / Outdated drivers – The most important component for any hardware is its drivers so if the wrong drivers are installed, your PC won’t be able to detect your NVIDIA graphics card.
Keep the list above in mind so that you can avoid irritating situations like this in the future. Go ahead and scroll to the next section to find the solutions and fix your graphics card.
Also read how to update drivers on Windows 11.
How To Fix NVIDIA Graphics Card Not Detected in Windows 11?
You can fix the NVIDIA graphics card not detected in Windows 11 by fixing corrupted files, updating BIOS or by installing / upgrading your graphics card drivers. If none of these solves your problem, you need to remove the GPU and reassemble everything carefully.
Follow these steps to fix the NVIDIA graphics card not detected in Windows 11:
1. Scan and Fix Corrupted Files
Third-party software or temporary residual files can sometimes corrupt crucial system files that can interfere with your GPU. Fortunately, Windows can detect and fix issues automatically if you just enter a simple command.
Follow these steps to scan and fix corrupted files in Windows:
- Press the Windows and R keys at the same time to open a Run window.
- Type cmd in the text box and press the Enter key to launch it.
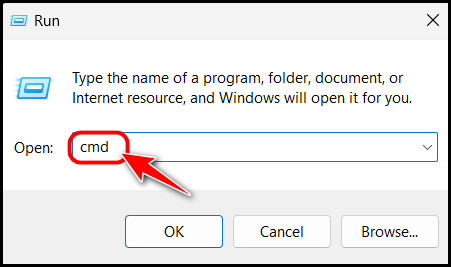
- Type or copy and paste sfc /scannow in the Command Prompt window to execute it.

- Reboot your PC once the process completes.
If your issue isn’t serious, this simple fix should solve it. Don’t worry if your GPU is still undetected because you have many more solutions to try.
Follow our guide to fix blue screen on Windows 11.
2. Update GPU Drivers
There are multiple ways you can update your drivers, but I recommend following the sequence I describe for the best results. Basically, I recommend updating through the Settings app and then from the Device Manager.
If you can’t find any changes after this, you need to try using third-party software to update them.
Follow these steps to update your GPU drivers:
- Use the Windows + I shortcut to launch the Settings app.
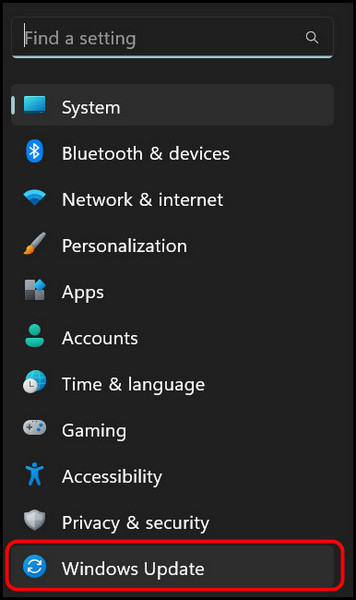
- Click on the Windows Update menu at the left navigation panel to switch to it.
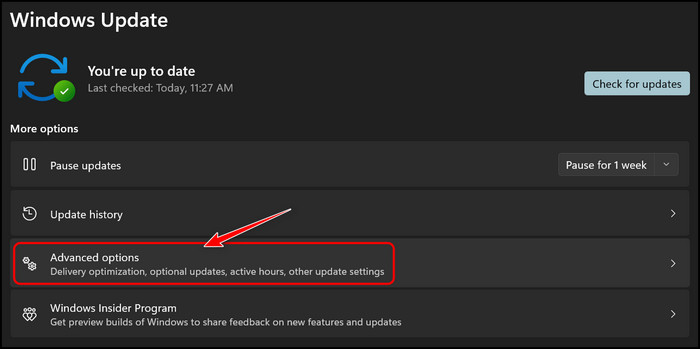
- Click on Advanced Options from the right panel.
- Scroll to the Additional Options section and select Optional Updates from the list.
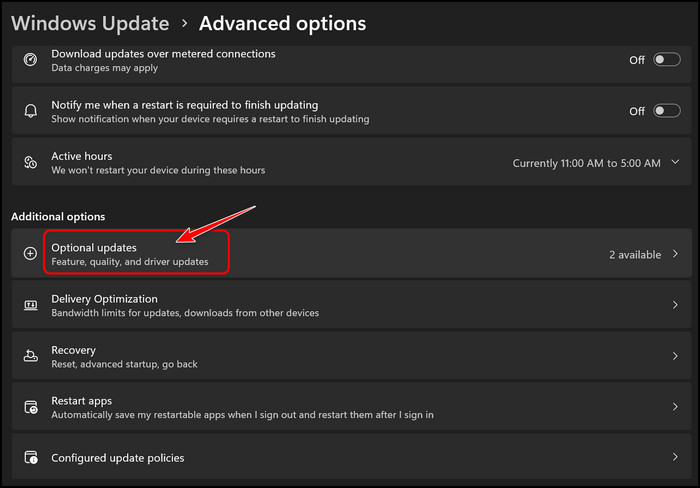
- Click on Driver Updates to expand it and check every option under it. Once that’s done, click on the Download & Install button to proceed.

- Reboot your PC once the drivers are updated.
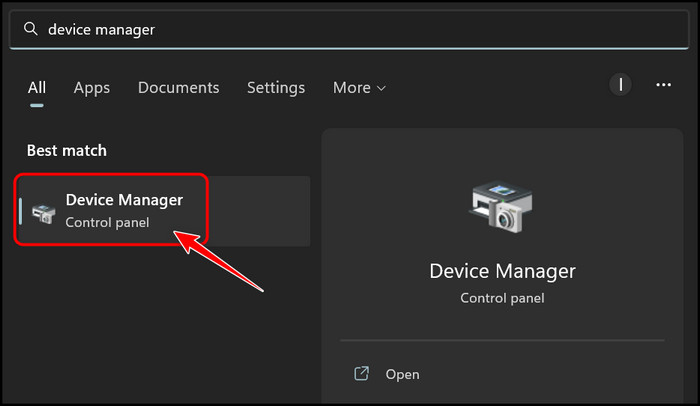
- Go to Start, search for Device Manager, and launch it.
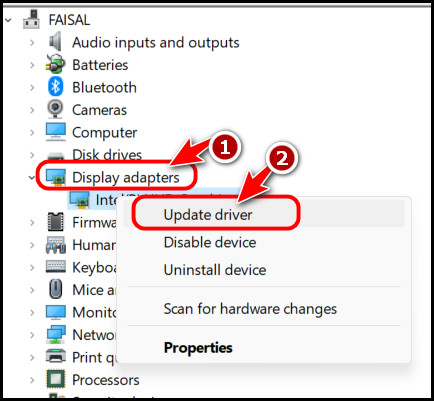
- Locate the Display Adapters option and double-click on it to expand it. Then, right-click on your NVIDIA graphics card and select Update Driver.
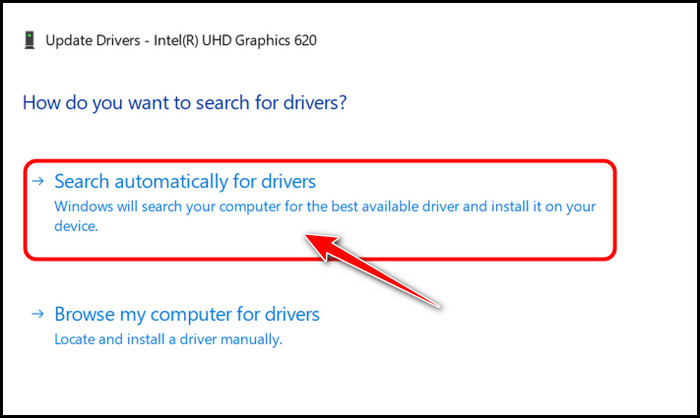
- Select Search Automatically for drivers in the window to proceed.
- Reboot your PC after the drivers are updated.
Check if your PC can detect the GPU now. If it can’t, I recommend you to try updating using a third-party driver software. Some great ones include IOBit Driver Booster, Driver Reviver and DriverEasy.
If you still face issues, move to the next solution.
Also, check out our separate post on how to fix PC won’t go to sleep in Windows 11.
3. Check Hidden Devices
If you were unable to find your NVIDIA driver in the Device Manager list in the previous method, it’s possible that it’s hidden. A user has confirmed that this fixed his problem permanently.
Follow these steps to check hidden devices:
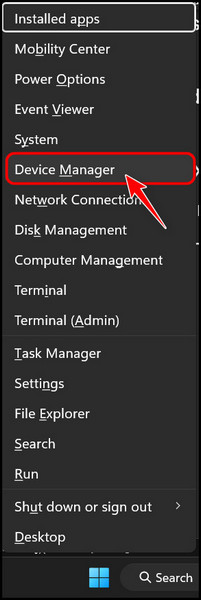
- Press the Windows and X keys at the same time to open a context menu at the bottom left corner of your taskbar.
- Click on Device Manager from the list.
- Click on the View menu from the top menu bar and select Show hidden devices.
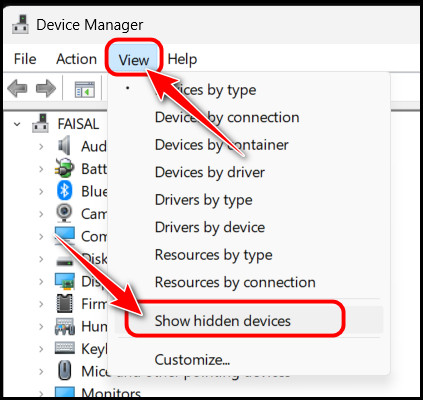
- Check if the driver is visible now.
If your NVIDIA GPU is visible in the Device Manager, your PC is correctly detecting it. So, if you can’t find it in Device Manager, you should try uninstalling updates.
Check out the easiest way to install active directory users & computers on Windows 11.
4. Uninstall Windows Updates
As I mentioned earlier, Windows updates can make changes to several system components, including drivers and more. As a result, if your drivers are causing issues with your GPU, you can try going back to a previous version where everything works.
Follow these steps to uninstall Windows Updates:
- Use the Windows + I shortcut to launch the Settings app.
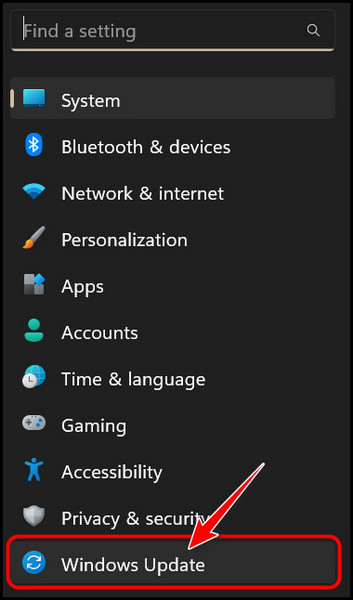
- Select Windows Update on the left navigation menu.
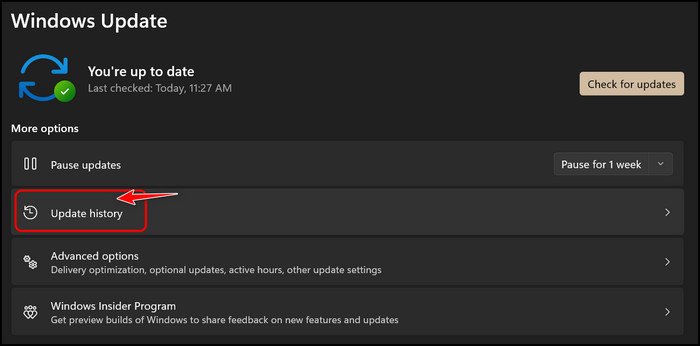
- Click on Update History under the More Options section on the right panel.
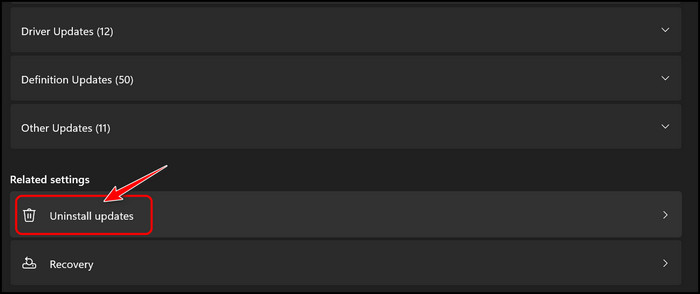
- Scroll to the Related Settings section at the bottom and click on Uninstall Updates.
- Click on the Uninstall button next to one of your recent updates. While the choice is totally up to you, I recommend uninstalling the update that says ‘Update for Microsoft Windows’.
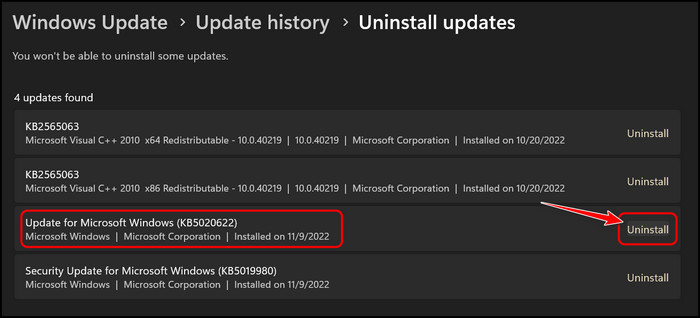
After your PC reboots, Windows should be able to detect your GPU without any issues.
I have tested these methods on multiple devices, and they are working well, so I’m confident you will find your solution among them.
Final Thoughts
To conclude, Windows is known to fail at detecting several hardware components, like RAM, GPU or even SSD sometimes. However, the problem can be fixed easily by updating drivers or performing fixes.
The first section of this guide should tell you what to do to avoid future problems, while the second will help you sort out your issues. If none of those solutions work, your GPU might be faulty, so you need to get it to the closest service center quickly.
So, which method did the job? Use the comment section to let me know.