Let’s be honest: it’s quite embarrassing when you invite your colleagues/business partners to a Teams meeting and end up having trouble with your audio or video feed. To avoid such scenarios, MS Teams has a built-in test call feature to check everything beforehand.
Although performing a test call isn’t complicated at all, there are still a few things you should know about checking your audio and video before you go online.
With that in mind, let’s discuss everything you need to know about test calls in Microsoft Teams.
How to Make a Test Call Before a Teams Meeting
But wait, there’s more! You can’t do a test call when you’re bound to a browser or a cell phone, but you can at least start a meeting with yourself, which basically serves the same purpose.
Still, I’d recommend using the desktop app, as it provides all the features and an overall better user experience. Not only does it allow users to make a test call, but it also provides additional options to thoroughly inspect hardware functionality, which I’m going to address in this write-up.
So, keep reading and don’t skip over any section, or you’ll miss out on many useful tips.
Follow these steps to make a test call in Microsoft Teams:
- Open the Teams app on your device.
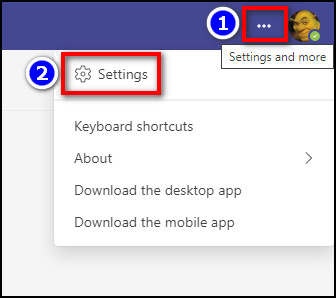
- Click on the three-dot icon from the top-right corner next to your avatar.
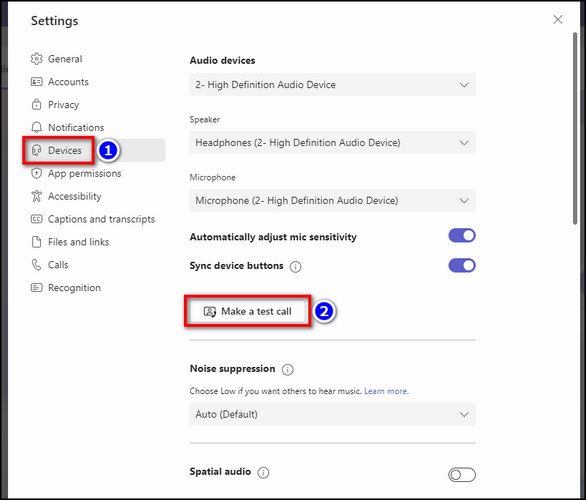
- Select Settings > Devices.
- Click on Make a test call from the Audio devices section.
- Follow the Echo bot’s command & say a few words into your microphone.
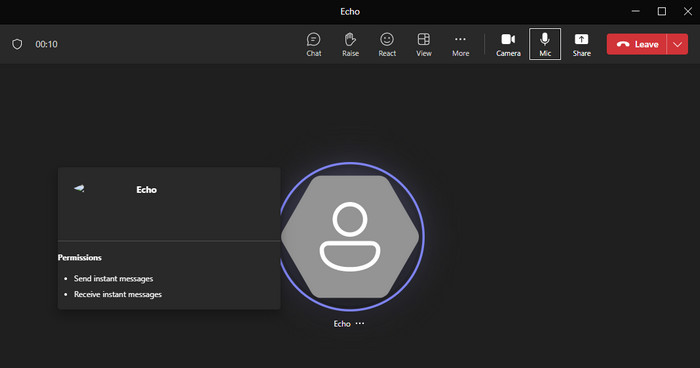
- Wait until the bot completes the test call & shows a result.
Or, you can just type /testcall in the search bar of the Teams app and hit Enter. Voila! A test call will automatically start and let the bot do the job. You can do what the bot says and record a voice clip, or let the call go on until it shows a result. It’s that easy.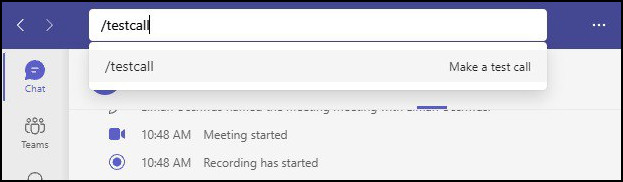
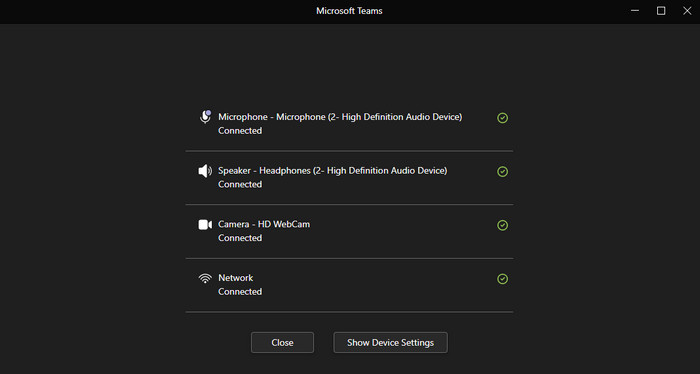
Now, if the test result shows green tick marks for all four criteria (microphone, speaker, camera, network), you’re good to go. It goes without saying that Microsoft automatically deletes the recording of the test call after the task is done.
So, don’t sweat about your privacy during this process. Now that you know how to make a test call to test your speaker and mic, let’s discuss what you should look for to ensure a good call quality.
On a side note, check out how to put a call on hold in Microsoft Teams.
How to Check Camera and Audio Quality Before a Teams Meeting
Apart from making a test call, you can check and customize the audio/video input of your Teams calls from Settings > Devices. From there, check if you have selected the right Microphone and Speaker from the Audio devices section. Then, scroll down to the Camera section & check the Preview. 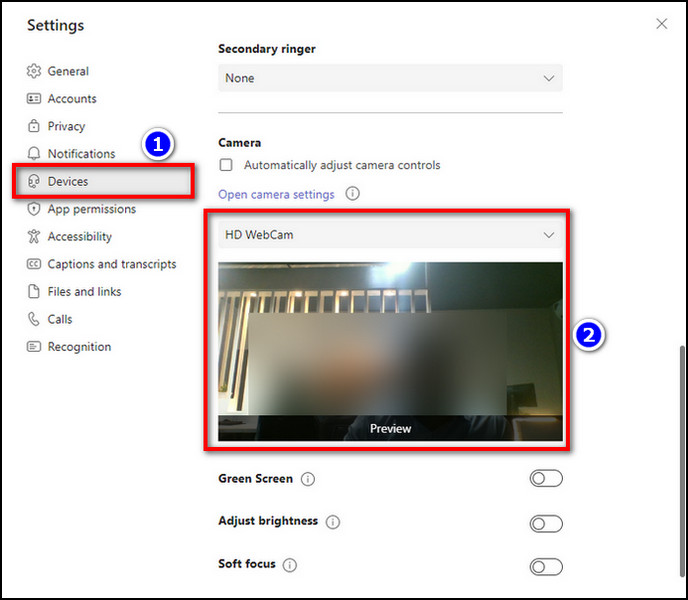
Make sure to select the right webcam from the drop-down below Open camera settings.
Furthermore, you can also toggle additional camera features according to your preference. For example, want to hide your background? You can use the green screen in MS Teams by turning on the corresponding toggle below the Preview.
Now, while performing the test call, speak properly into your microphone and carefully listen to the playback. It should give you an idea about the quality of your speaker and mic. In case the volume seems too low in MS Teams, follow the embedded article to properly resolve the issue.
To enable camera and microphone permission, press Windows Key+I and select Privacy. Now, click on Camera from the left side pane and scroll down to Allow desktop apps to access your camera. Make sure the toggle is turned on and Microsoft Teams is listed in that section.
After that, click on Microphone from the left side pane and do the same. If everything is enabled, you might need to restart or update the app to fix call quality issues on Microsoft Teams.
Frequently Asked Questions
What is the shortcut for test calls in Microsoft Teams?
Simply click on the search bar from your Teams app and type /testcall. Then, hit Enter on your keyboard, and the test call will begin right away. Keep in mind this shortcut only works in the app; it doesn’t work in Teams Web.
Why is the camera not available in Teams meeting?
If the webcam on your device is disabled from the MS Teams or Windows settings, your camera feed won’t be available in a meeting. However, we can’t rule out the possibility of defective camera hardware.
Can you call yourself in MS Teams?
No. You can’t call yourself on Microsoft Teams, but you can call your landline if your organization has enabled such a feature. However, you can always hold a meeting with yourself/as the only attendee to check whether everything works fine or not.
Ending Remarks
To sum it up, if you have the latest version of the Teams app, you can check the camera and microphone directly from the settings without using test calls. But if you really want to make sure everything is functioning properly, just use the slash command to start a test bot call. That’s it.
Anyway, following this write-up should set you on the correct path to optimize your Team call quality in no time. To learn more about other Microsoft services, feel free to check our website.
Adios!