With Promoted Links, you can seamlessly elevate your SharePoint sites by creating visually appealing and interactive navigation menus. It helps you to craft a captivating navigation panel that connects users to the heart of your organization.
Incorporating promoted links can increase visibility, simplify navigation, and improve user engagement when using SharePoint for your organization’s intranet and a publicly shared website.
In this article, I’ll explain how to add promoted links in both modern & classic SharePoint pages.
Let’s begin!
SharePoint Promoted Links is a valuable feature that enables quickly sharing links attached to eye-catching images. To utilize this feature, you simply build a Promoted Links List, where you can add links, allocate pictures to each link, and conveniently organize them.
SharePoint automatically generates a visually appealing Tile view based on the Promoted Links List. This functionality is handy for SharePoint Administrators who aim to create engaging and user-friendly navigation on their site’s homepage.
This feature, also called SharePoint Tiles, enhances the aesthetics and user-friendliness of your site, creating a more enjoyable experience for your end users.
A leading sample of promoted links can be seen in the Getting Started web part, commonly included on the homepage of classic SharePoint sites by default.
Though modern SharePoint sites don’t support Promoted Links, you can still add them through different web parts, which I’ve explained in the following section.
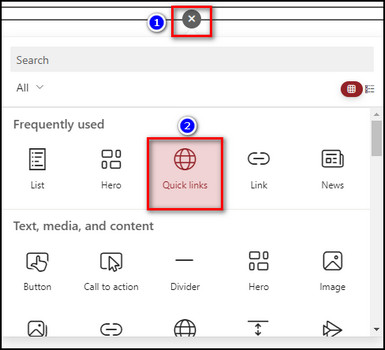
To add the Promoted Links web part to your modern SharePoint Online page, go to the desired page and click Edit. Then, hover over the part where you want to insert the Promoted Links. Click on the (+) icon to add a new web part to the page. Search for and select Quick links.
You can also insert your promoted links using SharePoint’s Hero and Link web parts.
Follow the instructions below to add Promoted Links to modern pages in SharePoint:
Use the Quick Links Web Part
- Open your SharePoint site where you want to insert promoted links.
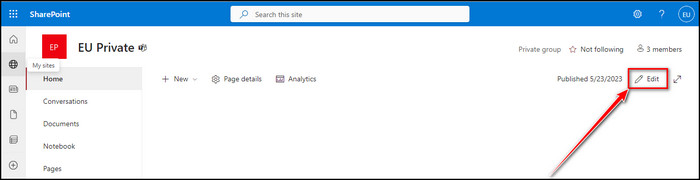
- Select Edit at the top right corner.
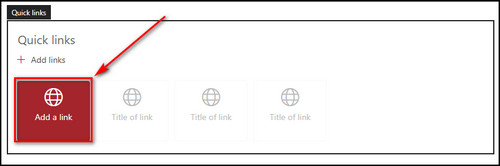
- Click the Plus icon to add a new web part and choose Quick links.
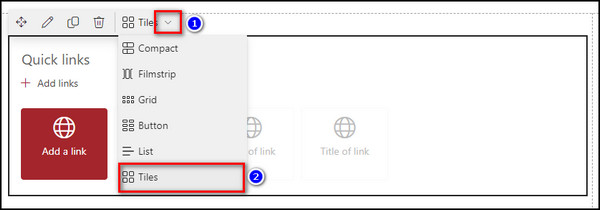
- Change the Quick links layout if you want. The Tiles layout will provide the classic promoted links view.
- Select Add a link and connect to your OneDrive file or SharePoint site.
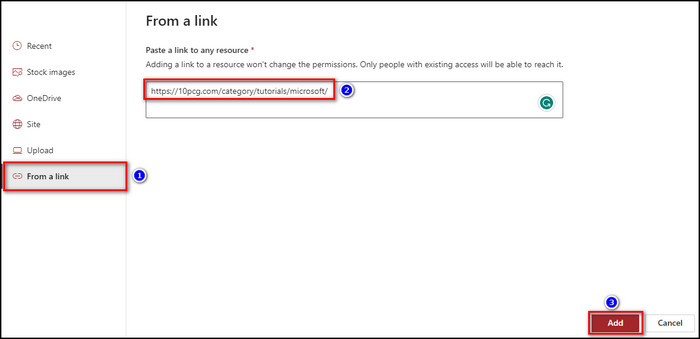
- Go to the From a link tab to connect to an external link. Enter the link in the text box, and click the Add button.
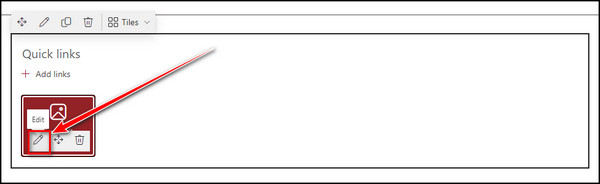
- Click Edit (Pen icon) on the added quick link to customize it.
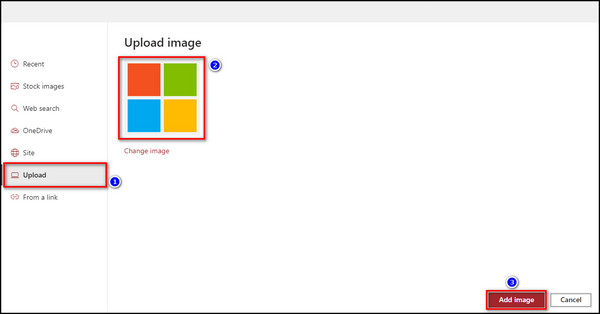
- Choose Custom image and click Change to set your own picture for the link.
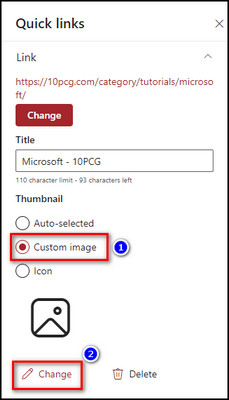
- Move to the Upload tab, select the picture appropriate for the link, and click Add image.
- Select Add links and repeat the above steps to add more promoted links and images to the Quick links web part.

Utilize the Hero Web Part
- Open the Edit mode for your SharePoint site where you want to add promoted links.
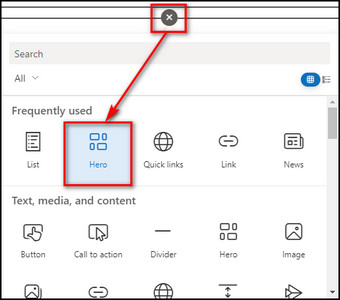
- Click the Plus icon to add a new web part and choose Hero.
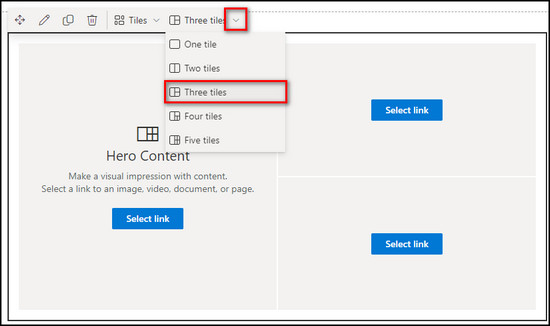
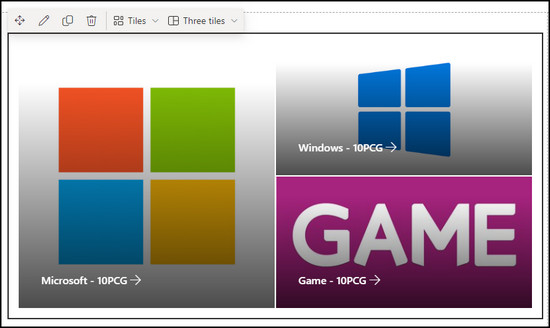
- Choose the same number of tiles as the promoted links you want to insert. Remember, you cannot add more than five tiles in a single Hero web part.
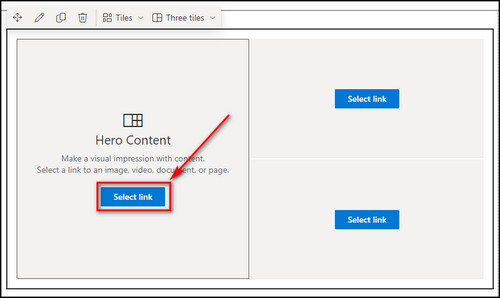
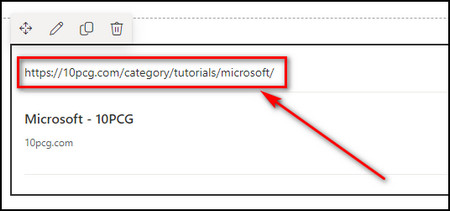
- Click on Select link to connect with your OneDrive file, SharePoint site, or an external promoted link.
- Navigate to the Form a link tab to insert an external link. Enter the desired link into the designated text box, and click Add.
- Click Edit to modify the added link on the Hero web part.
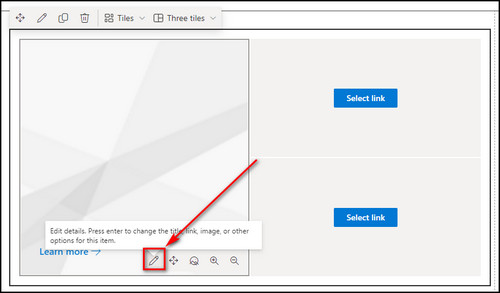
- Expand Background image, choose Custom image, and click the Change button to assign a picture for the promoted link.
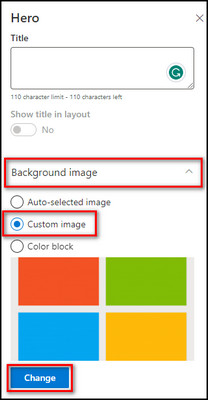
- Proceed to the Upload tab, pick the photo appropriate for the link, and click Add image.
- Click on Select link and repeat the above steps to add more promoted links and pictures to the Hero web part.
Add the Link Web Part
- Open the SharePoint site and click the Edit button from the upper right.
- Click the Plus icon to add a new web part and choose Link.
- Enter your promoted link.
- Select Edit on the Link web part and toggle off the Display link to hide the promoted link text. It will provide a cleaner look.

Remember, you can only add one external link with the Link web part.
Although the above three methods allow you to add external links to your SharePoint site for promotion purposes, they don’t use the Promoted Links app. If you want to incorporate promoted links through the app, go to the following section, where I’ve explained how.
To add the Promoted Links app to your SharePoint site, you need first to change your site to a classic experience. Then you can use the app. Now you must create a Picture Library containing the images associated with the promoted links and connect the image links and promoted links.
Below I’ve provided the steps to configure Promoted Links in classic SharePoint sites:
1. Add the Promoted Links App
- Open the SharePoint Team site where you want to insert Promoted Links.
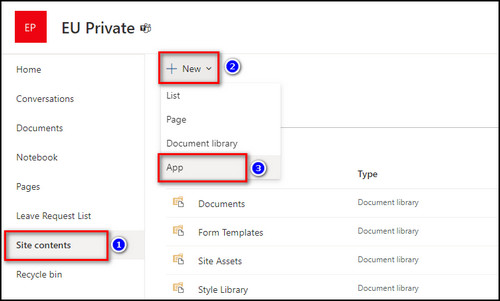
- Go to the Site contents tab, click New, and choose App.
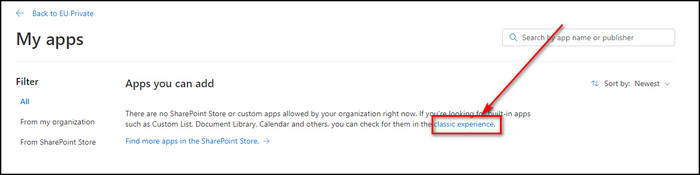
- Select classic experience.
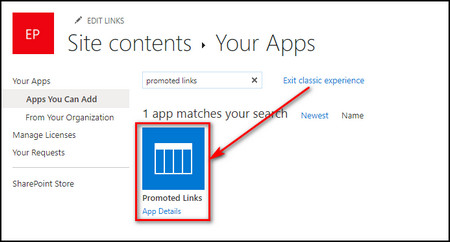
- Search for the Promoted Links app and select it.
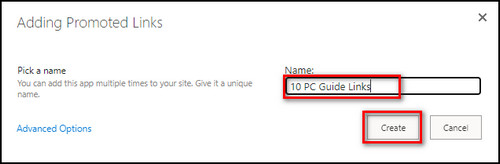
- Provide the Promoted Links app name and click the Create button.
2. Create a Picture Library
- Click on classic experience again and select the Picture Library app.
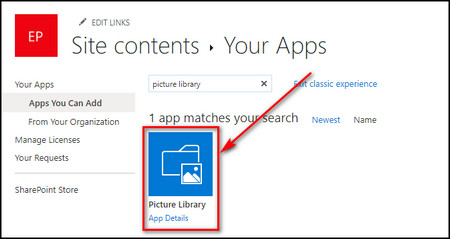
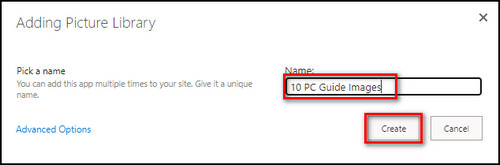
- Enter the Picture Library name and click on Create.
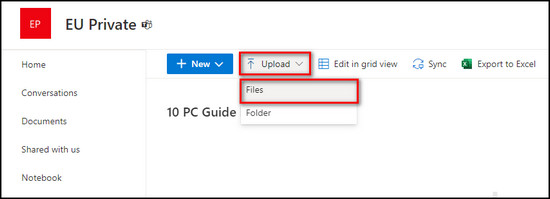
- Open the recently created Picture Library page, select Upload > Files, and select the images for the links you want to promote.
3. Add Promoted Links Images
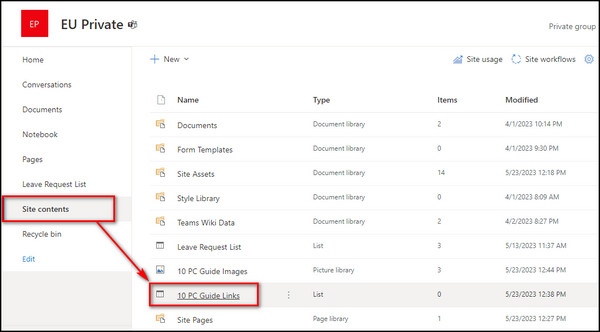
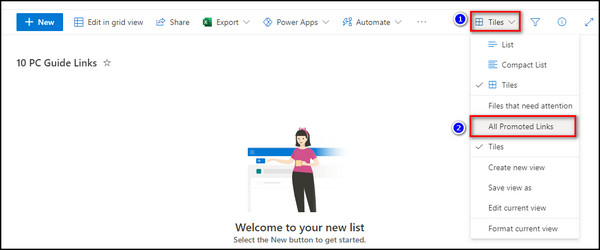
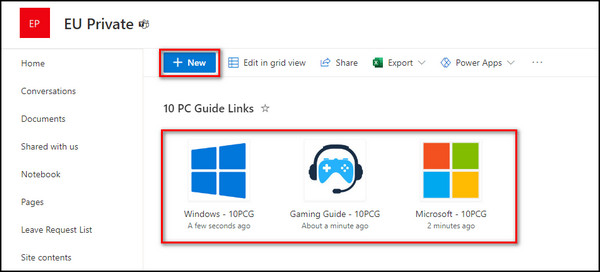
- Go to the Promoted Links app you’ve added from the Site contents tab.
- Select Tiles and choose All Promoted Links from the dropdown menu.
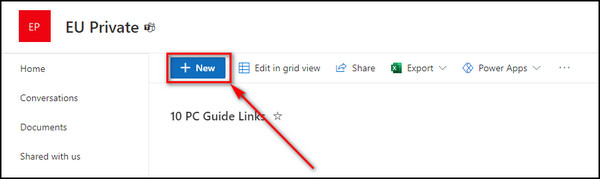
- Click on the New button.
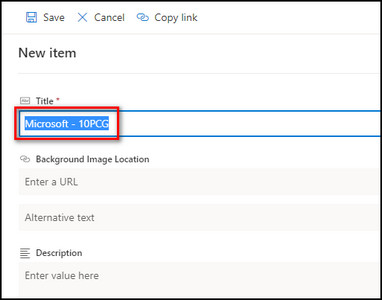
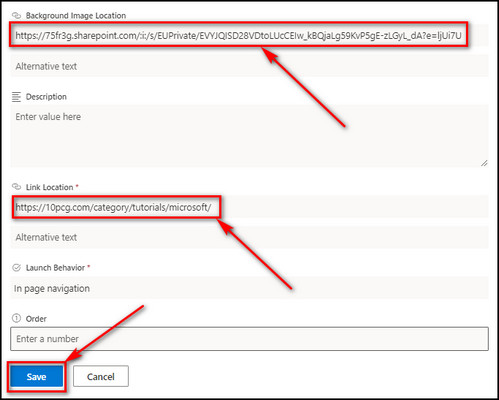
- Enter the Title of the new item.
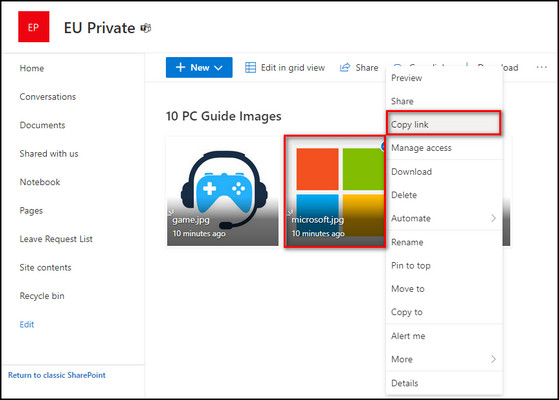
- Go to the Picture Library page, right-click on the background image for the item, and select Copy link.
- Paste the link in the Background Image Location field.
- Enter your promoted link into the Link Location field, and click Save.
- Click the New button and repeat the steps to add more promoted links.
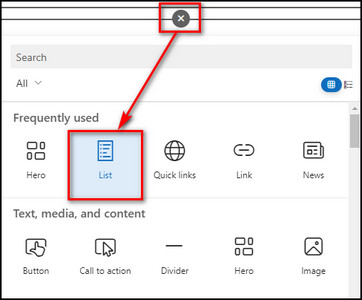
- Open the SharePoint page where you want to add the promoted links and click on Edit.
- Select the Plus icon to add a new web part and choose List.
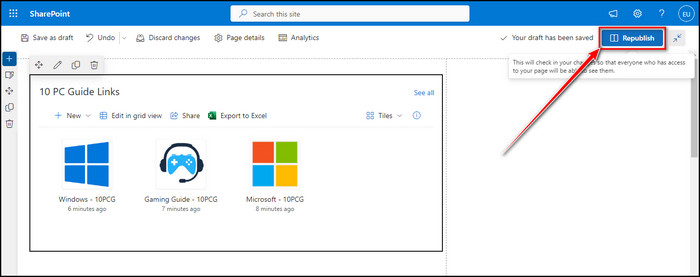
- Choose the Promoted Links app name you’ve created.
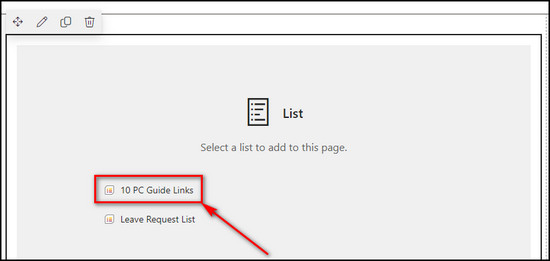
- Select Republish to update your site.
Now by effectively utilizing this feature, you can create visually appealing and informative shortcuts that drive engagement and improve productivity.
FAQs
What is the difference between promoted links and links in SharePoint?
The primary distinction between Promoted Links and Summary Links lies in their organization. Promoted Links are organized at the list level, whereas Summary Links are added to a web page, and you can organize them when editing the page.
What is a promotion link?
Promotional links refer to third-party websites for which the Company receives compensation, promotional benefits, or other forms of consideration.
How do I edit a promoted link in SharePoint?
Access your SharePoint account and navigate to the site that includes the promoted links list. Locate the Edit option in the upper right corner. If the Edit option is not visible, log in with an account with Full control or Edit permissions for the site.
How do I arrange promoted links in SharePoint 2013?
To arrange promoted links in SharePoint 2013, select Edit in grid view on the Promoted Links app, click on Title, choose Sort Ascending, and select Exit grid view.
Final Thoughts
Incorporating promoted links in SharePoint is an effective way to enhance user experience, promote important content, and simplify navigation within the platform.
By following the steps provided in this article, you can easily create and customize promoted links to highlight important content, applications, or external resources.
Suppose you aim to promote internal tools, drive traffic to specific sites, or provide quick access to frequently visited pages. In that case, the promoted links app is the perfect way to create an intuitive and personalized user interface.
Comment below if you have further questions, and we’ll get back to you.