The AutoSave feature is like a seatbelt. In short—a lifesaver. It automatically stores the changes made to your document and saves you from an accidental exit.
But when the auto-saving option doesn’t work, it increases the danger of losing valuable files. I’ve seen many people who lost important data due to power loss or an unwanted crash.
Therefore, I’ll show how you can fix the auto save not working issue in this article and eliminate the chance of losing document progress.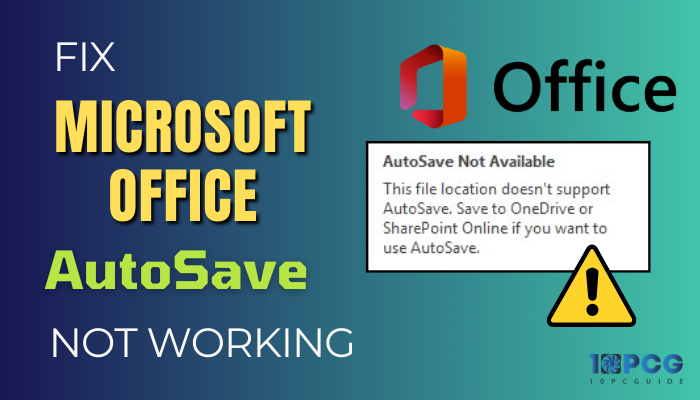
So, let’s begin.
Why is Your Microsoft Office Not Autosaving?
Microsoft Office isn’t auto-saving the changes because you’ve disabled the feature from Options and did not connect your OneDrive account to the application. In addition, the auto-save option won’t work if you enable password protection and because of Office issues.
The auto-save feature is mainly used in Microsoft Word and Excel. Both programs share the same settings as they belong to the same suite. The following passage will describe why the auto-save is not working in the MS Office.
Here are the reasons behind Auto Save isn’t working in Microsoft Office:
Disabled AutoSave
The auto-save button shows at the top left corner of your Office program. If you keep the option disabled or from Settings, the document won’t save automatically.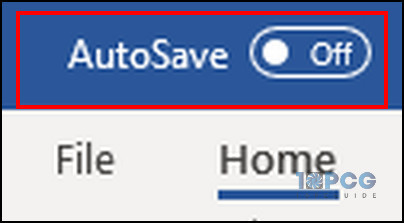
OneDrive isn’t Connected
The auto save option uses OneDrive to store the changes. If you haven’t saved the file to your OneDrive account, the feature won’t work.
Enabled Password Protection
The password encryption system lets the user keep the document safe from unwanted changes. But when you enable the feature, the OneDrive AutoSave keeps turning off.
To demonstrate the encryption, I’ve password-protected my account. The auto save feature is disabled as soon as the encryption begins. If you try to enable the auto-save, it will show you the auto-save isn’t available due to the privacy settings notice.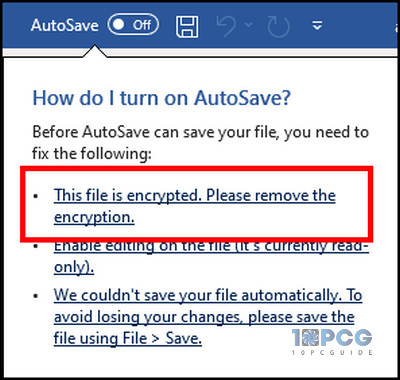
Microsoft Office Issue
The auto save option is available for Microsoft 365 programs. You will require a newer version to get the feature. If you use an old version, such as Microsoft Office 2016, the auto-save won’t work.
Also, problems with the Office program and corrupted documents can hinder the auto save feature and will show grayed-out AutoSave options.
All the problems are straightforward to resolve, and the following passage will show tested methods to fix them quickly.
How to Fix AutoSave Not Working in Microsoft Office
To fix the auto-save option in Microsoft Office, you must enable the feature from settings and save the document in your OneDrive account. Also, you need to remove the password protection, turn off add-ins, repair Office programs, and update to the latest version to solve the issue.
The auto save feature has changed with the introduction of Microsoft Office 365. Therefore, the user who came from the previous version may find the AutoSave not working as before.
But there’s nothing to worry about. Consider reading the following procedures carefully to solve the auto save feature not working on Windows and Mac problems.
Here are the ways to fix AutoSave not working in Microsoft Office:
1. Enable AutoSave
The automatic save feature is found in the Save settings from the Options. Usually, the option stays enabled. So that you can get the unsaved version if you mistakenly close the program.
You should review the settings and enable the auto save feature from the Office application on Windows 10.
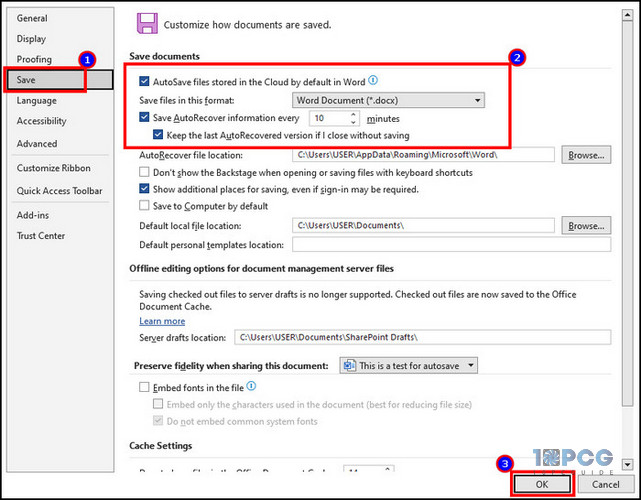
Here are the steps to enable Auto Save:
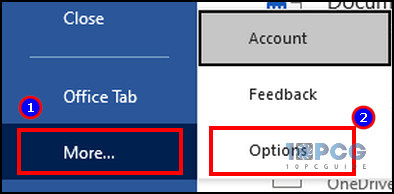
- Open Microsoft Word/ Excel and go to File.
- Navigate to Options.
- Press on Save from the left pane.
- Check the box beside AutoSave files stored in the cloud by default.
- Enable Save AutoRecover information every and set the time.
- Click OK to save the changes.
Now, the auto-saving feature will store a version of the document in your local storage after the selected period.
2. Save to OneDrive
The minimum auto save time for the local storage is one minute. But why would you wait when you can save automatically after making a change?
In this method, you need to turn on the auto save and store the document in your OneDrive. Also, this is the way suggested by Microsoft to save the progress of your Office documents automatically.
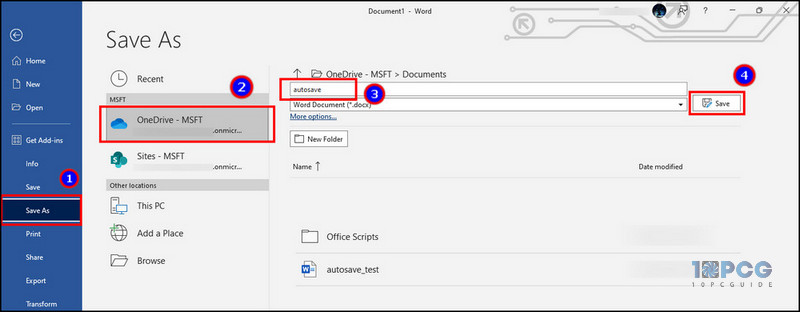
Follow the process below to AutoSave documents in OneDrive:
- Press on File and click on Save As.
- Choose the OneDrive account and select the folder.
- Type the name and click on Save.
Uploading the file to OneDrive will automatically turn on the feature and fix the OneDrive auto save not working issue.
Also, you can directly press the AutoSave button and choose your OneDrive account to accomplish the same process.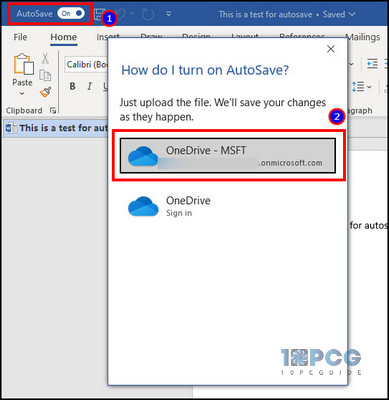
Closing the document will automatically save the changes on your OneDrive.
3. Remove Password Protection
If you use a password for the document, you must disable it from the settings to enable auto save.
Here is the procedure to turn off password protection:
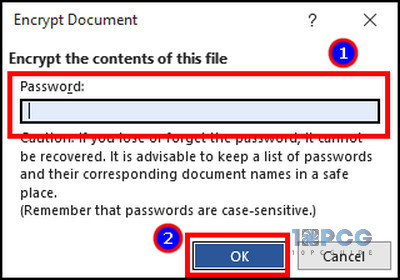
- Press on File and go to Info.
- Click on Protect Document and select Encrypt with Password.
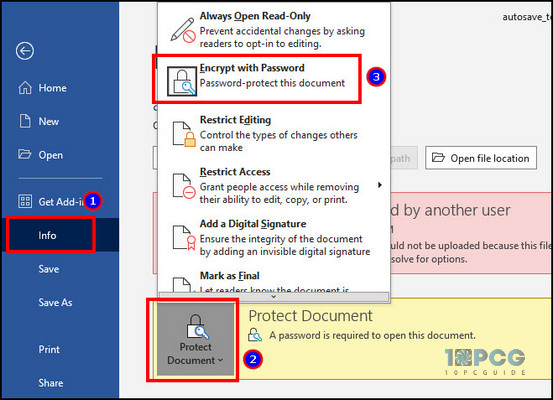
- Clear the password and press OK.
- Enable the AutoSave
If you still face issues turning on auto-save, restart the Office app and try to enable it again.
4. Repair Microsoft Office
Sometimes, the Office application faces bugs and glitches affecting all the suite programs. You need to repair the Microsoft Office program to resolve the issue.
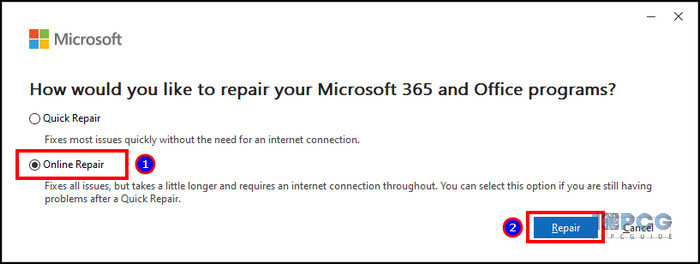
Read the process below to repair Microsoft Office:
- Go to Apps & features.

- Click on Microsoft Office or Microsoft 365 and press Modify.

- Select Quick repair or Online repair.
- Press on Repair.
After completing the repair process, restart your computer and check if the auto save feature works properly on Office 365.
5. Disable Add-ins
The third-party add-ins may create problems when auto-saving the changes in your Office document. You need to disable them to fix the issue.
Follow the steps below to disable Office add-ins:
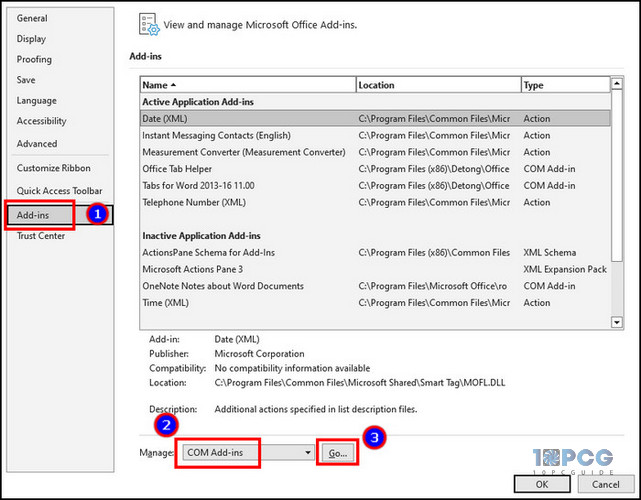
- Press on File and navigate to Options.
- Click on Add-ins from the left.
- Select COM Add-ins and press on Go.
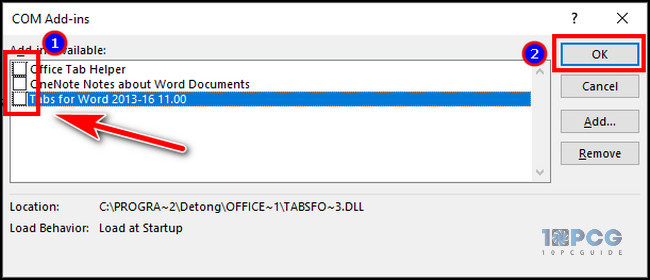
- Uncheck the box beside add-ins and press OK.
Restart the Microsoft Office program and test the auto save feature.
6. Repair Corrupted Documents
It’s very common for Word and Excel documents to become corrupted due to bugs. But you can repair the document and enable the auto save very easily.
Here is the way to repair corrupted documents:
- Press on File and click on Open.
- Select Browse and find the document.
- Click on the file and press the drop-down button beside Open.
- Press on Open and Repair.
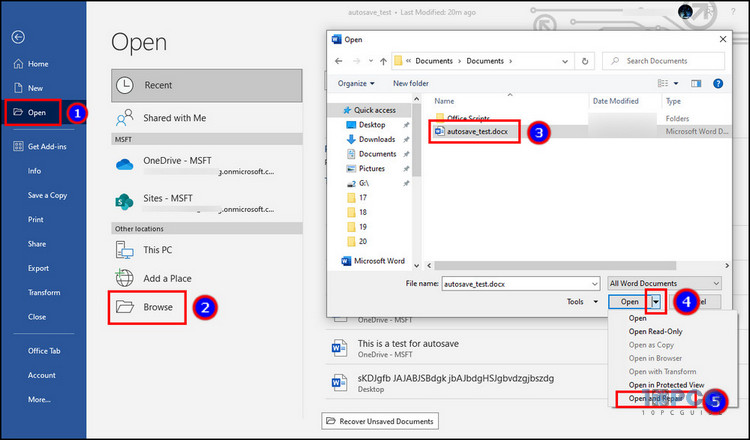
Only the file from the local storage is repairable. So, if you have a document on online storage, download it to your drive first and then use the repair process.
7. Update Office
The auto save feature is available from Microsoft Office 2021 or later and Microsoft 365. If you use an older version, the option won’t appear.
Follow the procedure below to update the Office application:
- Press on File and navigate to Account.
- Click the drop-down menu from Update Options.
- Press on Update Now.
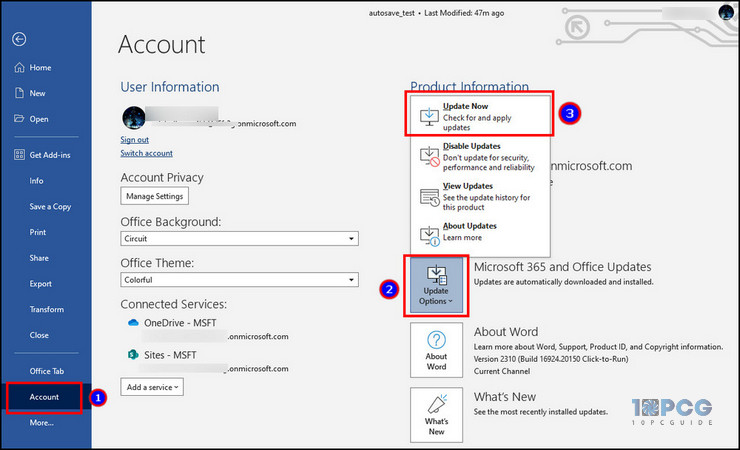
After completing the update, restart Microsoft Office and check the auto save option.
Ending Note
Auto save is a helpful option for every Microsoft Office user, especially those who forget to save documents before closing.
If the feature doesn’t work correctly, you can enable the autosave feature, store it to OneDrive, remove password encryption, disable add-ins, repair Office, and update applications to fix AutoSave not working issues.
Cheers!