Excel consists of thousand of extraordinary features to handle large data files effortlessly. It is a spreadsheet program with powerful data visualization and analysis tools from Microsoft Corporation.
By default, when we enter any text content in a cell, it aligns to the left of the cell border, and the numeric content aligns to the right of the cell border.

But in some cases, we may need to move the text or number a little from the cell borders.
In this well-researched article, I will cover how you can indent any cell or range of cell context using four easy-to-follow methods. Without further discussions, let’s dive into this article to learn the details to indent in Excel.
Tag Along!
How to Indent in Excel Based on Cell Value
You can use indentation if you need to move your cell content from the cell border. Using the Conditional Formatting feature, you can create a new rule to indent in Microsoft Excel. To indent a cell or range of cells based on cell value, follow the below procedures.
Here are the steps to indent in Excel based on cell value:
- Open your document in Excel.
- Select the cell or range of cells that you want to indent.
- Navigate to Home > Conditional Formatting > New Rule.
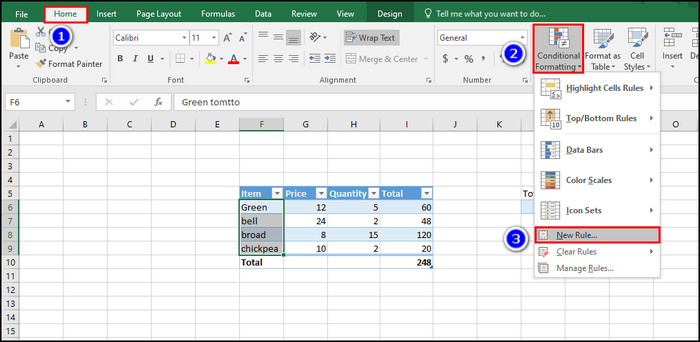
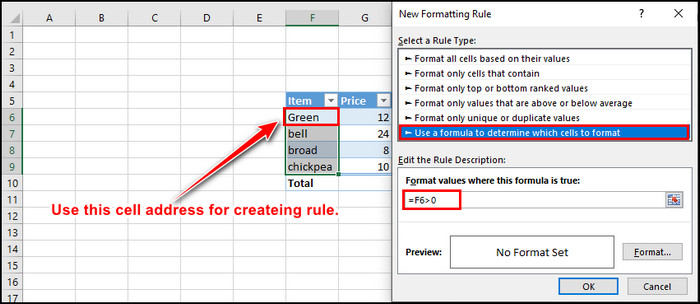
- Select Use a formula to determine which cells to format.
- Enter the formula =F6>0. (Here, F6 is the starting cell address, and 0 is the value. Chnage the formula depending on your cell address.).
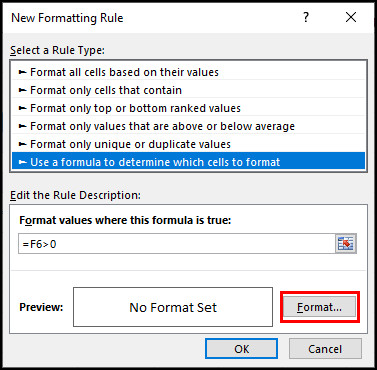
- Click on the Format button.
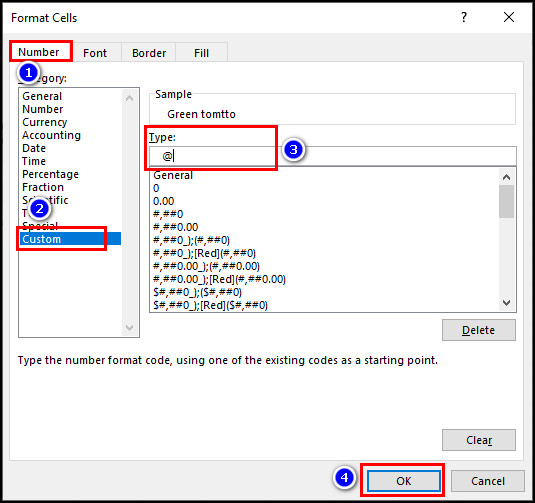
- Switch to the Number tab.
- Select Custom under Category.
- Hit the spacebar three times and then put in @. (Three spaces and an at symbol).
- Click OK to save the Format Cells changes.
- Click OK to apply the new rule.
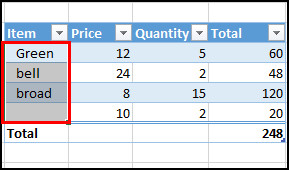
The above process will indent your cell content based on your cell value. You can insert more than three spaces if you need more space at the start of your cell content.
Related content you should read about Excel: how to reference other files?
How to Indent Text in Microsoft Excel Using Ribbon
You can find numerous features in the Excel ribbon, including the indent option. To increase or decrease indent text from the ribbon, go through the below procedures.
Here are the methods to indent text using ribbon in Excel:
- Open your Excel file.
- Select the cell or range of cells where you want to apply the indentation.
- Go to the Home tab from the ribbon.
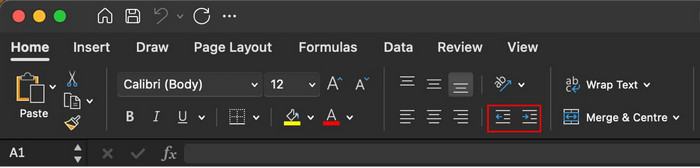
- Click on the Increase Indent icon (four horizontal lines and a right-facing arrow) to increase the indent.
- Click on the Decrease Indent icon (four horizontal lines and a left-facing arrow) to decrease the indent.
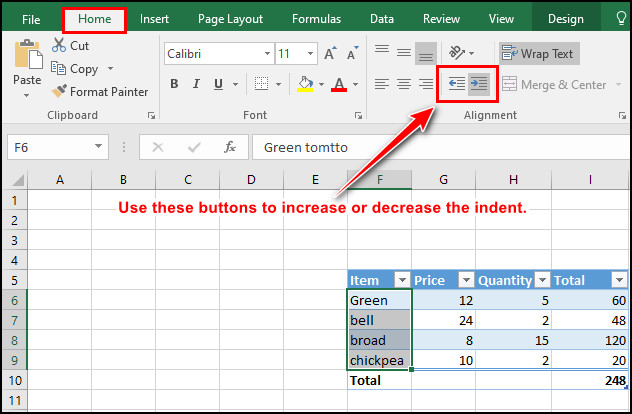
- Click several times on the Increase Indent icon to add more indentation space.
You have successfully added an indent for the selected cells using the Increase Indent icon. Besides, depending on your need, you can decrease the indentation by clicking on the Decrease Indent icon several times.
Quick Note: In case you use the indentation regularly, you can add the indent icons to Quick Access Toolbar. Right-click on the indent icon and select the Add to Quick Access Toolbar option to add the indent icon to the Quick Access Toolbar. 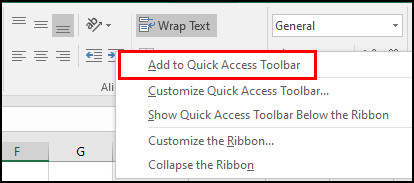 Some more guide on how to print from Excel with gridlines?
How to Indent Individual Lines in the Same Cell In Excel
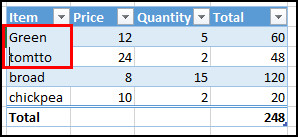
Applying indentation will move all the lines from the cell border when multiple lines are in the same cell. In the cell edit mode, the indent options are grayed out, so you will not be able to indent various lines.
But sometimes, you may need to indent all lines except the first one. In that case, you can apply indent manually for any lines in a cell. Read the below processes to indent individual lines in the same call.
Here are the ways to indent individual lines in the same call:
- Open your Excel document.
- Select the cell with multiple lines.
- Double-click on the cell to get into the edit mode or press the F2 button.
- Place the cursor at the start of the line where you need to insert an indent.
- Press the Spacebar multiple times to get the desired indentation.
- Repeat the process for all lines.
- Click elsewhere on the sheet to exit the edit mode.
Following the above procedures, you can quickly insert an indent for cells that contain multiple lines.
Check out the easiest way for how to center worksheet horizontally in Excel?
How to Indent Text in Excel Using Keyboard Shortcuts
Using keyboard shortcuts can boost your work productivity and save time. This method is suitable for you if you are more comfortable using a keyboard rather than going through the application’s menus.
To use shortcuts to insert an indent for a cell or range of cells on Windows and Mac, go through the below instructions.
Here are the steps to indent text using keyboard shortcuts on Windows:
- Open your Excel file.
- Select the cell or range of cells that you want to insert indentation.
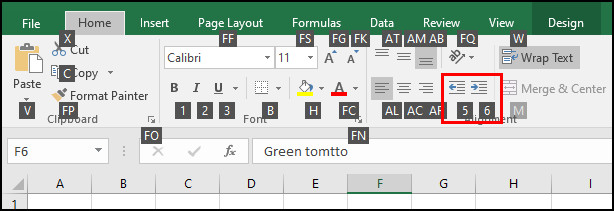
- Press the ALT + H + 6 keys one by one to indent to the right.
- Press the ALT + H + 5 keys one by one to indent to the left.
That will increase or decrease indent, depending on your keyboard command. You can also use keyboard shortcuts to indent text in Excel on Mac.
Here are the steps to indent text using keyboard shortcuts on Mac:
- Open your Excel file.
- Select the cell or range of cells.
- Press the Option+Control+Tab keys together to indent to the right.
- Press the Option+Control+Shift+Tab keys together to indent to the left.
The above steps will increase or decrease the indent of the selected cell to the left or right, depending on your keyboard command.
Frequently Asked Questions
What does it mean to indent in Excel?
The indent feature is used to move your cell content farther away from the cell border with a single click.
Can I do a hanging indent in Excel?
Yes, you can do a hanging indent in Excel. To do so, select the cells you need to indent the navigate to Home > Alignment > Increase Indent. Click on the Increase Indent button multiple times to add more indents.
How do I indent the second line of text in Excel?
To indent the second line of a cell, select the cell and press F2 to enable edit mode. Then place your cursor on the second line where you want to insert the indent and press the Spacebar several times, depending on your need.
Wrapping Up
In Microsoft Excel, the text content inside a cell aligns to the left side of the cell border by default, and the numeric context aligns to the right side of the cell border.
Sometimes, you may need to move the cell’s content a little from the cell border. The indent feature can do that for you with just a single click.
I have discussed all the possible ways to insert indent to a single cell or range of cells. Do you have any additional queries on this topic? Leave a comment below for further assistance.