Planner enables users to create plans, assign tasks, set due dates, and collaborate with other team members in real time.
And with the integration to Microsoft Teams, you can easily manage tasks and assignments right from the Teams interface.

In this article, I’ll explain how to use Planner in Microsoft Teams, including setting up new plans, creating tasks, and visualizing a plan through different options.
Let’s begin!
Check the simple way to fix @mention not working in Teams.
How to Use the Planner App in Microsoft Teams
To use Planner in MS Teams effectively, add the Tasks by Planner and To Do tab to your channel. Create a new plan or choose an existing one. Add tasks to the plan, assign users, and set due dates. Customize your project by adding labels, creating buckets, and selecting priority.
Follow the instructions below to use the Planner app in Teams:
1. Add Planner to Teams
- Open your browser and go to Microsoft 365.
- Sign in with your Microsoft account.
- Click on the App launcher from the upper left corner and choose Teams.
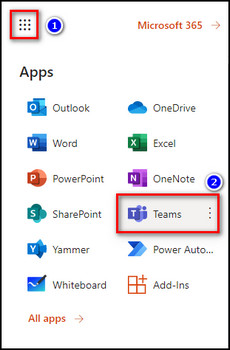
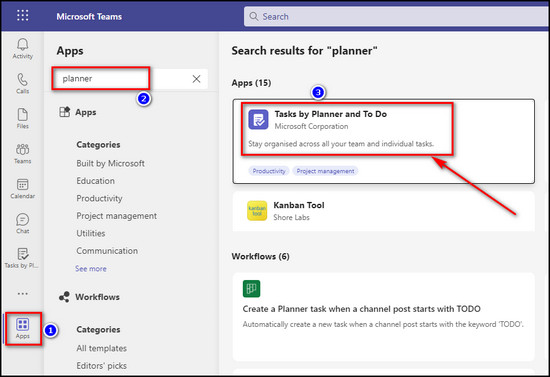
- Select Apps on the left sidebar.
- Search for Planner, select Tasks by Planner and To Do, and click the Add button to install it to Teams.
Read the easy step to fix AutoSave not working in Teams.
2. Create a Plan with Planner in Teams
Though you are using Planner within Microsoft Teams, the app doesn’t restrain you from the Planner features. You and any of your team members can make new plans, create smaller tasks, and modify them as you complete your project.
Here’s how to create a plan with Planner in MS Teams:
Make a Plan Tab
- Select the Teams tab from the left menu in Microsoft Teams.
- Open the channel in which you want to create a plan.
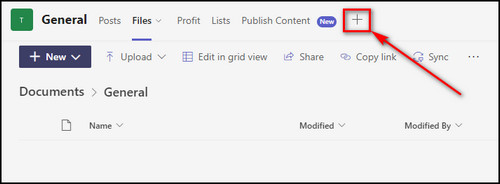
- Select Add a tab from the top menu bar.
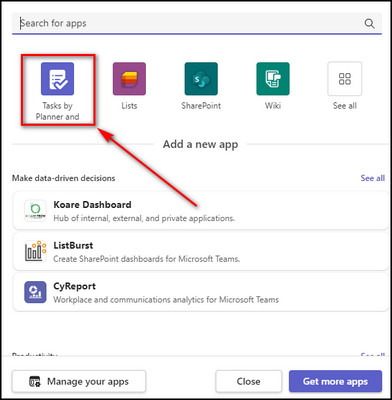
- Choose Tasks by Planner and To Do.
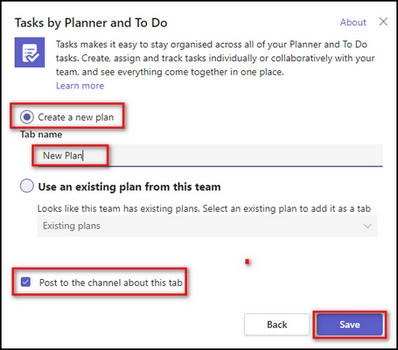
- Select Create a new plan to make a plan from scratch, or choose Use an existing plan from this team to pull a pre-made plan from Microsoft Planner.
- Provide a name for the planning tab, select Post to the channel about this tab to announce to everyone associated with the channel on this tab of tasks, and click Save.
Create Tasks
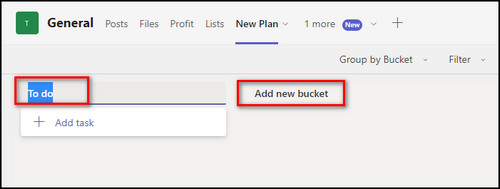
- Click on To do and rename the bucket at your teams’ convenience. Buckets are groups of similar tasks. Click on Add new bucket and give it a title to divide your plan into different sections.
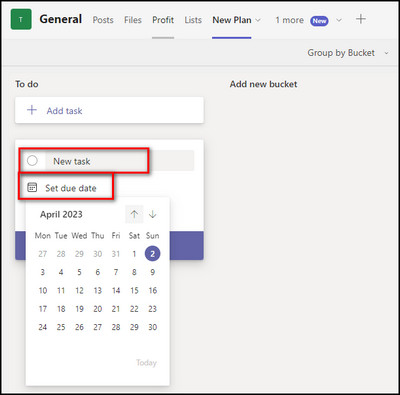
- Select Add task under a bucket. It will create a new card.
- Give the task a name, click Set a due date, and provide the deadline for the task.
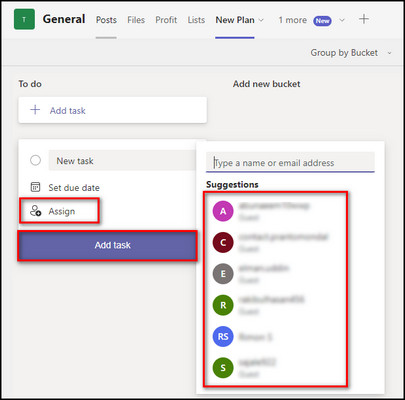
- Click on Assign, and select the user you want to be responsible for the job. You can assign a task to multiple users. Then select Add Task.
Edit Tasks
- Select the newly created task to add more details.
- Add a label to color-code similar tasks. It will help you visually and aid you in filtering through different tasks.

- Use the dropdown list under Progress to set the task as Not started, In progress, or Completed.
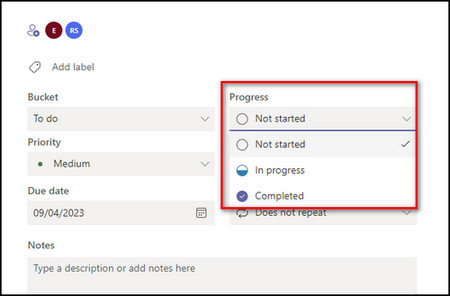
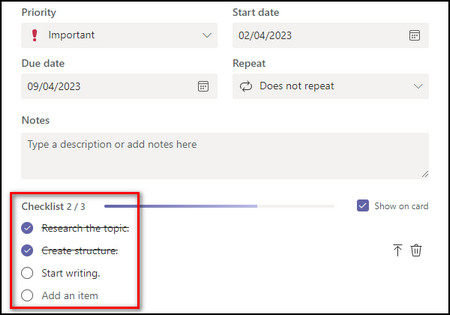
- Set the task Priority, Start date, and Due date. You can also add notes to the task, which can include links.

- Add multiple steps to create sub-tasks in the Checklist section.
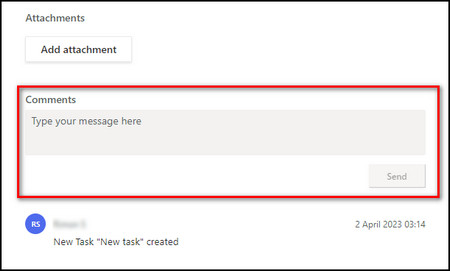
- Click on Add attachment to include files to the task. You can attach files from your local device. Anything you upload will be stored in the SharePoint library. So it will be available to all the users working on the task. You can also add links by providing the URL, and if the file is already in SharePoint, select it directly from here.

- Type your message in the Comments box in case you have to provide more information regarding the task.
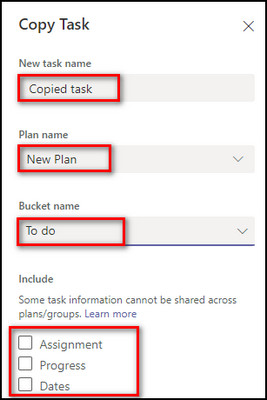
- Copy the information of a task if you are creating a similar task. For that, click the ellipses for the task you want to duplicate and select Copy task.
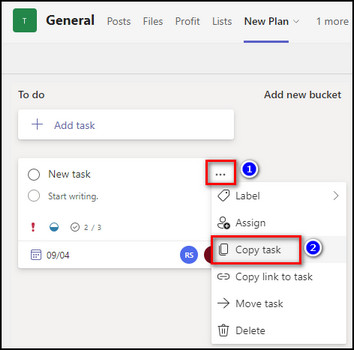
- Update the name of the copied task, select the Plan name, choose the bucket under which you want to copy the task, select the items you wish to replicate, and click Copy. Now the copied task will be a standalone task. View and modify it as you like.
Now create your tasks in all the different buckets required to complete the whole project.
Follow our guide to fix Microsoft Teams not loading in Chrome.
How to Organize Your Team’s Tasks with Planner in MS Teams
If users have completed every task they were assigned in a specific bucket, any team members and owners can move the task card to the next phase under a different bucket. You can now update the card here and add new steps to it.
Open the task card and assign the project admin to the task. Once the admin sees the checklist has been completed, they can add new steps, add attachments and modify the task in order to fulfill the particular phase/bucket.
When the newly added steps are done, the task card is put to the next phase, and the admin & project managers repeat the process.
A task card will be marked as Completed when it has gone through all the phases, and no more steps are left in the checklist. You can still bring it back by setting the Progress field to In progress.
Check out our separate post on can’t play embedded sound in PowerPoint over Teams.
How to Filter and Visualize Tasks with Planner in Microsoft Teams
You can use different views for the Planner. The standard board view is set to Group by Bucket by default. To change the grouping, click the dropdown from the top bar and select another view. For example, view tasks by Assigned to, Progress, Due date, Labels, or Priority.
Use the Filter dropdown menu to limit a view and only show tasks arranged with Due date, with a particular Priority & Progress, filter by the user a task is Assigned to, or show Unassigned tasks. Click on Clear to remove all filters.
Go to the Charts tab for a more graphical display of your plan.
The Charts tab has the following sections:
- Status: Here, you can easily see the current condition of each task.
- Bucket: You’ll get a summary of all the tasks by buckets.
- Priority: It shows how many tasks you have in each priority.
- Members: This section helps you determine whether all the users’ workload is balanced.
The next visualization option you have in Planner is Schedule. It provides a calendar-type of view for your tasks.
From this view, select a task to edit it. You can also create new tasks from there. Simply click on the Plus icon, give the task a name, select the bucket, and adjust the due date if necessary.
On the right side, you’ll see the list of Unscheduled tasks. These do not appear on the calendar.
You may also like to read about how to fix camera not working only on Microsoft Teams?
FAQs
What is a Planner in Microsoft Teams?
Microsoft Teams’ Planner is a Microsoft 365 feature that allows you to create boards containing your team’s tasks and projects. To incorporate a Planner tab into Teams, select Add a tab next to your tabs at the top of a chat or channel and choose Tasks by Planner and To Do.
Is Microsoft Planner free with teams?
Microsoft Planner is not a free tool. It comes with the Microsoft 365 suite; you can access it through business, education, and enterprise subscription plans.
How to add Planner to Teams private channel?
To add Planner to Teams private channel, first, create a plan in a standard channel. Click on the Planner tab and Copy link to tab. Then go to the private channel, select Add a tab, choose Website, paste the copied Planner link in the URL field, and click Save.
Final Thoughts
Integrating Planner into MS Teams allows you to easily create task boards, assign tasks, set due dates, create checklists, and share them with your teams. They can track their progress and increase productivity.
By following the steps provided in this article, you and your team members can maximize the use of Microsoft Planner within Teams and achieve your goals in a timely and organized manner.
Leave a comment below if you have further questions, and we’ll get back to you.