When you need to send an important mail, you want the receiver to treat it with urgency. So that they can reply back to you as quickly as possible. But how to make your email stand out among hundreds of mail in Outlook’s inbox?
You can set an email’s priority as high from the message compose window. This marks the mail with an indicator so that the recipient can know it needs immediate attention.
So, let’s see how you can do that right in this article.
What is a High-Priority Email in Outlook?
A high-priority email needs your attention right away. It can be a message from your boss or an urgent meeting notice. Normally, you would answer these before anything else in your inbox. On Outlook, a high-priority email has a red exclamation mark next to it. This is something that is absent from most other emails.
A high-priority email on Outlook has a red exclamation mark next to it. This is not present on any other email in your inbox. This indicates that the sender wants you to work on that email immediately.
Setting priority on email distinguishes them from regular emails. It can also make finding the important messages in the Inbox faster. Without the indicator, you would need to read every subject line to find the urgent emails. But if you give mail priority, they can scroll through and just look for the exclamation mark in the inbox.
But this does not mean you abuse this functionality. Don’t just send every other mail, i.e, your company’s newsletter, and set its priority high. Then, the people on the receiving end will no longer treat your emails with utmost significance.
How To Send High-Priority Email in Outlook
To send an email as high priority on Outlook, click on New Mail and select High Priority from the email compose window. It can be present under the Tags or Message tab, depending on your version of Outlook installed. On Mac, the priority option is next to the Subject line.
I have shown how to do this in different iterations of Outlook for different operating systems. Let’s take a look at these now.
Here are the methods to send a high-priority email on Outlook:
Send High Priority Email on Outlook Windows
To set your email to a high priority, look for the exclamation mark in Outlook’s New Mail Window. Depending on different versions, its look and position will vary.
The recent iteration of Outlook shares the same UI elements as the web version. While the older version looks and feels almost the same to each other.
So, setting priority for emails on Outlook 2016 and older will be the same. Meanwhile, Outlook 2019 and newer, including the 365 version, have a similar interface. That means you can set priorities in the same way for them.
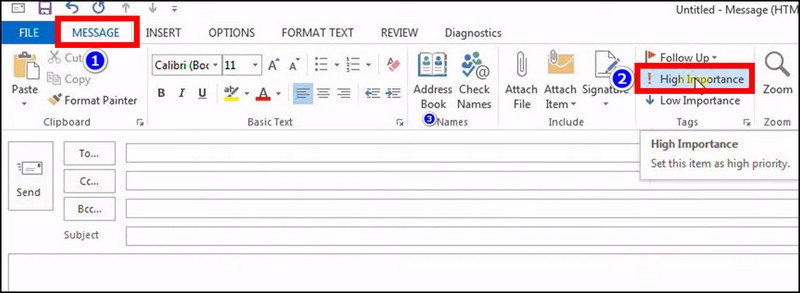
This is how you can send a high-priority email on Outlook 2016 and older:
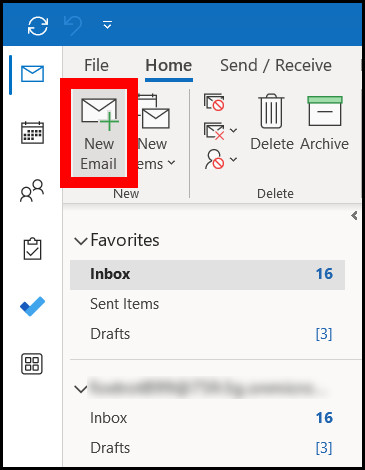
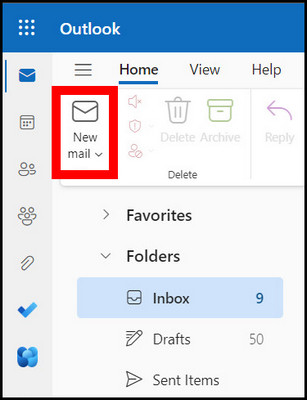
- Click on New Mail.
- Press the High Importance button present under the Message tab.
- Fill in the email details.
- Press the Send button.
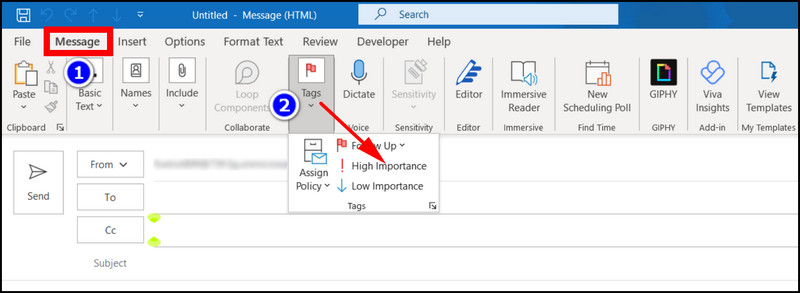
Now let’s look at how to send high-priority mail on Outlook 2019/2021/365:
- Press the New Mail button.
- Click on Tags and select High Importance.
- Enter the email details as usual.
- Press Send.
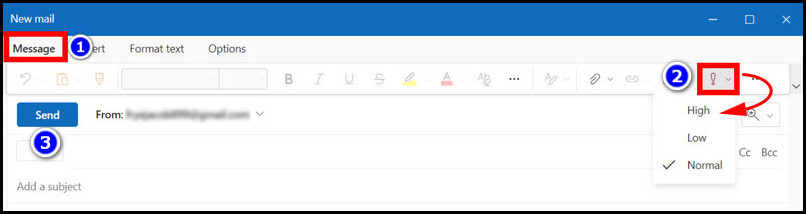
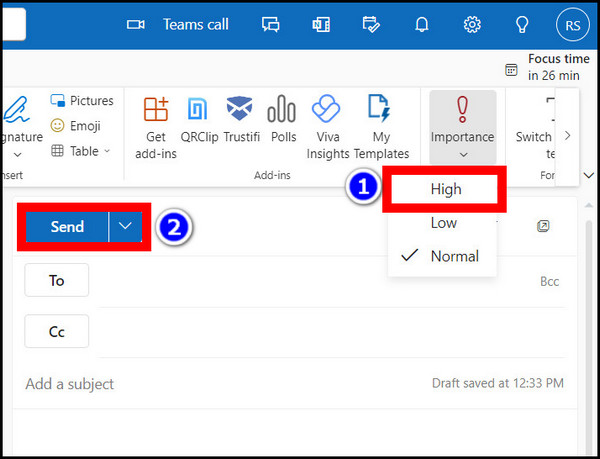
If you have switched to New Outlook, its interface is a bit different. Follow the steps below to send a high-priority email.
- Click on New Mail.
- Press the Exclamation symbol present in the Message tab.
- Select High from the dropdown menu.
- Enter the contents of the mail.
- Press Send.
Now, the recipient should see the important symbol next to the mail in their inbox.
Set an Email High Priority on Outlook Mac
The Outlook for Mac has a different interface than its Windows counterpart. It shares many UI elements from Outlook for the web. Hence, the ability to set email priority is also here.
This is how you can send a high-priority email on Outlook for Mac:
- Click on New Message.
- Press on Priority in the subject line.
- Select High.
- Press Send after you have finished entering the mail’s content.

The email will arrive in the receiver’s inbox with an ‘important’ icon attached to it.
Send Urgent Email on Outlook Web App
You can mark an email as important even on Outlook’s web version. As this is accessible from any browser, you can do this from any operating system as long as you have a modern browser installed.
Here are the steps to send a high-priority email from Outlook Web App:
- Open Outlook from your browser and log in using your credentials.
- Click on New Mail.
- Click the exclamation symbol and select High.
- Press Send after you are done composing the rest of the email.
This is how the email looks when the recipient sees it on their inbox.
How to Mark a Received Email as High Priority on Outlook
What if you received an email and want to mark it as important? Even if the email did not come with an importance tag, you can choose to give it one. That way, when you need the same email again, it will be very easy to locate it in your inbox.
You can either do this on an individual basis or create a rule that does this automatically for you.
Here are the different ways of marking a received mail as a high priority on Outlook:
1. Mark an Individual Email as Important
You can only do this from Outlook’s desktop app. The web version and the mobile app cannot do this.
To do this, go to your Inbox and click on the mail you need to mark. Find Filter Email present under Home in the ribbon menu. Click on it and select Important.
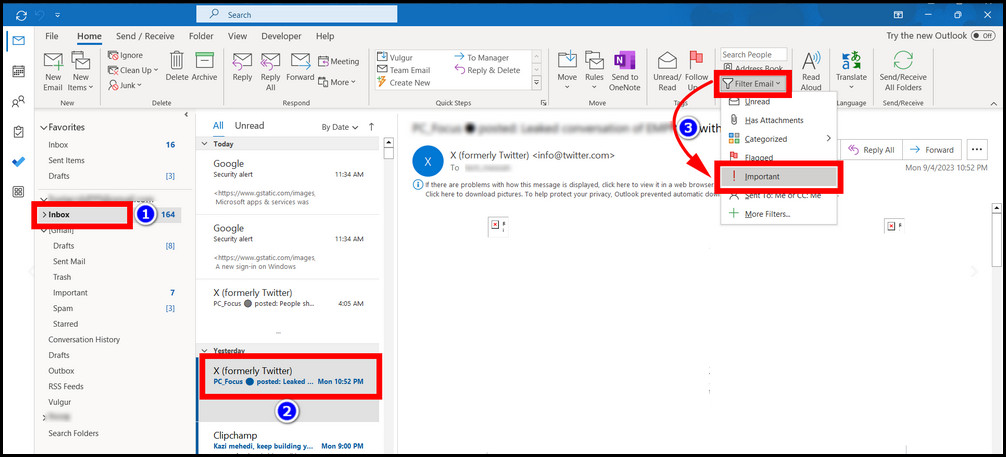
An exclamation mark appears next to this mail in Outlook’s Inbox view.
2. Mark Multiple Emails as Important
This option is useful when you want to mark the emails from a particular sender as important so that you don’t need to handle individual emails and set their importance status.
We will add a rule in Outlook that only marks mail from a certain address. This option is available on Outlook for PC, Mac, and Web. The mobile app does not get this feature, though.
Here is how to create a rule to mark multiple emails as important on the Outlook Desktop app:
- Open Outlook.
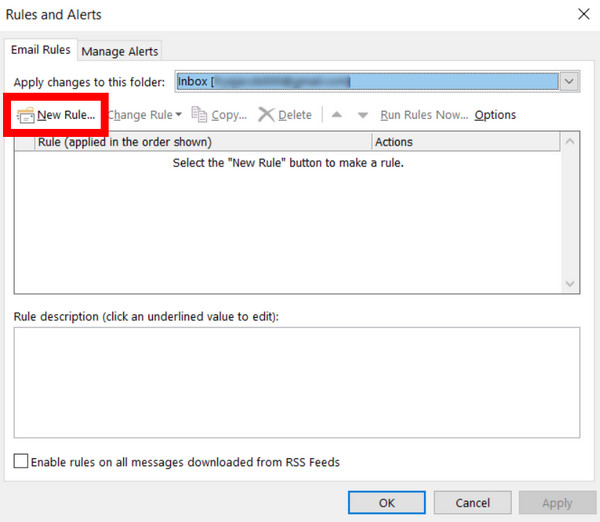
- Click Rules > Manage Rules & Alerts.
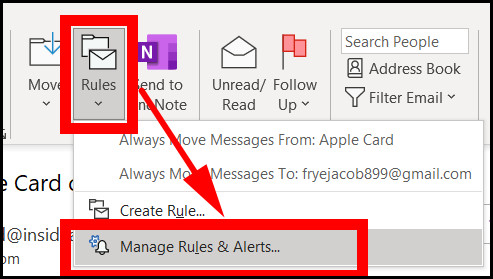
- Click on New Rule.
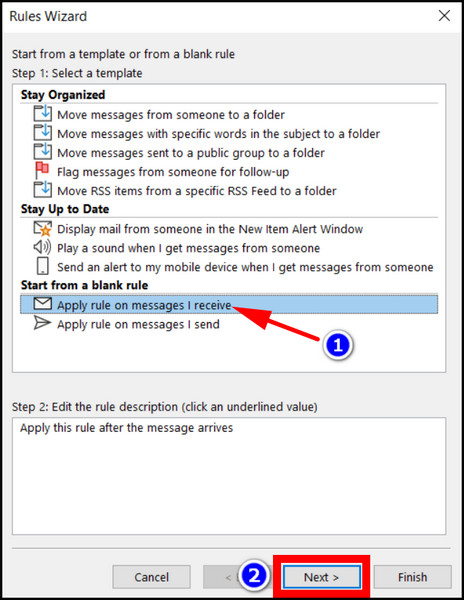
- Select Apply rule on messages I receive and click Next.
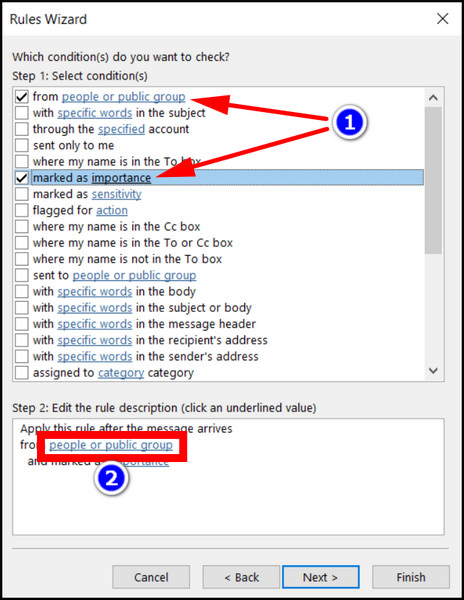
- Mark checkboxes next to from people or public group and marked as importance.
- Click on People and Public Group under Step 2.
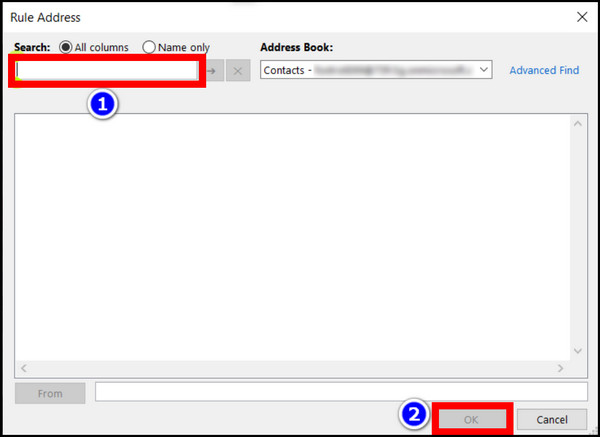
- Enter the contact name in the search bar and press Enter. When you see the name, click it and press OK.
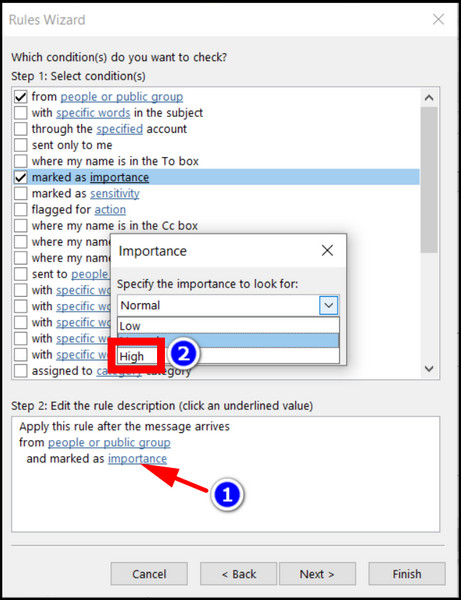
- Click Importance under Step 2.
- Select High from the drop-down list.
- Press the Finish button.
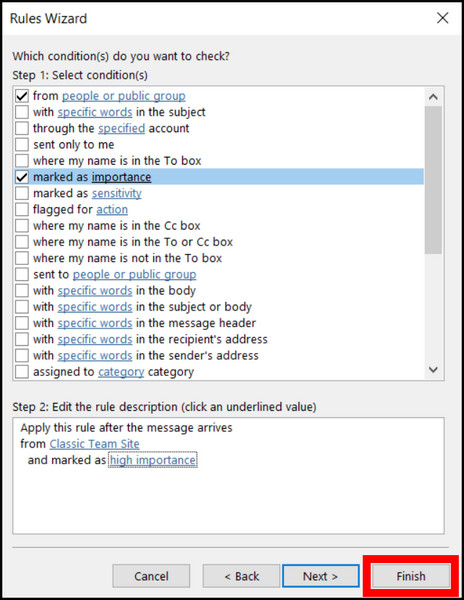
The next time you receive messages from this contact, Outlook will automatically add the important icon. You can click and view the messages as usual.
Frequently Asked Questions
How to send high-priority mail in the Outlook mobile app on Android/iOS?
You cannot send an email marked with a high priority on Outlook for Android and iOS. This feature is not yet available on the mobile app. Currently, you can only do this from Outlook’s desktop app.
How to send high-priority mail in the Outlook app on iPad?
You cannot send a high-priority email using Outlook on an iPad. Setting priority on emails is not available on Outlook’s mobile app. The iPad uses the same mobile app as the iPhone and Android. Hence, you do not get that feature here.
Final Words
Setting Priorities on your email is a nifty little feature on Outlook. I personally like how it shows you an email is important without introducing any distractions. The best part about it is how easy it is to implement.
Just do not make it too irrelevant by using it too often.
I hope you find this feature useful in your daily workflow. And that’s all for this article today.