Modern Outlook lets you categorize your Outlook items in color categories. This feature considerably helps one to find an item with just a glance.
However, to make the default categories more user-convenient and align with their unique workflow & preferences, one should rename the category in Outlook to their choice.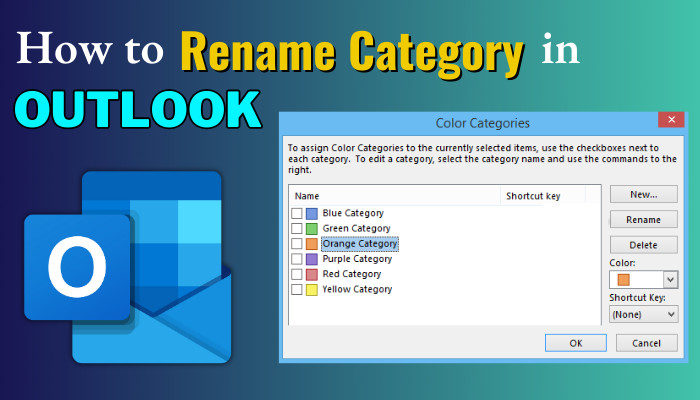
In this article, I will show you how easily you can change the category name in Outlook. Let’s dive in.
Why is it Important to Rename Categories in Outlook?
Outlook categories help you assemble similar messages, tasks, contacts, or calendar events into a group with color. But as the default Outlook color category may confuse you at a later time to search a mail or contact, it is recommended to retitle the category in Outlook.
You can create your own categories or pick from a default color category when in a rush. The sticky part is that the default color category in Outlook is labeled with color names, such as
- Red Category
- Orange Category, and
- Yellow Category, etc.
But it becomes bothersome when you need to find an item quickly & you need to remember in which color category you put the required items. So, for convenient navigation and to keep the workflow steady, you should rebrand your items with custom category names.
How Can You Categorize an Item in Outlook
To differentiate some crucial messages or calendar events & mark them with color categories in Outlook, select the item > expand Tags from the ribbon > choose Categorize & select the default color-coded categories. You can appoint multiple color categories to a single email, task, or meeting.
The instruction to assign a color category to Outlook calendar event or email applies to Outlook 2019, 2016, 2013, 2010, and Outlook for Microsoft 365. You must require a Microsoft Exchange Account to utilize the feature.
Follow the below to assign a category to an Outlook item:
- Open Outlook & choose the desired item to categorize in Outlook.
- Click on the down arrow of Tags from the top ribbon if required.
- Expand the Categorize button.
- Pick a default color category from the list.
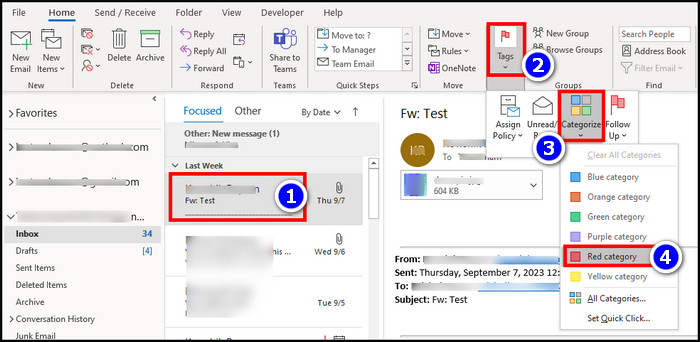
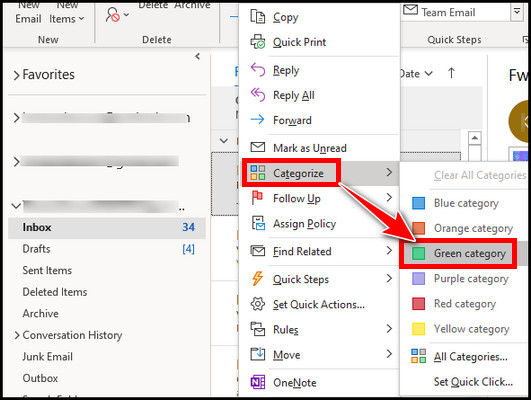
Alternatively, you can right-click an item, select Categorize & choose a category name from the list.
What if you want to modify the category name in Outlook? Keep reading to learn that process.
How to Rename Categories in Outlook
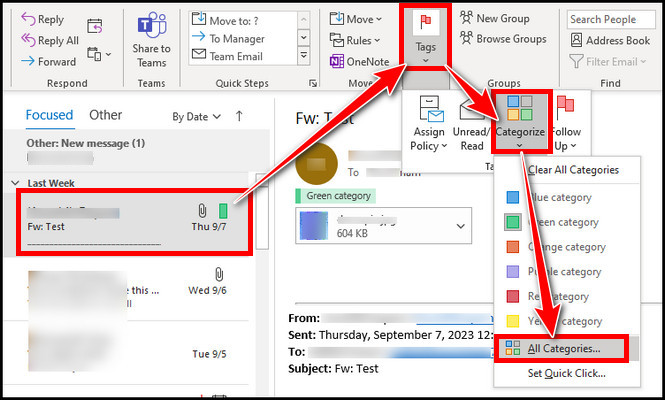
To customize the existing color-coded category name in Outlook, select the categorized item > expand Tags > Categories > All Categories > select the category name you want to change > hit Rename and give a convenient name to your preference.
For Outlook Desktop Applications
If you use some color-coded categories frequently on Outlook desktop clients, it is wise to designate them with meaningful titles.
Here’s how to edit a category name in the MS Outlook Desktop:
- Open Outlook desktop app.
- Select the default color-coded item you want to rename.
- Expand Tags from the ribbon.
- Click Categorize & choose All Categories.
- Select the category name you want to modify.
- Choose Rename.
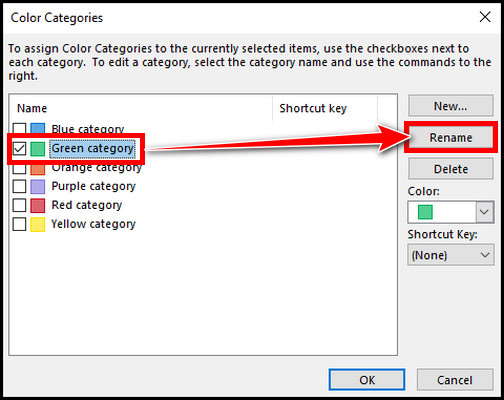
- Type the new name & hit OK.
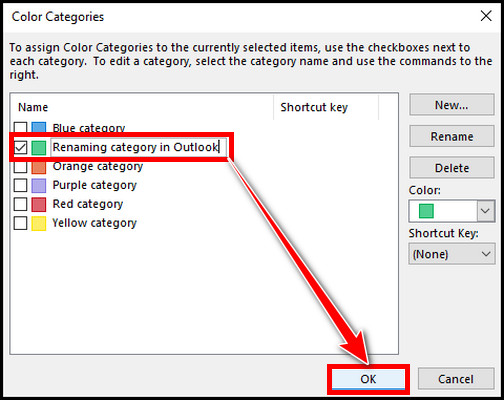
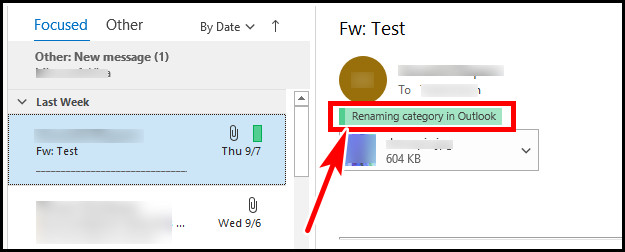
After returning to Outlook, you will see the category label updated with the name you just set.
For Outlook Web Version
Like the desktop client, you can also rename the Outlook category on Outlook 365.
Follow the process below to rename a category on Outlook Web:
- Go to the Outlook 365 site.
- Click the item you want to modify the category name.
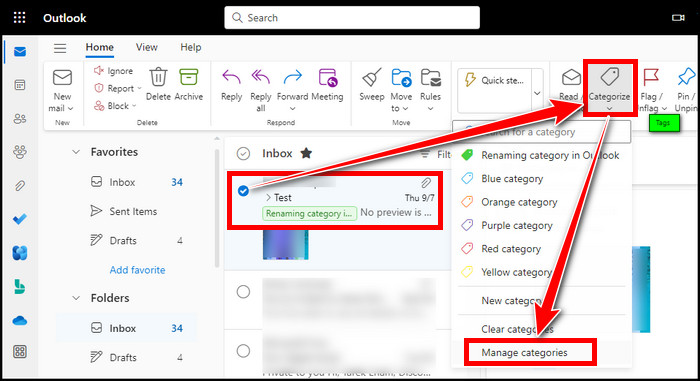
- Expand Categorize from the upper Tags group.
- Choose Manage categories.
- Click on the pencil icon beside the category you want to change.
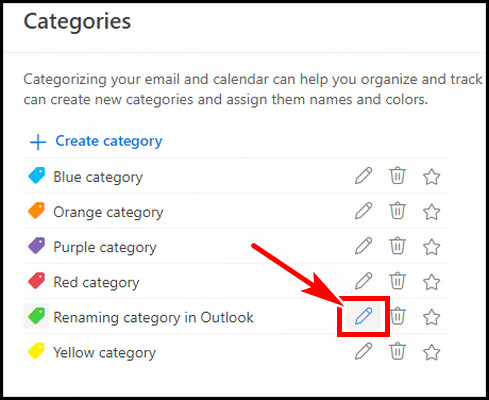
- Set your name & hit Save.
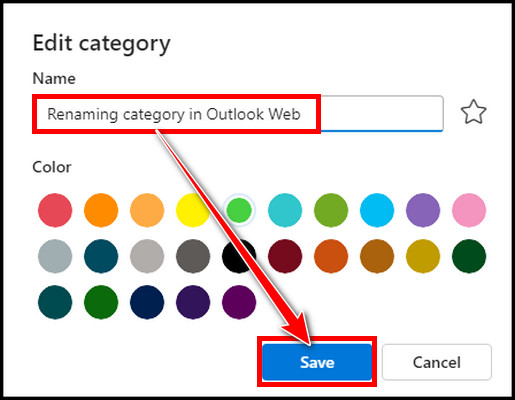
Optionally, you can also change the color from there before hitting Save.
Besides, You can change a category name on Outlook Web if you wish.
To do that,
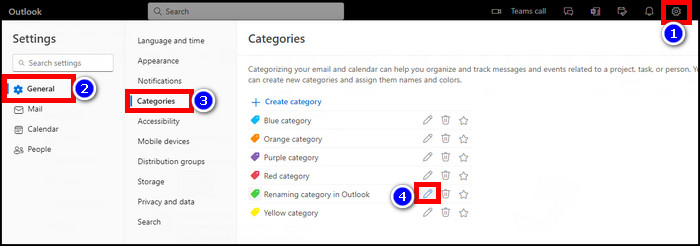
- Click on the gear icon (Settings) from the top-right side.
- Select the General tab from the left.
- Choose Categories & edit the category name from the process mentioned above.
How to Create a New Category in Outlook and Use them
Outlook offers default color-coded categories to organize the contents visually. Besides the default color-named category, you can add your own categories in Outlook Web, Desktop, and Mobile.
Add a New Category in Outlook
When there are tons of items you need to categorize, you will be required to add some new categories. Microsoft Outlook offers six default categories with color names. Adding categories with your own setup will help you conveniently arrange the items.
Outlook Desktop Client
To make a new category in the Outlook desktop app:
- Run the Outlook app.
- Expand Tags from the upper ribbon.
- Choose Categories.
- Select All Categories.
- Click on New.
- Give a name, pick a color & hit OK.

Outlook Web
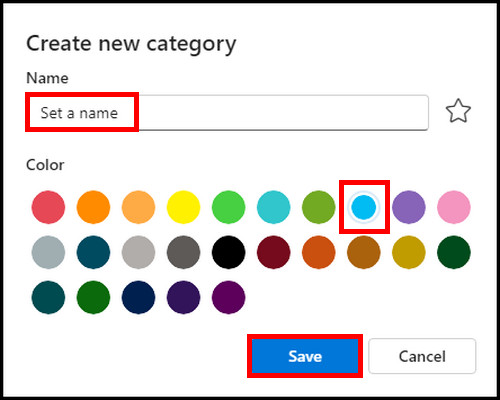
Follow the steps below to add a new category on the Outlook 365 app:
- Navigate and sign in to Outlook web.
- Click the Settings icon.
- Choose the General tab and then Categories.
- Click on + Create Category from the right top.
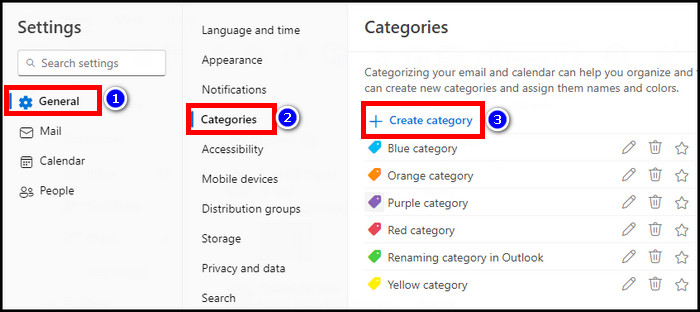
- Set a suitable name & color and hit Save.
Mobile Device
Here’s the process to add a new Outlook category on Android.
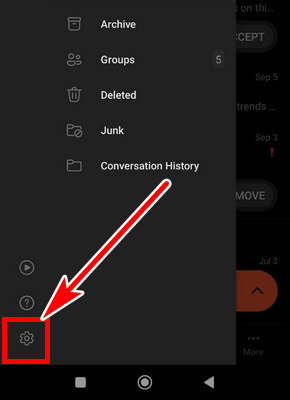
- Launch the Outlook app on your Android.
- Tap on the profile icon from the top left corner.

- Select the gear icon from the bottom left.
- Scroll down to the Preferences section & choose Categories.
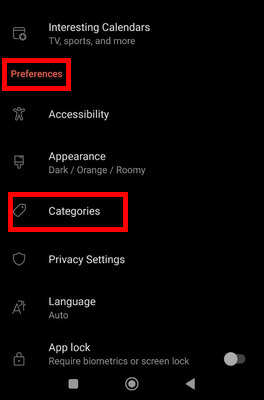
- Tap on + ADD A CATEGORY.
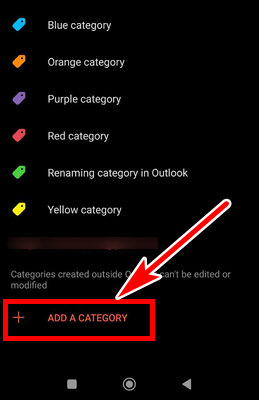
- Name the category, pick a color & press DONE.

You will get your newly created custom category after this. But what if you don’t need some old categories? You can delete the unnecessary categories & to learn how to do it, continue reading.
Delete a Category in Outlook
If you have some extra categories on Outlook that are no longer needed, you can easily remove those categories.
Outlook Desktop Client
To clear a category on the Outlook Desktop app:
- Run the Outlook app on your PC.
- Expand Tags if required and expand Categorize.
- Choose All Categories.
- Select the category you don’t need anymore & hit Delete from the right.
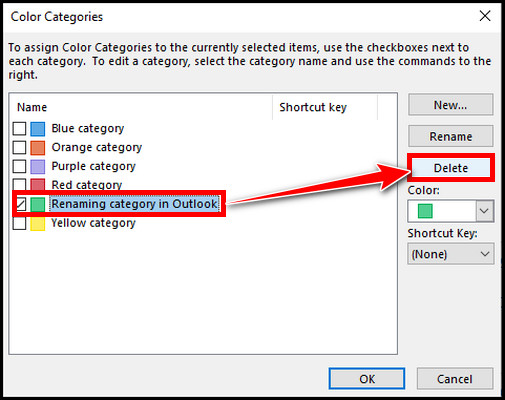
- Confirm with Yes when a new warning window prompts.

It will delete the category & you will no longer see it when trying to add a category for a new item. However, the deleted category will remain with the items it was tagged with.
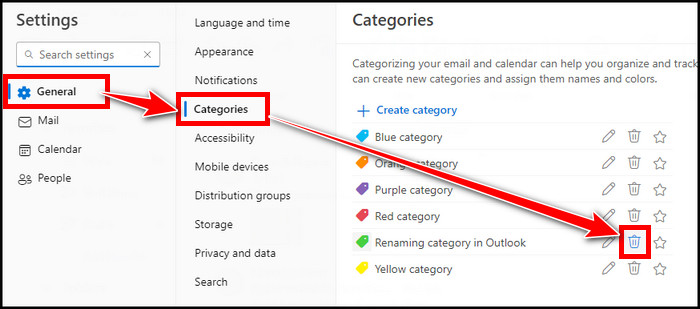
Outlook Web
Follow the below to delete an Outlook Web category:
- Go to your Outlook web.
- Navigate to Settings.
- Choose the General tab.
- Go to the Categories section.
- Click on the trash can icon to delete an unnecessary category.
There’s no way to delete a category on the Outlook mobile app. So, if you must remove a category, consider doing it from the desktop app or Outlook Web.
How to Sort Mailbox by Category in Outlook
Sorting is a feature to arrange items in a manner we want to display, like date, size, subject, etc. You can sort your mailbox by category to quickly find the desired message in Outlook.
Here’s how you can sort emails by category in Outlook:
- Run the Outlook Desktop client.
- Click on the By Date above the mailbox.
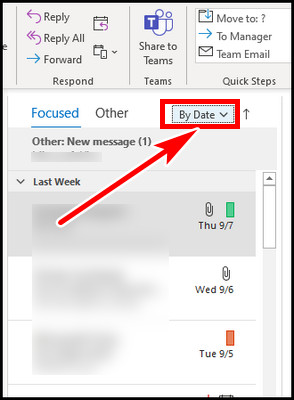
- Choose Categories.
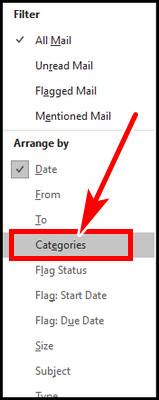
The inbox will be sorted into categories. You can use the Z to A on Top icon if you see the categories are at the bottom.

FAQs
How to change the category name in Outlook for Mac?
To modify the category name in Outlook on Mac, launch Outlook > click on the Categories button from the ribbon > Edit Categories > click twice on the category name that you want to rename & set a new name as you want. You can also change the color from here.
Can you rename the default color categories in a shared mailbox?
Yes, you can. But you will have to use Outlook Web for this. You need to use the Open another mailbox (click on the profile icon on the top right to see the option) to open the shared profile with full access granted. You can then edit & update the category names.
Will renaming a category affect the item that is already assigned to that category?
No, altering the category name won’t affect an item that is already tagged with it. The updated name will be displayed on the item with the new name. Moreover, the items that are assigned with that modified category name will remain connected to the category.
Can you rename default built-in categories in Outlook?
Outlook allows you to use the default color-coded category or create a custom one. That being said, you can use the default ones & rename those to your preferred ones. It is worth mentioning that if you have already used the default categories on multiple items, it can lead to confusion as it will change its name everywhere in the app.
Conclusion
By renaming the Outlook default categories name, you can efficiently manage and prioritize your workflow. Finding an item with a custom name rather than the default color name will be easier.
Here, I have described how easily you can assign a category in Outlook & how to modify the name if required. If you have any more queries, please leave a comment.
Have a great day!